3OM-1751-002w_G5S.pdf - 第131页
3OM-1751 1-77 1303-001 6.2.1 "Operation" Window This enables you to perform a manual operation (inching) of each unit. When the [Operation] button is pressed in the "MOTOR" window, the "Operation…
3OM-1751
1-761303-001
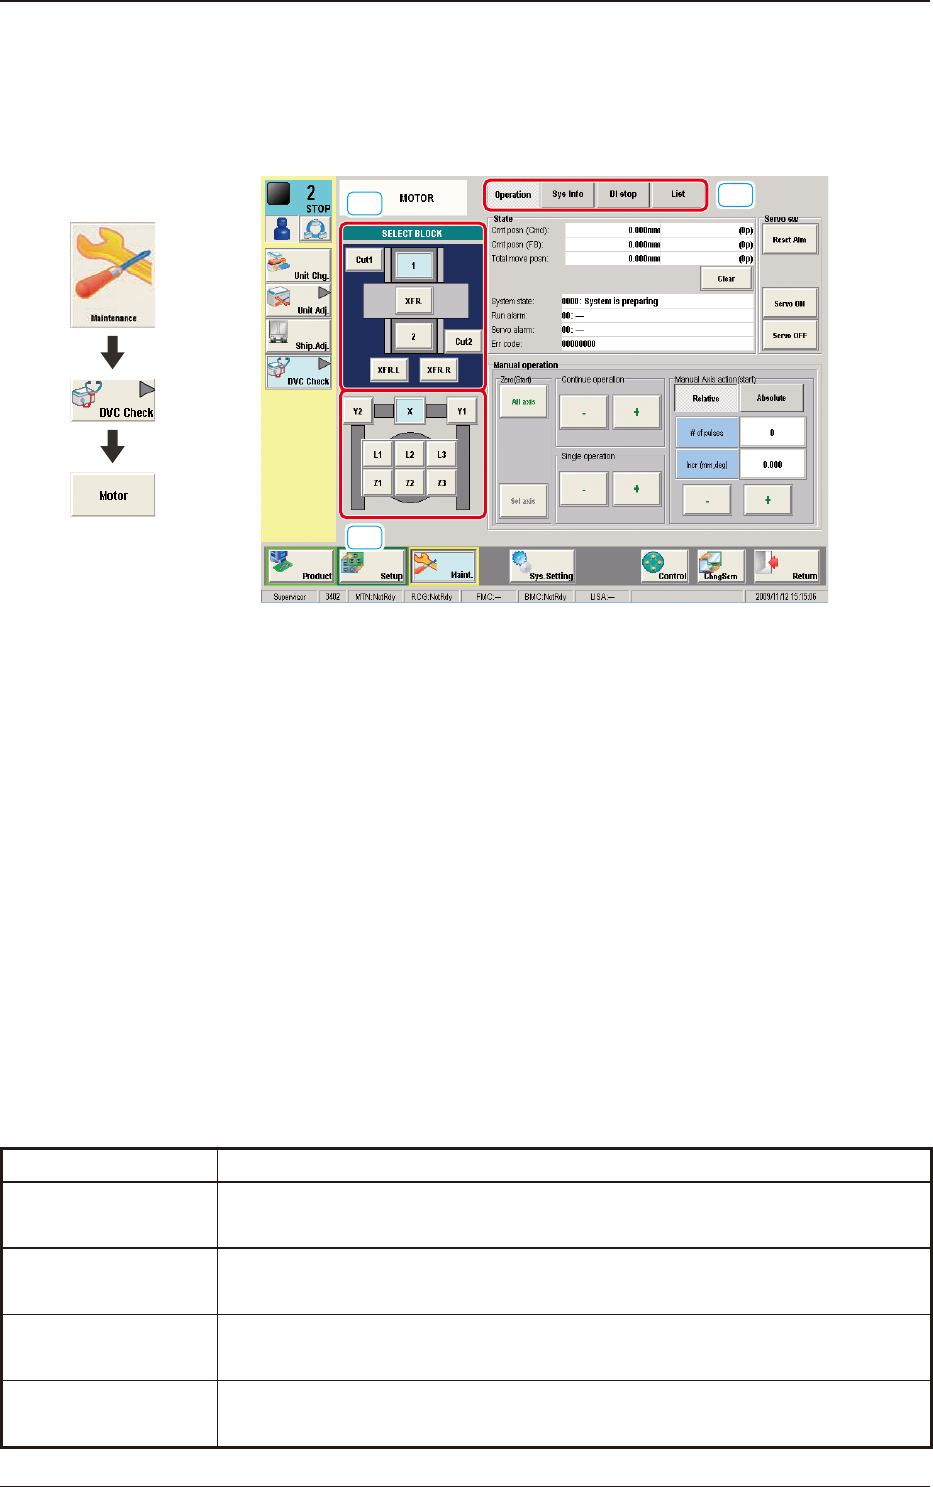
6.2 "MOTOR" Window
This window enables you to perform a manual operation (inching) of each unit
and view the current system information.
[1]
[3]
[2]
F3A53
[1] SELECT BLOCK Buttons
Each block in the graphic image of the machine is provided with a button
function.
The indication of the "[2] Unit Select Buttons" varies depending on the
selected block.
[2] Unit Selection Buttons
Arranged are the unit buttons for the block selected with a block selection
button.
When a button is pressed, the corresponding unit is selected.
[3] Display Change Buttons
Pressing any of these buttons, displays the corresponding window.
The description of each window is as follows.
Buttons Description
Operation
The corresponding window enables you to perform a manual operation
(inching) of each unit.
Sys Info
The corresponding window enables you to view the current system
information of the machine.
DI stop
The corresponding window enables you to view the machine monitor and
parameters.
List
The corresponding window enables you to view the status of each section.
T3A7
6.2 "MOTOR" Window
Graphic
Development
3OM-1751
1-771303-001
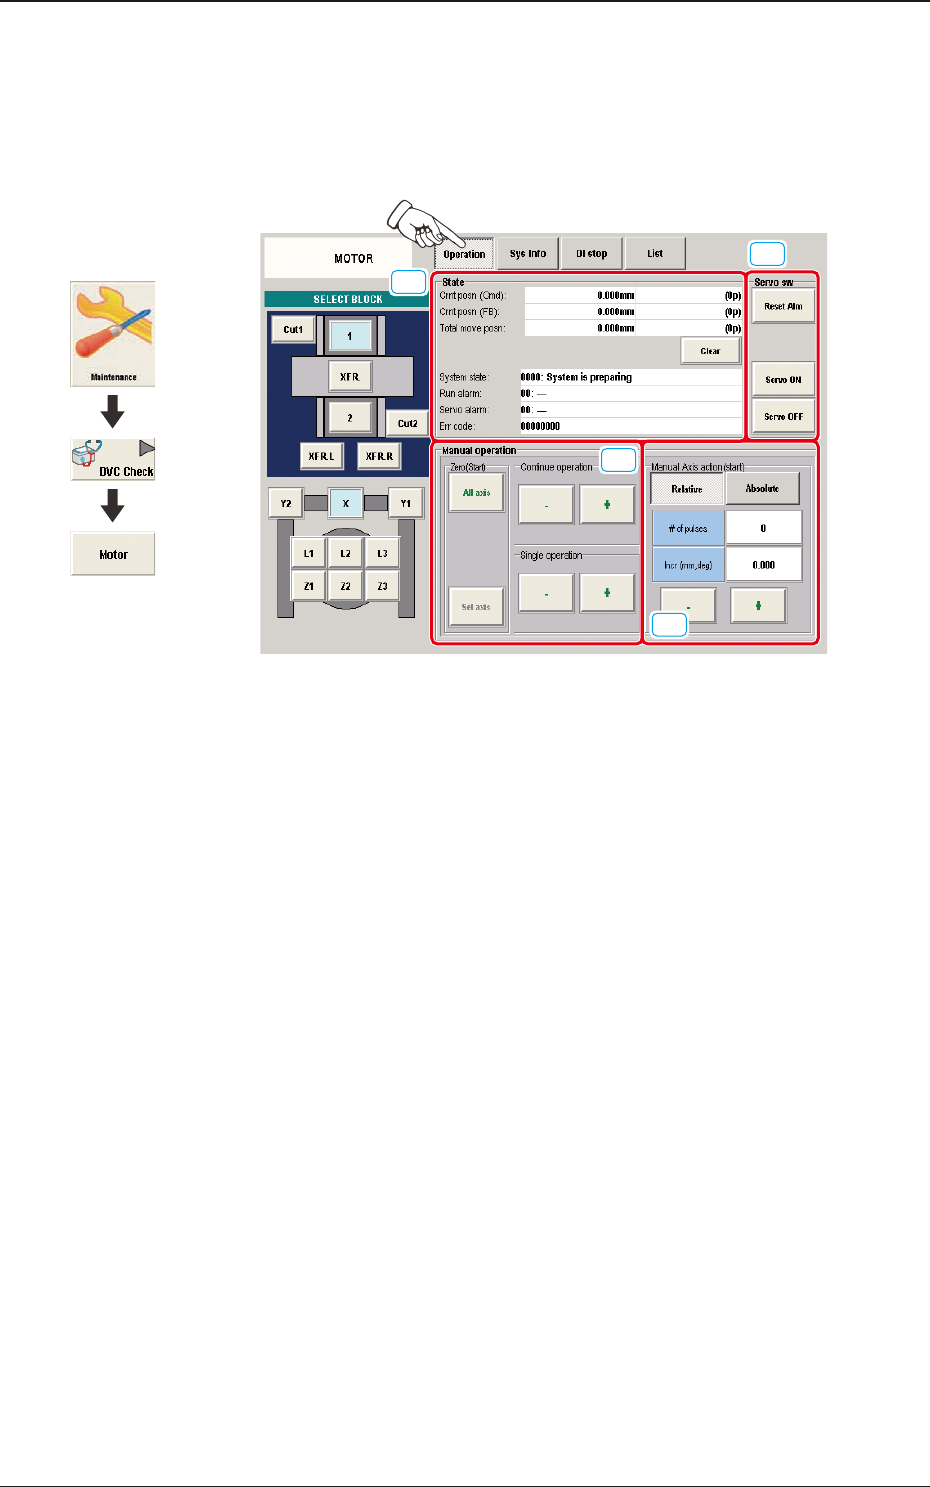
6.2.1 "Operation" Window
This enables you to perform a manual operation (inching) of each unit.
When the [Operation] button is pressed in the "MOTOR" window, the "Operation"
window appears.
[1]
[2]
[3]
[4]
F3A54
[1] "State" Group Box
The following information is displayed.
Crnt posn (Cmd)
Crnt posn (FB)
Total move posn
System state
Run alarm
Servo alarm
Err code
[2] "Servo sw" Group Box
The following buttons are provided.
[Reset Alm] Button
: Resets the alarm to its normal condition.
[Servo ON] Button
: Turns on the servomotor.
[Servo OFF] Button
: Turns off the servomotor.
6.2 "MOTOR" Window
Graphic
Development

3OM-1751
1-781303-001
[3] "Manual operation" Group Box
The following operation buttons are arranged.
"Continue operation" Group Box
Press either the [+] or the [-] button to specify the direction of manual axis
operation for the unit.
"Single operation" Group Box
Press either the [+] or the [-] button to specify the direction of manual axis
operation for the unit.
"Zero (Start)" Group Box
[All axis] Button
: Zeroes all axes.
[Sel axis] Button
: When pressed, this button zeroes the axis selected by the
unit selection buttons.
[4] "Manual Axis action (start)" Group Box
One of the following buttons can be selected to determine whether the
manual axis action should take place based on the relative or the absolute
value.
[Relative] Button
When pressed, this button displays the relative values in the "# of
pulses" and "Incr (mm, deg)" text boxes for the selected unit.
When the [# of pulses] and [Incr (mm, deg)] buttons are pressed, the
corresponding data entry window opens.
When a numerical value is entered and the [Set] button is pressed, the
entered numerical value is set in the corresponding text box.
The [+] or the [-] button can be used to determine the direction of the
manual axis (inching) movement for the selected unit.
[Absolute] Button
When pressed, this button displays the absolute values in the "# of
pulses" and "Pos (mm, deg)" text boxes for the selected unit.
When the [# of pulses] and [Pos (mm, deg)] buttons are pressed, the
corresponding data entry window opens.
When a numerical value is entered and the [Set] button is pressed, the
entered numerical value is set in the corresponding text box.
When the [START] button on the operation panel is pressed in 10
seconds after the [ON] button, the selected axis is shifted to the
specied position.
F3A55
F3A56
6.2 "MOTOR" Window