00190802-02.pdf - 第28页
1 Hardware / Software Installati o n User’s Manu al Line Computer UNIX 1.2 Hardware Installation Software Version 402.xx Edition 06/ 96 1 - 14 Setting display size and position Adjusti ng the hor izontal p osition ● Sele…
User’s Manual Line Computer UNIX 1 Hardware / Software Installation
Software Version 402.xx Edition 06/96 1.2 Hardware Installation
1 - 13
☞
NOTE
The life of the screen can be extended if brightness and contrast are adjusted to low or medium.
Changing the monitor settings using the OSD menu
Procedure:
●
Press the MENU button (1).
The OSD window appears on the screen together with the first display level of the OSD menu.
The digit in the left-hand corner shows the display level within the OSD menu. There are three levels.
Next to the number of the level the current operating mode (resolution and refresh rate) of the screen
is indicated (depending on the setting of the graphic card).
The second and third lines contain the symbols and abbreviations for the setting functions.
The first symbol is marked in color.
●
Using the MINUS (2) or PLUS (3) button select the symbol or abbreviation representing the
function you wish to set.
The selected symbol or abbreviation is marked in color.
●
Press the CONFIRM button (4).
Depending on the function, a scale indicating the setting area will appear in the OSD window, or a
submenu will be displayed (level two).
●
In the submenu select the symbol or abbreviation of the function you wish to adjust, if applicable,
using the MINUS or PLUS button.
●
Press the CONFIRM button to activate the selected function.
●
Press MINUS or PLUS as often as necessary to obtain the desired result.
☞
NOTE
The adjusting procedure may be aborted by pressing the MENU button.
●
Press the CONFIRM button to confirm the setting.
●
To exit from the OSD menu press the MENU button repeatedly, if required.
All settings confirmed by pressing the CONFIRM button are automatically saved upon exiting
from the menu.
1 1024 x 768 / 75Hz
➩➪
GC CA DG IS

1 Hardware / Software Installation User’s Manual Line Computer UNIX
1.2 Hardware Installation Software Version 402.xx Edition 06/96
1 - 14
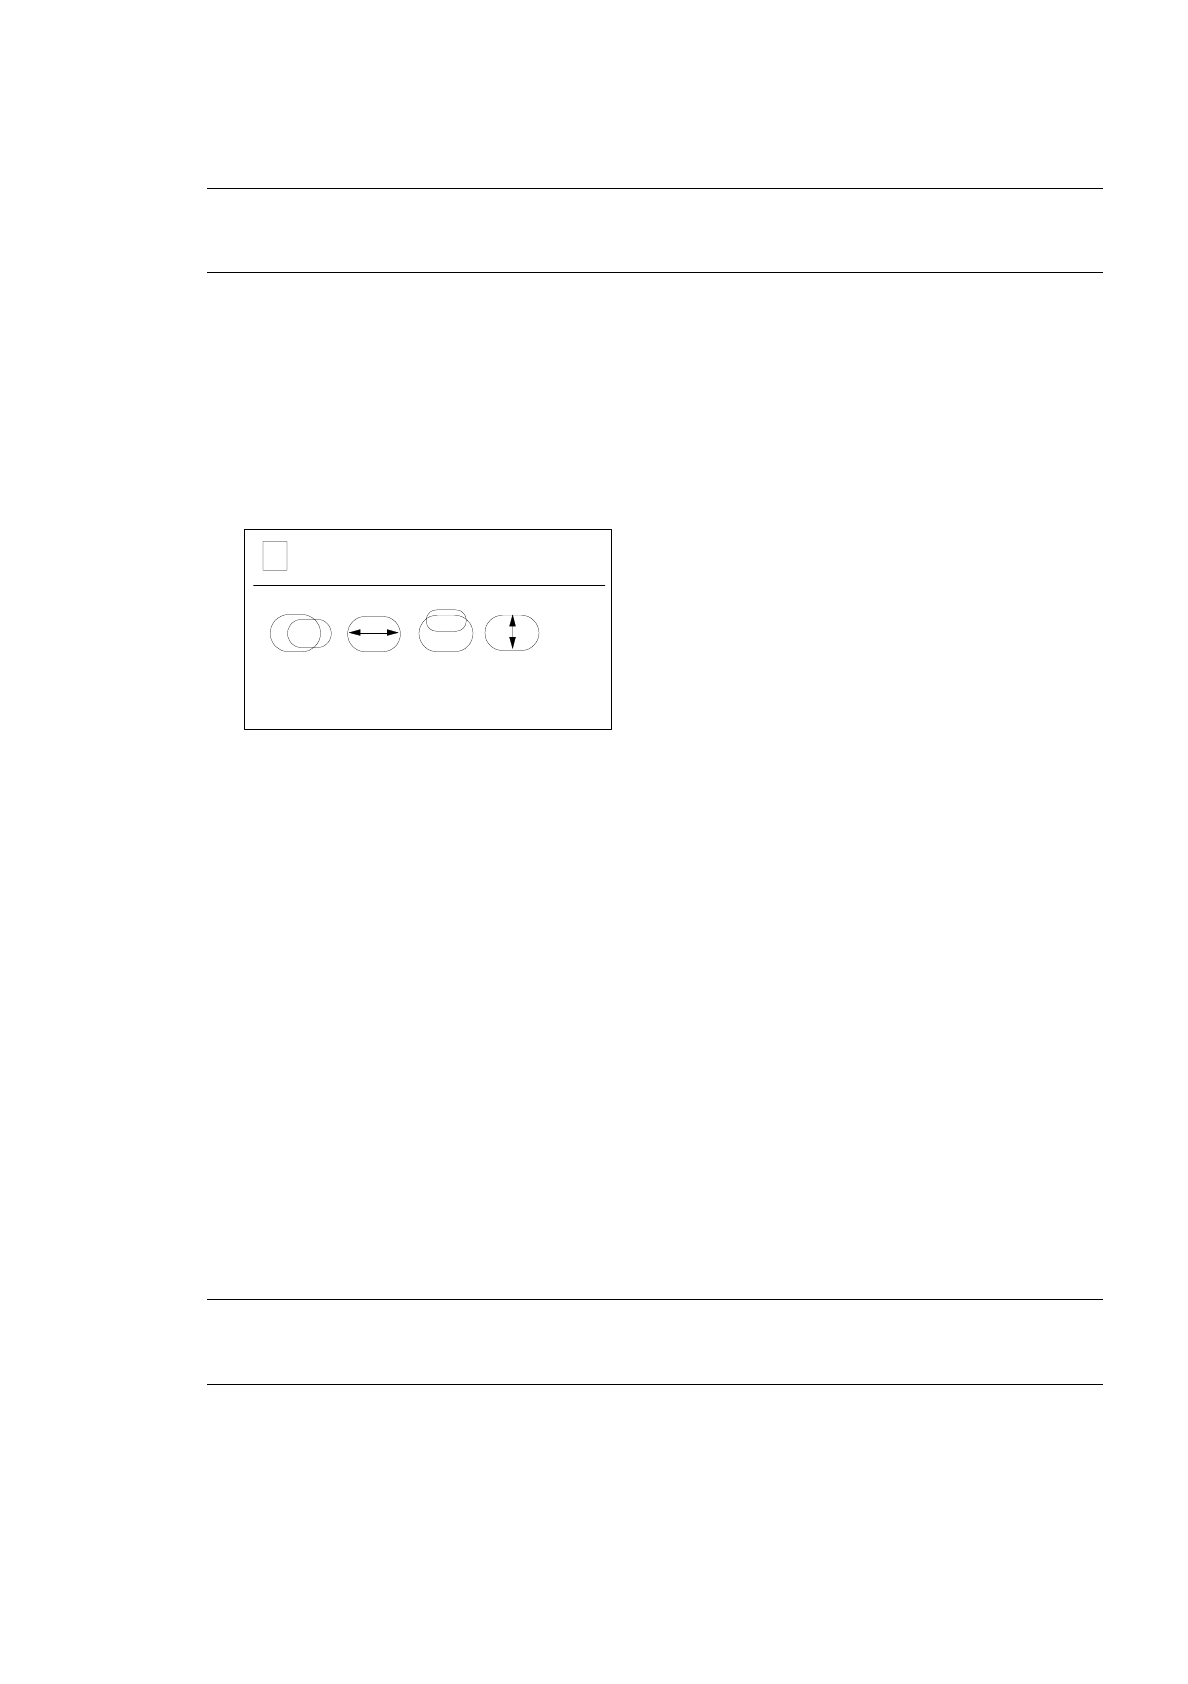
Setting display size and position
Adjusting the horizontal position
●
Select symbol .
●
Press the CONFIRM button.
●
Using the PLUS oder MINUS button shift the picture to the left or right.
●
Press the CONFIRM button.
Adjusting the horizontal size
●
Select symbol .
●
Press the CONFIRM button.
●
Using the PLUS oder MINUS button increase or decrease the size of the picture.
●
Press the CONFIRM button.
Adjusting the vertical position
●
Select symbol .
●
Press the CONFIRM button.
●
Using the PLUS oder MINUS button shift the picture up or down.
●
Press the CONFIRM button.
Adjusting the vertical size
●
Select symbol .
●
Press the CONFIRM button.
●
Using the PLUS oder MINUS button increase or decrease the size of the picture.
●
Press the CONFIRM button.

User’s Manual Line Computer UNIX 1 Hardware / Software Installation
Software Version 402.xx Edition 06/96 1.2 Hardware Installation
1 - 15
Correcting distortions
●
Select abbreviation
GC
(Geometry Correction).
●
Press the CONFIRM button.
The second level of the OSD menu will be displayed.
Correcting trapezium distortion
●
Select symbol .
●
Press the CONFIRM button.
●
Using the PLUS or MINUS button correct the image.
●
Press the CONFIRM button.
Correcting skew distortion
●
Select symbol .
●
Press the CONFIRM button.
●
Using the PLUS or MINUS button correct the image.
●
Press the CONFIRM button.
Adjusting colors
●
Select abbreviation
CA
(Color Adjustment).
●
Press the CONFIRM button.
The second level of the OSD menu will be displayed.
2
GC
2
CA
➩➪
93 65
U1 U2