c921199.R00_EN.pdf - 第26页
1-6 1 Handling 8 Secure the tape guide assembly . Set the carrier tape so that it engages with the sprocket teeth. Securing the tape guide T ape guide assembly T ape guide front lever 63124-9L-00 c CAUTION Secure the tap…
1-5
1
Handling
4
Set the tape on the tape feeder.
Insert into the tape opening.
Installing the tape
Tape
63102-9L-00
c
CAUTION
Take care not to install the tape upside down.
5
Peel off the top tape.
A tape has two layers; the ”carrier tape” contains electronic components and the ”top tape” covers
the components. Peel off the tape to separate the layers.
6
Set the carrier tape.
Insert the carrier tape into the hole of the tape guide front lever.
7
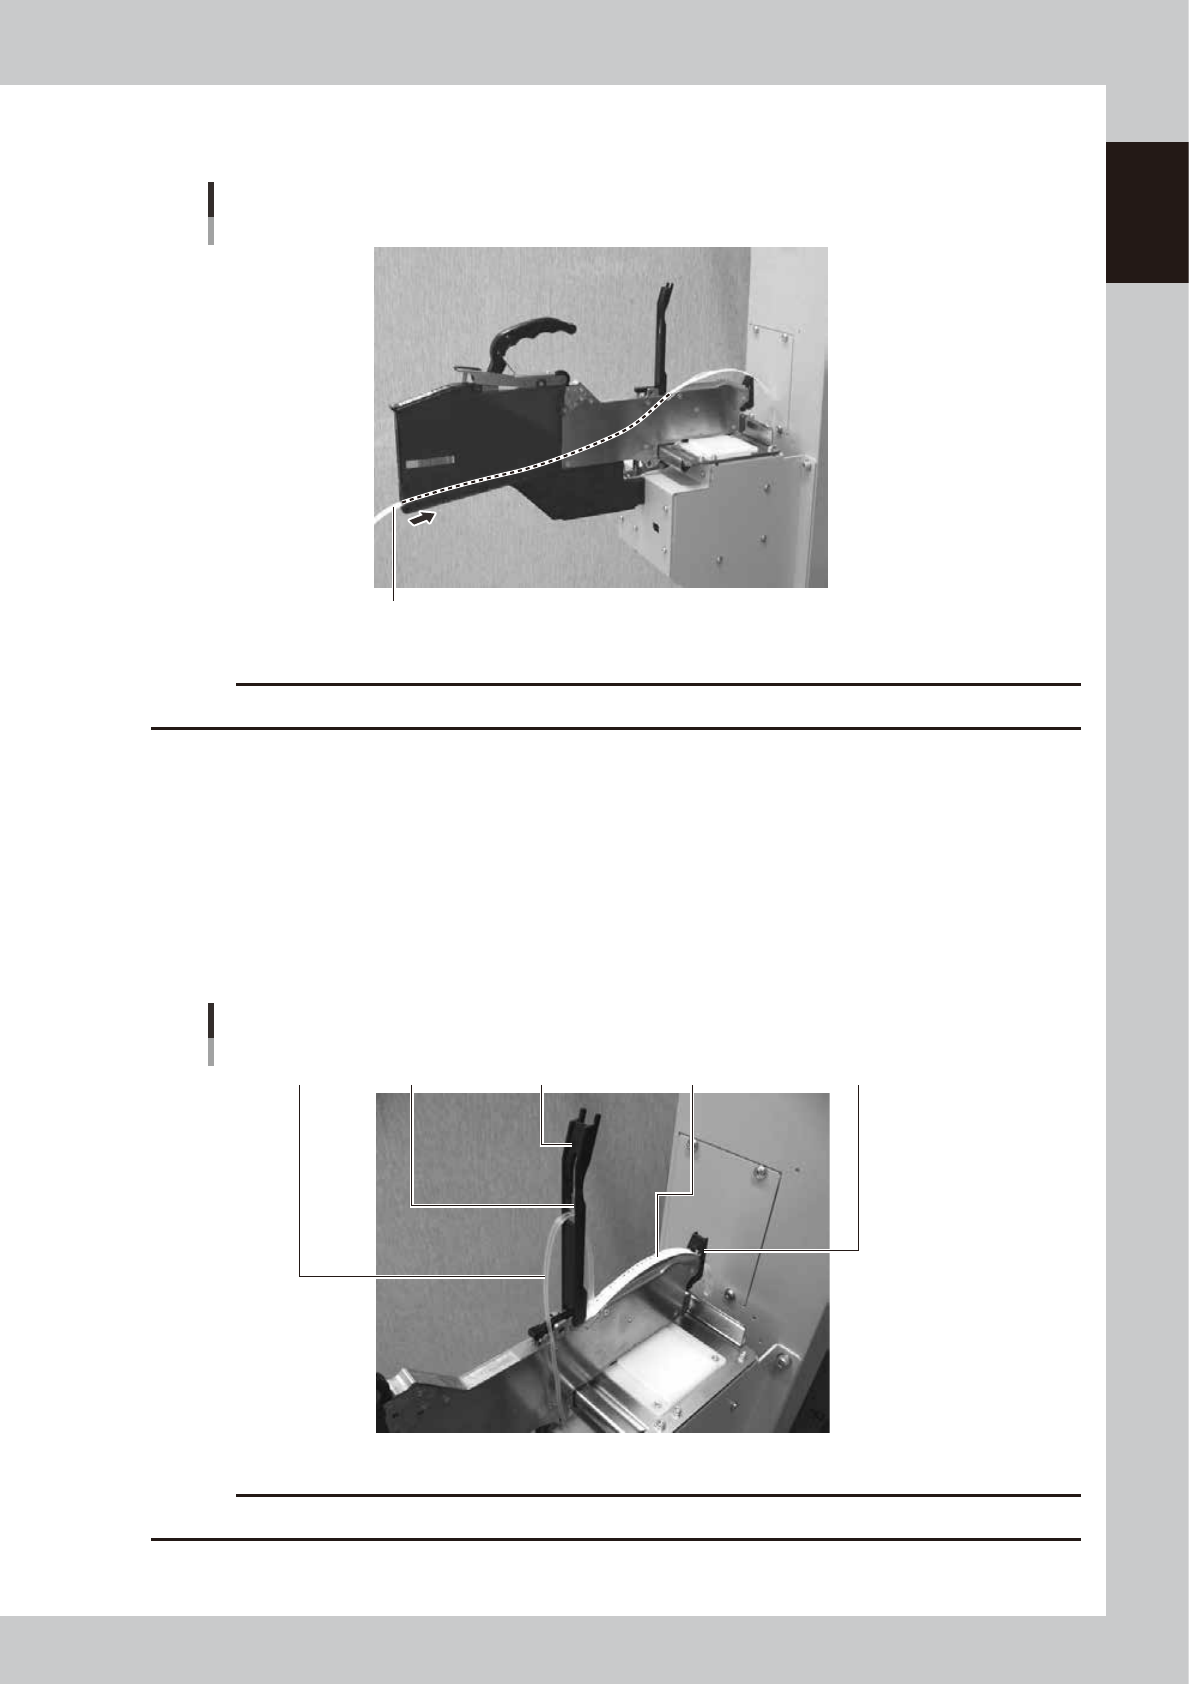
Set the top tape.
Pass the top tape into the notch of the tape guide assembly. Pull the top tape long enough to reach
the winding roller.
Carrier tape, top tape
Tape guide assembly Bottom plateTop tape Carrier tape Tape guide front lever
63123-9L-00
c
CAUTION
Take care not to deform the bottom plate inside the tape guide assembly.
1-6
1
Handling
8
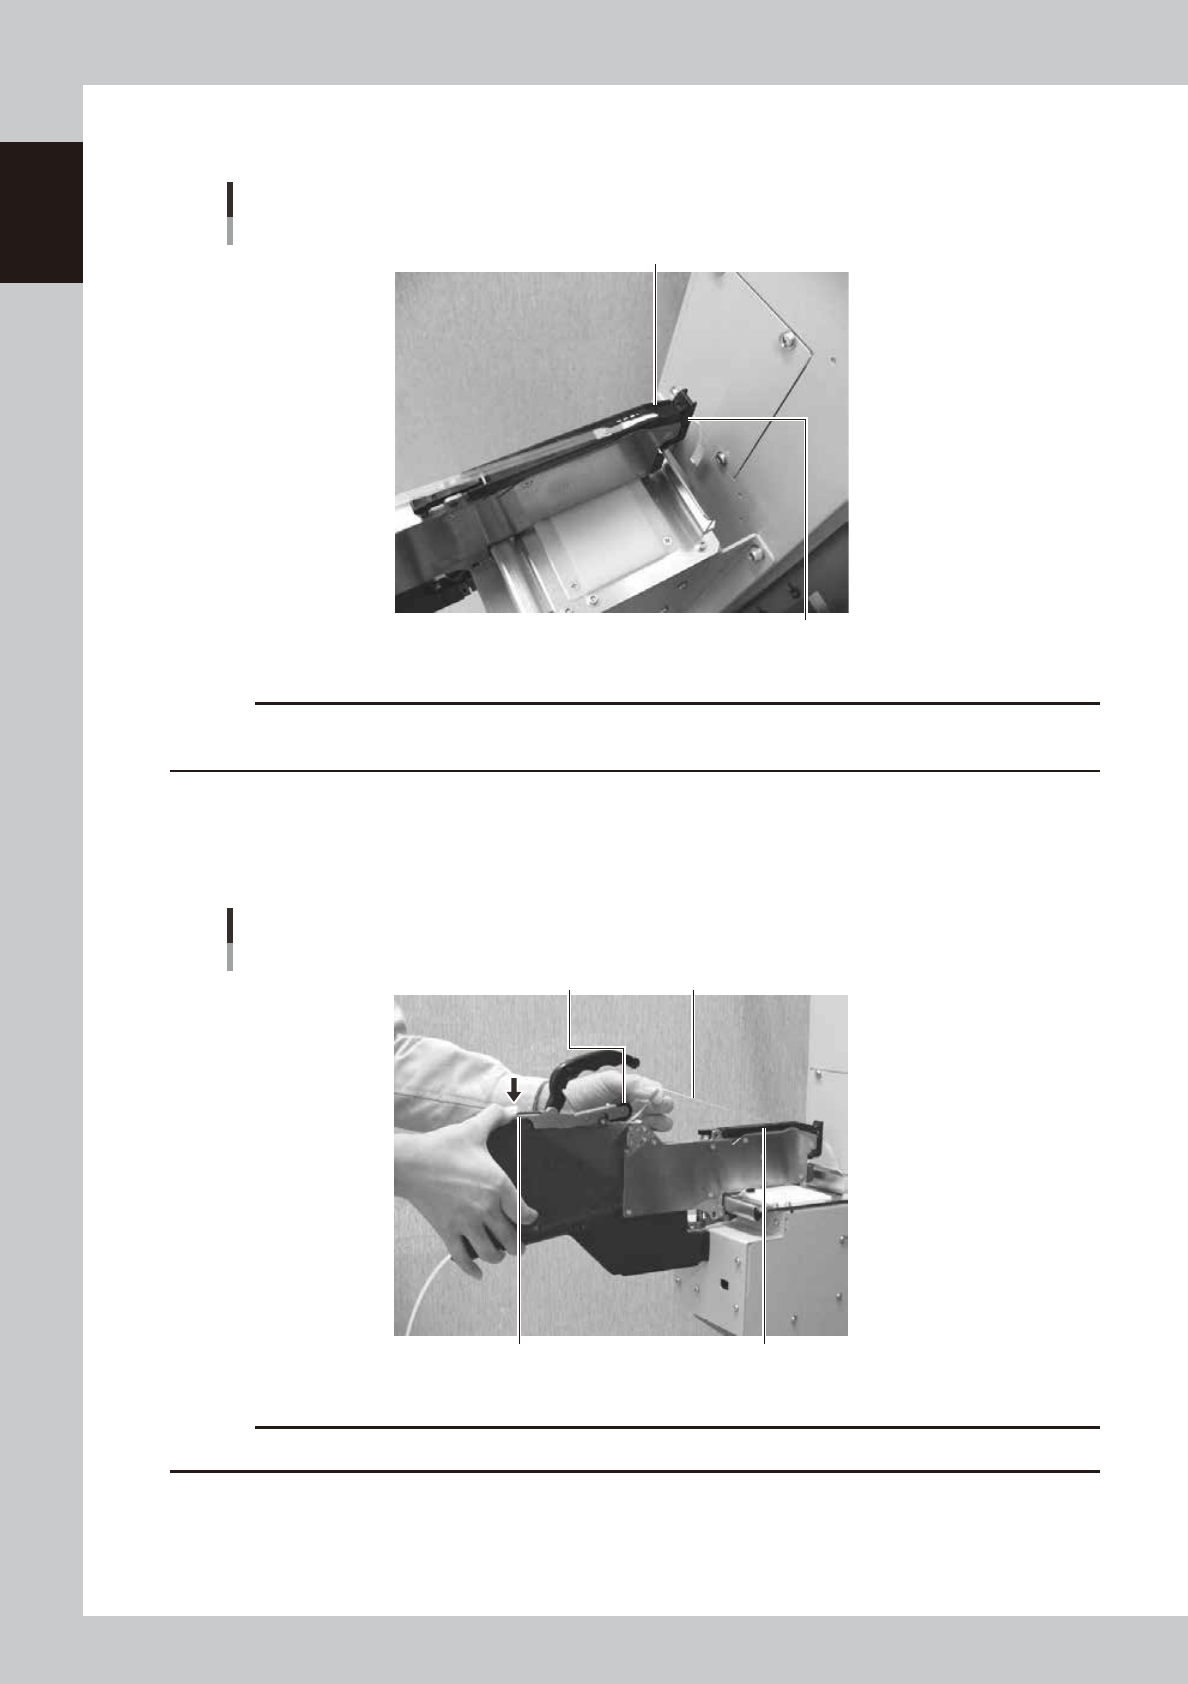
Secure the tape guide assembly.
Set the carrier tape so that it engages with the sprocket teeth.
Securing the tape guide
Tape guide assembly
Tape guide front lever
63124-9L-00
c
CAUTION
Secure the tape guide assembly while pulling the top tape so that the top tape will not sag in the tape guide
assembly.
9
Set the top tape on the winding roller.
Hold a portion of the winding roller lever shown in the figure to make a clearance around the winding
roller, pass some length of the top tape into the clearance and release the winding roller lever to pinch
the top tape.
Setting the top tape
Top tapeWinding roller
Winding roller lever Tape guide assembly
63105-9L-00
c
CAUTION
Check that the top tape between the tape guide assembly and the winding roller is not twisted.
1-7
1
Handling
0
Reel the top tape to take up the slack.
Pull the top tape lightly in the direction of the arrow and the sag will be taken up automatically.
Taking up the slack of the top tape
Top tape
63107-9L-00
c
CAUTION
· Let the top tape slide between your fingers so that it is taken up straight.
· Repeat the step until the slack is taken up.
· Take care not to hurt your hand when taking up the top tape.
q
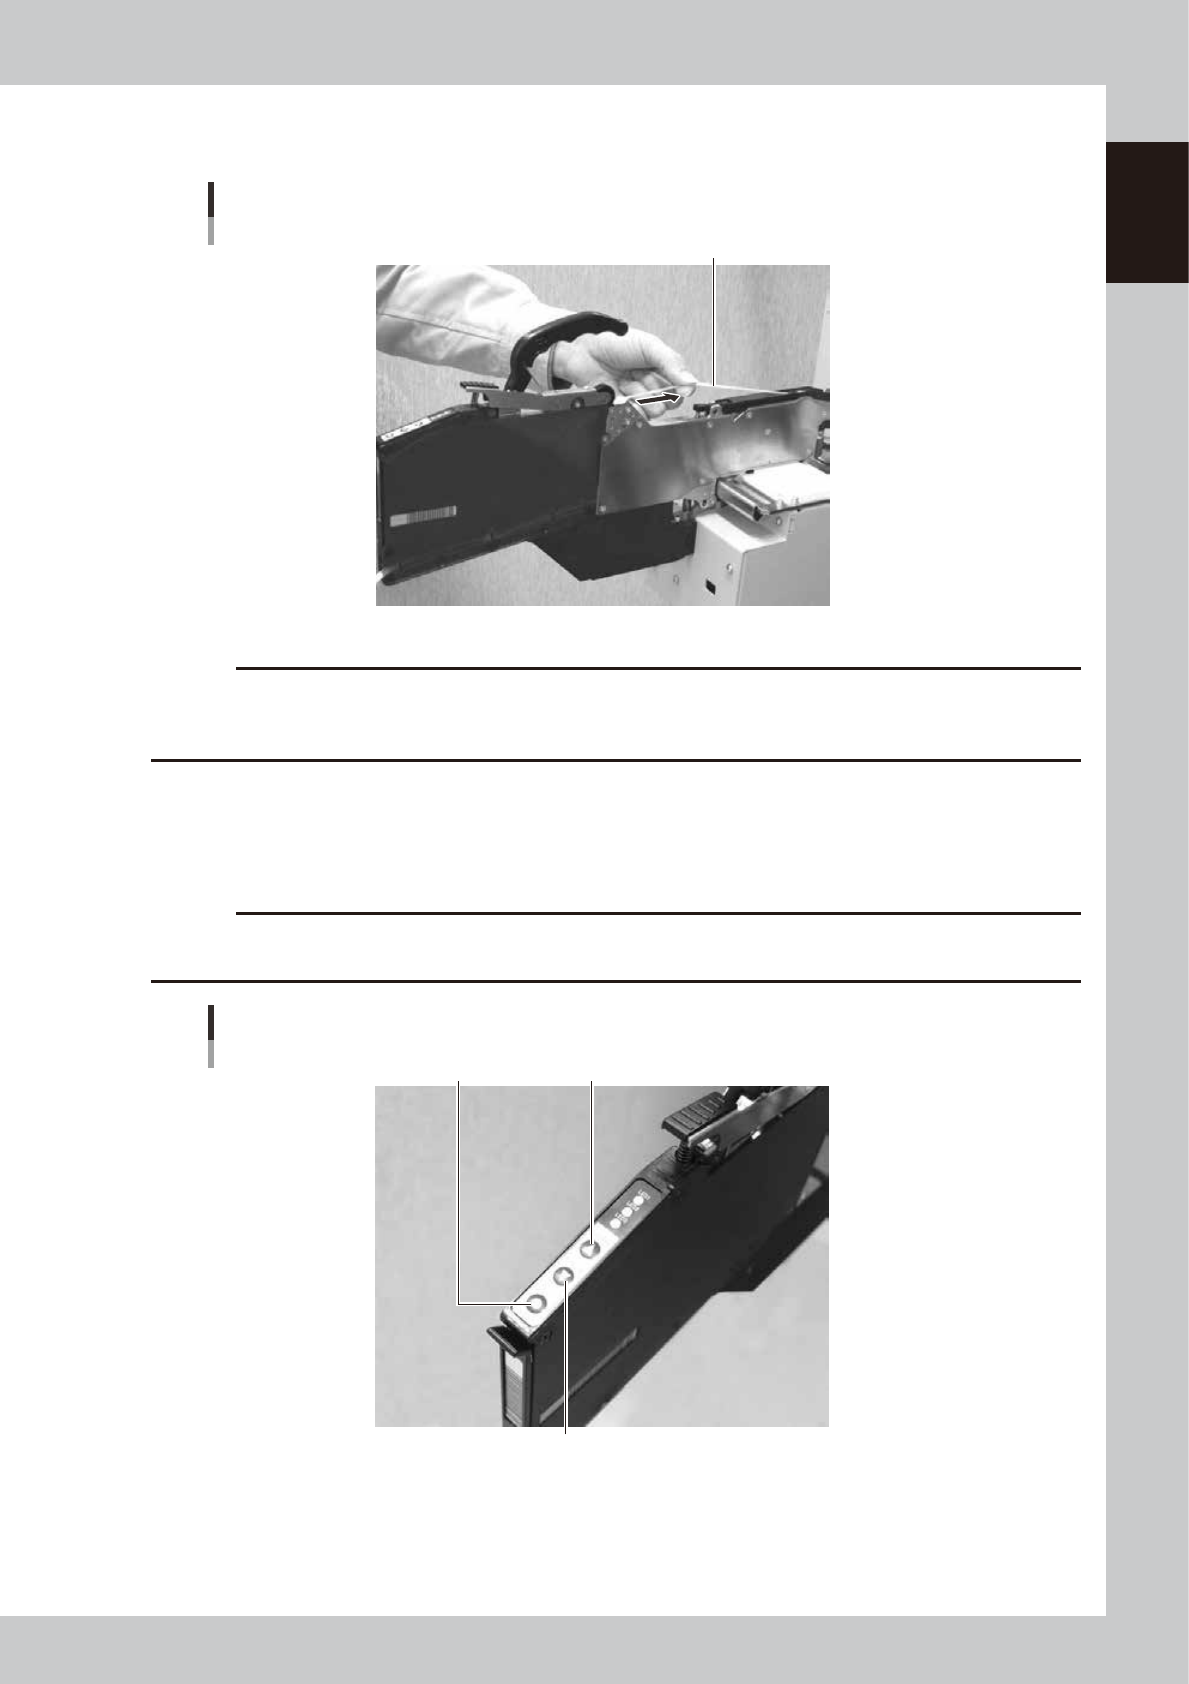
Feed components to the pickup position.
Press the ”FEED” button of the feeder to feed components to the pickup position. If you want to move
components backward, press the ”BACK” button of the feeder. Refer to the table for the feed pitches
which correspond to each button operation.
c
CAUTION
When feeding the components to the pickup position, do not use the [BACK] button. Always use the [FEED] button to
advance the carrier tape.
“FEED” button, “BACK” button, “FUNC” button
“BACK” button
“FEED” button“FUNC” button
63108-9L-00