c921199.R00_EN.pdf - 第48页
2-2 2 Replacing parts 2. T ape Guide Assembly 2.1 Removal 1 Lift the tape guide assembly . Open the tape guide front lever and lift the tape guide assembly. 63202-9L-10 2 Remo ve the tape guide assembly . Push down the t…
2-1
2
Replacing parts
1. Replaceable parts
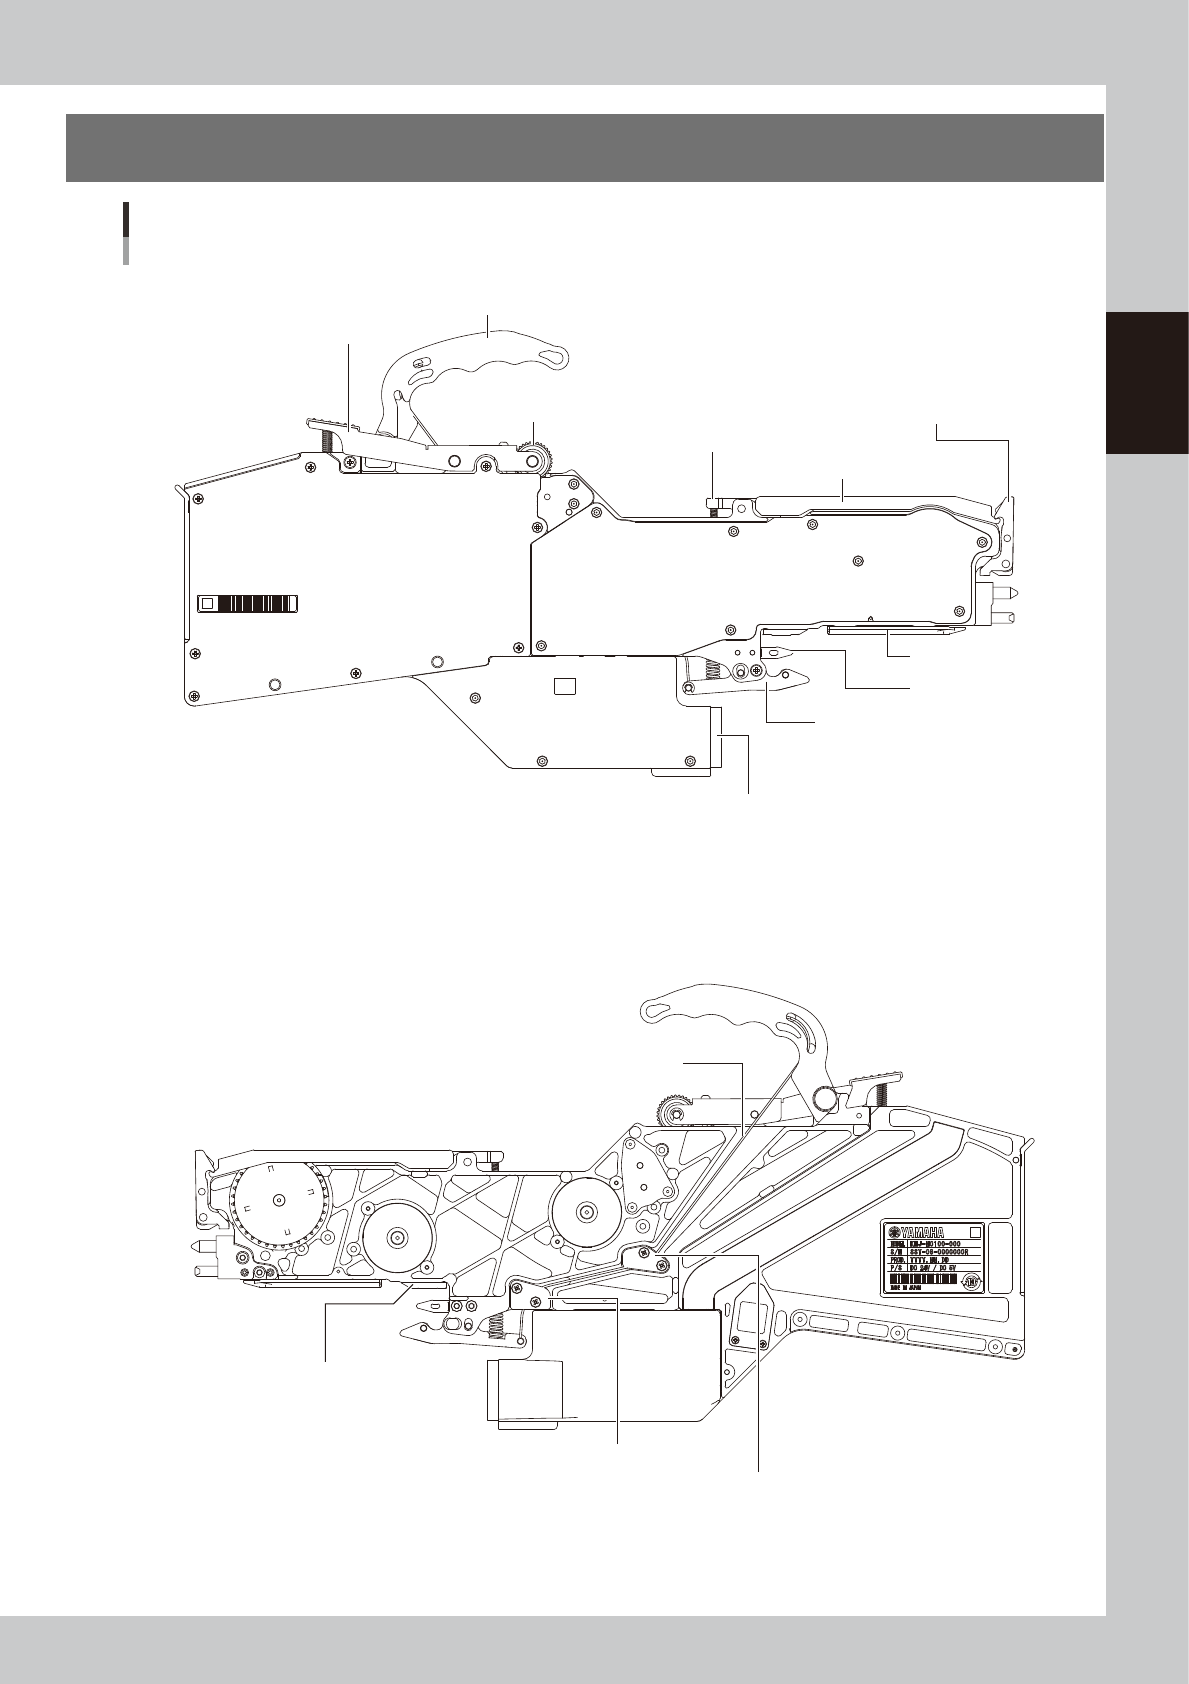
2. Tape guide assembly
11. Handle
13. P/O2 roller
12. P/O lever assembly
5. Under rail
7. Tail pin
6. Clamping lever assembly
14. Board connector
9. Unclamping wire
10. Wire cover 1
10. Wire cover 2
8. Under plate
4. Tape guide rear lever
3. Tape guide front lever
Replaceable parts
63201-9L-20
2-2
2
Replacing parts
2. Tape Guide Assembly
2.1 Removal
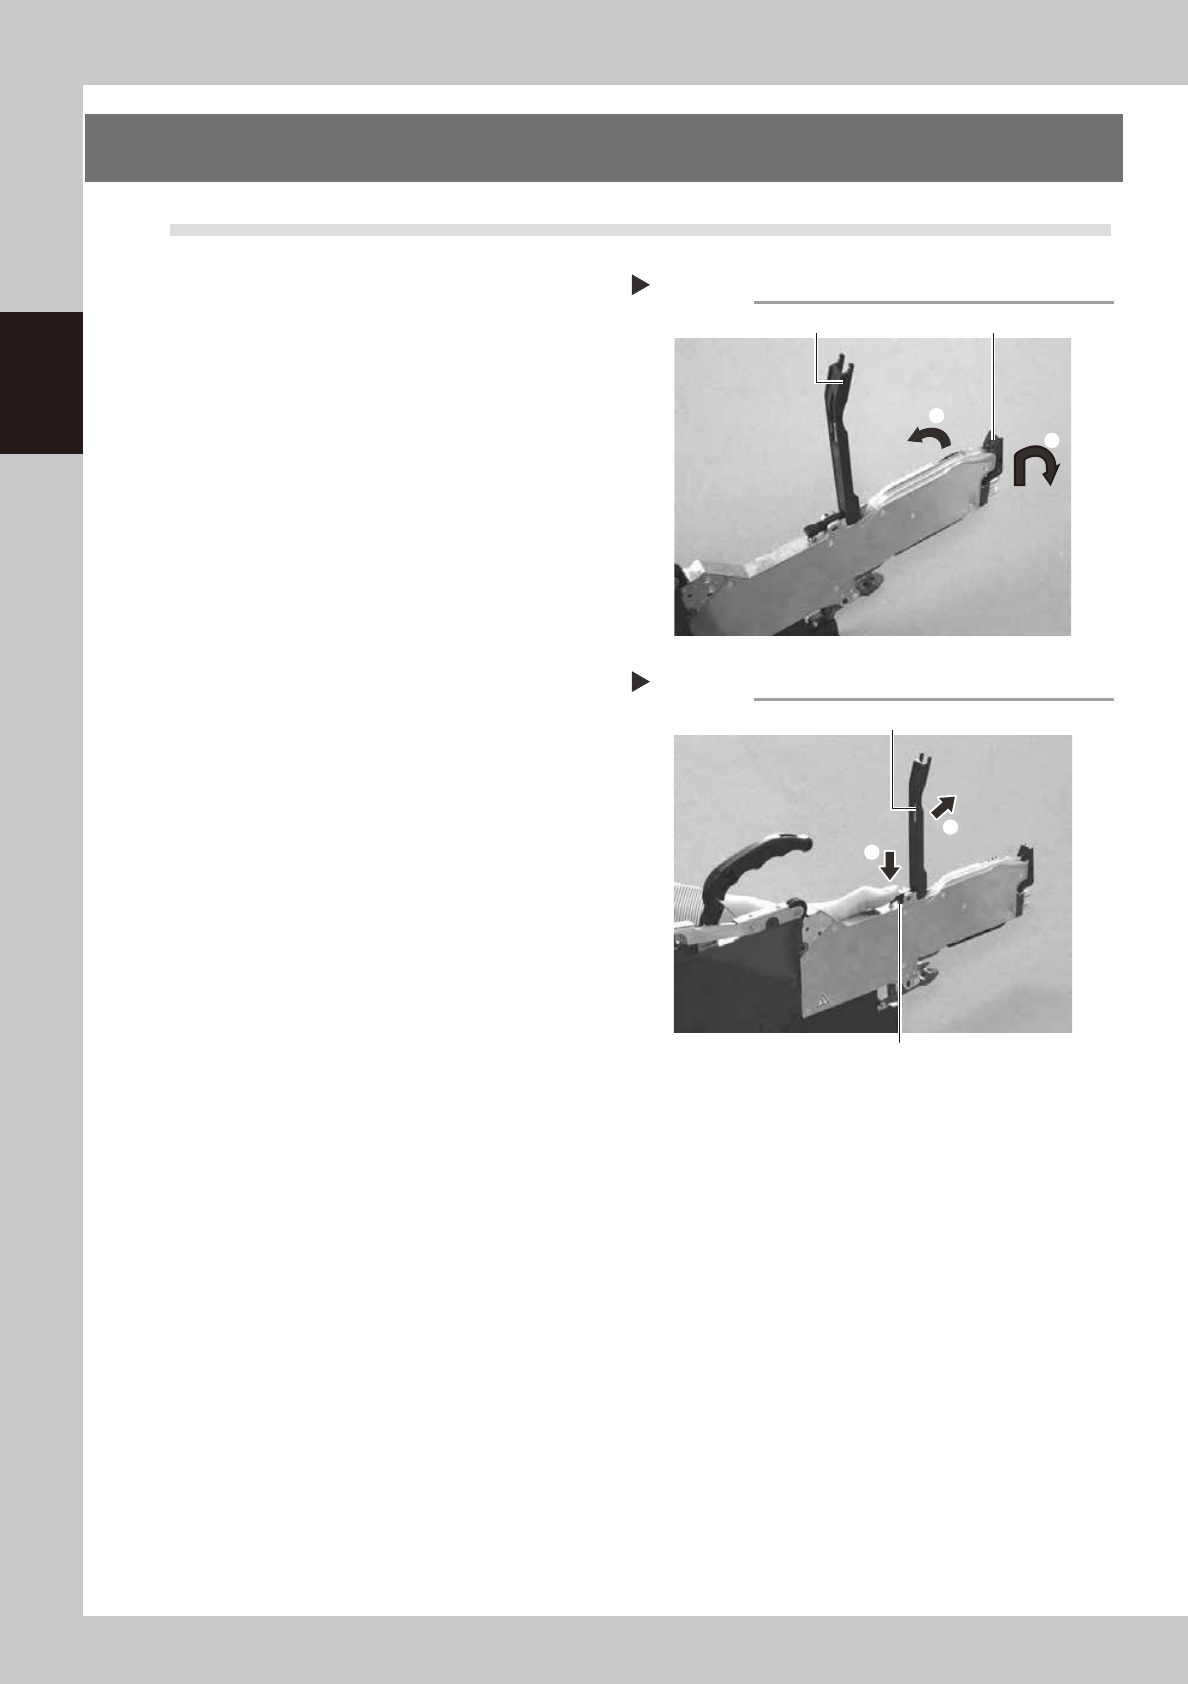
1
Lift the tape guide assembly.
Open the tape guide front lever and lift the
tape guide assembly.
63202-9L-10
2
Remove the tape guide assembly.
Push down the tape guide rear lever and
remove the tape guide assembly from the
body.
63203-9L-10
Step 1
2
Lifting the tape guide assembly
Tape guide assembly Tape guide front lever
1
Step 2
Removing the tape guide assembly
Tape guide rear lever
Tape guide assembly
2
1
2-3
2
Replacing parts
2.2 Installation
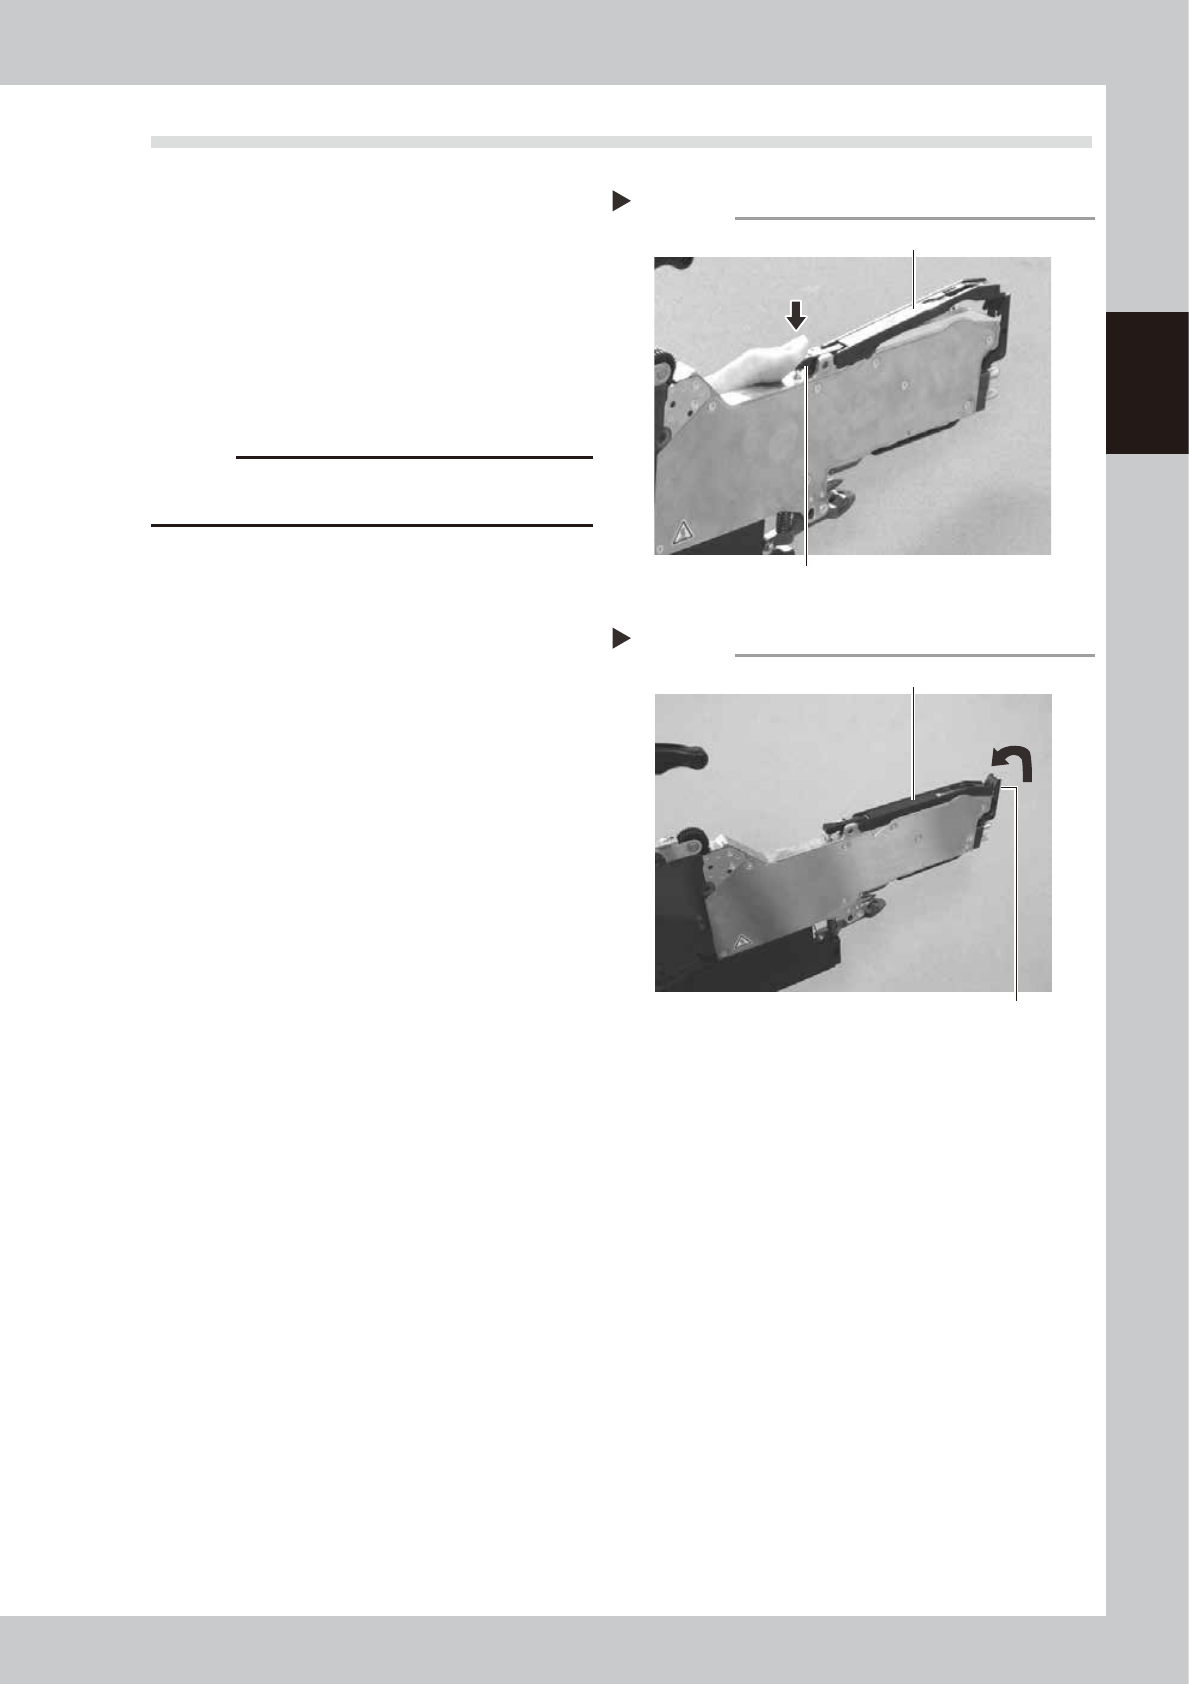
1
Install the tape guide assembly.
Push down the tape guide rear lever and
install the tape guide assembly to the body.
63204-9L-10
2
Secure the tape guide assembly.
Push down the tape guide assembly and
check that it is locked with the tape guide
front lever.
63205-9L-10
c
CAUTION
Check that the sprocket assembly does not interfere
with the tape guide assembly after the installation.
Step 1
Installing the tape guide assembly
Tape guide rear lever
Tape guide assembly
Step 2
Installing the tape guide assembly
Tape guide front lever
Tape guide assembly