c921199.R00_EN.pdf - 第56页
2-10 2 Replacing parts 6. Clamping lever assembly 6.1 Removal 1 Remo ve the axis of the unclamping wire. Remove the E-ring of the unclamping wire attached to the clamping lever assembly with a precision screwdriver (flat…

2-9
2
Replacing parts
5. Under rail
5.1 Removal
1
Remove the under rail.
Remove the two screws securing the under
rail with a Phillips screwdriver (No. 1) to
remove the under rail.
63212-9L-10
5.2 Installation
1
Install the under rail.
Apply thread lock (241) to the two screws
and install the new under rail using the
Phillips screwdriver (No. 1).
• Tightening torque: 30N·cm
63213-9L-10
Step 1
Removing the under rail
Screw
Under rail
Step 1
Installing the under rail
Under rail Screw
Thread lock (241)
Screw
2-10
2
Replacing parts
6. Clamping lever assembly
6.1 Removal
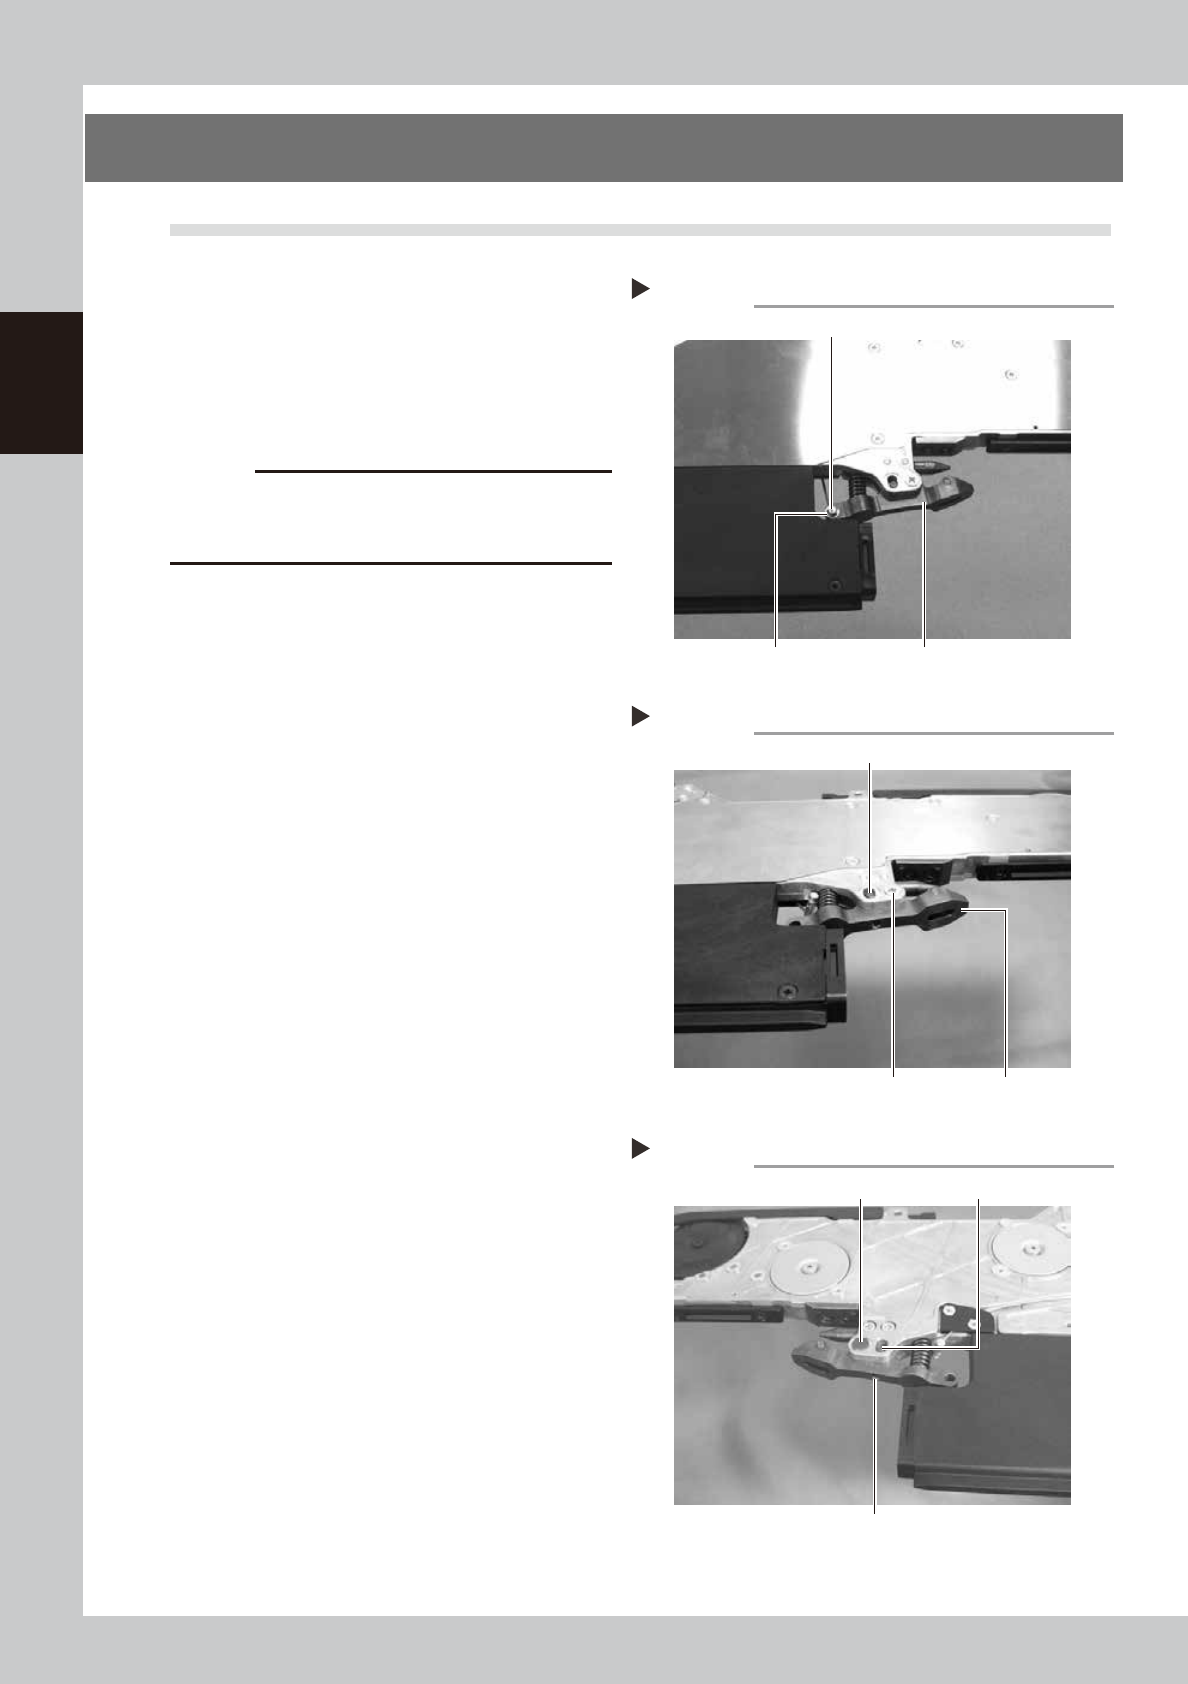
1
Remove the axis of the unclamping
wire.
Remove the E-ring of the unclamping wire
attached to the clamping lever assembly
with a precision screwdriver (flat-blade) and
remove the axis of the unclamping wire.
63214-9L-00
c
CAUTION
· When removing the E-ring, pay attention not to lose it.
· The E-ring is an exclusive part. If it should be lost, do
not use any E-ring other than the specified one.
2
Remove the clamping pin.
Remove the screw securing the clamping
lever assembly main axis with a Phillips
screwdriver (No. 2) and remove the
clamping pin by inserting a hexagonal
wrench or the like in the thread part.
3
Remove the torque limiter pin.
Loosen the setscrew securing the torque
limiter pin for vertical movement of the
clamping lever assembly with a hexagonal
wrench (1.5) and pull off the torque limiter
pin.
63215-9L-00
63216-9L-00
4
Remove the clamping lever
assembly.
Remove the clamping lever assembly.
Removing the axis of the unclamping wire
Step 1
Clamping lever assemblyE-ring
Axis of the unclamping wire
Removing the clamping pin and torque limiter pin
Step 2, 3
Screw Clamping lever assembly
Torque limiter pin
Removing the clamping pin and torque limiter pin
Step 2, 3
Setscrew
Clamping pin
Torque limiter pin
2-11
2
Replacing parts
6.2 Installation
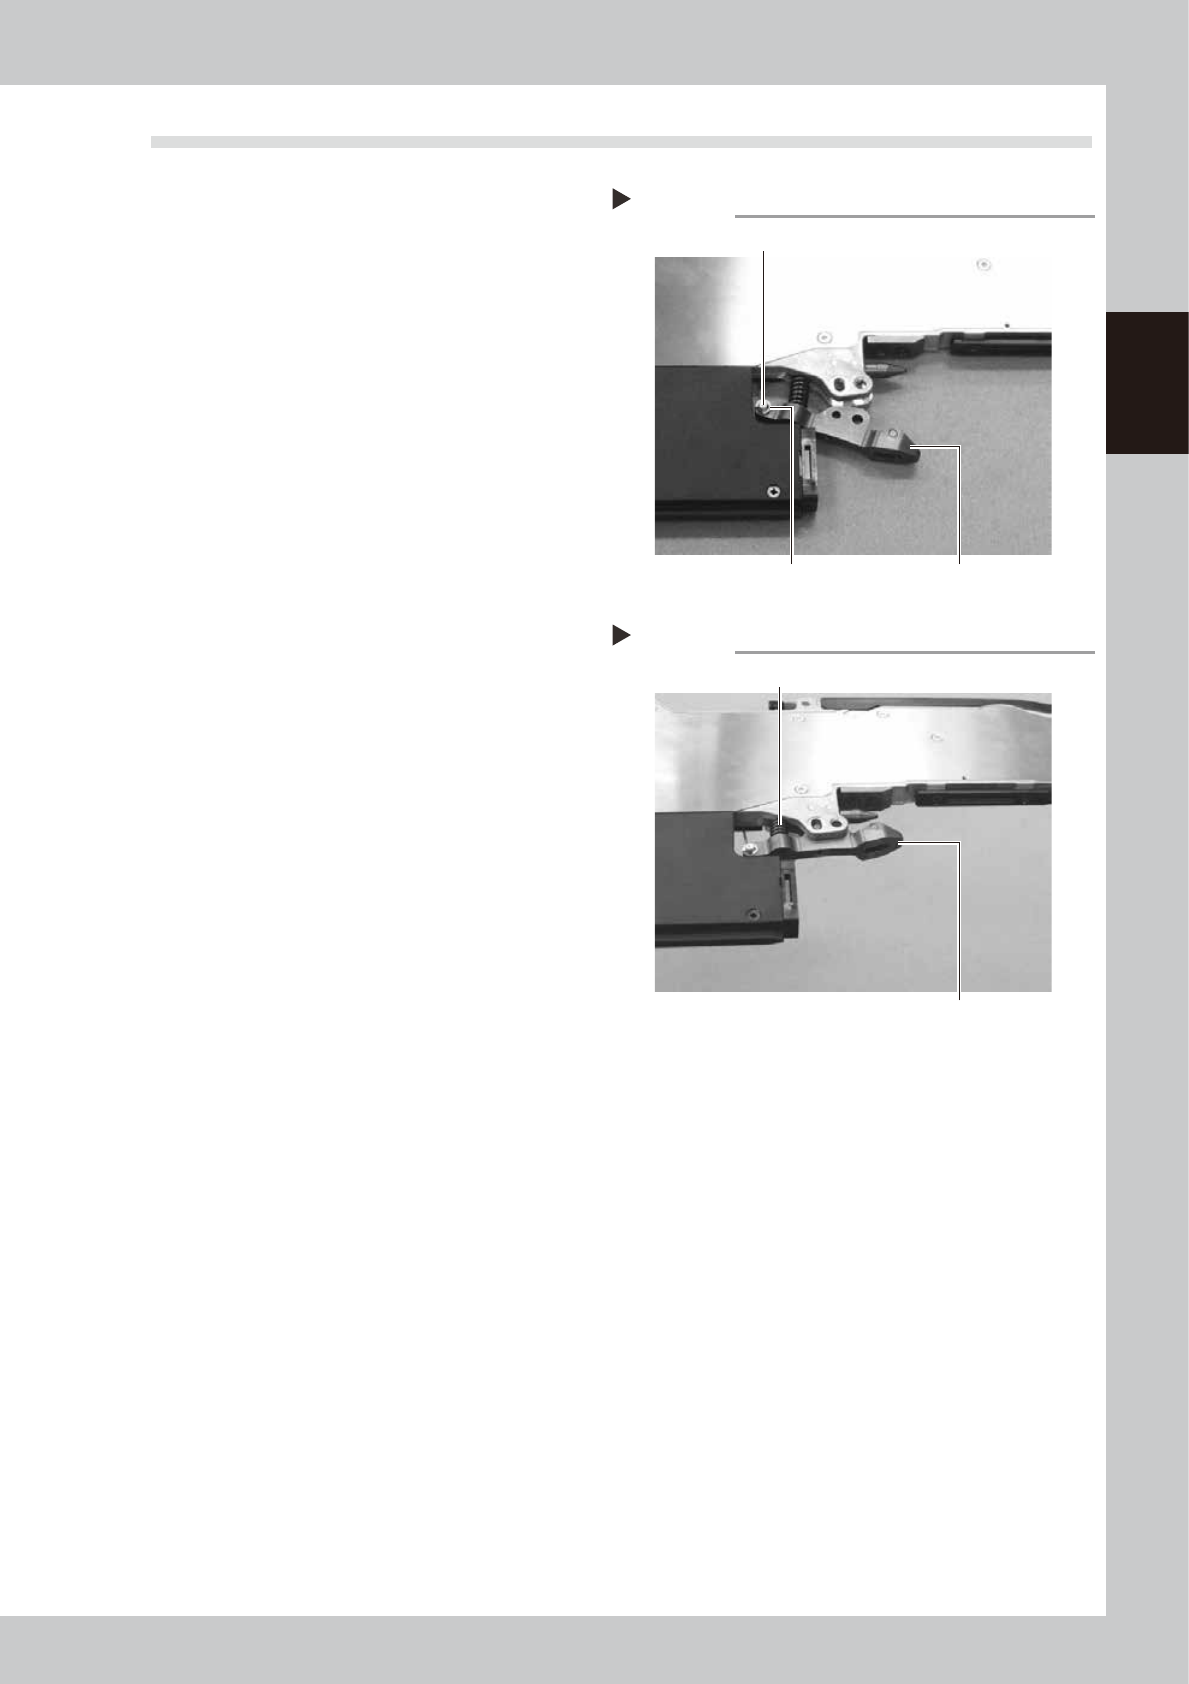
1
Install the axis of the unclamping
wire.
Pass the axis of the unclamping wire into the
new clamping lever assembly, install the
E-ring and secure the E-ring with longnose
pliers.
63217-9L-00
2
Install the clamping lever assembly.
Install the clamping lever assembly to the
body while compressing the spring.
63218-9L-00
Installing the axis of the unclamping wire
Step 1
E-ring
Axis of the unclamping wire
Clamping lever assembly
Installing the clamping lever assembly
Step 2
Spring
Clamping lever assembly