444CEOM1-CM202.pdf - 第123页
Page 3-25 FUNCTIONS 3 Machine Settings Setting/Canceling Bad Head • T o set the bad head, press Bad head . When the bad head is set, the button is high- lighted in yellow . • T o cancel the bad head, press the Bad head h…

Page 3-24
Machine Settings
3-5-2 Pick-up Position Learning
This is used to check the correction value through the pick-up position learning during production
for each feeder address.
For the learning data, during production, 1/10 of the recognition result will be added on to the
current learning value.
When you press All reset or load production data, the pick-up position learning data of all the
feeder addresses are reset to 0.0.
• The “Chip name” or “Parts name” for each tape
feeder is displayed. (Every time you press this,
they are changed.)
• Choose the feeder table to be displayed.
(CM201 has only the stage A.)
All reset
Deletes all the learning data.
Press Yes when the message appears.
• When the pick-up learning value X or Y of each
feeder address is -0.5 mm or under, 1mm or
over, the “OV” field is colored in yellow.
3-5-3 Defective Nozzle
This is used to check the states of nozzles and specify/reset defective nozzles for each head.
The buttons of the nozzles which have become defective automatically during production are
colored according to the factor.
• The defective nozzles will not be used for production. When canceling them after checking, press
the button of the nozzle you would like to cancel. Then the color of button returns to a normal
color (light gray).
• When you would like to specify a normal nozzle as a defective one, press the button of the nozzle
you would like to specify defective. Its button will be colored in yellow (specified defective head
color).
• During an automatic operation, you cannot specify and cancel defective nozzles.
• At the judgment value screen, set the conditions for the automatic defective nozzle setting.
( Maintenance Manual)
Choose the head that has the nozzle you will
specify or cancel.
(CM201 has only the stage A.)
Press the switch of the nozzle you would like to
specify defective or cancel.
Every time you press the switch, “specify” and
“cancel” are changed over.
1
2
444C-E-OMA03-A01-06
Page 3-25
FUNCTIONS
3
Machine Settings
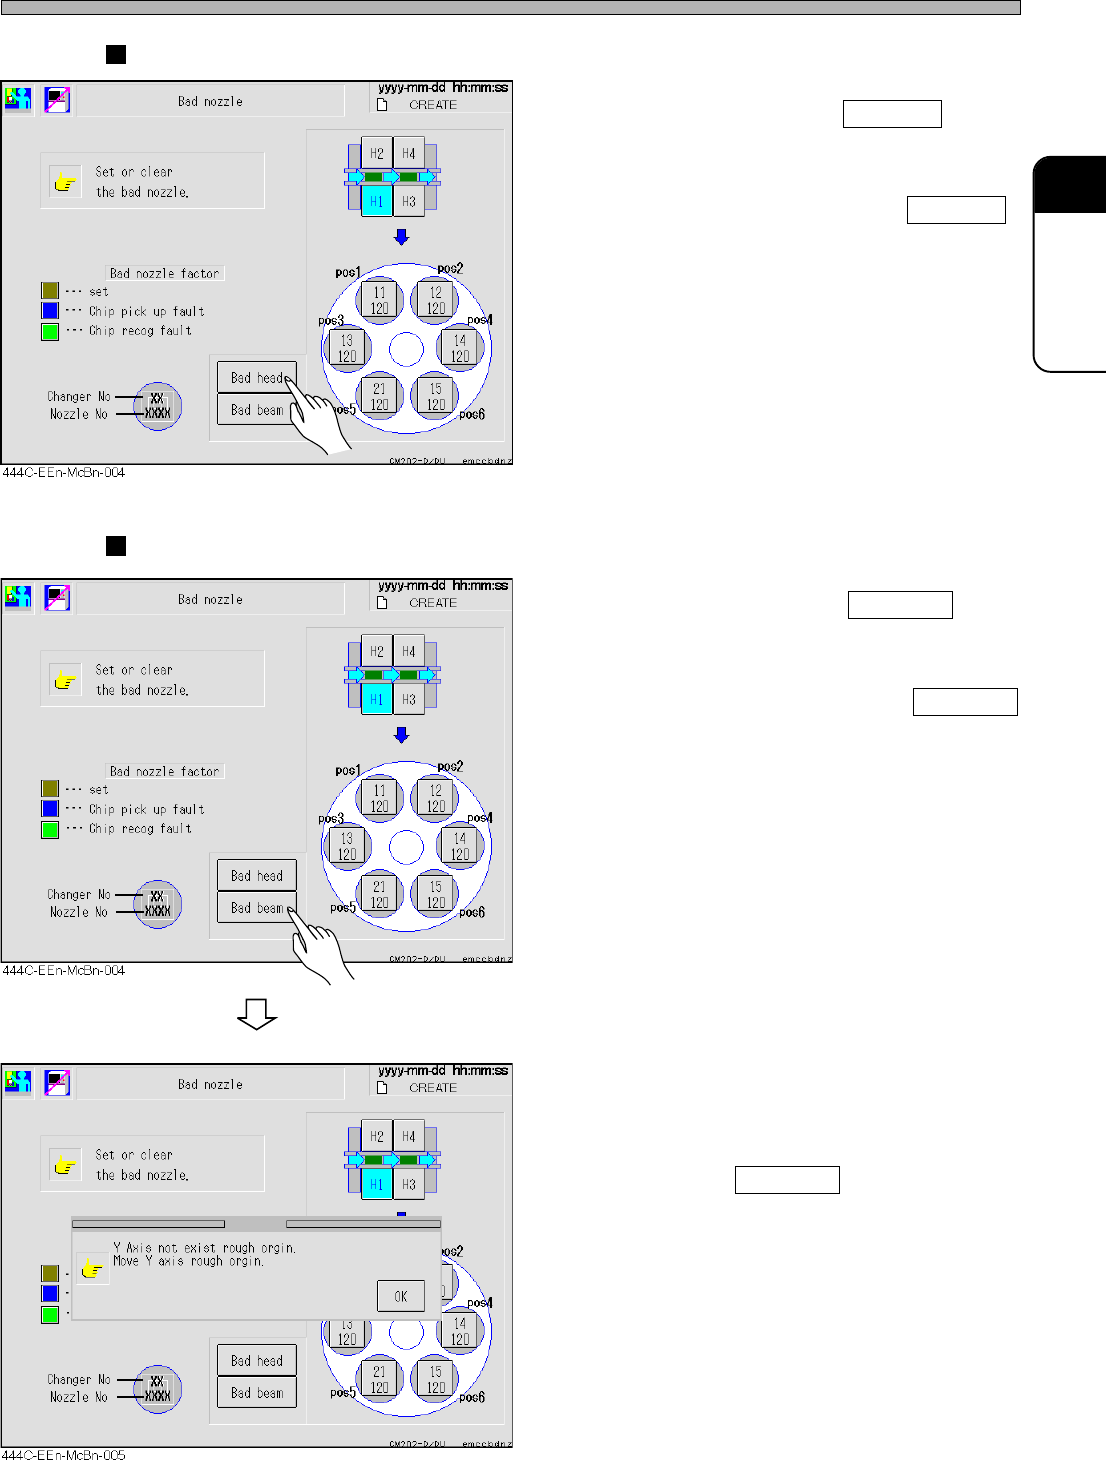
Setting/Canceling Bad Head
• To set the bad head, press Bad head .
When the bad head is set, the button is high-
lighted in yellow.
• To cancel the bad head, press the Bad head
highlighted in yellow.
When the bad head is canceled, the display of
the button returns to normal.
∗ After the bad head has been set, Zθ axis will
not operate, however, XY axis will operate.
After retracting the Z axis of the head to the
position where it will not interfere with the
machine, set the bad head.
Setting/Canceling Bad Beam
• To set the bad beam, press Bad beam .
When the bad beam is set, the button is
highlighted in yellow.
• To cancel the bad beam, press the Bad beam
highlighted in yellow.
When the bad beam is canceled, the display of
the button returns to normal.
∗ After the bad beam has been set, XYZθ axis
will not operate. After retracting the Y axis to
the origin position, set the bad beam.
• If the Y axis of the beam to be set as the bad
beam is not at the origin position, the message
appears.
After retracting the Y axis to the origin sensor
position, press Bad beam to set the it again.
When setting the bad beam on the front side,
that on the rear side is automatically set.
444C-E-OMA03-A01-03
∗ If the Y axis is not at the
origin position
Page 3-26
Machine Settings
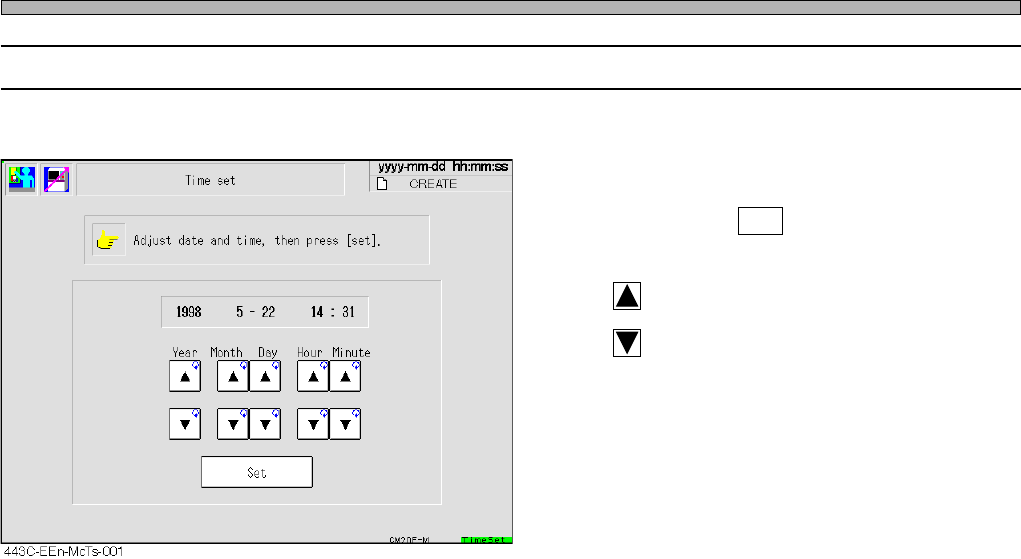
3-5-4 Setting Time
This is used to set the time of the machine.
• Change the numeric value of the year, month,
day, hour and minute you would like to change,
and then press Set .
The current time is changed.
: Puts ahead the time
: Puts back the time.
444C-E-OMA03-A01-02