00194474-0702_AI_HeadReconfig_X_605_DE+EN.pdf - 第160页
2 Assembly Instructions - SIPLACE X-Series Head Reconfiguration Kits Head Reconfiguration Kits 07/2010 Edition 160 : Unplug the connector fo r the DP axis (see photograph below). 2 : Loosen the four screws used to fix th…
Head Reconfiguration Kits 2 Assembly Instructions - SIPLACE X-Series Head Reconfiguration Kits
07/2010 Edition
159
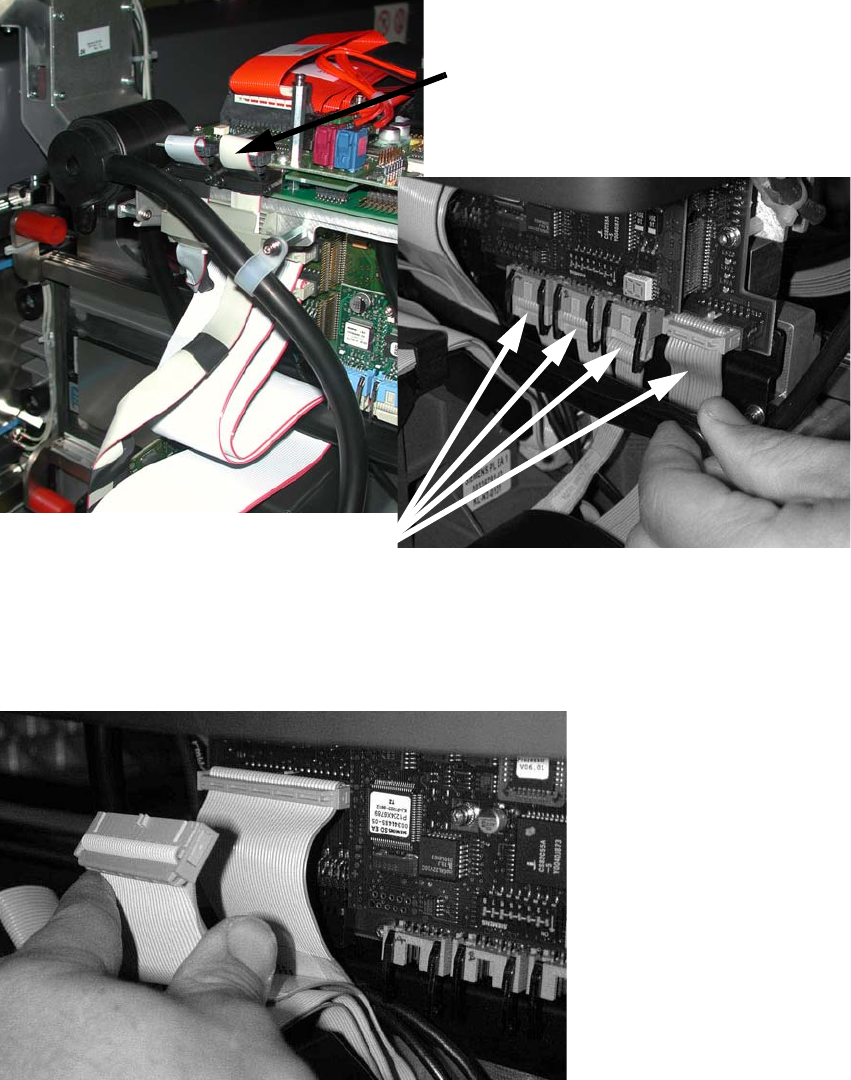
: Detach the component camera cable and the four cables as shown in the photograph .
2
: Release the pushbutton and remove the strain relief over the cables.
: Detach the two cables (see the photograph below).
2
2
Component camera cable
Four cables
2 Assembly Instructions - SIPLACE X-Series Head Reconfiguration Kits Head Reconfiguration Kits
07/2010 Edition
160
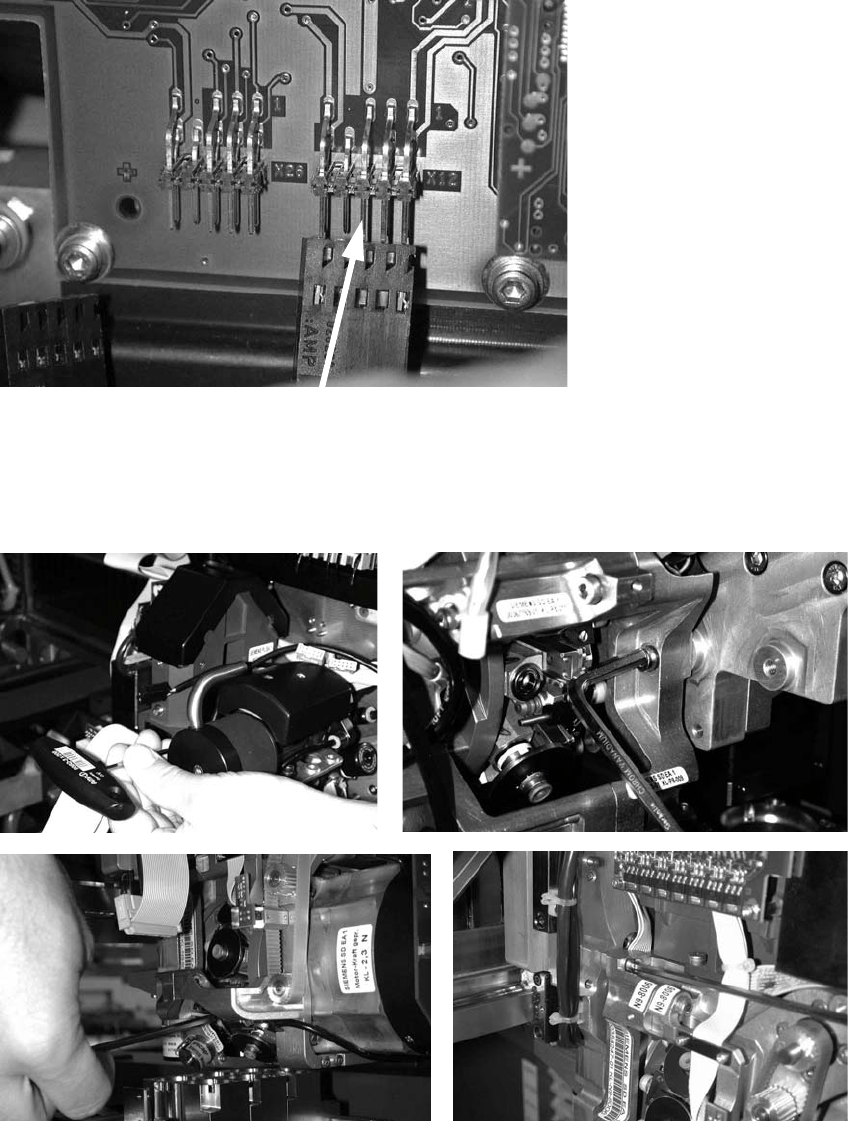
: Unplug the connector for the DP axis (see photograph below).
2
: Loosen the four screws used to fix the placement head.
With screws two and three, you should first remove one sleeve to make the screws more ac-
cessible.
2
2
Head Reconfiguration Kits 2 Assembly Instructions - SIPLACE X-Series Head Reconfiguration Kits
07/2010 Edition
161
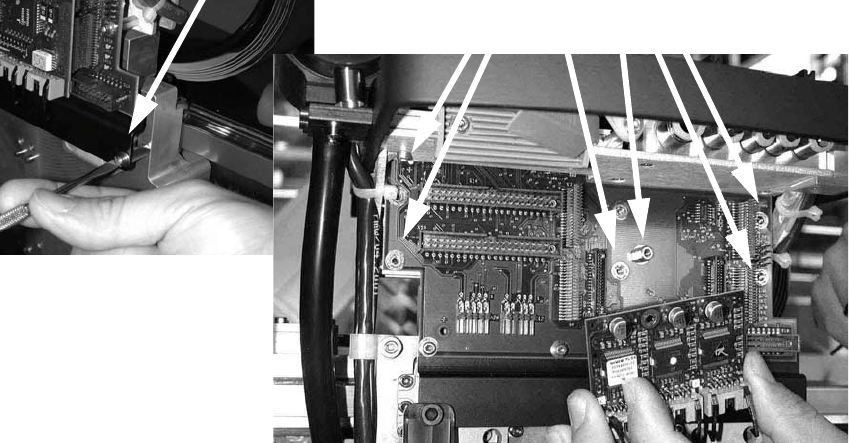
: Loosen the screws on the rail below the head adapter board and the screws of the head
adapter board, and then remove both the large (head interface) and the small board (step mo-
tor board).