00194474-0702_AI_HeadReconfig_X_605_DE+EN.pdf - 第198页
2 Assembly Instructions - SIPLACE X-Series Head Reconfiguration Kits Head Reconfiguration Kits 07/2010 Edition 198 : Plug the "Partition plate for the fiducial " (item no. 03022077-) onto the set screw . Make s…
Head Reconfiguration Kits 2 Assembly Instructions - SIPLACE X-Series Head Reconfiguration Kits
07/2010 Edition
197
2
Note the correct installation height without fail. 2
Risk of crash: The camera must be installed in the lower position in a two-gantry placement area
with a C&P 6/12 placement head - otherwise there is a risk of crashing! 2
2
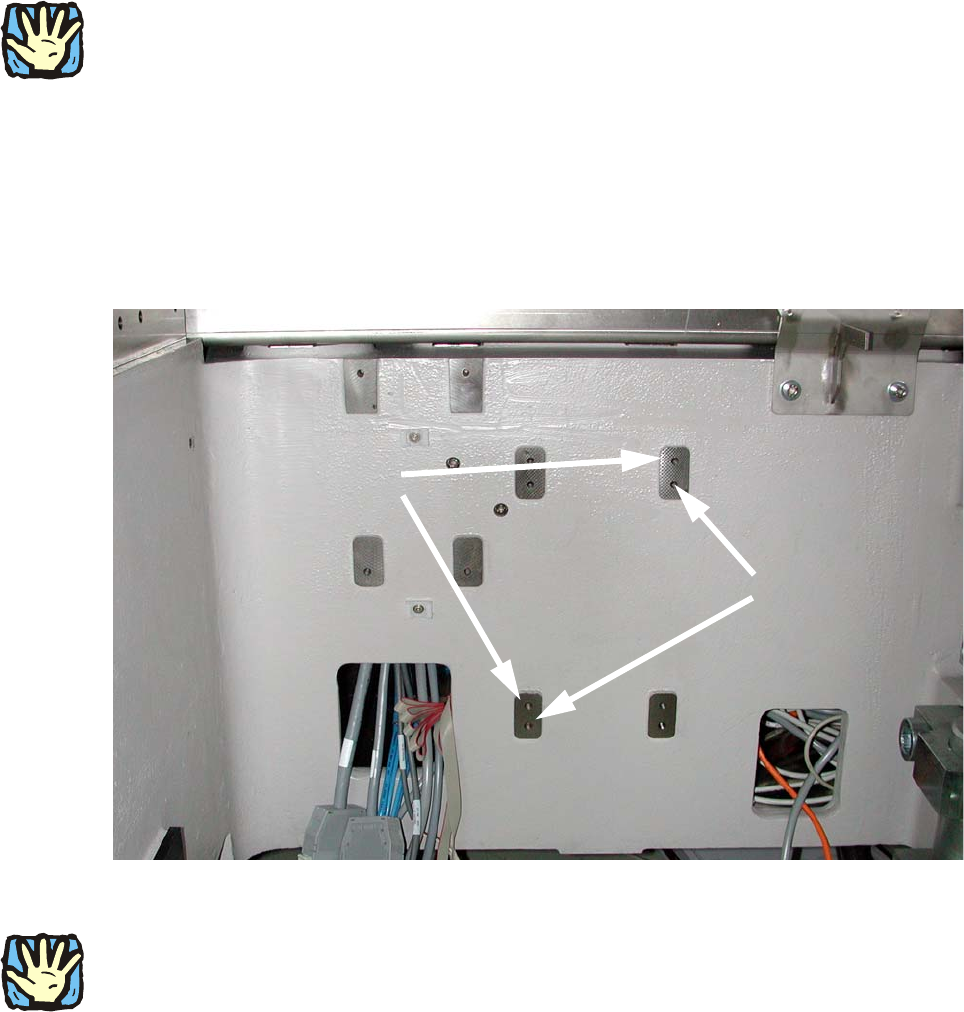
: Screw two setscrews, DIN913 M6x50 - ST (item no. 03005958-) into the holes shown in the
photograph:
upper holes: without C&P placement head,
lower holes: with C&P placement head.
2
2
2
2
2
2
2
The "partition plate for fiducials" is very heavy. 2
2
2
2
2
2
2
2
With C&P
placement head:
Premount 2 setscrews
in the lower position
Without C&P placement head:
Premount 2 setscrews
in the upper position
2 Assembly Instructions - SIPLACE X-Series Head Reconfiguration Kits Head Reconfiguration Kits
07/2010 Edition
198
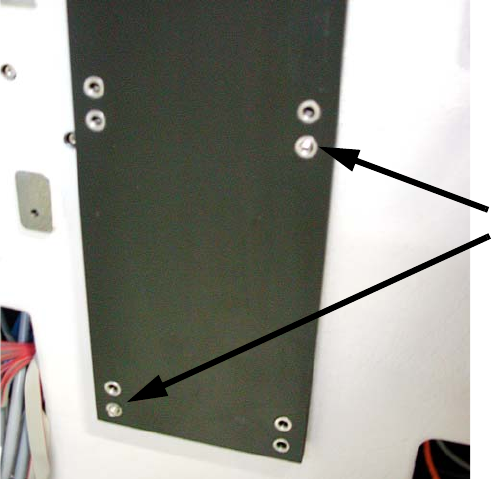
: Plug the "Partition plate for the fiducial" (item no. 03022077-) onto the set screw.
Make sure that all eight holes coincide with the threaded holes in the machine frame.
2
2
2
2
2
2
2
2
2
2
2
2
2
2
2
2
2
2 setscrews
Head Reconfiguration Kits 2 Assembly Instructions - SIPLACE X-Series Head Reconfiguration Kits
07/2010 Edition
199
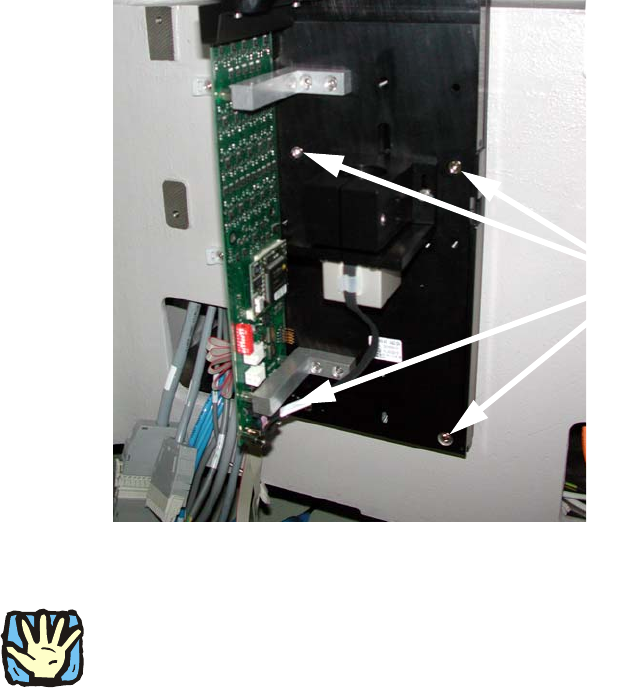
: Place the base plate of the camera on the "Partition plate for the fiducial" so that both set
screws are accessible and screw down tight using two screws DIN912 M6x35 - 8.8 (item no.
00845062-).
2
: Now replace both set screws with bolts.
2
If this is not possible, the camera must be removed again and the set screws replaced with suit-
able items. There must be no setscrew hidden behind the camera since the latter can possibly be
mounted askew because of this. 2
2
2
2
2
2
2
2
2
2
2
2
4 screws