182050 User manual.pdf - 第19页
semi automatic 0$&+,1 (352*5 $00,1 * 67$*($ ),7 648((* ((6 Software Version 07SP02 User Manual 1.9 6. Fit the r ear squeegee onto the rear sq ueegee mount, tighteni ng the thumb- scre ws until the y are fi nge…
semi automatic
0$&+,1(352*5$00,1*
67$*($),7648((*((6
1.8 User Manual Software Version 07SP02
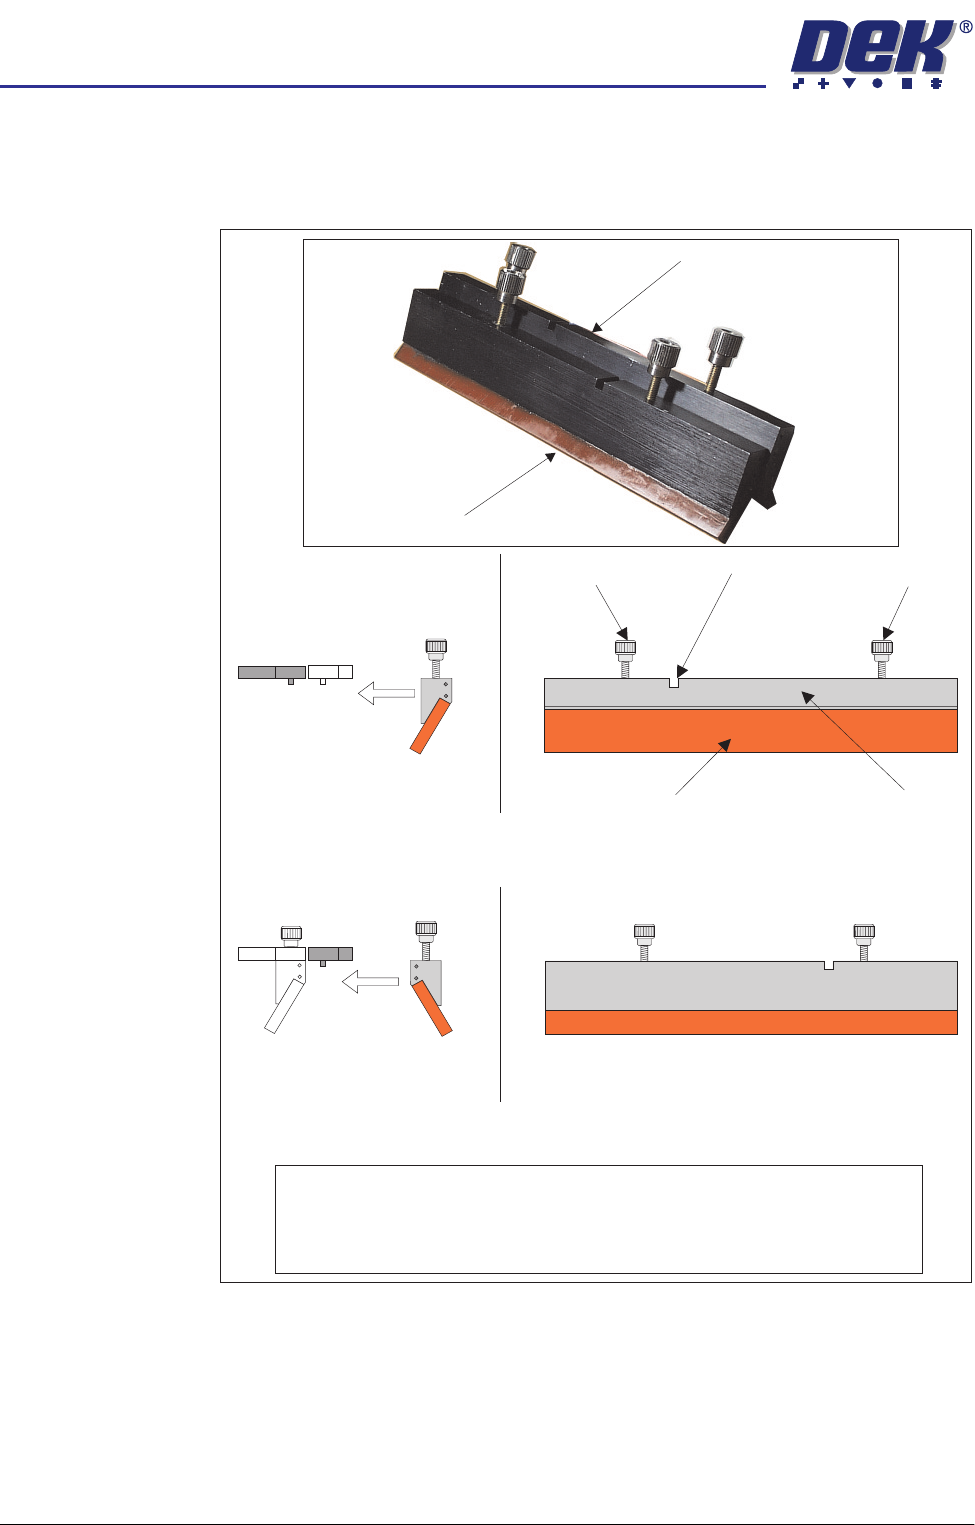
The front and rear squeegees must be fitted in the correct positions. Each
squeegee has a keyway machined into it to ensure that it cannot be
incorrectly fitted.
NOTE
To prevent incorrect orientation when fitting squeegees, the locking screws on
the rear squeegee are positioned wider apart than those on the front
squeegee. Keyway slots are also in different positions.
Rear Squeegee
Front Squeegee
Rear Squeegee (Front View)
Front Squeegee (Front View)
Squeegee Blade Squeegee Holder
Locking Screw Keyway
Locking Screw
Fit to Rear
Squeegee Mount
Fit to Front
Squeegee Mount
Side View of Squeegee
and Squeegee Mounts
Side View of Squeegee
and Squeegee Mounts

semi automatic
0$&+,1(352*5$00,1*
67$*($),7648((*((6
Software Version 07SP02 User Manual 1.9
6. Fit the rear squeegee onto the rear squeegee mount, tightening the thumb-
screws until they are finger tight.
7. Fit the front squeegee onto the front squeegee mount, ensuring that the
thumbscrews are only finger tight.
8. Lower the printhead cover.
9. Press the System button.
10. Select Continue (F1).
Continue
semi automatic
0$&+,1(352*5$00,1*
67$*($),7648((*((6
1.10 User Manual Software Version 07SP02
Squeegee
Reference Height
Every time new squeegees are mounted onto the machine, the squeegee
height must be calibrated to a new reference height setting. Carry out the steps
below to set the squeegee reference height. When set, the reference height is
stored in the machine software as the zero pressure position.
1. Press Calibrat Heights (F2).
The message ‘Remove Screen Before Commencing Pressure Calibra-
tion’ is displayed.
2. Press Exit (F8).
3. Press Change Screen (F5).
The message ‘Open Cover and Remove Screen’ is displayed.
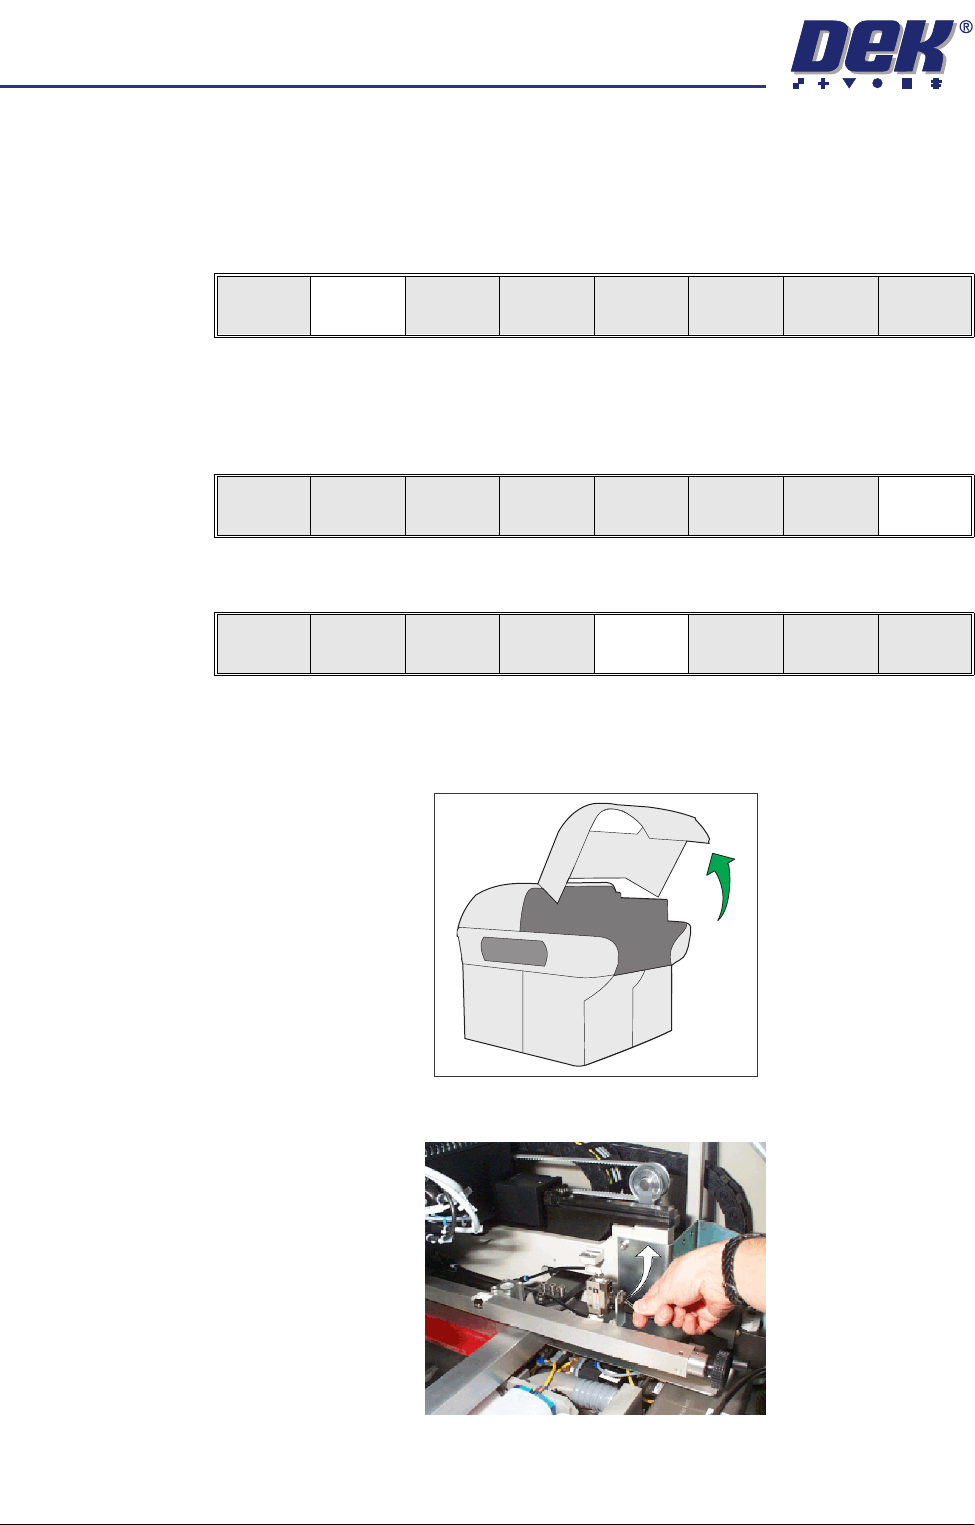
4. Raise the printhead cover.
5. Toggle screen clamp switch to up position (Off) (standard chase only).
Change
Squeegee
Calibrat
Heights
Exit
Continue
Restore
Defaults
Exit
Mode
Load
Data
Edit
Data
Setup
Squeegee
Change
Screen
Change
Tooling
Change
Language
Exit