182050 User manual.pdf - 第213页
semi automatic &21680$ %/(5( 3/(1,6+0 (176 3$67(/2$ ',1* Software Version 07SP02 User Manual 8.5 Auto Dispense An alternat ive to manual loading of solder pas te to the screen is given wit h the provision of a…
semi automatic
&21680$%/(5(3/(1,6+0(176
3$67(/2$',1*
8.4 User Manual Software Version 07SP02
6. Press the Continue (F1) button.
Paste Removal During continuous printing operations paste residue build up may occur with the
same screen in use and with the squeegee option fitted. This build up can affect
the print quality of the print process, ie paste in apertures, paste ‘tramlining’ on
the screen and residue on the squeegees.
Before loading paste the operator should ensure that any residue is cleaned off
the screen and squeegees.
To clean the screen effectively, it is recommended that the operator removes
the screen from the machine during this operation (see Operator manual -
Product Change over).
WARNING
RECOMMENDED SOLVENTS. ANY SOLVENTS USED MUST COMPLY WITH
LOCAL ENVIRONMENTAL GUIDELINES. DEK RECOMMEND USING SOLVENTS
THAT ARE ENVIRONMENTALLLY FRIENDLY, IE CFC FREE AND WATER BASED.
SOLVENTS USED MUST HAVE FAST EVAPORATION RATES AND FLASHPOINT
SPECIFICATIONS GREATER THAN 39ºC.
WARNING
SOLDER PASTE AND SOLVENTS. WHEN USING OR HANDLING ANY SOLDER
PASTE OR SOLVENT FORMULATION THE MANUFACTURERS’ RECOMMEND
SAFETY PRECAUTIONS MUST BE STRICTLY ADHERED TO.
WARNING
PROTECTIVE CLOTHING. APPROVED PROTECTIVE CLOTHING SHOULD BE
WORN BY SOLDER PASTE AND SOLVENT HANDLERS AT ALL TIMES TO
ELIMINATE FUME INHALATION, EYE CONTACT, SKIN CONTACT AND
INGESTION.
Remove paste from the screen and squeegees with a spatula and place in a
suitable container. Smear deposits are removed using a suitable cleaning cloth
dampened with a suitable solvent.
NOTE
Waste paste and contaminated cleaning cloths are to be disposed of in accord-
ance with local authority regulations.
Continue
semi automatic
&21680$%/(5(3/(1,6+0(176
3$67(/2$',1*
Software Version 07SP02 User Manual 8.5
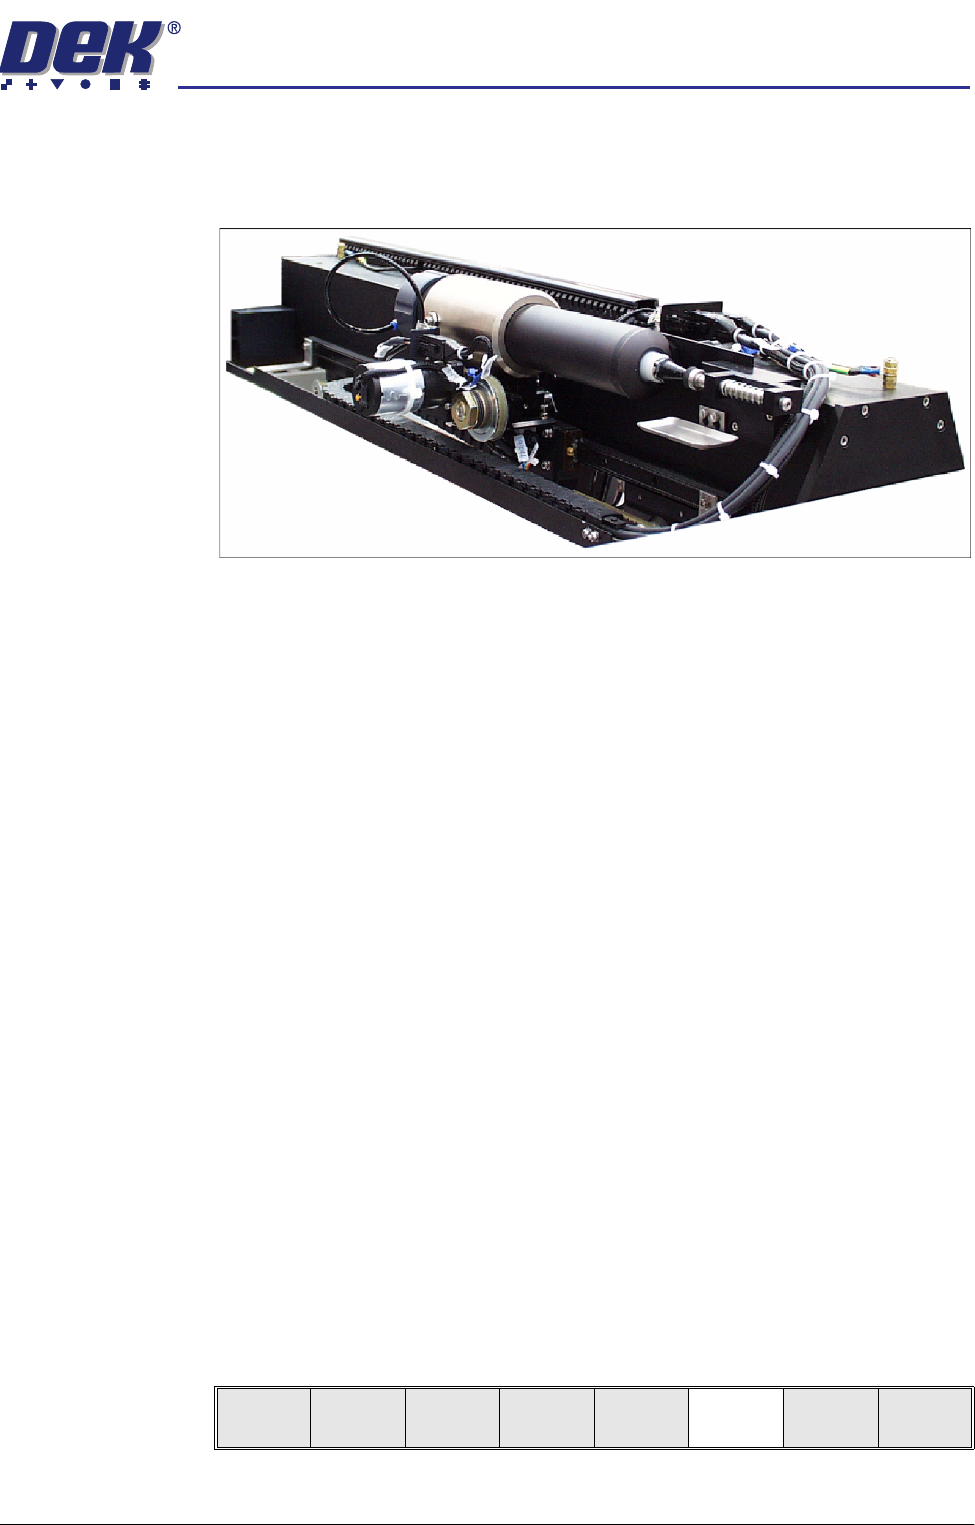
Auto Dispense An alternative to manual loading of solder paste to the screen is given with the
provision of an automatic paste dispenser. This is mounted to the rear of the
print carriage.
The paste dispenser uses either a 1 Kg or 500g cartridge. The 500g cartridge
requires the fitting of a sleeve which is an option. This enables any loading of
paste to be carried out without the need for the operator to handle the paste.
A slug inside the cartridge, travels down the cartridge as the paste is used. A
proximity sensor fitted to the side of the dispenser detects the metal content of
the paste. When the cartridge is empty the sensor initiates a ‘Print Medium
Low. Please Replenish’ warning window to the operator.
Programming into a
Product File
The paste dispense parameters can be setup when editing a product file for a
new product, although it may be more convenient to set these after the product
has been run for a while and paste requirements have been determined.
The parameters to be edited that affect the operation of the paste dispenser are:
Paste Dispense Rate:
• This determines the frequency of the cycling of the paste dispenser. The
setting is gauged by running the product and noting the number of prints
before paste replenishment is required. This can be set to any number
between 0 to 100 in increments of 1.
Paste Dispense Speed:
• This determines the speed at which the paste dispenser travels across the
screen and hence the amount of paste which is dispensed. This parameter
needs to be set in conjunction with the Paste Dispense Rate. This can be
set to any number between 10mm/s and 100mm/s in increments of 1mm/s.
To Enter Paste
Dispense
Parameters From
the Status Page
1. Press Setup (F6).
Run
Open
Cover
Paste
Load
Clean
Screen
Setup Monitor Maint.
semi automatic
&21680$%/(5(3/(1,6+0(176
3$67(/2$',1*
8.6 User Manual Software Version 07SP02
2. Press Edit Data (F3).
3. Using the Next and Previous keys (F4 - F5) select the Paste Dispense
Rate.
4. Using the Incr. and Decr. keys (F6 -F7) set the required rate.
5. Using the Next key (F4) select the Paste Dispense Speed.
6. Using the Incr. and Decr. keys (F6 - F7) set the required speed.
7. Press Exit (F8).
8. Press Exit (F8).
Mode
Load
Data
Edit
Data
Setup
Squeegee
Change
Screen
Change
Tooling
Change
Language
Exit
Save Next Previous Incr. Decr. Exit
PASTE DISPENSE RATE
PASTE DISPENSE SPEED
PASTE RECOVERY RATE
FRONT PASTE RECOVERY
REAR PASTE RECOVERY
SCREEN CLEAN MODE 1
SCREEN CLEAN RATE 1
DRY CLEAN SPEED
WET CLEAN SPEED
VAC CLEAN SPEED
VAC CLEAN START TIME
FRONT START OFFSET
REAR START OFFSET
FRONT KNEAD PRESSURE
0
30
0
0
0
NONE
0
40
40
10
1.0
30
30
0.0
Prts
mm/s
mm
mm
Prts
mm/s
mm/s
mm/s
secs
mm
mm
kg
.. more
Edit Current Process Parameters
Save Next Previous Incr. Decr. Exit
Save Next Previous Incr. Decr. Exit
Save Next Previous Incr. Decr. Exit
Save Next Previous Incr. Decr. Exit
Mode
Load
Data
Edit
Data
Setup
Squeegee
Change
Screen
Change
Tooling
Change
Language
Exit