182050 User manual.pdf - 第264页
semi automatic &21680$ %/(5(3/ (1,6+0 (176 352)/2: 8.56 User Manual Software Ve rsion 07SP02 17. Select Exit (F8). 18. Select Proceed (F1). The ProFlow uni t is placed in contact with the stencil. 19. Raise t he pri…
semi automatic
&21680$%/(5(3/(1,6+0(176
352)/2:
Software Version 07SP02 User Manual 8.55
6. Select Remove Cover (F8). The message ‘Open the printer cover and
remove the ProFlow unit’s base cover’ is displayed.
7. Raise the printhead cover.
8. Remove the ProFlow unit’s base cover.
9. Lower the printhead cover.
10. Press the System button.
11. Select Exit (F8).
12. Select Yes (F1). The message ‘The ProFlow unit will be placed in the
REAR envelope’ is displayed.
13. If the ProFlow unit is required to be placed in another envelope continue with
Step 14. If the ProFlow unit is required to be placed in the machine preferred
envelope go to Step 18.
14. Select, Select Another (F8).
The following window is displayed:
15. Use the Next or Previous keys (F4 or F5) to highlight Front.
16. Select Use (F1).
Yes
Remove
Cover
Exit
Yes
Remove
Cover
Proceed
Select
Another
Preferred Envelope
REAR
FRONT
Use Next Previous Exit
Use Next Previous Exit
semi automatic
&21680$%/(5(3/(1,6+0(176
352)/2:
8.56 User Manual Software Version 07SP02
17. Select Exit (F8).
18. Select Proceed (F1). The ProFlow unit is placed in contact with the stencil.
19. Raise the printhead cover.
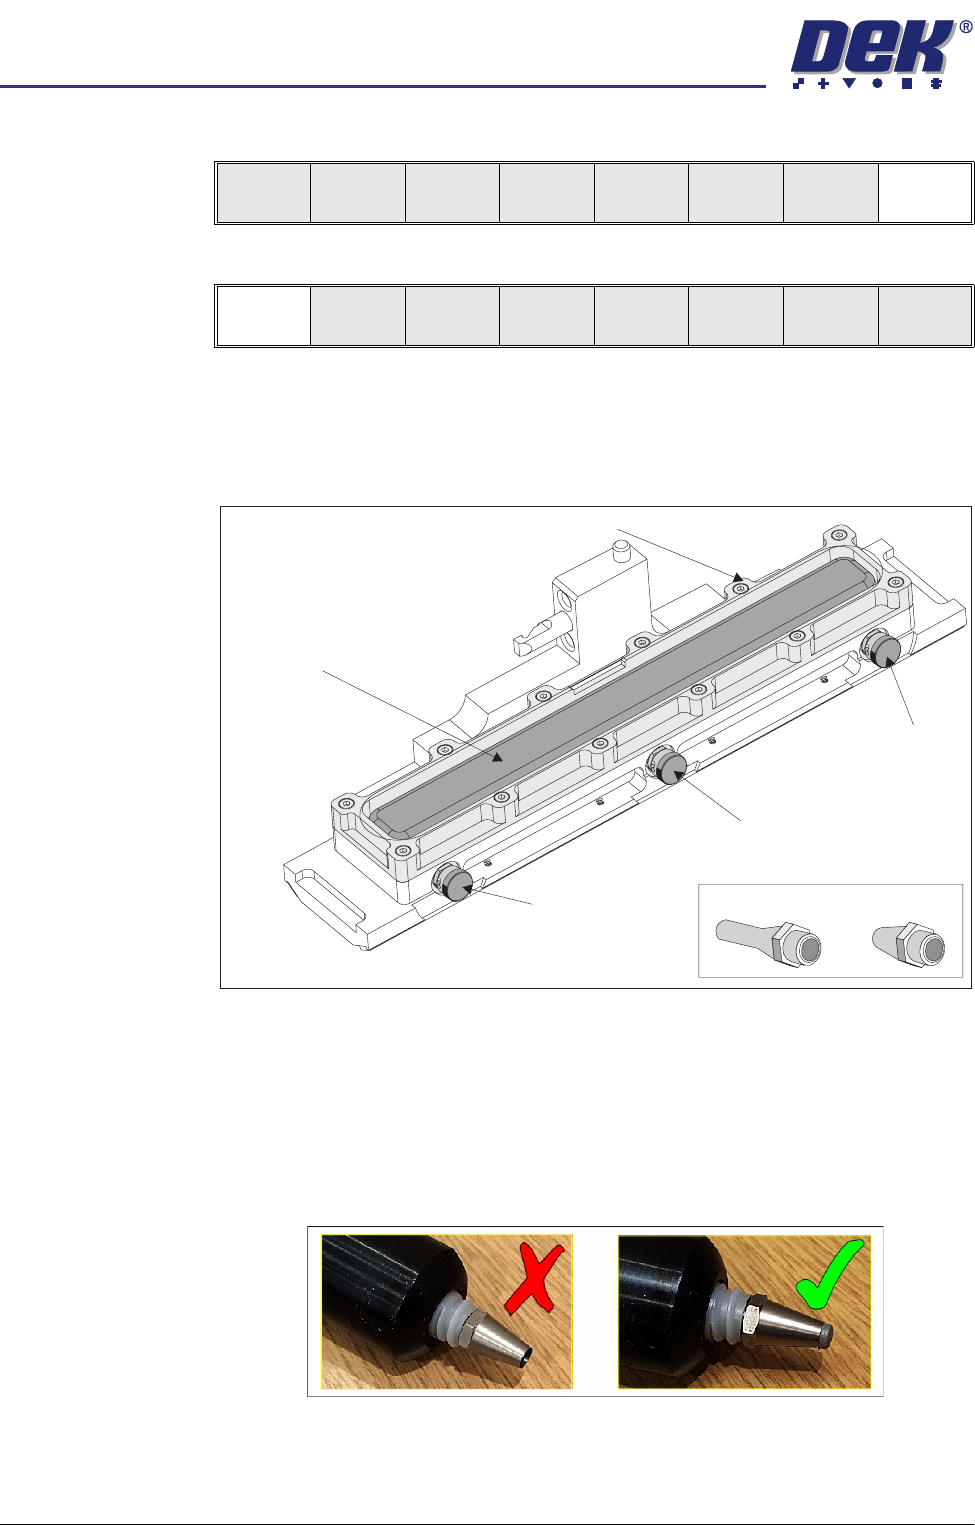
20. Ensure that the ProFlow pressure mechanism is in the raised position (to
expose transfer head diaphragm).
21. Remove the centre filling port bayonet cap.
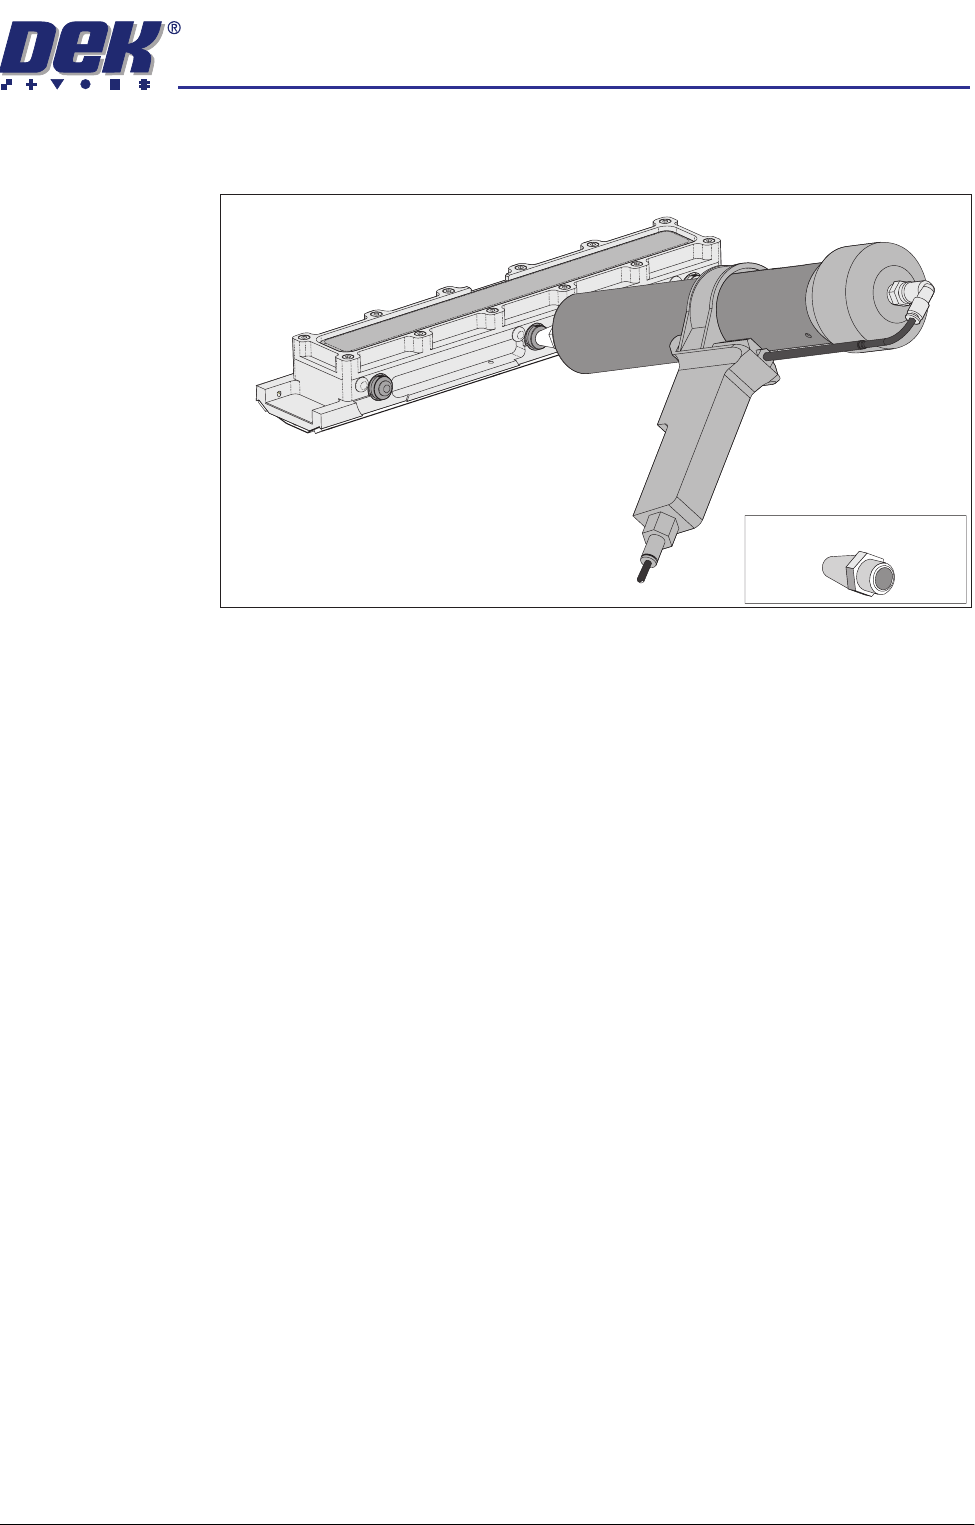
22. Using either a general purpose mastic gun or the optional ProFlow pneu-
matic recharging gun. Load a standard cartridge and fit the short recharging
nozzle to the cartridge, (figure below refers).
NOTE
To ensure that any air within the cartridge and nozzle is expelled prior to
using the gun, charge the gun so that paste is starting to exude from the
nozzle.
Use Next Previous Exit
Proceed
Select
Another
Filling Port
Bayonet Cap
Diaphragm
Diaphragm Retainer
Recharging Nozzles
Filling Port
Bayonet Cap
Filling Port
Bayonet Cap
Transfer Head (Showing Diaphragm)
semi automatic
&21680$%/(5(3/(1,6+0(176
352)/2:
Software Version 07SP02 User Manual 8.57
23. Push the nozzle of the gun into the centre filling port of the ProFlow transfer
head, (see figure below).
24. Slowly fill the diaphragm until it starts to balloon, smooth the top of the
diaphragm so that the paste is evenly dispersed along its length.
25. Alternatively, fill using all three filling ports for even distribution.
NOTE
Ensure that only one port is opened at a time.
26. Do not overfill. If this occurs any excess seeps out between the wipers and
the screen.
NOTE
Clean any excess seepage before commencing print operations.
27. Ensure that the threaded areas around the filling ports are thoroughly clean
before commencing print operation.
28. Refit the port bayonet caps.
29. Lower the printhead cover.
30. Press the System button.
Short Recharging Nozzle