182050 User manual.pdf - 第260页
semi automatic &21680$ %/(5(3/ (1,6+0 (176 352)/2: 8.52 User Manual Software Ve rsion 07SP02 NOTE Prior t o completion , slowly retr act the nozzle from the fil ling hole to av oid creati on of air bu bbles withi n …
semi automatic
&21680$%/(5(3/(1,6+0(176
352)/2:
Software Version 07SP02 User Manual 8.51
Rechargeable Transfer Head
It is necessary at intervals to replenish the rechargeable transfer head. If there
is no print medium in the transfer head at the end of a print stroke, the warning
window ‘Print Medium Low. Please Replenish.’ is displayed.
WARNING
SOLDER PASTE AND SOLVENTS. WHEN USING OR HANDLING ANY SOLDER
PASTE OR SOLVENT FORMULATION THE MANUFACTURERS’ RECOMMEND
SAFETY PRECAUTIONS MUST BE STRICTLY ADHERED TO.
WARNING
PROTECTIVE CLOTHING. APPROVED PROTECTIVE CLOTHING SHOULD BE
WORN BY SOLDER PASTE AND SOLVENT HANDLERS AT ALL TIMES TO
ELIMINATE FUME INHALATION, EYE CONTACT, SKIN CONTACT AND
INGESTION.
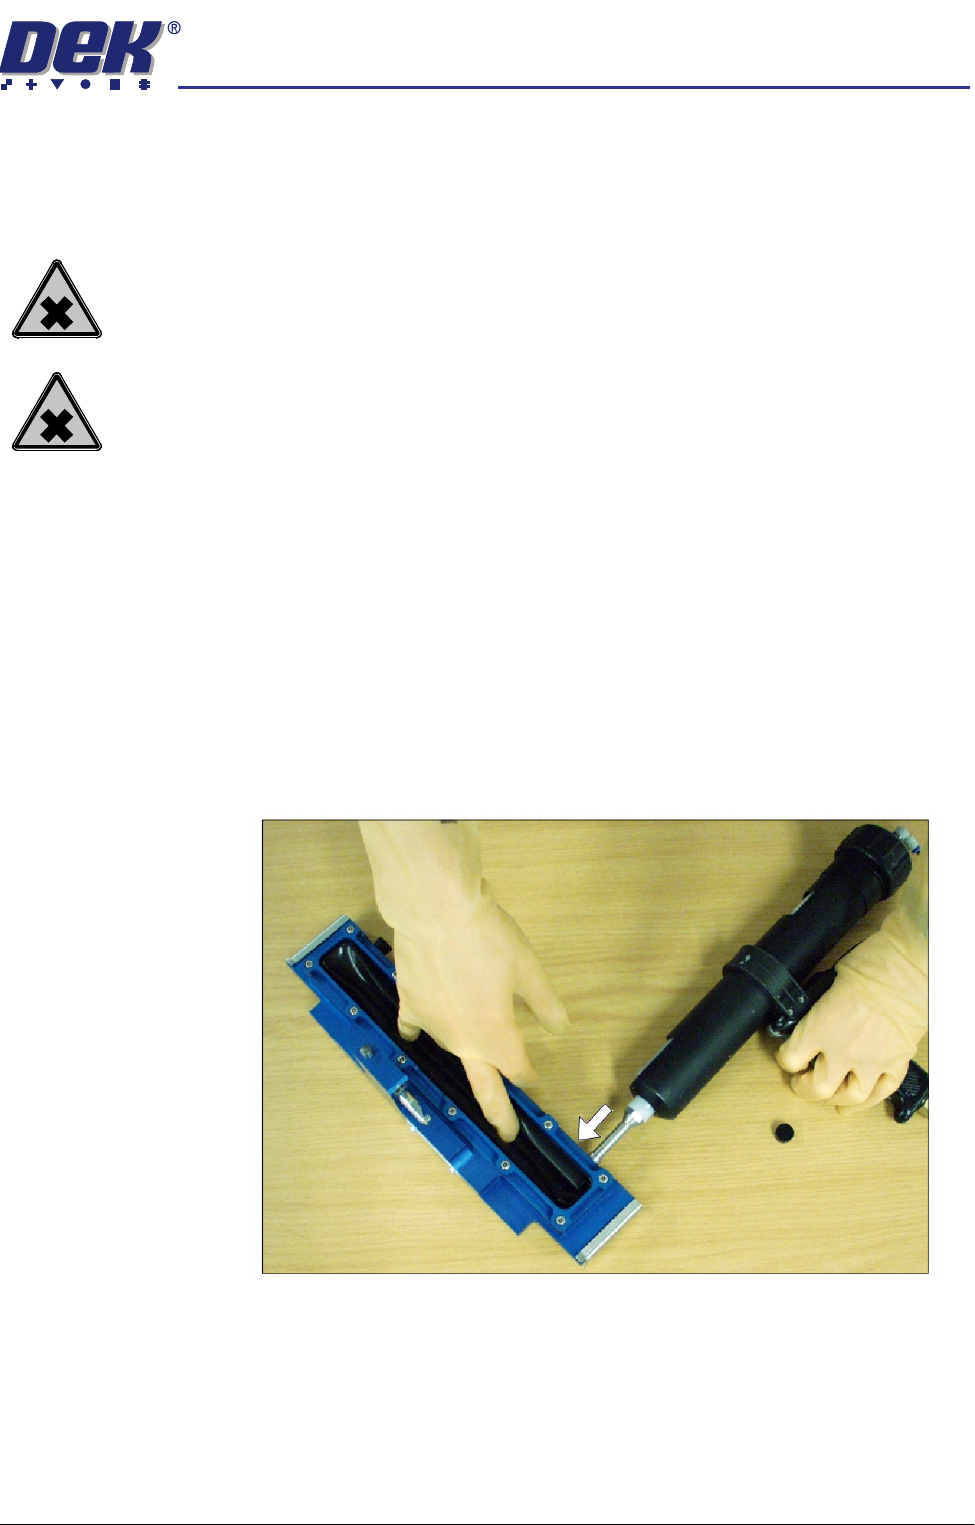
Initial Fill If an empty/new rechargeable transfer head is to be used prior to printing. The
transfer head unit is to be initially charged in accordance with the following:
1. Ensure the empty transfer head is fitted with a base cover.
2. Using the recharging gun (mastic or pneumatic gun). Load a standard
cartridge and fit the long recharging nozzle to the cartridge.
NOTE
To prevent air bubbles, ensure that the long nozzle is charged with paste
prior to carrying out the next Step.
3. Starting at one end of the unit, remove the filling hole bayonet cap and insert
the recharging nozzle into the unit, (figure below refers).
4. Start filling the cavity, at the same time push the diaphragm down with
fingers (Step 3 figure refers), to feel the paste filling the void. Whilst the
paste is filling, gently knead the diaphragm to evenly distribute the paste and
also prevent ballooning. Fill approximately one third the length of the unit.
On completion remove the nozzle and refit the bayonet cap.

semi automatic
&21680$%/(5(3/(1,6+0(176
352)/2:
8.52 User Manual Software Version 07SP02
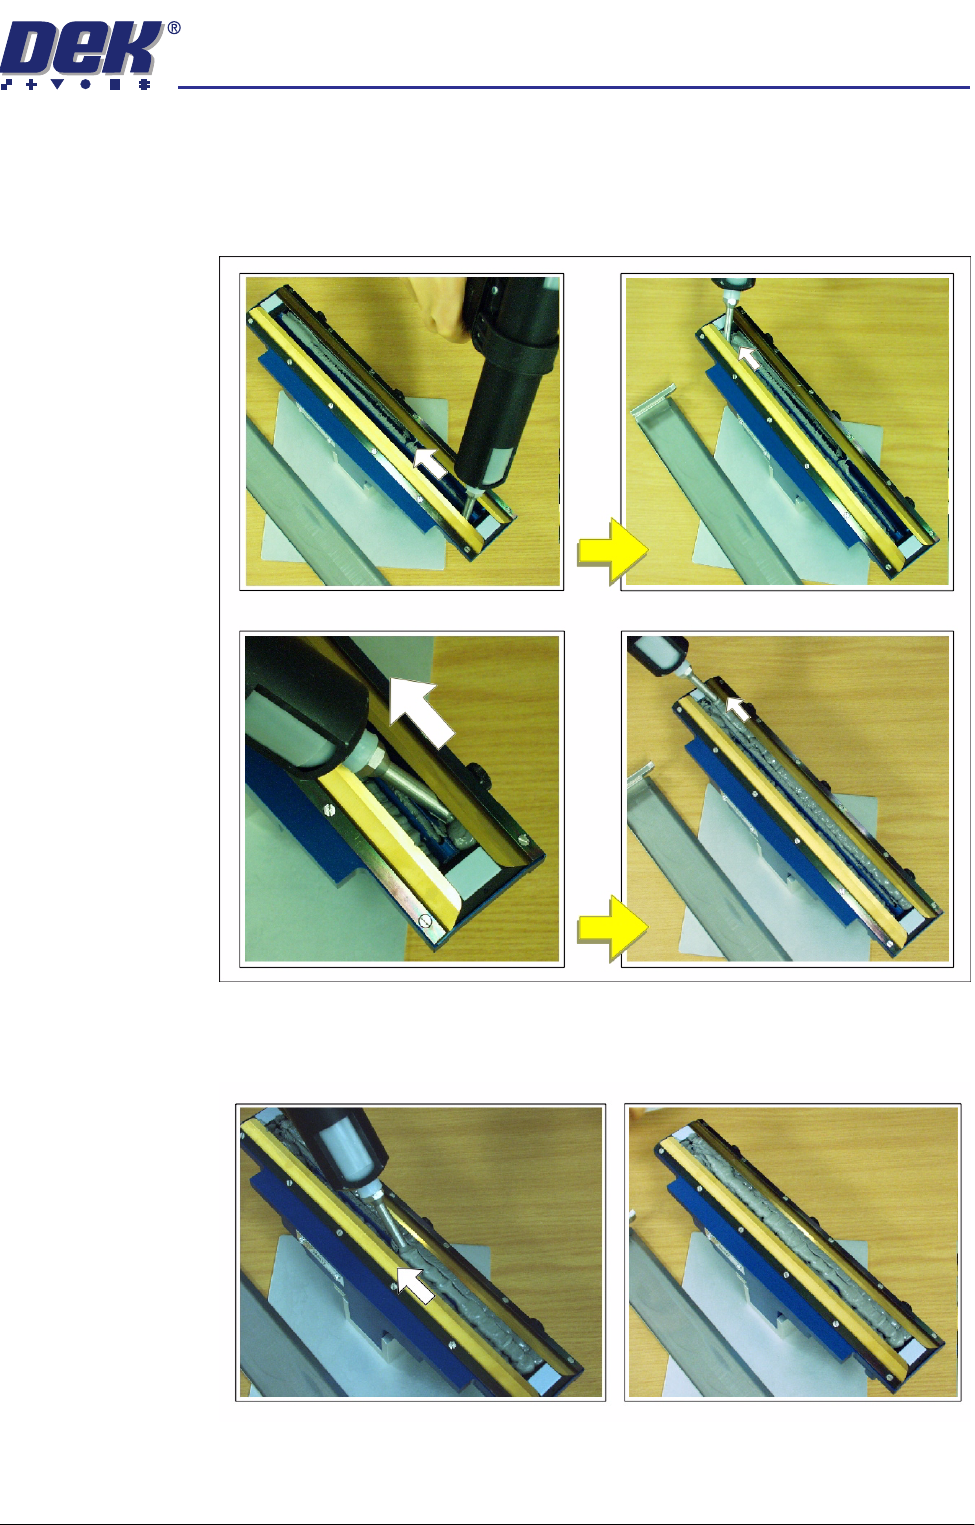
NOTE
Prior to completion, slowly retract the nozzle from the filling hole to avoid
creation of air bubbles within the paste fill.
5. Move the recharging unit to the centre filling port, and repeat Step 4.
6. Move the recharging unit to the last filling port and repeat Step 4 until the
void is full.
7. Knead the transfer head diaphragm so that the paste is dispersed evenly
along it’s length. The top of the diaphragm must be flat (not ballooned
upwards). Figures below refers.
semi automatic
&21680$%/(5(3/(1,6+0(176
352)/2:
Software Version 07SP02 User Manual 8.53
8. Fit the transfer head unit to the maintenance stand and remove the base
cover.
9. Using the recharging unit with long nozzle, fill the length of each side of the
unit, behind the wiper units, (figure below refers).
10. Apply the paste along the length of the centre, between the wipers, filling
paste level with the wiper blade edges, (figure below refers).