00197463-03_SM_CPP_Customer_EN.pdf - 第103页
8 Screwed joint, silencer and holding circuit 8.4 Replacing the holding circuit Service Manual SIPLACE Multistar (CPP / CPP M) 02/2018 103 Fig.175: Holding circuit fastening screws ► Insert the six fastening screws into…
8 Screwed joint, silencer and holding circuit
8.4 Replacing the holding circuit
102 Service Manual SIPLACE Multistar (CPP / CPP M) 02/2018
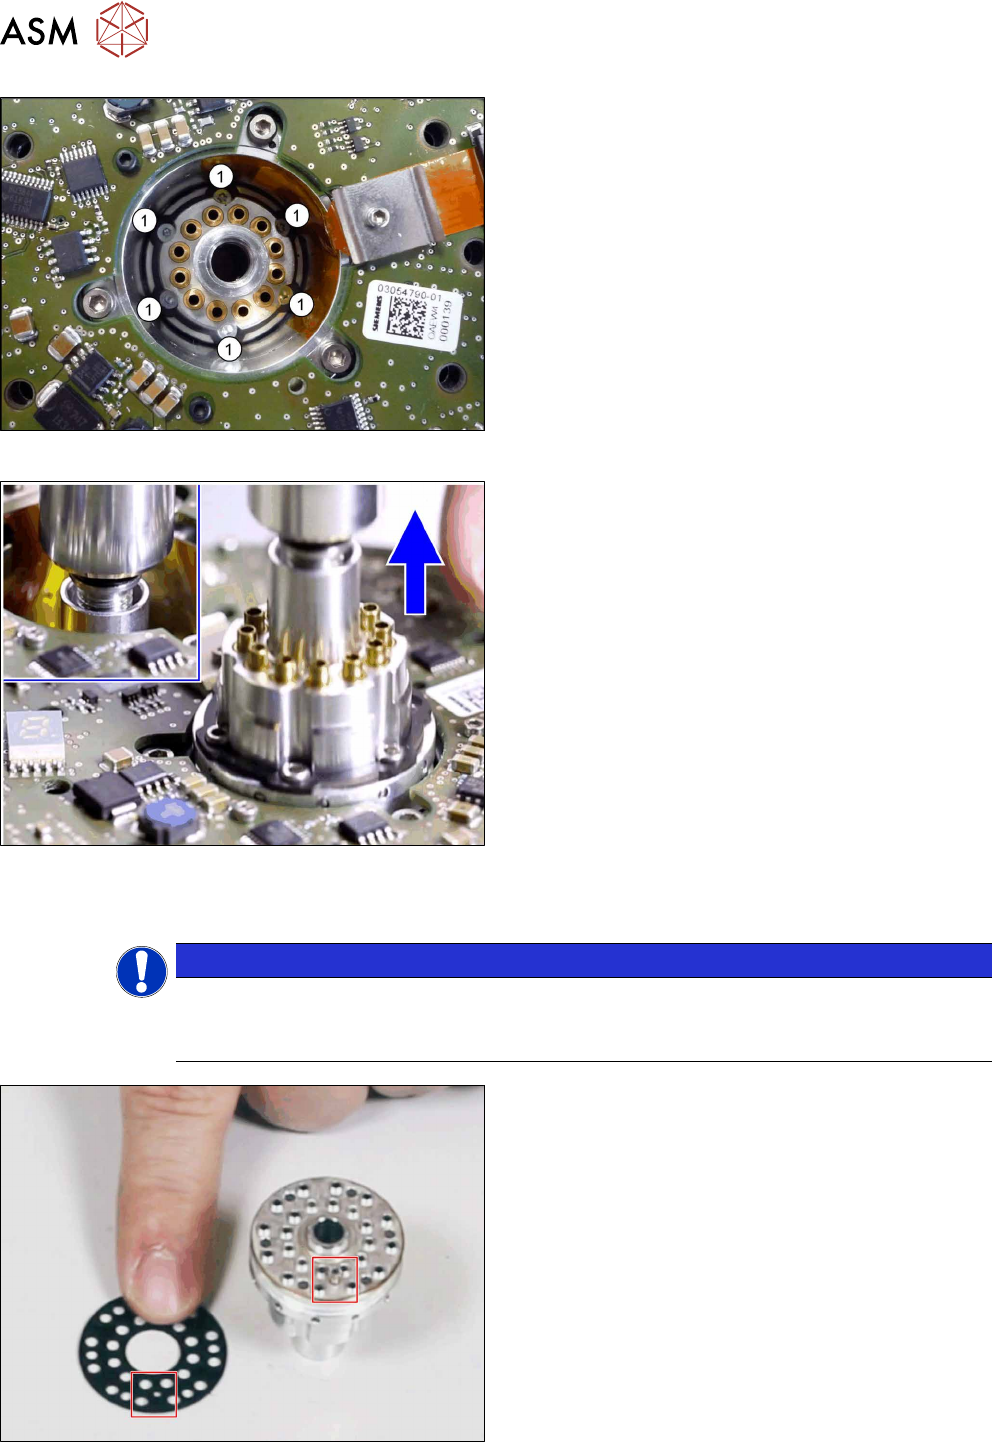
Fig.172: Holding circuit
► Remove the six screws(1) fastening the holding
circuit.
► Screw the screwed joint back into the holding cir-
cuit thread and carefully pull out the holding cir-
cuit.
Fig.173: Removing the holding circuit
► Remove the holding circuit with the help of the
screwed joint.
Installation
NOTICE
Seals
► When you fit a cleaned holding circuit, used new seals from the holding circuit seal set
[03095007-xx]. Keep the remaining seals safe.
Fig.174: Holding circuit seal
► Fit the seal into the holding circuit. Pay attention
to the correct fitting position of the pin.
8 Screwed joint, silencer and holding circuit
8.4 Replacing the holding circuit
Service Manual SIPLACE Multistar (CPP / CPP M) 02/2018 103
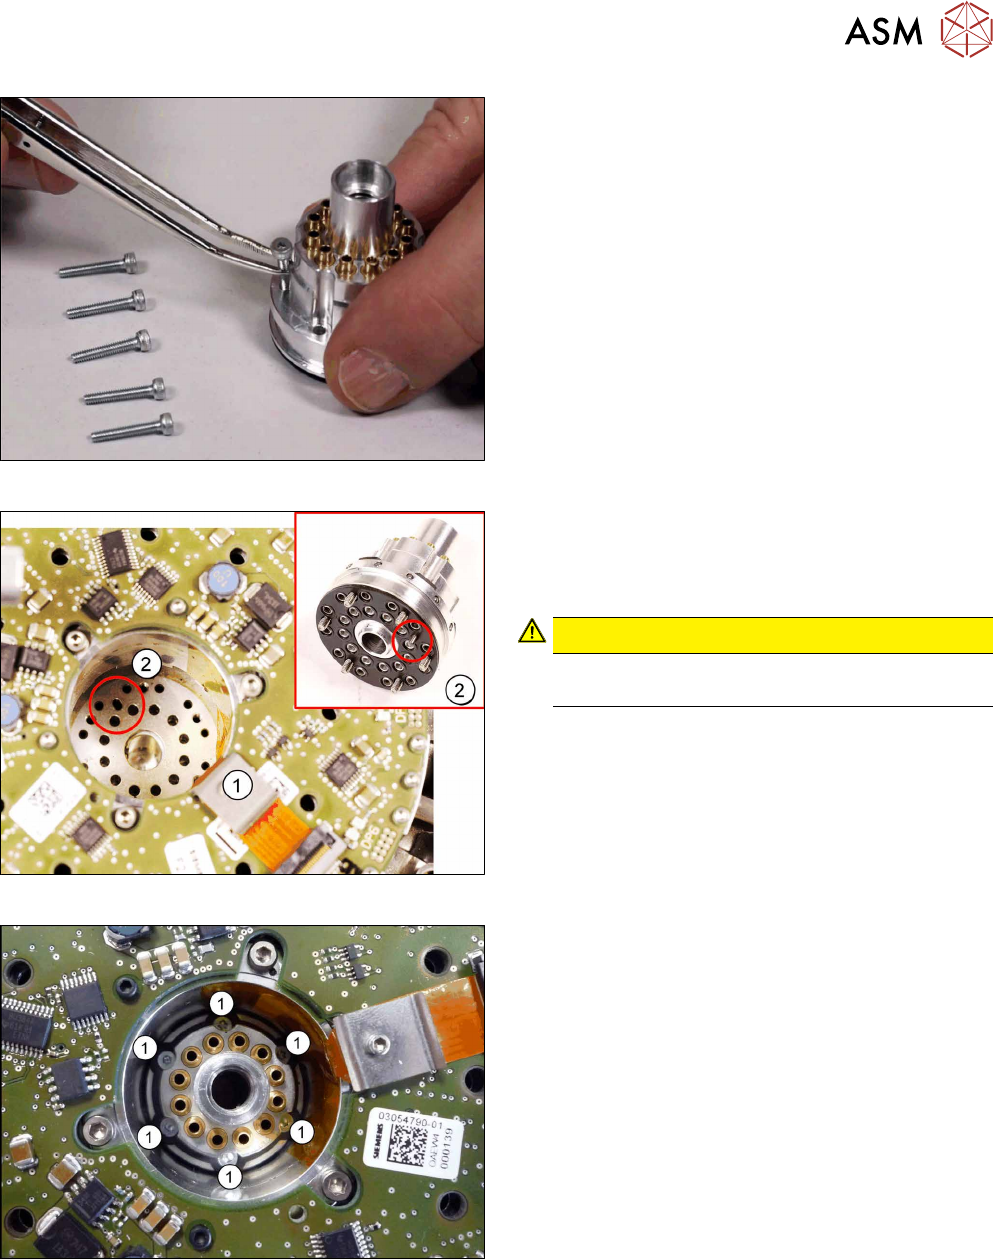
Fig.175: Holding circuit fastening screws
► Insert the six fastening screws into the holding
circuit.
Fig.176: Fitting the holding circuit
► Carefully insert the holding circuit. Pay attention
to the correct fitting position of the pin(2).
The holding circuit must engage properly when
inserted.
CAUTION!
Take care not to damage the Flexprint
cable (1).
.
Fig.177: Fixing the holding circuit
► Lightly tighten the fastening screws.
► Tighten the six screws fastening the holding cir-
cuit crosswise, with a torque of 0.2Nm.

8 Screwed joint, silencer and holding circuit
8.4 Replacing the holding circuit
104 Service Manual SIPLACE Multistar (CPP / CPP M) 02/2018
Fig.178: Inserting the seal
► Put on the top seal.
► Follow the removal instructions in reverse order for further installation.
Also observe the installation instructions in the following sections:
8.3.3 "Replacing the silencer" [}97]
8.2 "Replacing the screwed joint" [}94]
5.1 "Replacing the front plate [03061102-xx]" [}35]
► Observe in particular the torques specified!