00197463-03_SM_CPP_Customer_EN.pdf - 第44页
5 Front plate, star, Z axis and smoothed distributor disc 5.2 Removing and fitting the star (only for heads from FS05 upwards) 44 Service Manual SIPLACE Multistar (CPP / CPP M) 02/2018 Fig.56: Handle ► Remove the two sc…
5 Front plate, star, Z axis and smoothed distributor disc
5.2 Removing and fitting the star (only for heads from FS05 upwards)
Service Manual SIPLACE Multistar (CPP / CPP M) 02/2018 43
5.2 Removing and fitting the star (only for heads from FS05
upwards)
Overview
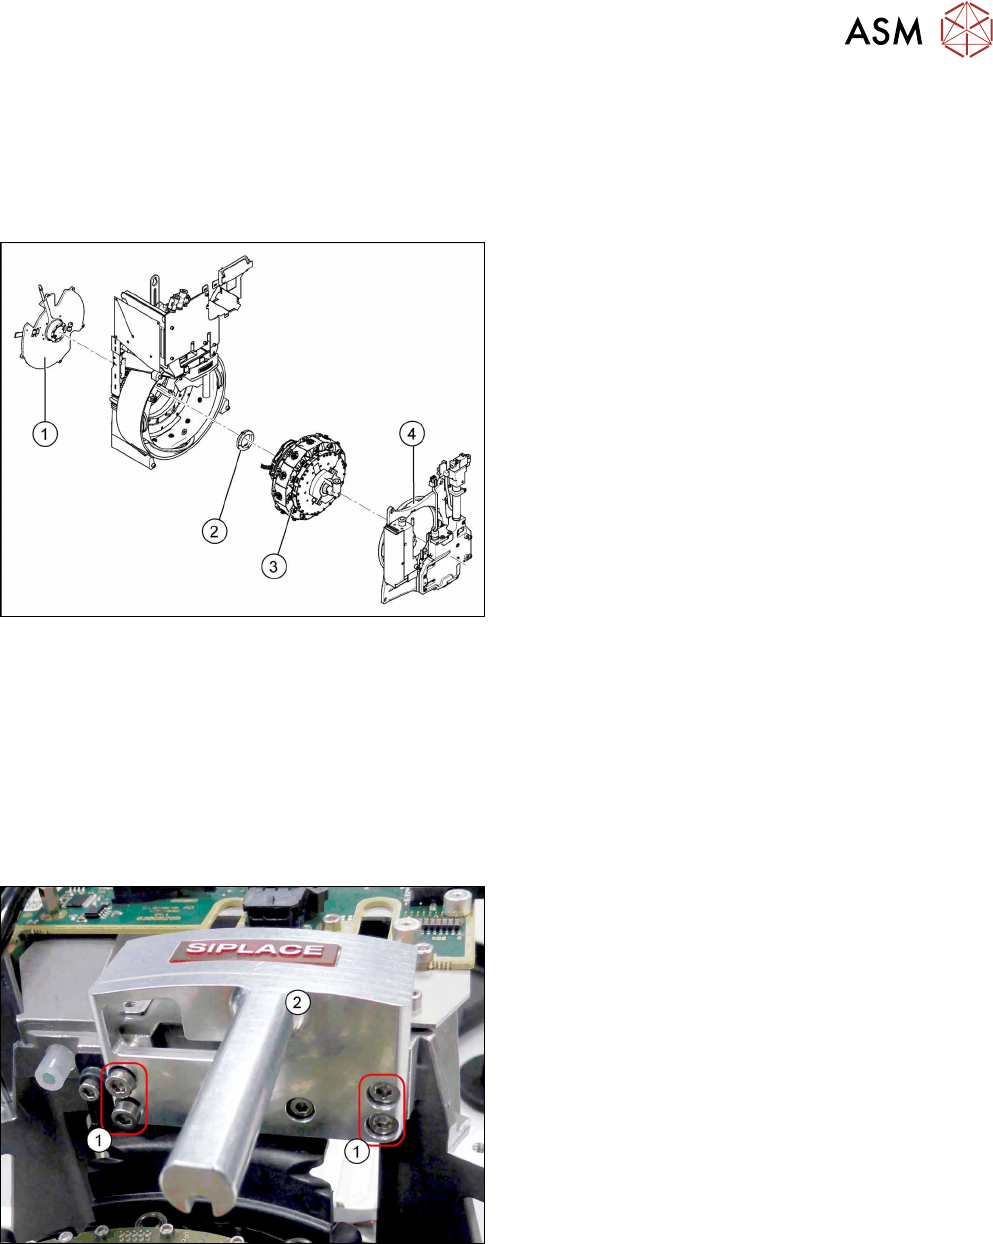
Fig.54: CPP head structure
1. Back plate
2. Smoothed distributor disc
3. Star
4. Front plate
Preparation
► Remove the head from the machine. For details about removing and fitting the placement
head, refer to the service manual for your machine.
fit the head on the head mount [03056231‑xx].
► Make sure that the component sensor protective cap is fitted.
1.1.3 "Protecting the component sensor" [}8]
Removal
Fig.55: Handle
► Remove the four screws(1) fastening the
handle(2) and remove the handle.
5 Front plate, star, Z axis and smoothed distributor disc
5.2 Removing and fitting the star (only for heads from FS05 upwards)
44 Service Manual SIPLACE Multistar (CPP / CPP M) 02/2018
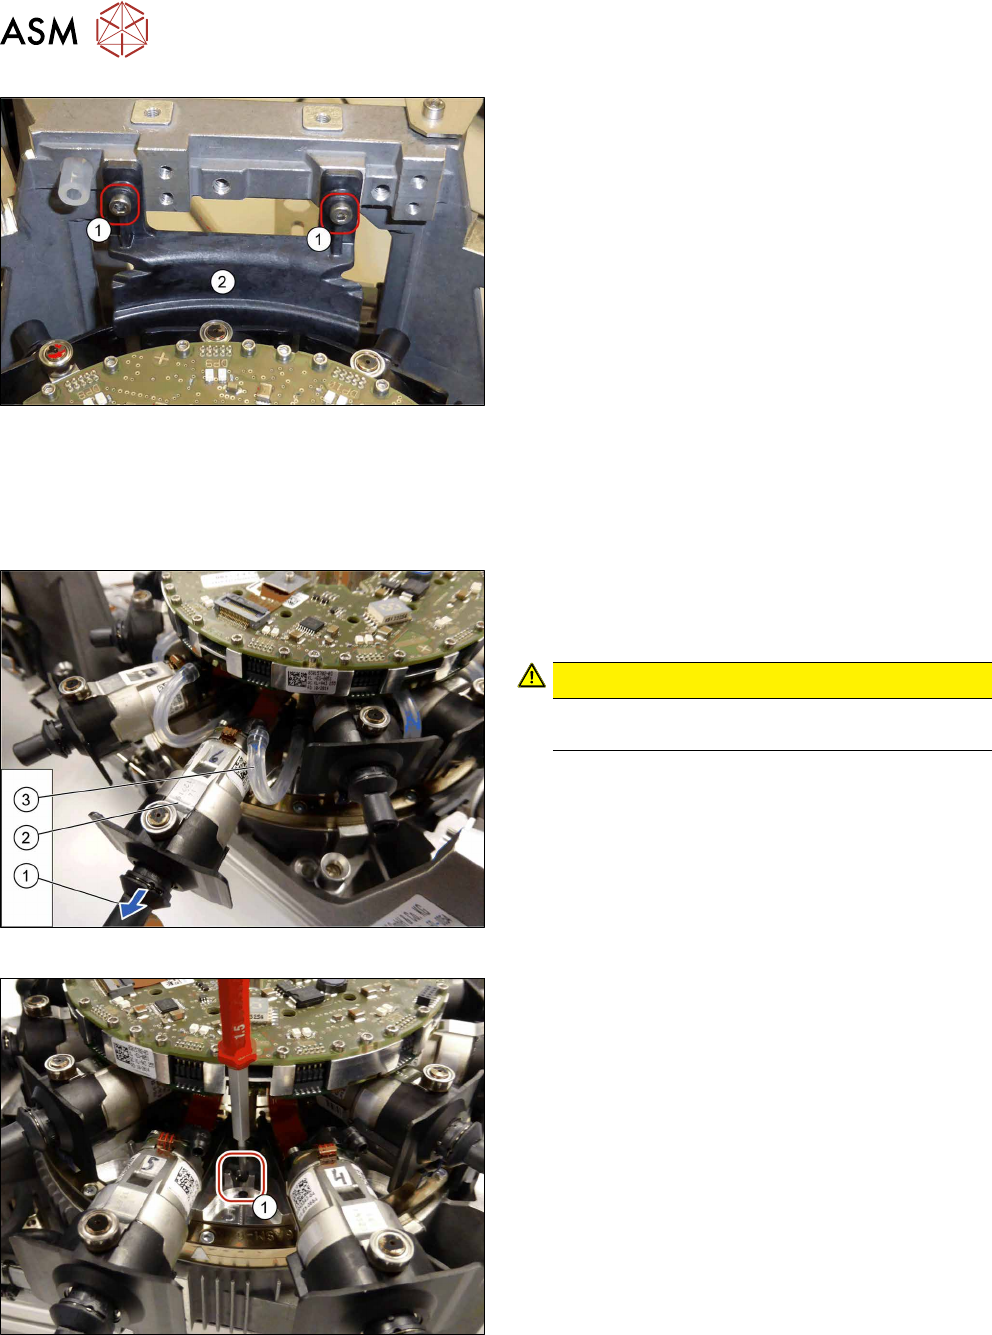
Fig.56: Handle
► Remove the two screws (1) fastening the camera
cover (2) and remove the camera cover.
► If required, dismantle the front plate.
5.1 "Replacing the front plate [03061102-xx]" [}35]
► Remove the screwed joint.
8.2 "Replacing the screwed joint" [}94]
Fig.57: Disconnecting the nozzles and hoses
► Pull the nozzle (1) off the DP drive.
► Pull the DP drive (2), together with the jaws, out
of the head.
CAUTION!
Do not pull on the black cover. This might break
if you do.
.
► Remove the hose(3) on both sides.
► Repeat these steps for all twelve DP drives.
Fig.58: Screws fastening the star
► Remove the twelve screws fastening the star.
These twelve screws are between the DP drives
in each case.
► Carefully pull the complete star assembly off the
star motor. While doing so, hold the star on the
SCS.
5 Front plate, star, Z axis and smoothed distributor disc
5.2 Removing and fitting the star (only for heads from FS05 upwards)
Service Manual SIPLACE Multistar (CPP / CPP M) 02/2018 45
Installation
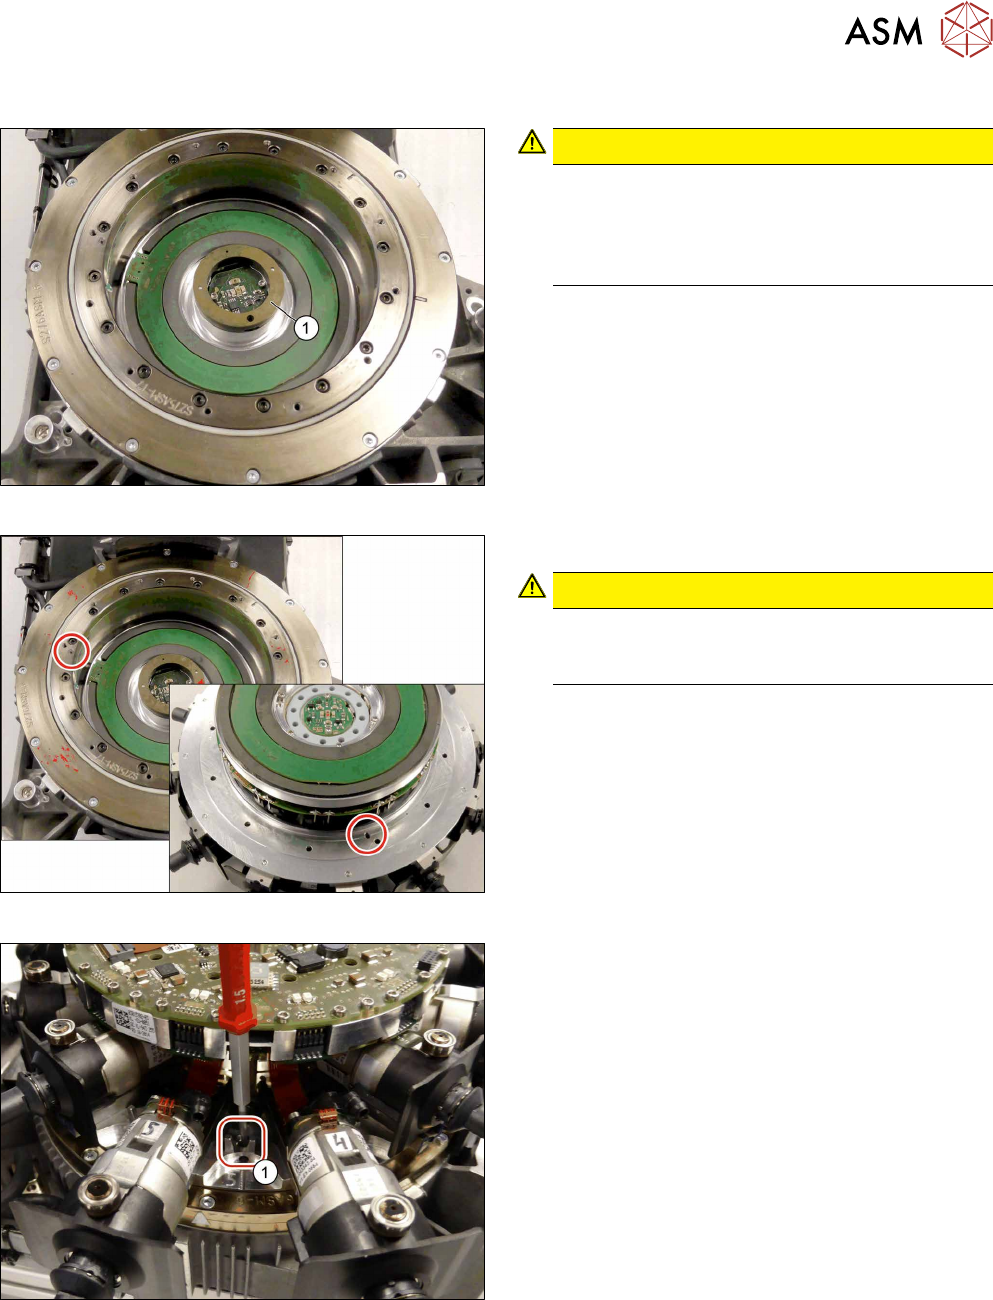
Fig.59: Correct position of the smoothed distributor disc
CAUTION!
Make sure that the smoothed distributor disc (1)
is fitted correctly between the back plate and the
star (grooves). The pins on the smoothed distrib-
utor disc must point in the direction of the back
plate.
.
Fig.60: Pin
► Insert the star into the head.
CAUTION!
When inserting the star, make sure that the pin
on the head is inserted into the relevant recess
on the star.
.
Fig.61: Fastening the star
► Fasten the star with the twelve screws.
Tighten the screws crosswise with a torque of
0.20Nm.