00197463-03_SM_CPP_Customer_EN.pdf - 第80页
7 Pressure control valve (PRV) 7.1 Replacing the PRV [03072785‑xx] 80 Service Manual SIPLACE Multistar (CPP / CPP M) 02/2018 Fig.122: Hoses 2 ► Pull off the hose (1) for vacuum/blast air outlet. Fig.123: Fastening scr…

7 Pressure control valve (PRV)
7.1 Replacing the PRV [03072785‑xx]
Service Manual SIPLACE Multistar (CPP / CPP M) 02/2018 79
7 Pressure control valve (PRV)
7.1 Replacing the PRV [03072785‑xx]
Parts, equipment and tools
●
CPP pressure control valve [03072785-xx] (replaces: [03055438-xx])
Overview
Fig.120: Pressure control valve (PRV)
1. Energy and data supply
2. Compressed air connection
3. Vacuum/air blast output for pickup/placement cir-
cuit
4. Exhaust air, for cooling the X linear motor
5. Top fastening screw M4x35
6. Bottom fastening screw M4x30
The PRV supplies the pickup/placement circuit with
vacuum during the pickup process and switches over
to air blast during placement.
The digital pressure control valve can be adjusted in-
finitely between max. vacuum and max. air blast in the
pickup / placement circuit.
Preparation
► Remove the head from the machine. For details about removing and fitting the placement
head, refer to the service manual for your machine.
fit the head on the head mount [03056231‑xx].
► Make sure that the component sensor protective cap is fitted.
1.1.3 "Protecting the component sensor" [}8]
Removal
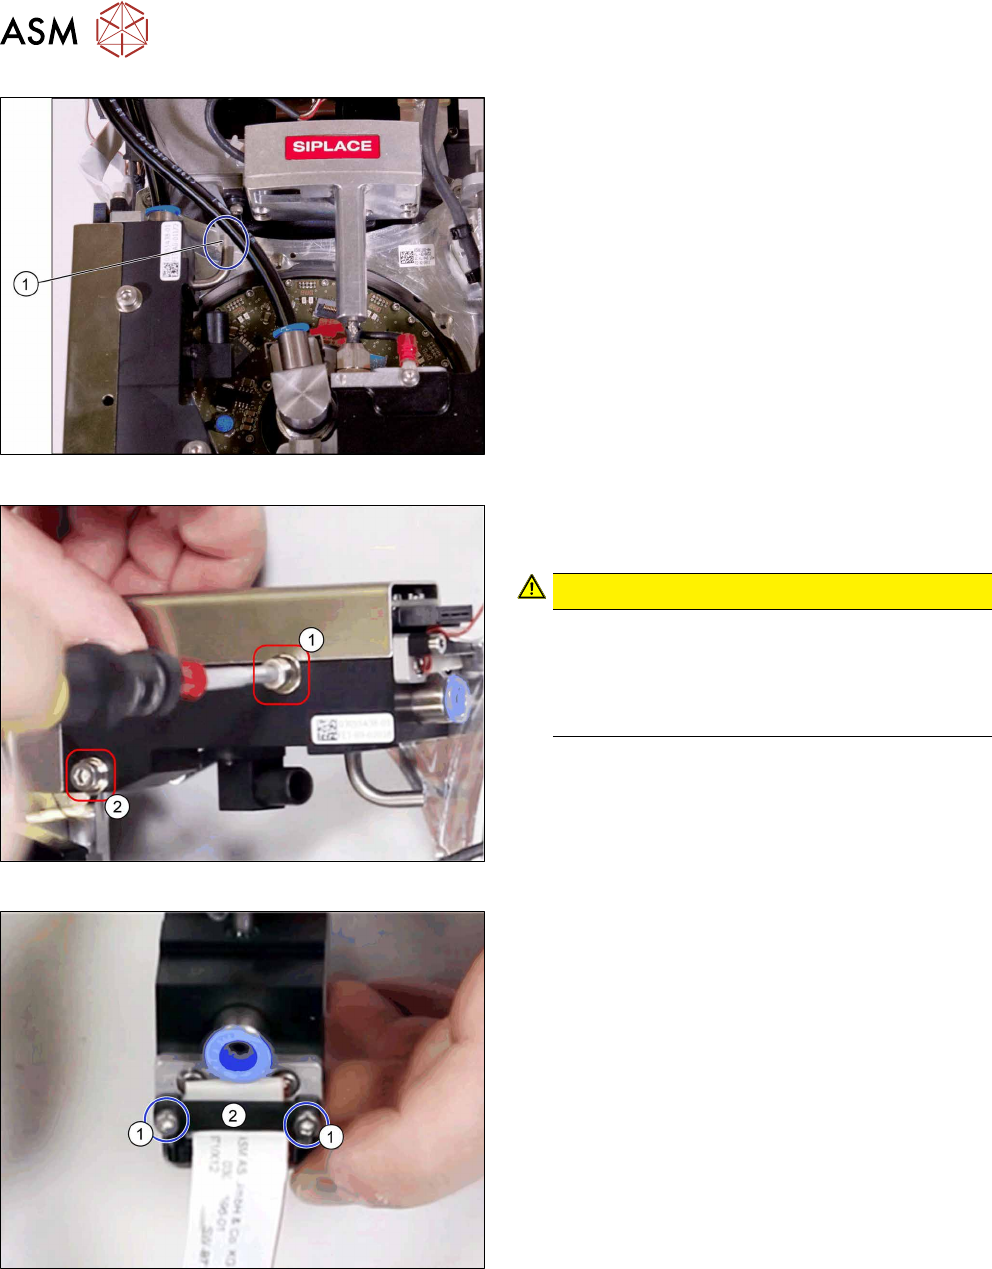
Fig.121: Hoses 1
► Disconnect the compressed air hose(1).
► Disconnect the exhaust air hose(2).
7 Pressure control valve (PRV)
7.1 Replacing the PRV [03072785‑xx]
80 Service Manual SIPLACE Multistar (CPP / CPP M) 02/2018
Fig.122: Hoses 2
► Pull off the hose(1) for vacuum/blast air outlet.
Fig.123: Fastening screws
1. Top fastening screw M4x35
2. Bottom fastening screw M4x30
CAUTION!
Different lengths
The two fastening screws have a different
length.
Make sure that the two screws are not confused
by mistake.
.
► Remove the two screws fastening the PRV and
then remove the PRV.
Fig.124: Cable clamp
► Remove the two screws(1) fastening the cable
clamp (2) and then remove the clamp.
7 Pressure control valve (PRV)
7.1 Replacing the PRV [03072785‑xx]
Service Manual SIPLACE Multistar (CPP / CPP M) 02/2018 81
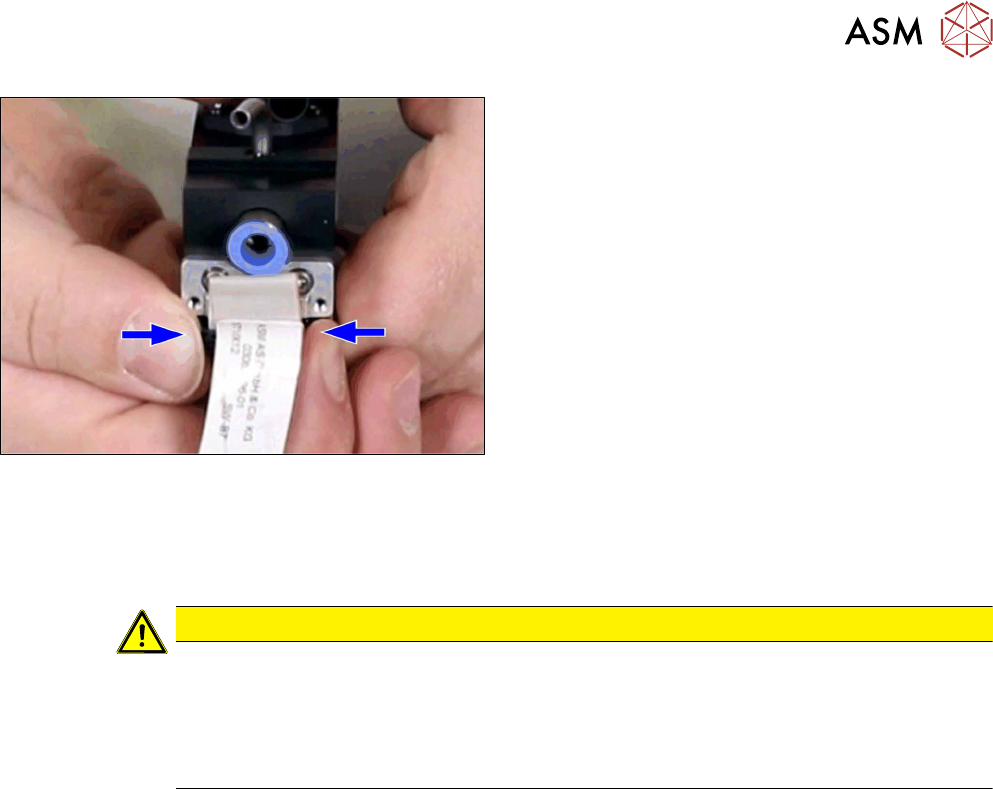
Fig.125: Unplug the connector
► Press on the two side clips and pull off the con-
nector.
Installation
► Follow the removal instructions in reverse order for installation. Also observe the following in-
structions:
CAUTION
Installation instructions
► Take care that the connector for the flat ribbon cable is not damaged. Press the two
side clips also when you attach it.
► Tighten the two fastening screws with a torque of 0.9Nm.
► After installation, perform a zero point calibration of the PRV.