00197463-03_SM_CPP_Customer_EN.pdf - 第98页
8 Screwed joint, silencer and holding circuit 8.3 Silencer 98 Service Manual SIPLACE Multistar (CPP / CPP M) 02/2018 Overview Fig.165: Installation position of two-part silencer Fig.166: Installation position of one-pa…
8 Screwed joint, silencer and holding circuit
8.3 Silencer
Service Manual SIPLACE Multistar (CPP / CPP M) 02/2018 97
Solution
► Replace the silencer in this event.
► Check the silencer regularly when you service the head, to see if there is any dirt and replace
as a preventative measure if necessary.
8.3.3 Replacing the silencer
NOTICE
Various versions
There are two different versions of the silencer (one-part and two-part).
The removal and installation steps are largely the same for both versions. Any relevant dif-
ferences will be mentioned explicitly.
Parts, equipment and tools
Select the required spare part:
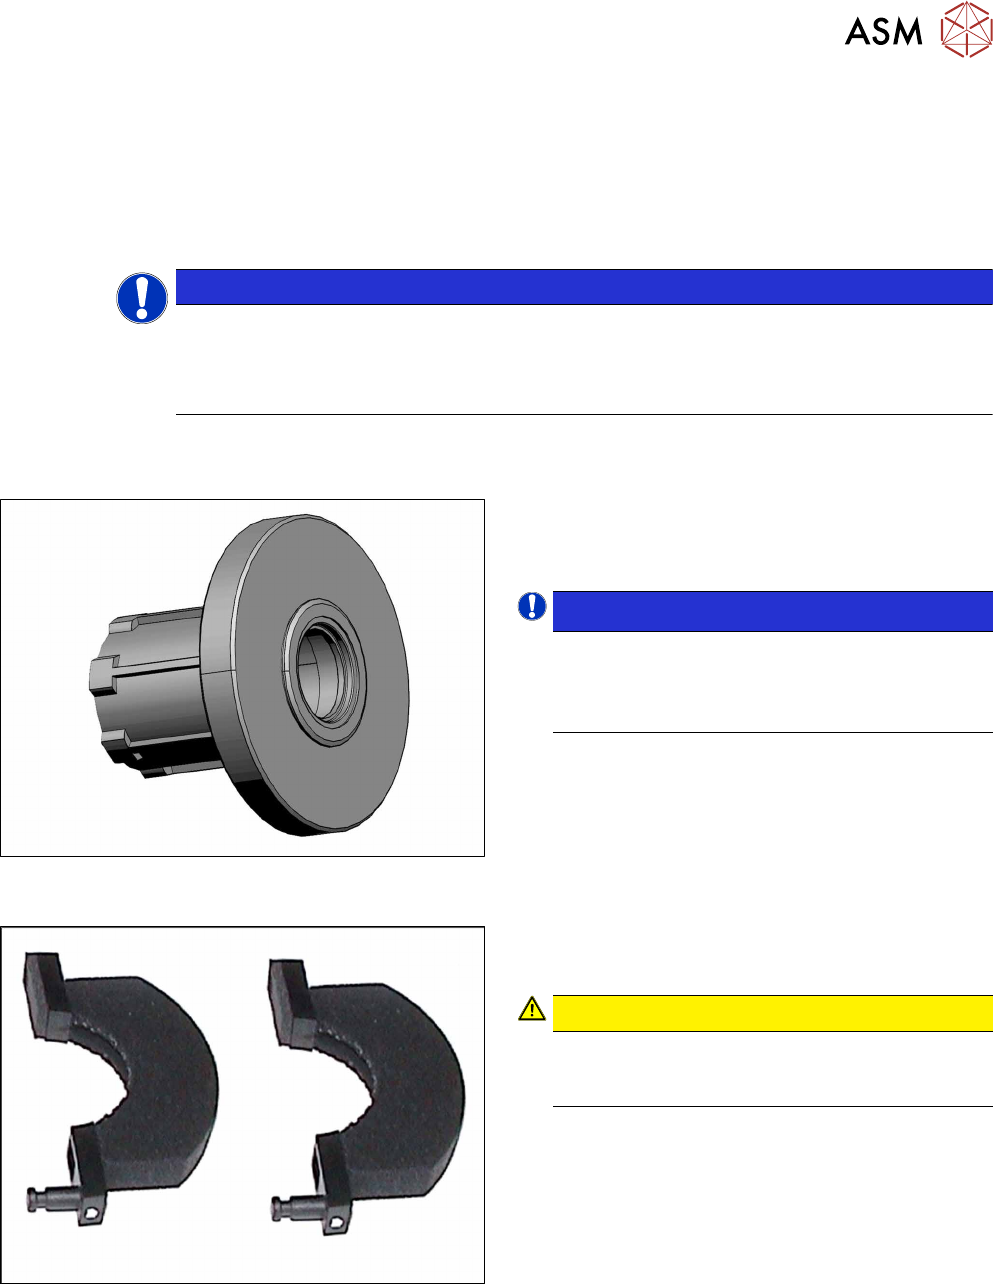
Fig.163: One-part silencer with holding circuit housing
[03081381‑xx] (all versions)
All head versions:
●
One-part silencer with holding circuit housing
[03081381‑xx]
NOTICE!
The one-part silencer has downwards compatib-
ility.
We recommend that you use the versions for all
heads.
.
Fig.164: Silencer assembly CPP [03061440‑xx] (two-part, up to
version 04)
Up to head version 04:
●
Silencer assembly CPP [03061440‑xx] (two-part)
CAUTION!
Use only the improved silencer from version -02
onwards with the plastic pin and white dot on the
plastic flange.
.
Replace any defective seals, where required:
●
Seal kit for holding circuit / CPP [03095007‑xx]
Keep any seals which are not needed.
8 Screwed joint, silencer and holding circuit
8.3 Silencer
98 Service Manual SIPLACE Multistar (CPP / CPP M) 02/2018
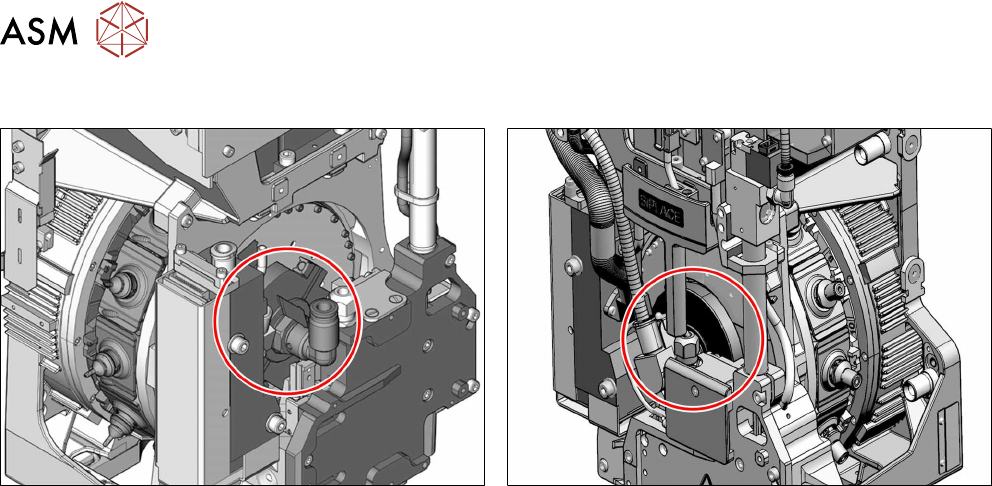
Overview
Fig.165: Installation position of two-part silencer Fig.166: Installation position of one-part silencer
► Observe the following section:
8.1 "Overview of screwed joint, holding circuit and seals" [}93]
Preparation
► Remove the head from the machine. For details about removing and fitting the placement
head, refer to the service manual for your machine.
fit the head on the head mount [03056231‑xx].
► Make sure that the component sensor protective cap is fitted.
1.1.3 "Protecting the component sensor" [}8]
Removal
► If required, dismantle the front plate.
5.1 "Replacing the front plate [03061102-xx]" [}35]
► Remove the screwed joint.
8.2 "Replacing the screwed joint" [}94]
► Take the silencer and its plastic housing out of the head.
► The removal is now complete for one-part silencers. You can now continue with installation.
8 Screwed joint, silencer and holding circuit
8.3 Silencer
Service Manual SIPLACE Multistar (CPP / CPP M) 02/2018 99
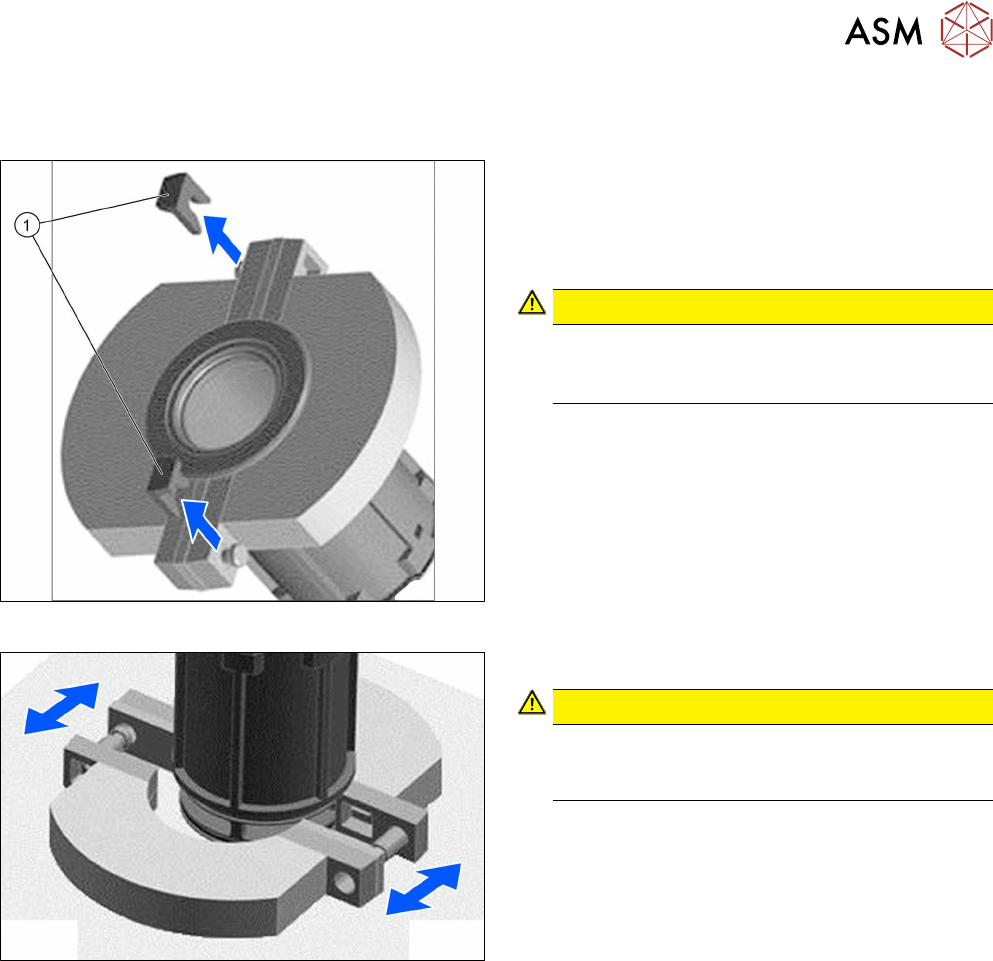
Replacement of two-part silencers
► Continue with the following additional steps for two-part silencers.
Fig.167: Removing the retaining clips
► Carefully remove the two retaining clips (1) on
the left and right of the silencer. When removing
the retaining clips, you will need to support the
tab on the silencer with your fingers. This pre-
vents the tab from breaking off.
CAUTION!
Make sure that you do not bend the silencer!
Always open both retaining clips to remove the
silencer!
.
Fig.168: Pulling the silencer parts apart
► Pull the two silencer halves apart.
CAUTION!
If more force is required, only exert this against
the plastic parts! The silencer might break other-
wise.
.
► Remove the silencer.