00197463-03_SM_CPP_Customer_EN.pdf - 第84页
7 Pressure control valve (PRV) 7.4 Replacing small parts on the PRV 84 Service Manual SIPLACE Multistar (CPP / CPP M) 02/2018 7.4 Replacing small parts on the PRV NOTICE Example The replacement is illustrated with the ex…
7 Pressure control valve (PRV)
7.3 Replacing the cable on the PRV [03063596‑xx]
Service Manual SIPLACE Multistar (CPP / CPP M) 02/2018 83
7.3 Replacing the cable on the PRV [03063596‑xx]
Parts, equipment and tools
●
Cable from intermediate distributor (ID2) to pressure control valve of the CPP [03063596-xx]
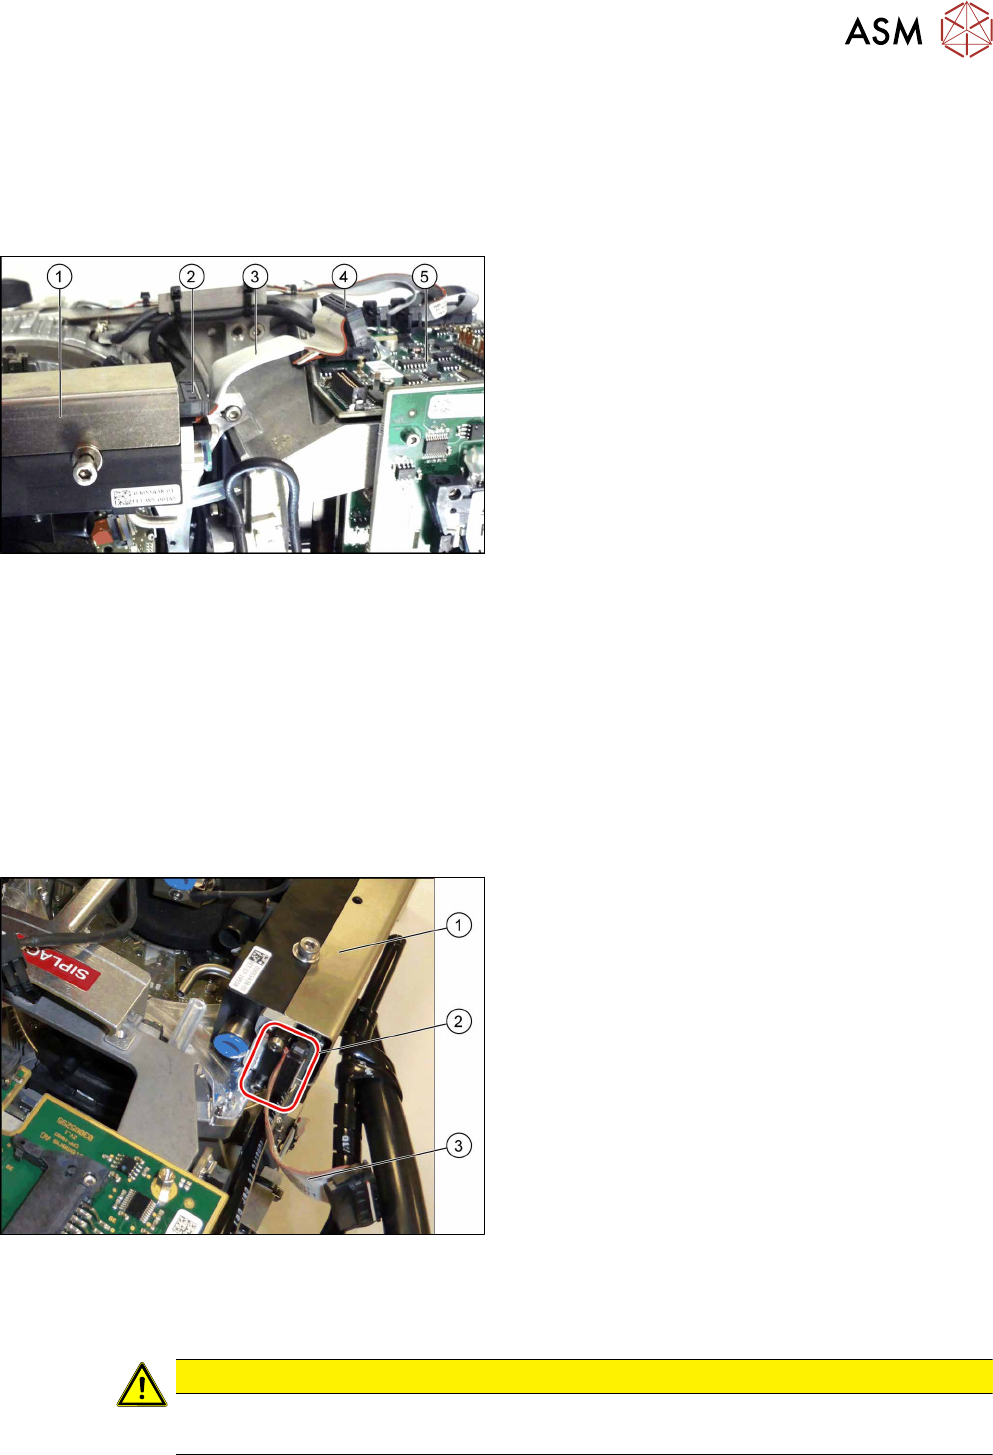
Overview
Fig.127: Pressure control valve (PRV)
1. Pressure control valve (PRV)
2. Connector on pressure control valve
3. Cable [03063596‑xx]
4. Connector on ID2
5. ID2
Preparation
► Remove the head from the machine. For details about removing and fitting the placement
head, refer to the service manual for your machine.
fit the head on the head mount [03056231‑xx].
► Make sure that the component sensor protective cap is fitted.
1.1.3 "Protecting the component sensor" [}8]
Removal
► Unplug the cable connector from ID2. Press the connector slightly at the sides to release the
lock.
1. PRV
2. Strain relief with two fastening screws and con-
nector
3. Cable [03063596‑xx]
► Remove the two screws fastening the strain re-
lief(2) and then remove the strain relief.
► Unplug the cable connector from the PRV. Press
the connector slightly at the sides to release the
lock.
Installation
► Follow the removal instructions in reverse order for installation. Also observe the following in-
structions:
CAUTION
Installation instructions
► When attaching, press the connector slightly at the sides to release the catch.
7 Pressure control valve (PRV)
7.4 Replacing small parts on the PRV
84 Service Manual SIPLACE Multistar (CPP / CPP M) 02/2018
7.4 Replacing small parts on the PRV
NOTICE
Example
The replacement is illustrated with the example of the pressure control valve (PRV) for the
SIPLACE Twin Head. The procedure is the same for other PRVs.
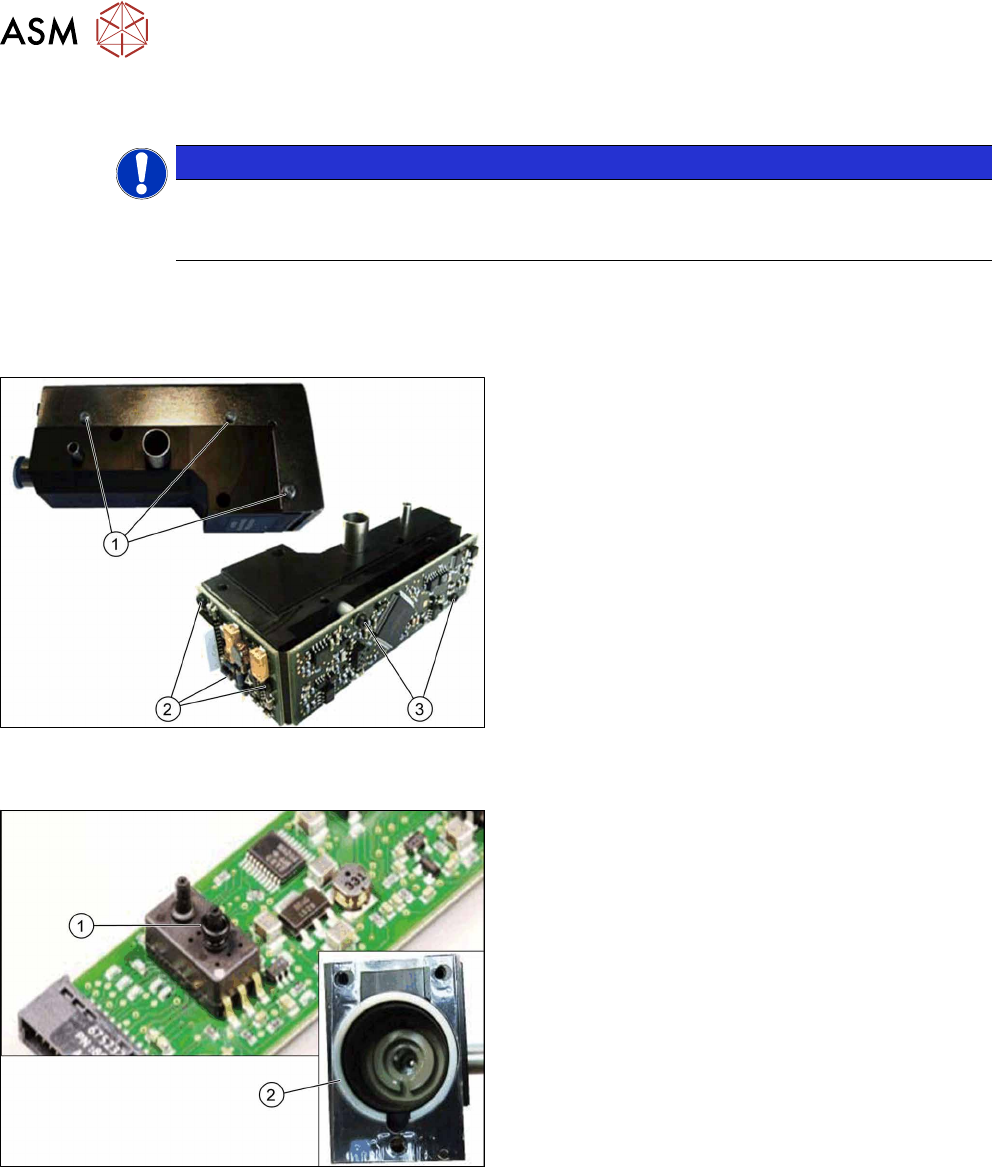
Parts, equipment and tools
Select the required spare part:
●
Self-tapping screws:
Fig.128: Screws
1. Self-tapping screw PT-WN1442-2.5X6-PT10
[03119666‑xx]
Self-tapping screw PT-WN1413-2.5X6-PT10
[03119678‑xx]
2. Self-tapping screw PT-WN1442-2.5X8-PT10
[03119677‑xx]
3. Self-tapping screw PT-WN1412-2.5X14-PT10
[03119676‑xx]
●
O-ring / centering ring:
Fig.129: O-ring / centering ring:
1. O-ring I3601 B-1.5X1.08-N-NBR70
[03119672‑xx]
2. Centering ring VADI-MPPE-QS6-24VDC–SA
[03119675‑xx]
●
Distance sleeve:
7 Pressure control valve (PRV)
7.4 Replacing small parts on the PRV
Service Manual SIPLACE Multistar (CPP / CPP M) 02/2018 85
Fig.130: Distance sleeve
1. Distance sleeve VADI-MPPE-QS6-24VDC–SA
[03119674‑xx]
NOTICE!
Newer versions of the PRV do not have these
distance sleeves anymore.
.
Preparation
► Remove the head from the machine. For details about removing and fitting the placement
head, refer to the service manual for your machine.
fit the head on the head mount [03056231‑xx].
► Make sure that the component sensor protective cap is fitted.
1.1.3 "Protecting the component sensor" [}8]
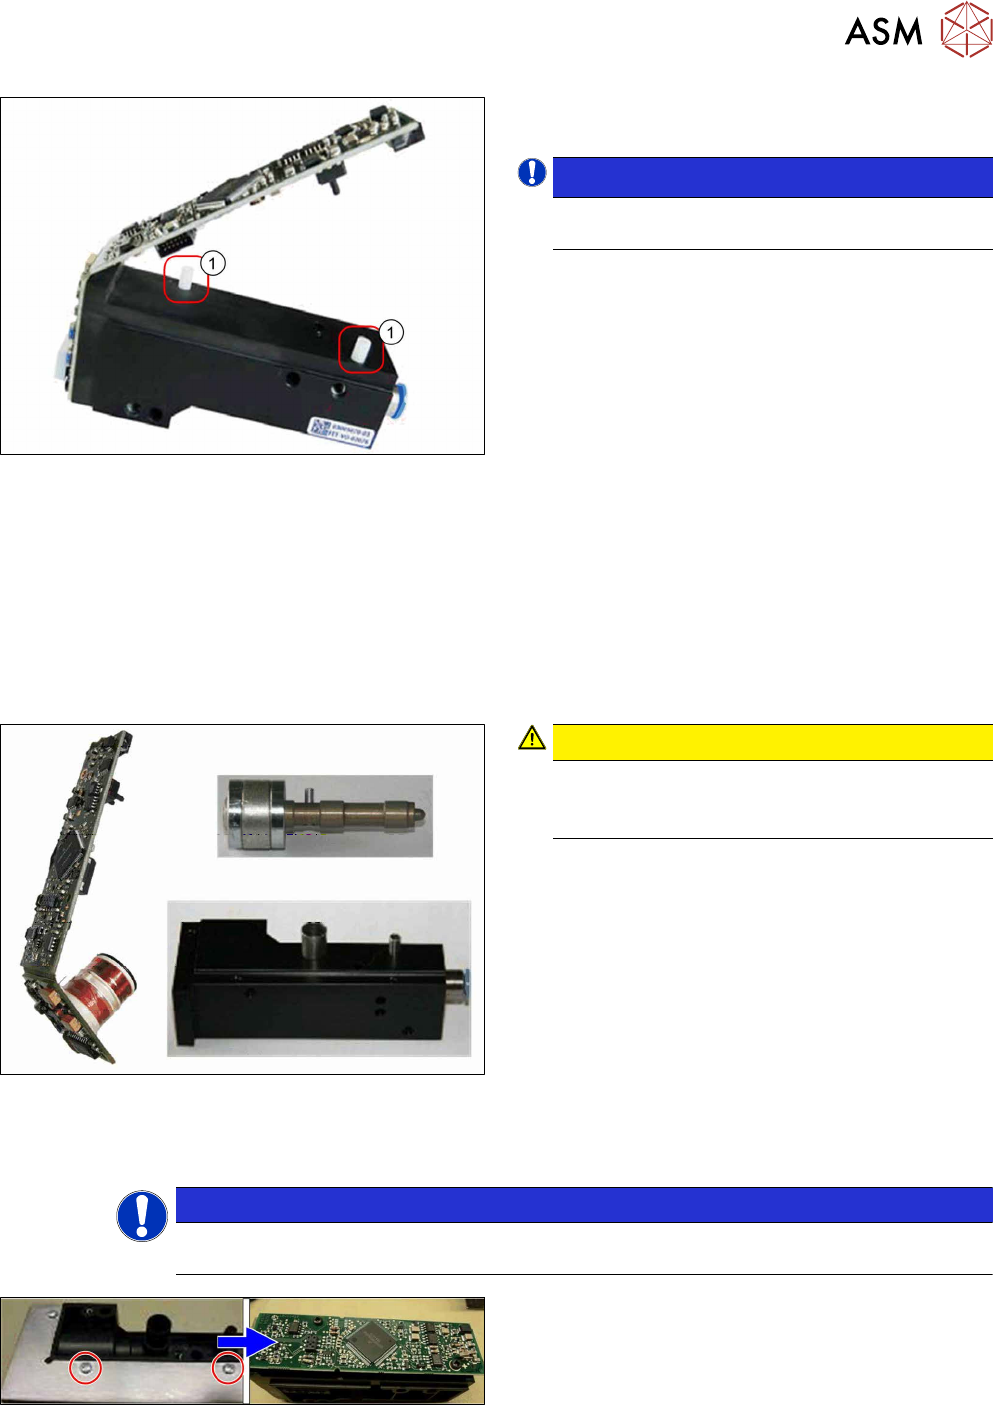
Removal
Fig.131: PRV parts
CAUTION!
Do not mix up the parts
The PRV parts are aligned and are not to be
mixed with the parts of other PRVs.
.
► Remove the pressure control valve.
7.1 "Replacing the PRV [03072785‑xx]" [}79]
NOTICE
Depending on the spare part to be replaced, you may not need to do all the following re-
moval steps.
Fig.132: Removing the cover plate
► Remove the three screws fastening the cover
plate and remove the cover plate.