00197463-03_SM_CPP_Customer_EN.pdf - 第97页
8 Screwed joint, silencer and holding circuit 8.3 Silencer Service Manual SIPLACE Multistar (CPP / CPP M) 02/2018 97 Solution ► Replace the silencer in this event. ► Check the silencer regularly when you service the head…
8 Screwed joint, silencer and holding circuit
8.3 Silencer
96 Service Manual SIPLACE Multistar (CPP / CPP M) 02/2018
8.3 Silencer
8.3.1 Overview of silencer versions
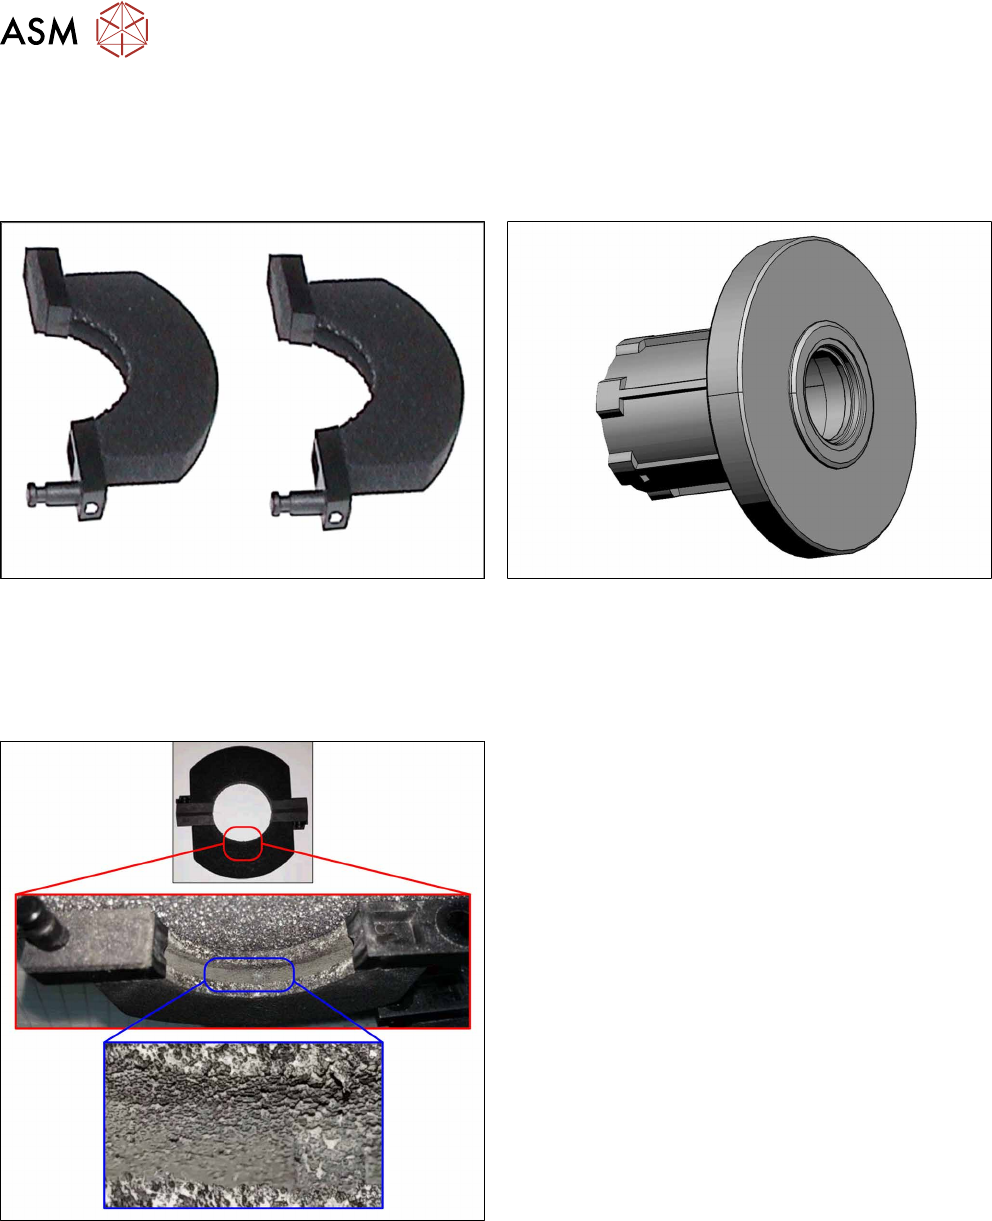
There are two versions of the silencer:
Fig.160: Two-part silencer [03061440‑03]
Fig.161: One-part silencer [03061440‑04]
8.3.2 Checking the silencer for contamination
Problem
Fig.162: Contaminated silencer
If the silencer [03061440‑xx] for the CPP head is full of
dust, this reduces the flow of air. This then reduces the
vacuum for the holding circuit for all 12 DP drives.
Contaminants which are sucked up will block the
pores of the silencer. This increases the pressure
building up behind the 12 venturi nozzles, the flow
through is reduced and the vacuum capacity of the
venturi nozzles is reduced.
Contaminated silencers reduce the holding circuit va-
cuum. A reduced vacuum can lead to numerous DP
stations being automatically switched off per head in
the production environment.
Analysis of holding circuit
►
At the station, perform a vacuum check in the holding circuit.
(See "Service Manual: Testing the vacuum system with closed nozzles" [00196101‑xx])
Target vacuum: approx. -850mbar
The following error situations could occur during this check:
All 12 DP drives demonstrate a reduced vacuum compared to the target value.
The values for the individual DP drives are however relatively even.
If this error situation occurs, it is probable that the silencer is dirty.
8 Screwed joint, silencer and holding circuit
8.3 Silencer
Service Manual SIPLACE Multistar (CPP / CPP M) 02/2018 97
Solution
► Replace the silencer in this event.
► Check the silencer regularly when you service the head, to see if there is any dirt and replace
as a preventative measure if necessary.
8.3.3 Replacing the silencer
NOTICE
Various versions
There are two different versions of the silencer (one-part and two-part).
The removal and installation steps are largely the same for both versions. Any relevant dif-
ferences will be mentioned explicitly.
Parts, equipment and tools
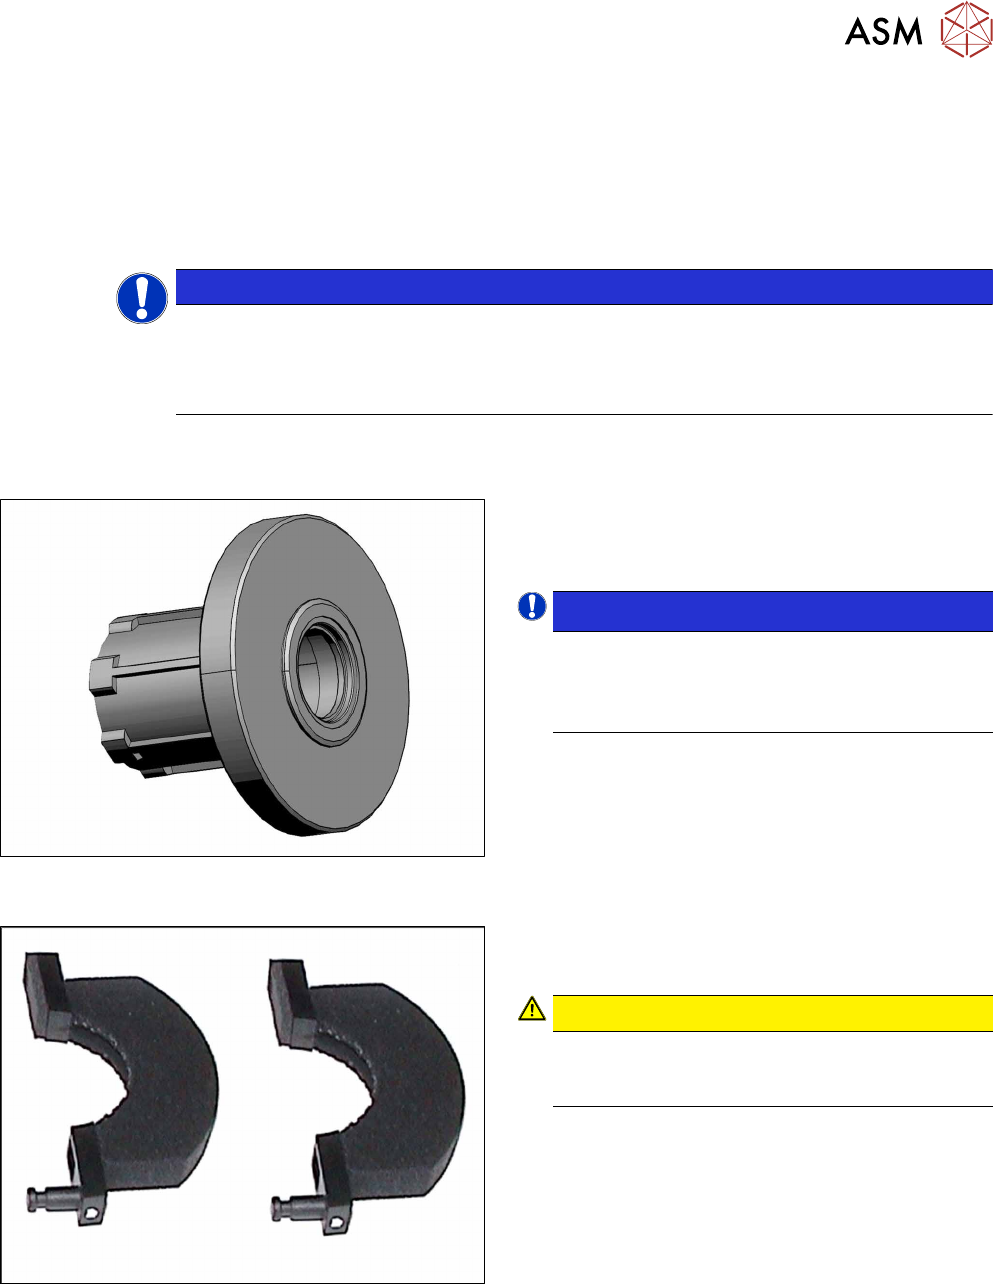
Select the required spare part:
Fig.163: One-part silencer with holding circuit housing
[03081381‑xx] (all versions)
All head versions:
●
One-part silencer with holding circuit housing
[03081381‑xx]
NOTICE!
The one-part silencer has downwards compatib-
ility.
We recommend that you use the versions for all
heads.
.
Fig.164: Silencer assembly CPP [03061440‑xx] (two-part, up to
version 04)
Up to head version 04:
●
Silencer assembly CPP [03061440‑xx] (two-part)
CAUTION!
Use only the improved silencer from version -02
onwards with the plastic pin and white dot on the
plastic flange.
.
Replace any defective seals, where required:
●
Seal kit for holding circuit / CPP [03095007‑xx]
Keep any seals which are not needed.
8 Screwed joint, silencer and holding circuit
8.3 Silencer
98 Service Manual SIPLACE Multistar (CPP / CPP M) 02/2018
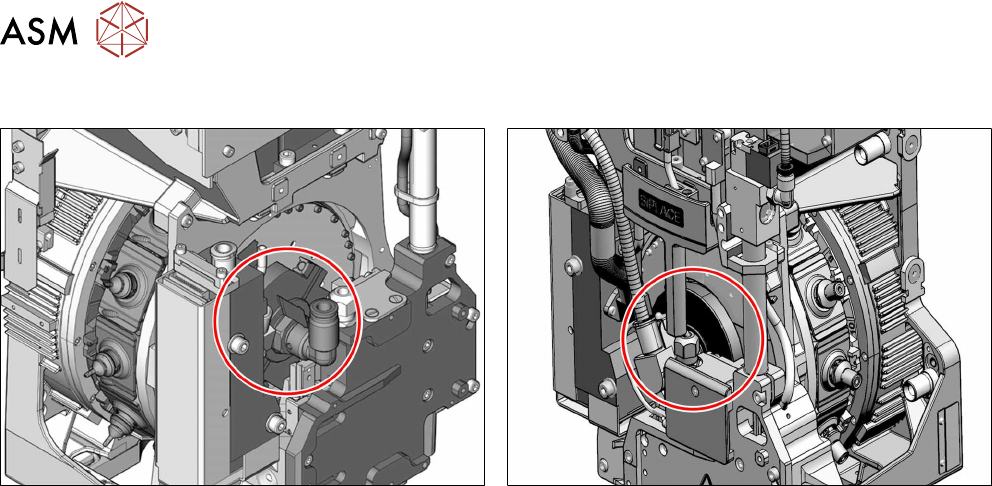
Overview
Fig.165: Installation position of two-part silencer Fig.166: Installation position of one-part silencer
► Observe the following section:
8.1 "Overview of screwed joint, holding circuit and seals" [}93]
Preparation
► Remove the head from the machine. For details about removing and fitting the placement
head, refer to the service manual for your machine.
fit the head on the head mount [03056231‑xx].
► Make sure that the component sensor protective cap is fitted.
1.1.3 "Protecting the component sensor" [}8]
Removal
► If required, dismantle the front plate.
5.1 "Replacing the front plate [03061102-xx]" [}35]
► Remove the screwed joint.
8.2 "Replacing the screwed joint" [}94]
► Take the silencer and its plastic housing out of the head.
► The removal is now complete for one-part silencers. You can now continue with installation.