00197463-03_SM_CPP_Customer_EN.pdf - 第88页
7 Pressure control valve (PRV) 7.4 Replacing small parts on the PRV 88 Service Manual SIPLACE Multistar (CPP / CPP M) 02/2018 Fig.140: Checking the PRV inside ► Check the inside of the PRV for damage. ► If the inside of…
7 Pressure control valve (PRV)
7.4 Replacing small parts on the PRV
Service Manual SIPLACE Multistar (CPP / CPP M) 02/2018 87
Installation
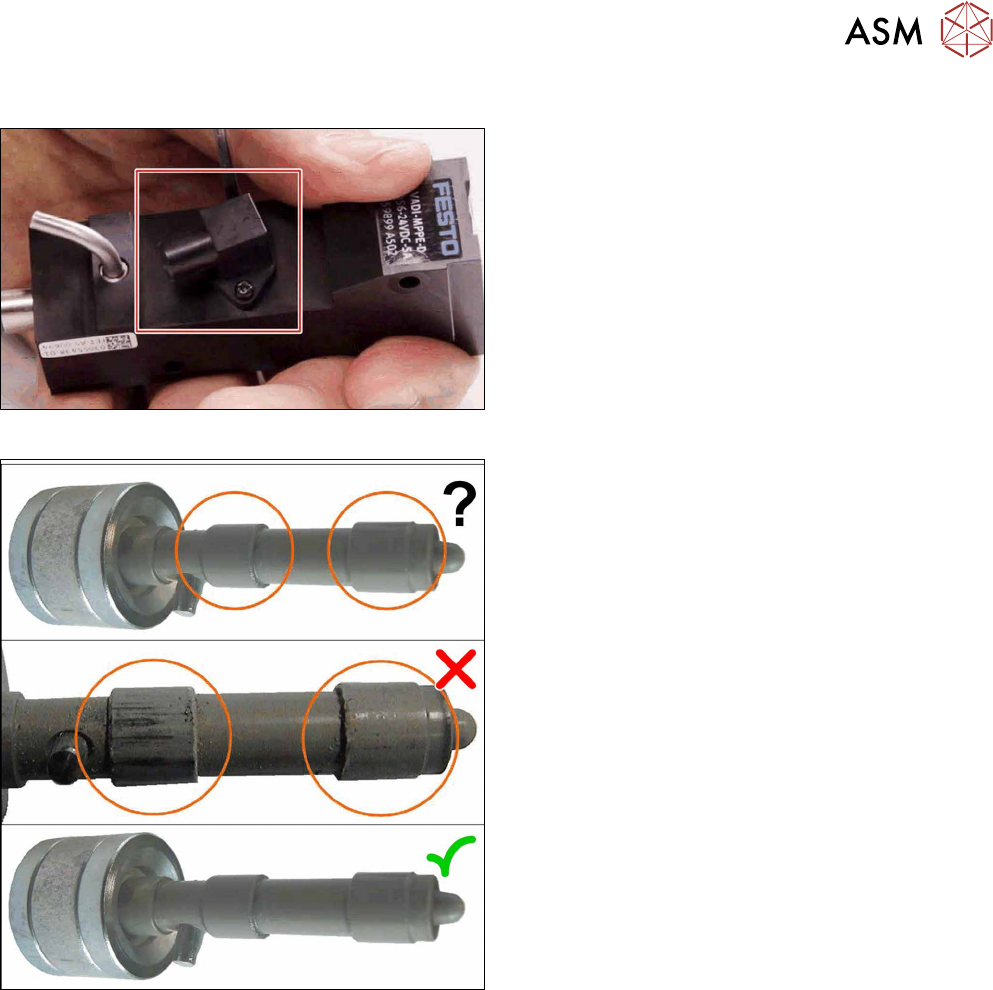
Fig.138: Removing the elbow pipe connector
► Remove the elbow pipe connector.
Fig.139: Check the plunger
► Check the plunger for damage.
► If the plunger is damaged, replace the whole
PRV.
► If the plunger is ok, proceed with the next step.
7 Pressure control valve (PRV)
7.4 Replacing small parts on the PRV
88 Service Manual SIPLACE Multistar (CPP / CPP M) 02/2018
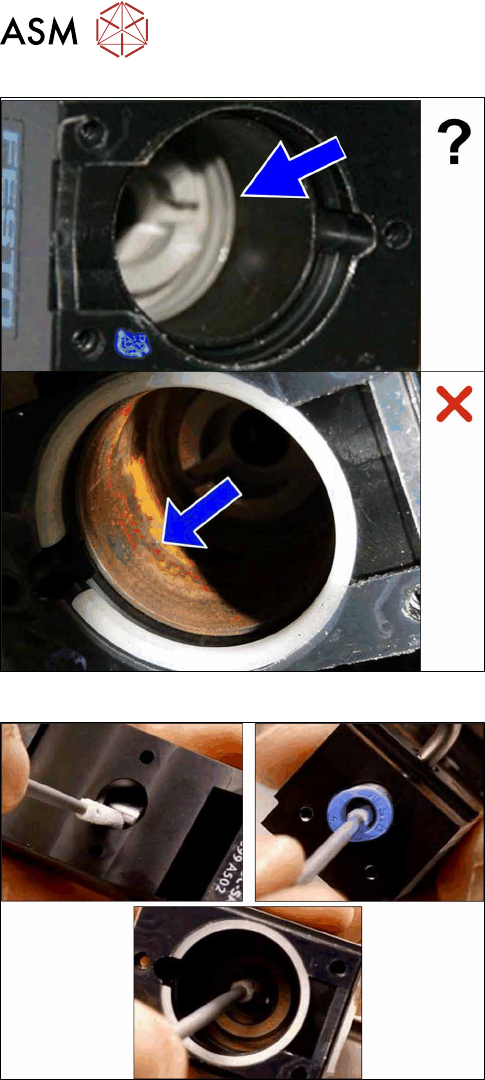
Fig.140: Checking the PRV inside
► Check the inside of the PRV for damage.
► If the inside of the PRV is damaged, replace the
whole PRV.
► If the inside is not damaged, proceed with the
next step.
Fig.141: Cleaning
► Clean the seat of the plunger tip and the venturi
nozzle until the cotton swab is no longer dirty
when it comes out.
Use a cotton swab coated with isopropyl.
7 Pressure control valve (PRV)
7.4 Replacing small parts on the PRV
Service Manual SIPLACE Multistar (CPP / CPP M) 02/2018 89
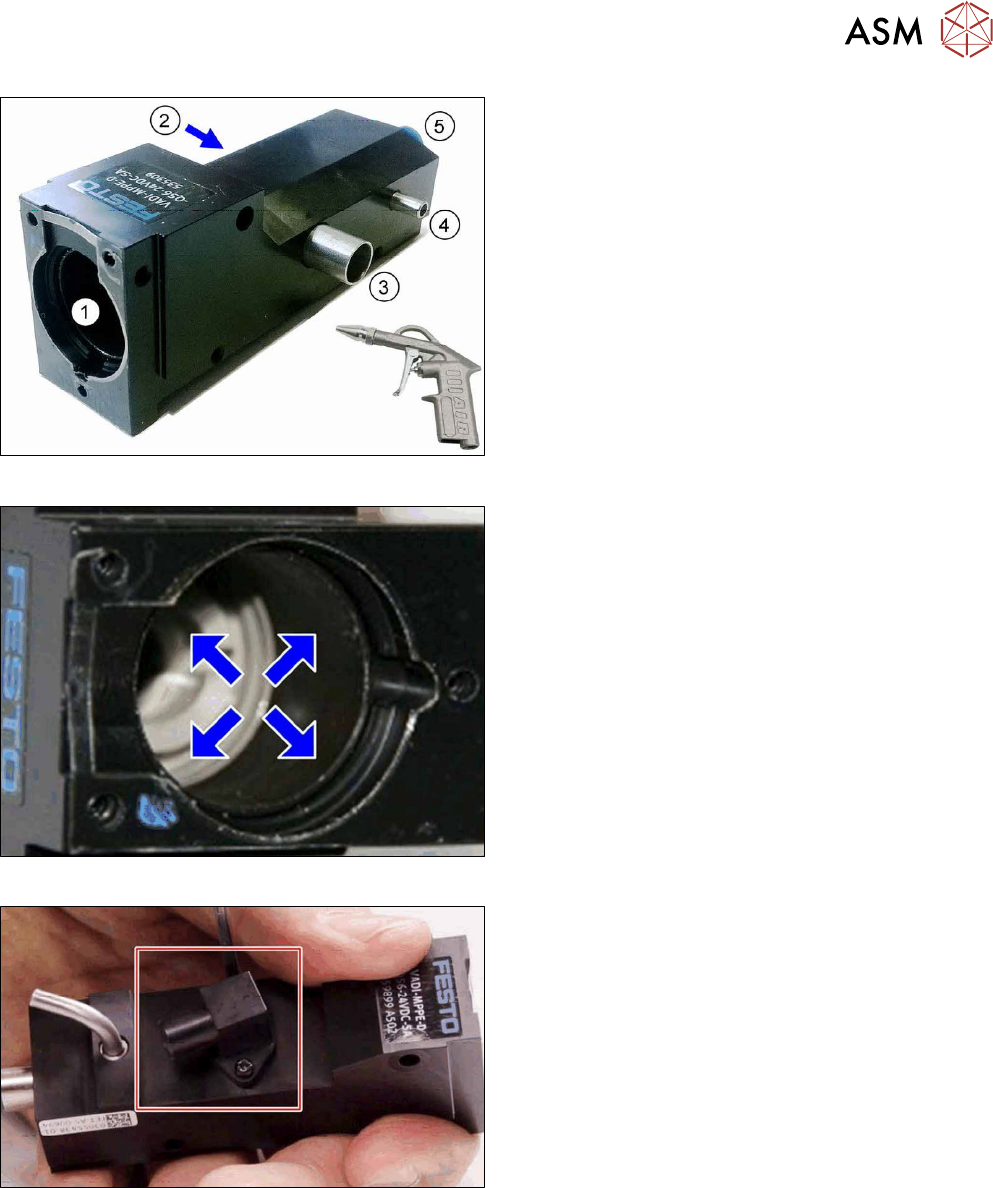
Fig.142: Blowing through the PRV
► Clean all the openings of the pressure control
valve with a compressed air pistol.
Observe the order of work:(1) to(5).
Fig.143: Cleaning the inside
► Clean the inside with a lint-free cloth soaked in
isopropyl.
Fig.144: Fitting the elbow pipe connector
► Fit the elbow pipe connector and fasten this with
a torque of 0.2Nm.