00197463-03_SM_CPP_Customer_EN.pdf - 第73页
6 DP drives 6.1 Replacing the DP drives Service Manual SIPLACE Multistar (CPP / CPP M) 02/2018 73 Installation Fig.113: DP drive fastening screws CAUTION! When tightening the screws, press carefully against the DP dri…
6 DP drives
6.1 Replacing the DP drives
72 Service Manual SIPLACE Multistar (CPP / CPP M) 02/2018
Removal
► If required, dismantle the front plate.
5.1 "Replacing the front plate [03061102-xx]" [}35]
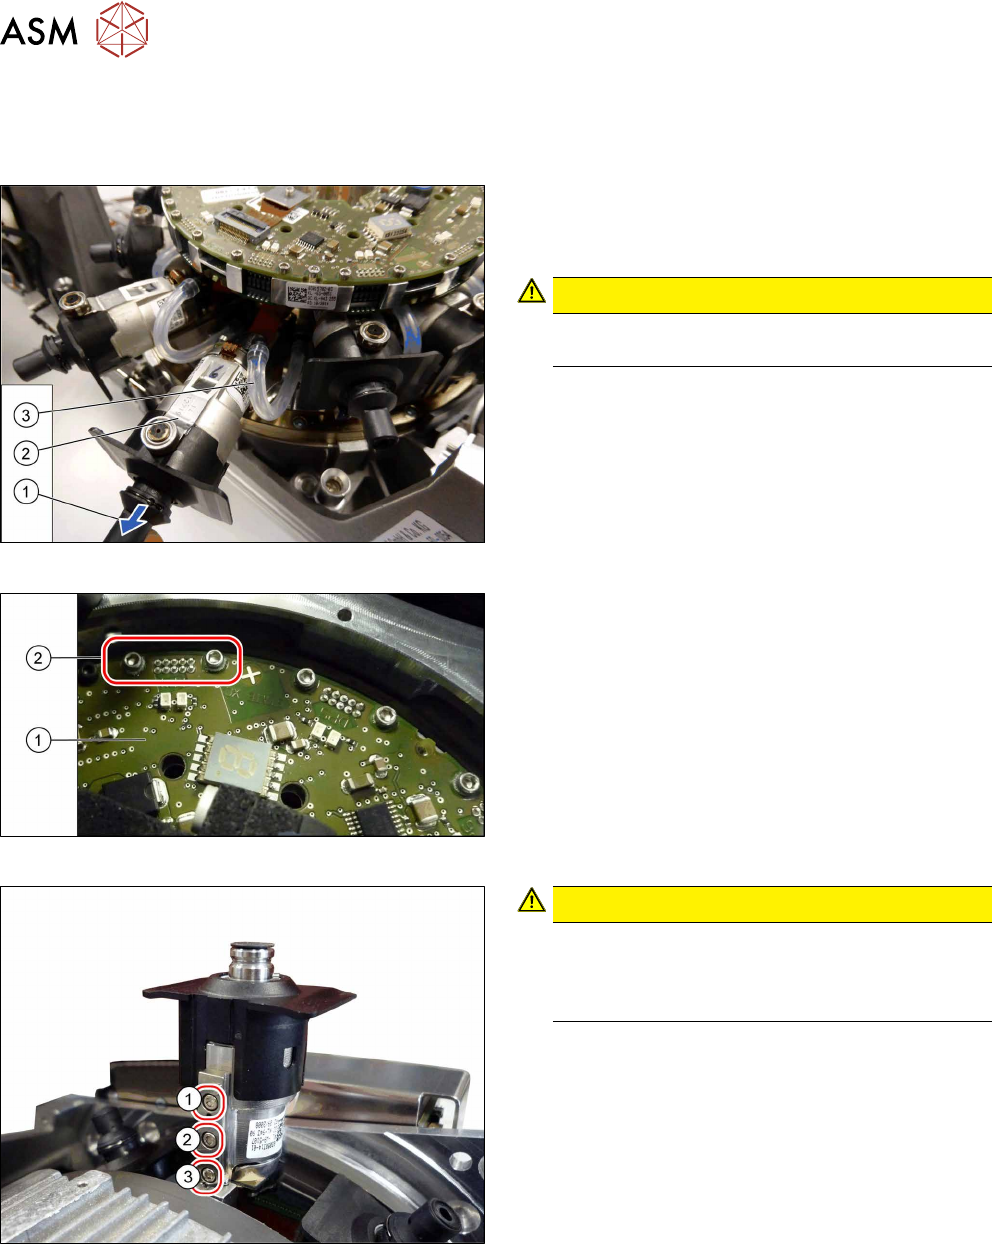
Fig.110: Pulling out the DP drive
► Pull the nozzle (1) off the DP drive.
► Pull the DP drive (2), together with the jaws, out
of the head.
CAUTION!
Do not pull on the black cover. This might break
if you do.
.
► Remove the hose(3) on both sides.
Fig.111: Connector fastening screws
► Remove the two screws(2) fastening the Flex-
print cable to the SCS(1).
► Disconnect the cable.
Fig.112: DP drive fastening screws
CAUTION!
When loosening the screws, carefully press
against the DP drive. This prevents excess force
being applied to the linear guide, which could
otherwise be damaged.
.
► First remove the screws (1) and (2).
► Then remove this screw(3). Use the special ball-
head Allen key.
► Remove the DP drive.
6 DP drives
6.1 Replacing the DP drives
Service Manual SIPLACE Multistar (CPP / CPP M) 02/2018 73
Installation
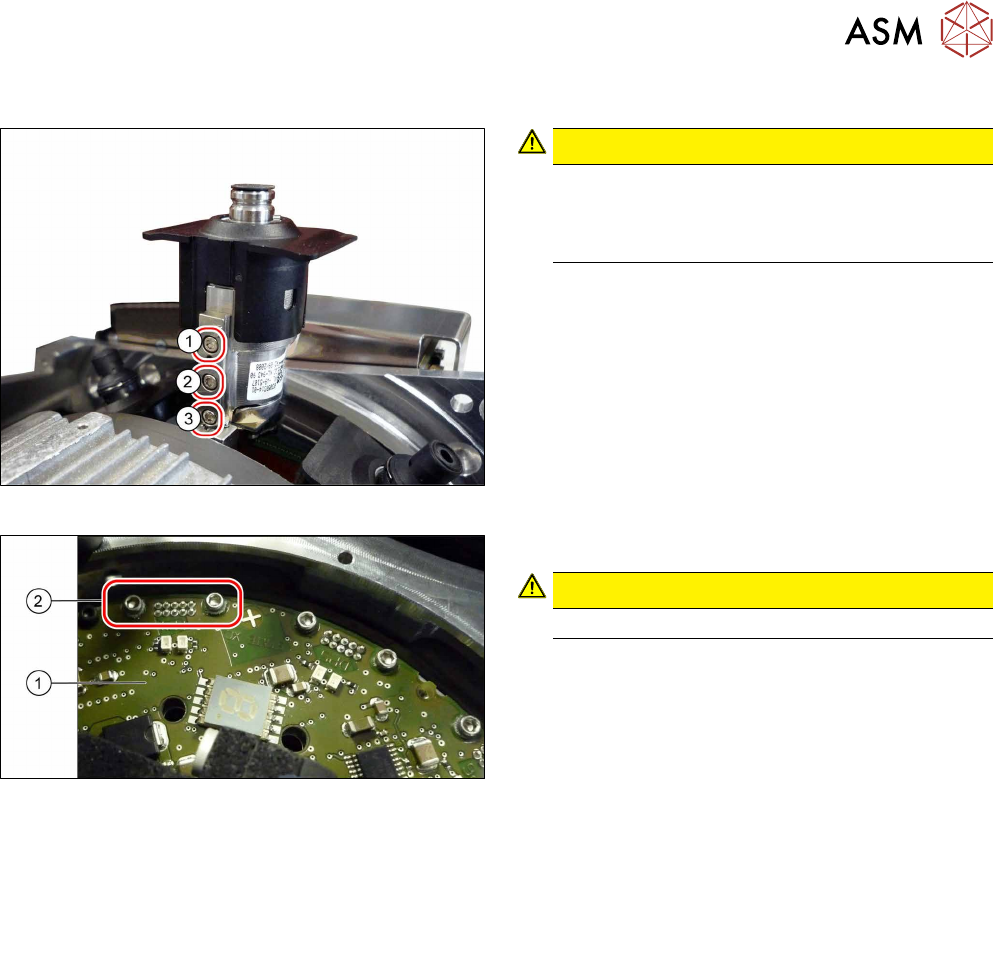
Fig.113: DP drive fastening screws
CAUTION!
When tightening the screws, press carefully
against the DP drive. This prevents excess force
being applied to the linear guide, which could
otherwise be damaged.
.
The screws are fastened in the reverse order during
installation:
► First tighten this screw(3) with a torque of
0.20Nm.
► Then tighten these screws(2) and(1), each with
a torque of 0.20Nm.
Fig.114: Connector fastening screws
► Carefully attach the cable.
CAUTION!
Take care, as the connector is easily damaged.
.
► Tighten the two screws(2) fastening the Flexprint
cable to the SCS(1) with a torque of 0.1Nm.
► Follow the removal instructions in reverse order for further installation.
Also observe the installation instructions in the following sections:
6.3
"Replacing the DP Drive Hose [03015920Sxx]" [}75]
5.1 "Replacing the front plate [03061102-xx]" [}35]
► Observe in particular the torques specified!
6 DP drives
6.2 Replacing the DP linear guide (segment guide) [03039099‑xx]
74 Service Manual SIPLACE Multistar (CPP / CPP M) 02/2018
6.2 Replacing the DP linear guide (segment guide)
[03039099‑xx]
Parts, equipment and tools
●
DP linear guide (segment guide) CPP [03039099‑xx]
Preparation
► Remove the head from the machine. For details about removing and fitting the placement
head, refer to the service manual for your machine.
fit the head on the head mount [03056231‑xx].
► Make sure that the component sensor protective cap is fitted.
1.1.3 "Protecting the component sensor" [}8]
Removal
► If required, dismantle the front plate.
5.1 "Replacing the front plate [03061102-xx]" [}35]
► Remove the DP drive.
6.1 "Replacing the DP drives" [}71]
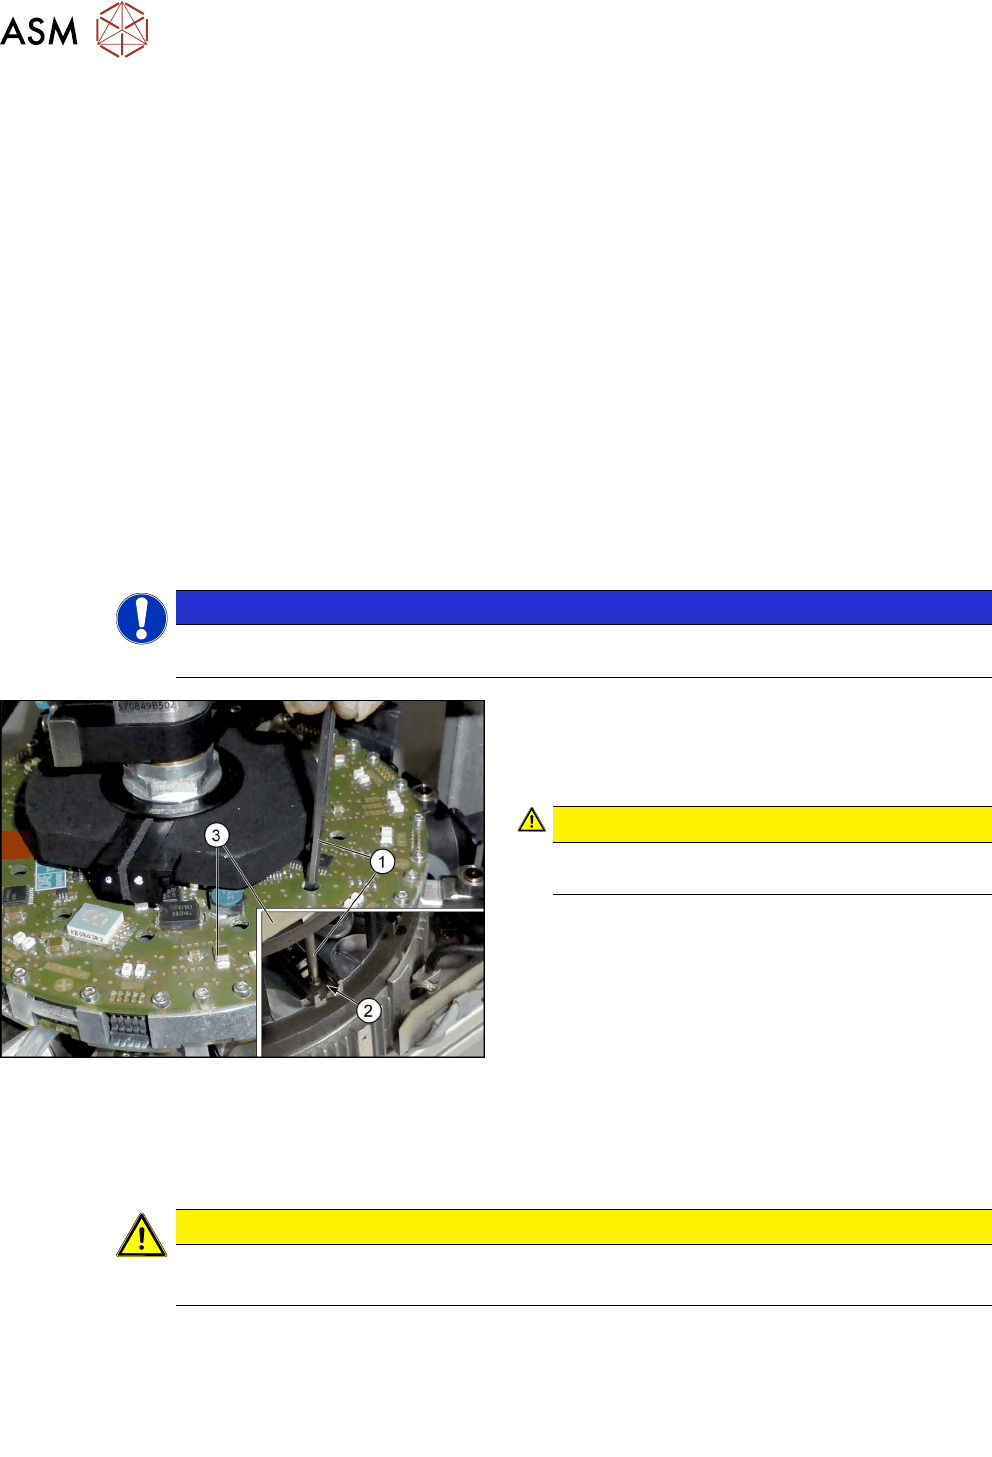
NOTICE
You do not needto unplug the Flexprint cable from the SCS when replacing the DP linear
guide.
Fig.115: Fastening screws
► Remove the two screws fastening the DP linear
guide(2). You can reach the back screw with the
attached extension(1) through the relevant open-
ing in the SCS(3).
CAUTION!
Take care not to damage the surface of the
SCS.
.
► Remove the DP linear guide.
Installation
► Follow the removal instructions in reverse order for installation. Also observe the following in-
structions:
CAUTION
Installation instructions
► Tighten the DP linear guide fastening screws with a torque of 0.2Nm.
► Observe the installation instructions in the following sections:
6.3 "Replacing the DP Drive Hose [03015920Sxx]" [}75]
6.1 "Replacing the DP drives" [}71]
5.1 "Replacing the front plate [03061102-xx]" [}35]
► Observe in particular the torques specified!