Xg系列调整手册.pdf - 第10页
2 Before beginning adjustments 2- 4 2. Preparator y work Before beginning basic adjustments and FAMF adjustments, the machine must be set up for adjust- ments condition. This section describes how to set up the machine f…
2
Before beginning adjustments
2-3
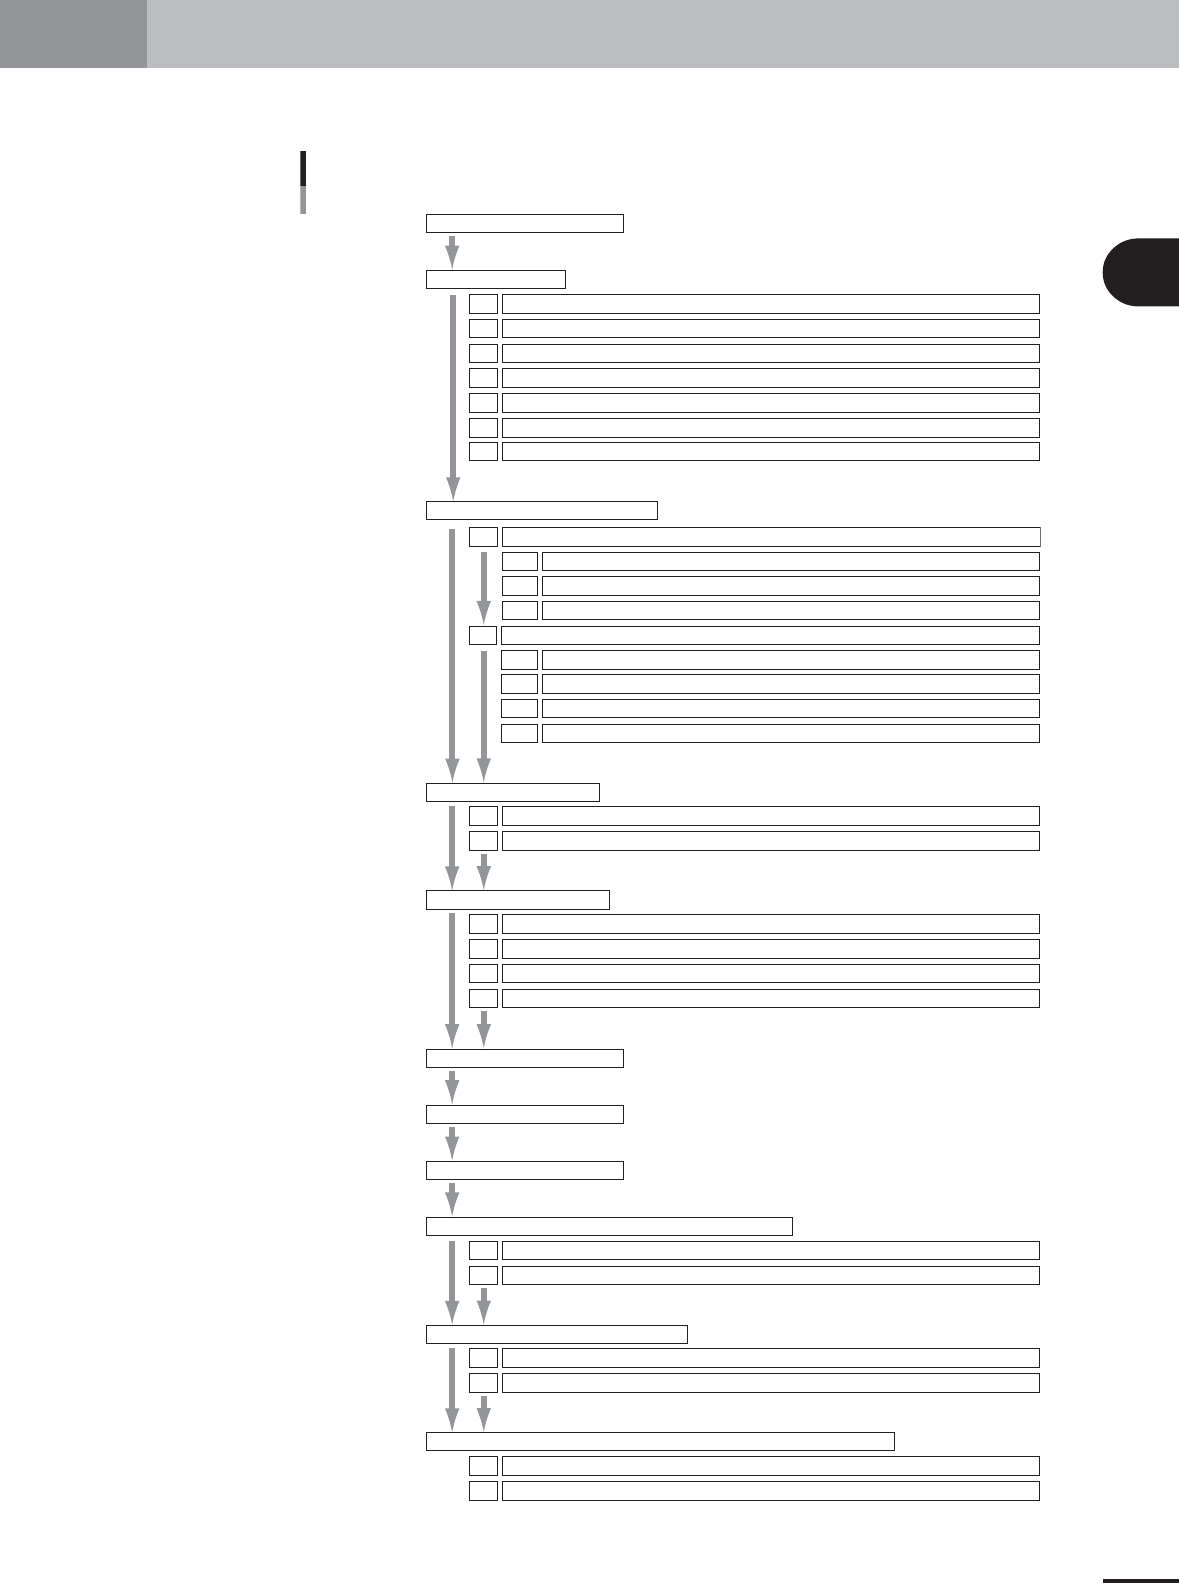
1. Machine adjustment flow
This section explains a typical flow of FAMF adjustments including preparatory work and basic adjust-
ments.
Machine adjustment flow chart
1.Machine adjustment flow
2.Preparatory work
System data backup
Restoring the system data
Warming up the machine
How to start the adjustment utility.
Changing the machine setting
Changing the machine setting (when needed during adjustment)
Selecting the PCB data
2.1
2.2
2.3
2.4
2.5
2.6
2.7
Chapter 2
Chapter 3
Chapter 4
1.Camera parameter adjustments
Camera lighting level adjustments1.1
Adjusting the moving camera lighting levels1.1.1
Adjusting the single-vision camera lighting levels1.1.3
Adjusting the multi-vision camera lighting levels1.1.2
Preparation for the moving camera scale calibration1.2.1
Camera scale calibration1.2
Calibrating the moving camera scale1.2.2
Calibrating the multi-vision camera scale1.2.3
Calibrating the single-vision camera scale1.2.4
2.R-axis accuracy offset
Measuring the R-axis accuracy offset with the multi-vision camera2.1
Measuring the R-axis accuracy offset with the single-vision camera
2.2
3.Head offset adjustments
Preparation for head offset adjustments of Heads 3, 5, and 7 (YV100Xg family) or Head 2 (YV88Xg)3.1
Adjusting the head offset of Heads 3, 5, and 7 (YV100Xg family) or Head 2 (YV88Xg)
3.2
Preparation for head offset adjustments of Heads 2, 4, 6 and 8 (YV100Xg family)3.3
Adjusting the head offset of Heads 2, 4, 6 and 8 (YV100Xg family)
3.4
1.FAMF adjustment flow
2.Preparing the glass PCB
3.Warming up the machine
4.FAMF adjustments using ceramic chip components
Preparation4.1
Performing FAMF adjustments using ceramic chip components
4.2
5.FAMF adjustments using glass QFP
Preparation5.1
Performing FAMF adjustments using glass QFP
5.2
6.FAMF adjustments using the FAMF station (reference description)
Setting up for the FAMF station6.1
FAMF adjustments using the FAMF station and glass QFP
6.2
25002-X9-00
2
Before beginning adjustments
2-4
2. Preparatory work
Before beginning basic adjustments and FAMF adjustments, the machine must be set up for adjust-
ments condition. This section describes how to set up the machine for adjustments.
2.1 System data backup
Before beginning adjustments, save the machine data settings as explained below.
c
CAUTION
Machine conditions during adjustments may adversely affect the component mounting accu-
racy. Be sure to make a backup of the system data to save the machine data settings before
adjustments. First turn on the power switch to start up the machine and display the initial
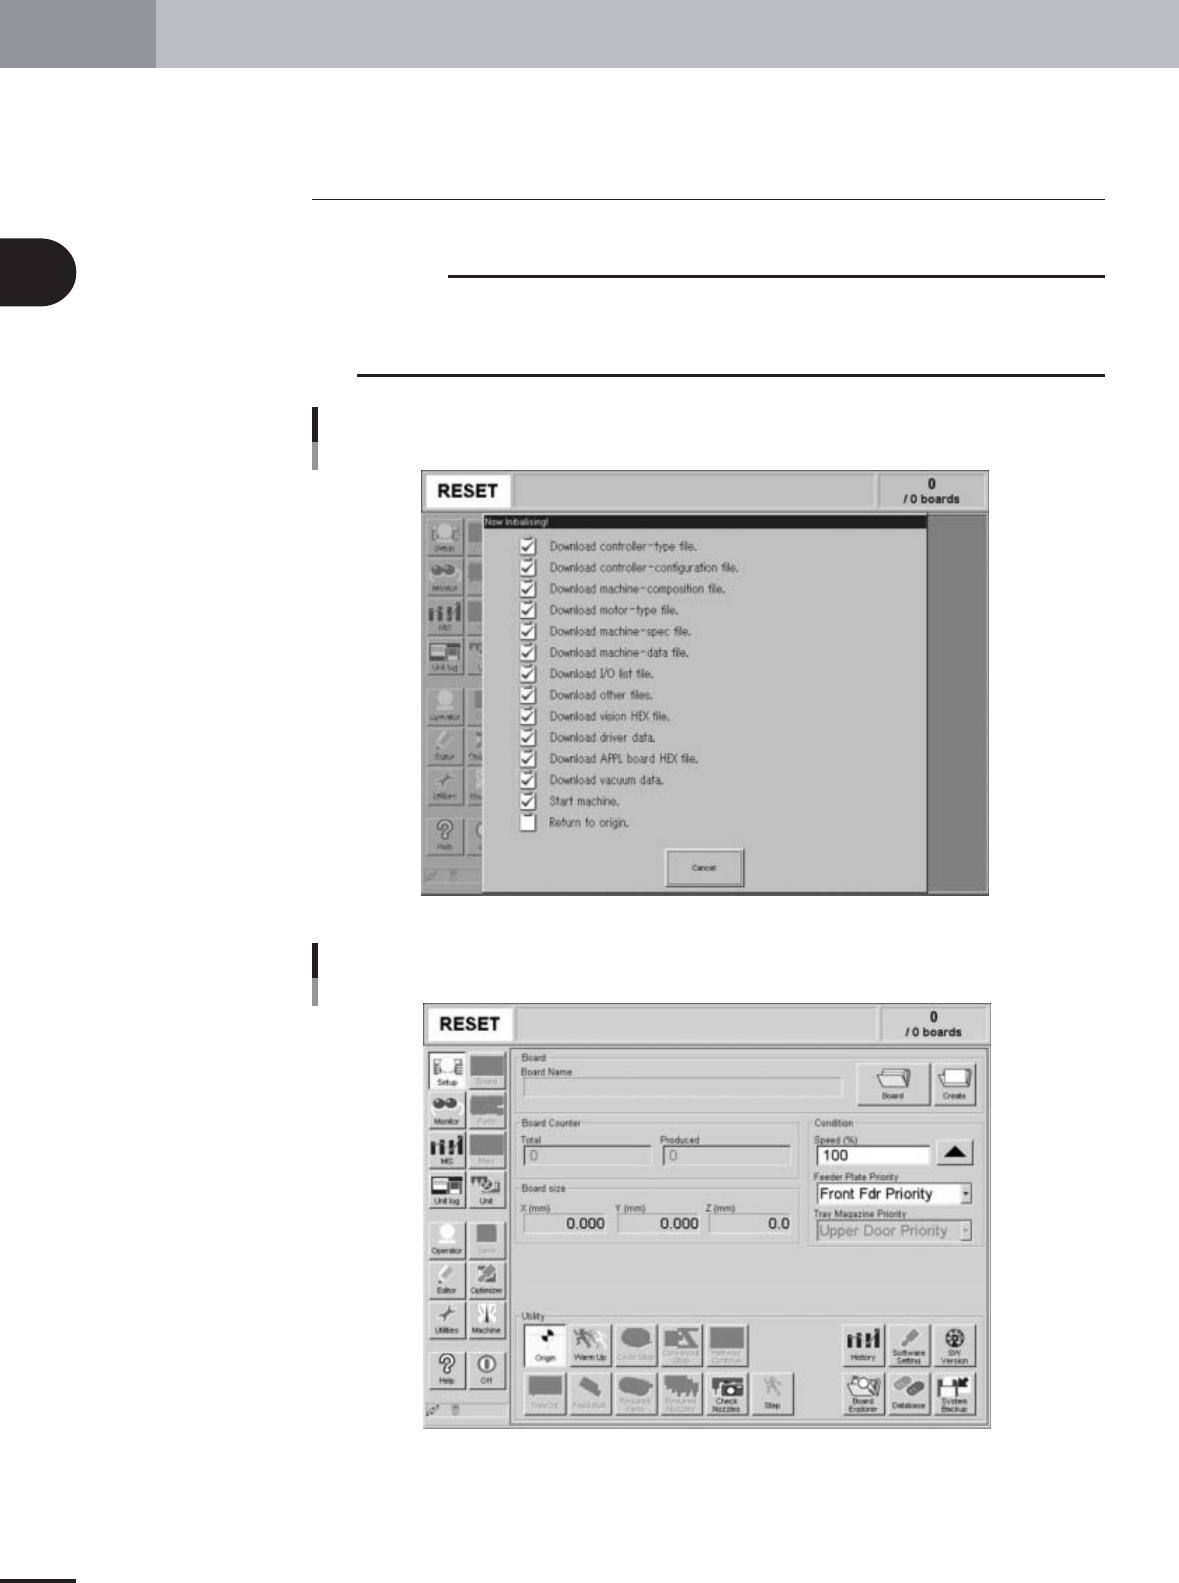
screen.
Initialization screen
27004-X9-00
Initial screen
27005-X9-00
2
Before beginning adjustments
2-5
2. Preparatory work
1
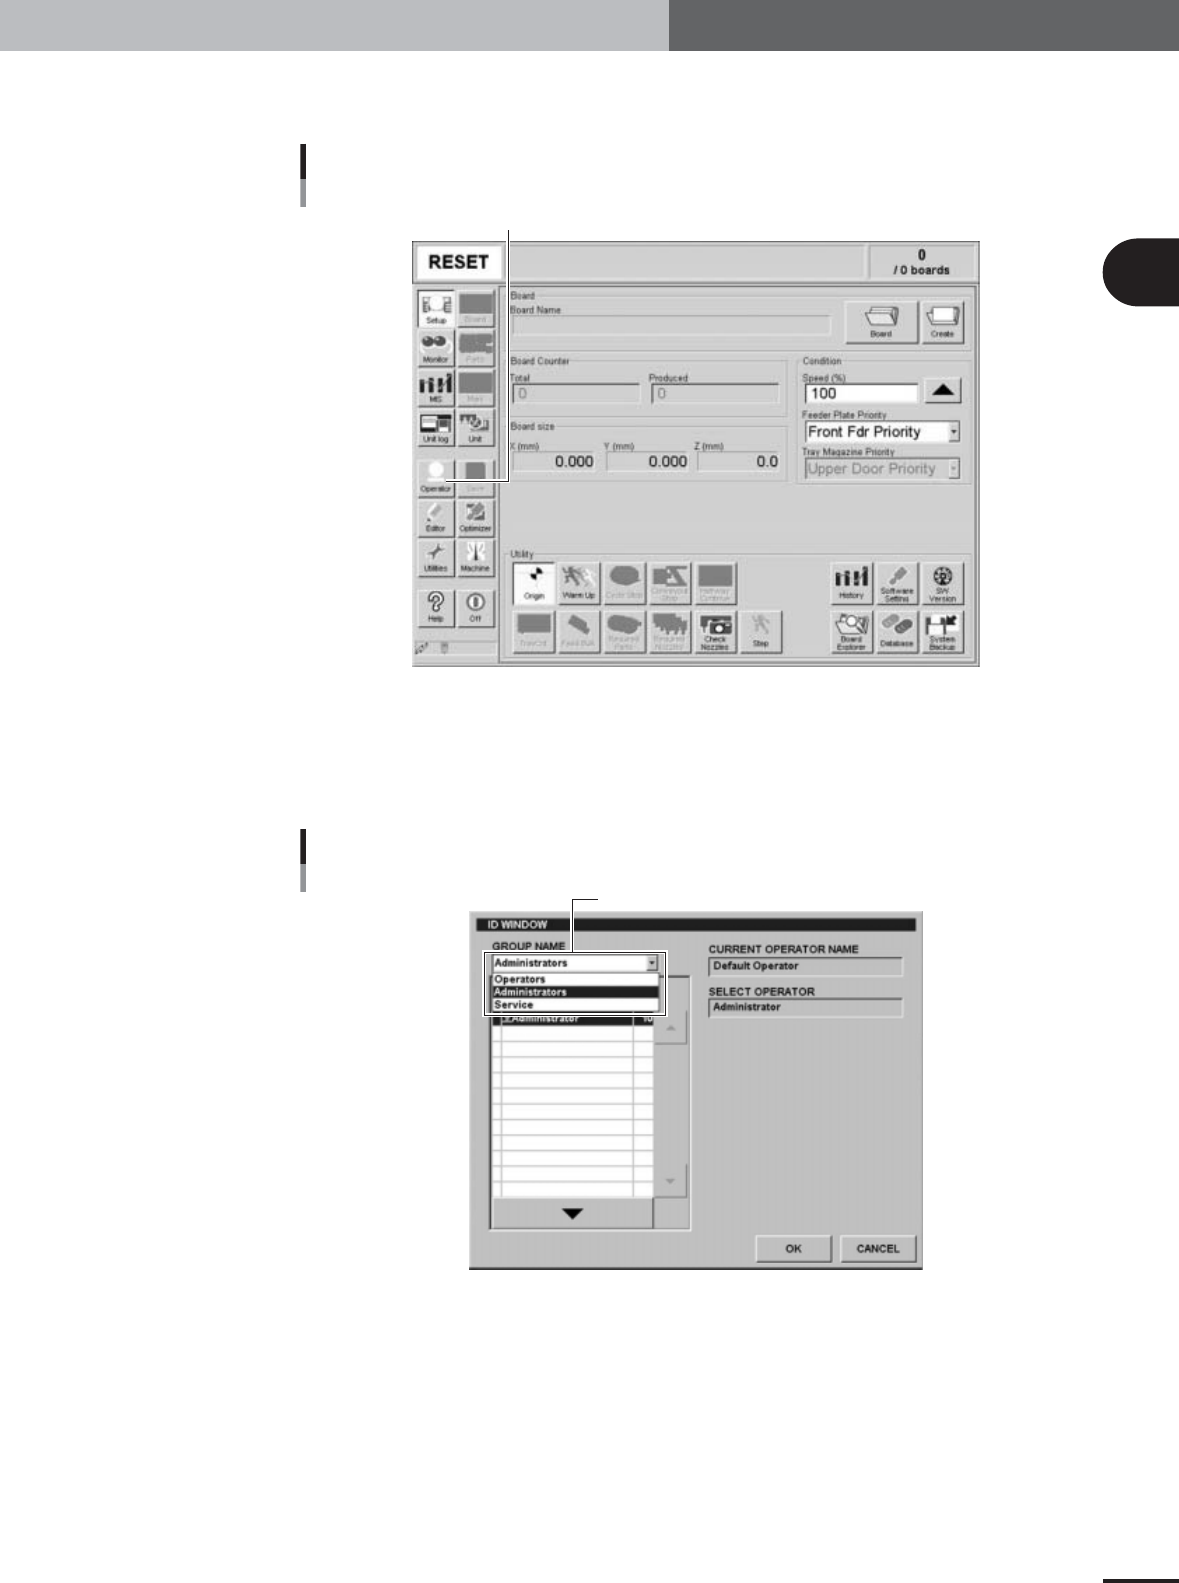
On the initial screen, press the [Operator] button.
The ID WINDOW dialog box appears for specifying the operator.
[Operator] button
Press the [Operator] button to open the ID WINDOW.
27005-X9-A0
2
Specify the operator and enter the password.
You may select "Administrator" or "Service" from the GROUP NAME drop-down list.
When the password is verified, the initial screen (Setup screen before selecting PCB
data) appears.
ID WINDOW
Select "Administrators" or "Service".
27006-X9-00