Xg系列调整手册.pdf - 第17页
2 Before beginning adjustments 2- 11 2. Prepar atory w ork 4 Press the [Start] button to start warm-up. The warm-up progress time and bar will appear under the "Progress Status". Wa rm-up screen 27017-X9-00 5 F…
2
Before beginning adjustments
2-10
2. Preparatory work
2.3 Warming up the machine
After starting up the machine, warm it up before beginning adjustments. We recommend
warming up the machine for about 30 minutes, which is longer than the warm-up for PCB
production.
If the machine is stopped for more than 5 minutes during adjustments, then warm it up
again for about 5 minutes.
1
Make pre-operation checks and then start up the machine.
For pre-operation checks and starting up the machine, refer to chapter 2, "Basic
operation", in the separate YV100Xg, YV88Xg surface mounter operation manual.
2
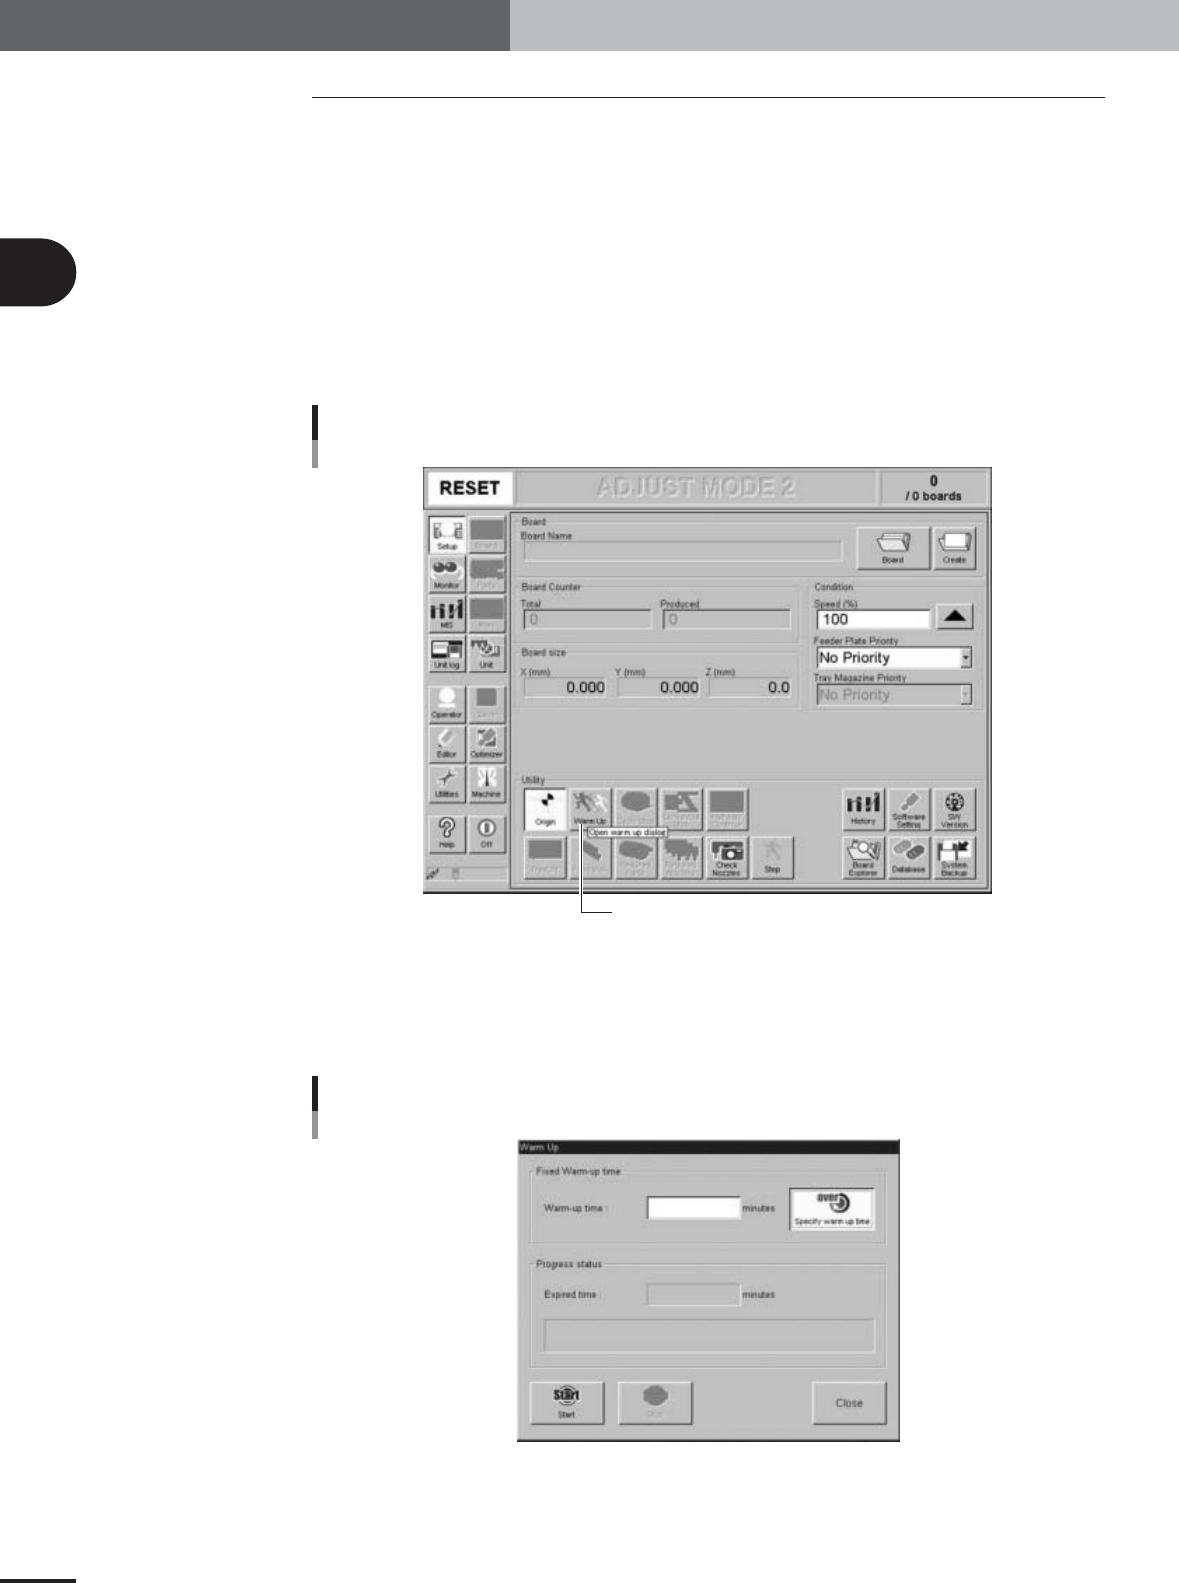
Press the [Warm Up] button on the Setup screen.
The Warm-up dialog box then appears.
[Warm-up] button
Press the [Warm Up] button to open the warm-up setting screen.
27015-X9-01
3
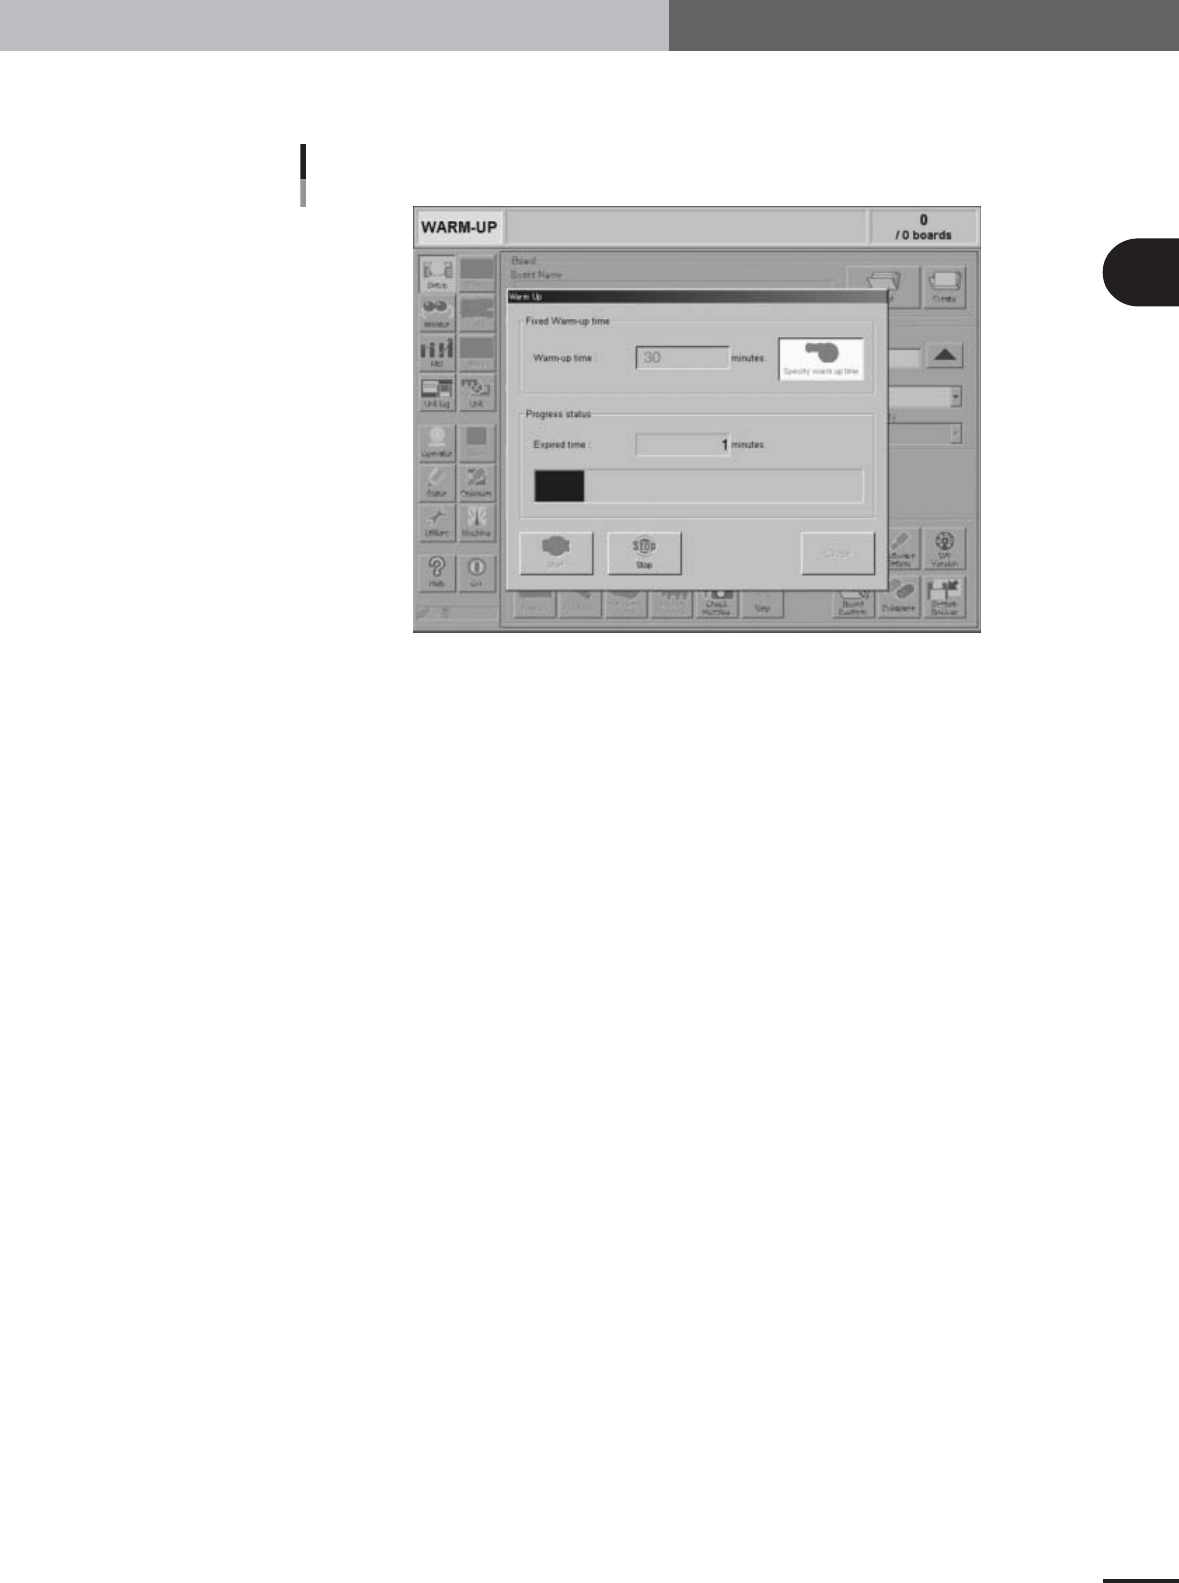
Enter a warm-up time.
Press the [Stop after time over] button and then enter the warm-up time. Warm-up
will automatically stop when the warm-up time you set has elapsed. A warm-up time
of 30 minutes is recommended for FAMF adjustments.
Warm-up dialog box
27016-X9-00
2
Before beginning adjustments
2-11
2. Preparatory work
4
Press the [Start] button to start warm-up.
The warm-up progress time and bar will appear under the "Progress Status".
Warm-up screen
27017-X9-00
5
Finish the warm-up.
Warm-up will automatically stop when the warm-up time you set in step 3 has
expired. Press the [Close] button after warm-up is complete and return to the previous
screen.
2
Before beginning adjustments
2-12
2. Preparatory work
2.4 How to start the adjustment utility.
To perform various adjustments, you must start the adjustment utility. You will be
required to enter the password for security.
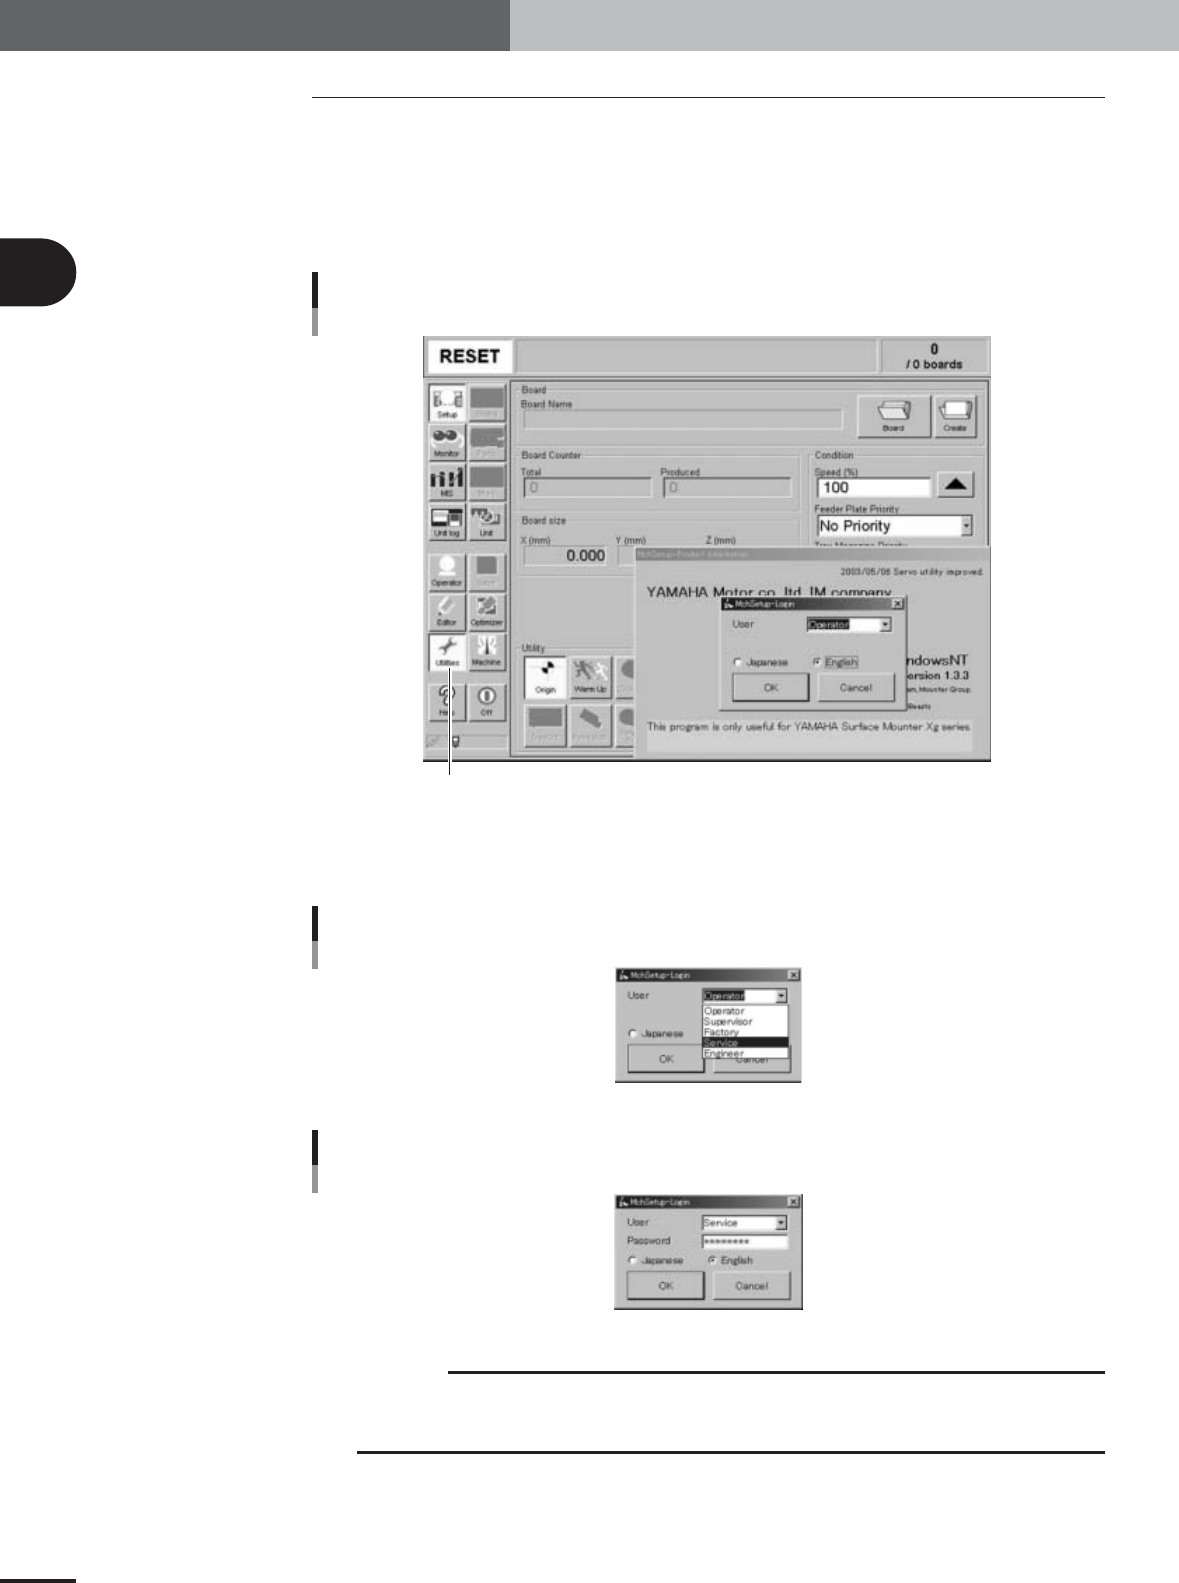
1
Press the [Utilities] button in the main menu button area of the
operation display.
The login dialog box appears as shown below.
Adjustment utility login dialog box
[Utilities] button
27018-X9-00
2
Select "Service" from the User drop-down list and enter the
password.
Selecting the user
27019-X9-00
Entering the password
27020-X9-00
c
CAUTION
Any work carried out with the adjustment utility will affect the machine performance and
operating accuracy. Keep the password carefully and do not share it with any person other than
supervisors.