Xg系列调整手册.pdf - 第40页
3 Basic adjustments 3- 18 1. Camer a parameter adjustments 1.2 Camera scale calibration 1.2.1 Preparation for the moving camera scale calibration To calibrate the moving camera scale, a custom-designed glass PCB is used.…
3
Basic adjustments
3-17
1. Camera parameter adjustments
8
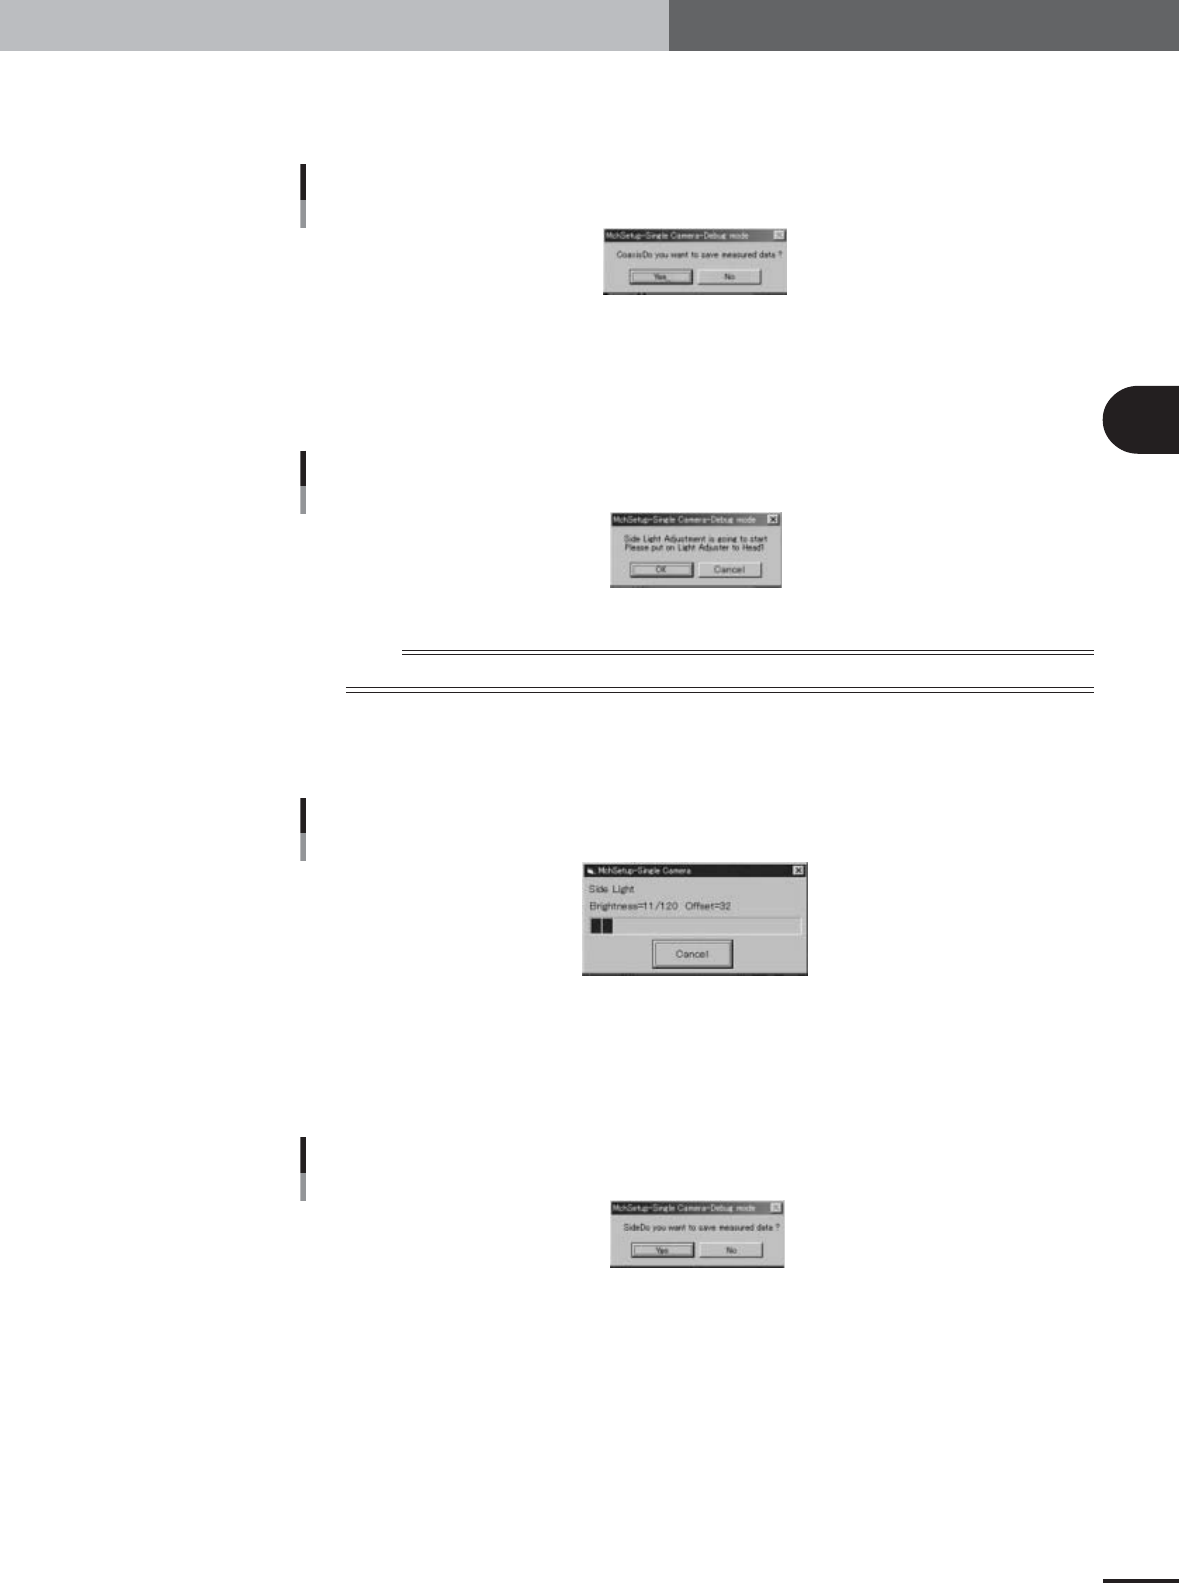
Save the result of the coaxial lighting level adjustment.
When the dialog box appears asking whether to save the result, press the [Yes] button
to save it and continue the adjustment.
Save confirmation dialog box
Coaxial light level
27061-X9-00
9
Next, start the side lighting level adjustment.
1.When the dialog box for the side lighting level appears, press the emergency stop
button, remove the light adjuster plate from Head 1 and attach the light adjuster
plate-2 (KV7-M8806-0XX) to Head 1, with the glossy surface facing up.
Confirmation dialog box
Side light level
27062-X9-00
n
NOTE
Attach the light adjuster plate-2 (KV7-M8806-0XX) to Head 1 so that the glossy surface faces up.
2.Press the [OK] button to start the adjustment.
The head assembly moves to a position above the single-vision camera, and the
side lighting level is automatically adjusted.
Progress bar during adjustment
Side light level
27063-X9-00
0
Save the result of the side lighting level adjustment.
When the dialog box appears asking whether to save the result, press the [Yes] button
to save it.
Typical side lighting level: 120±2
Save confirmation dialog box
Side light level
27064-X9-00
e
3
Basic adjustments
3-18
1. Camera parameter adjustments
1.2 Camera scale calibration
1.2.1 Preparation for the moving camera scale calibration
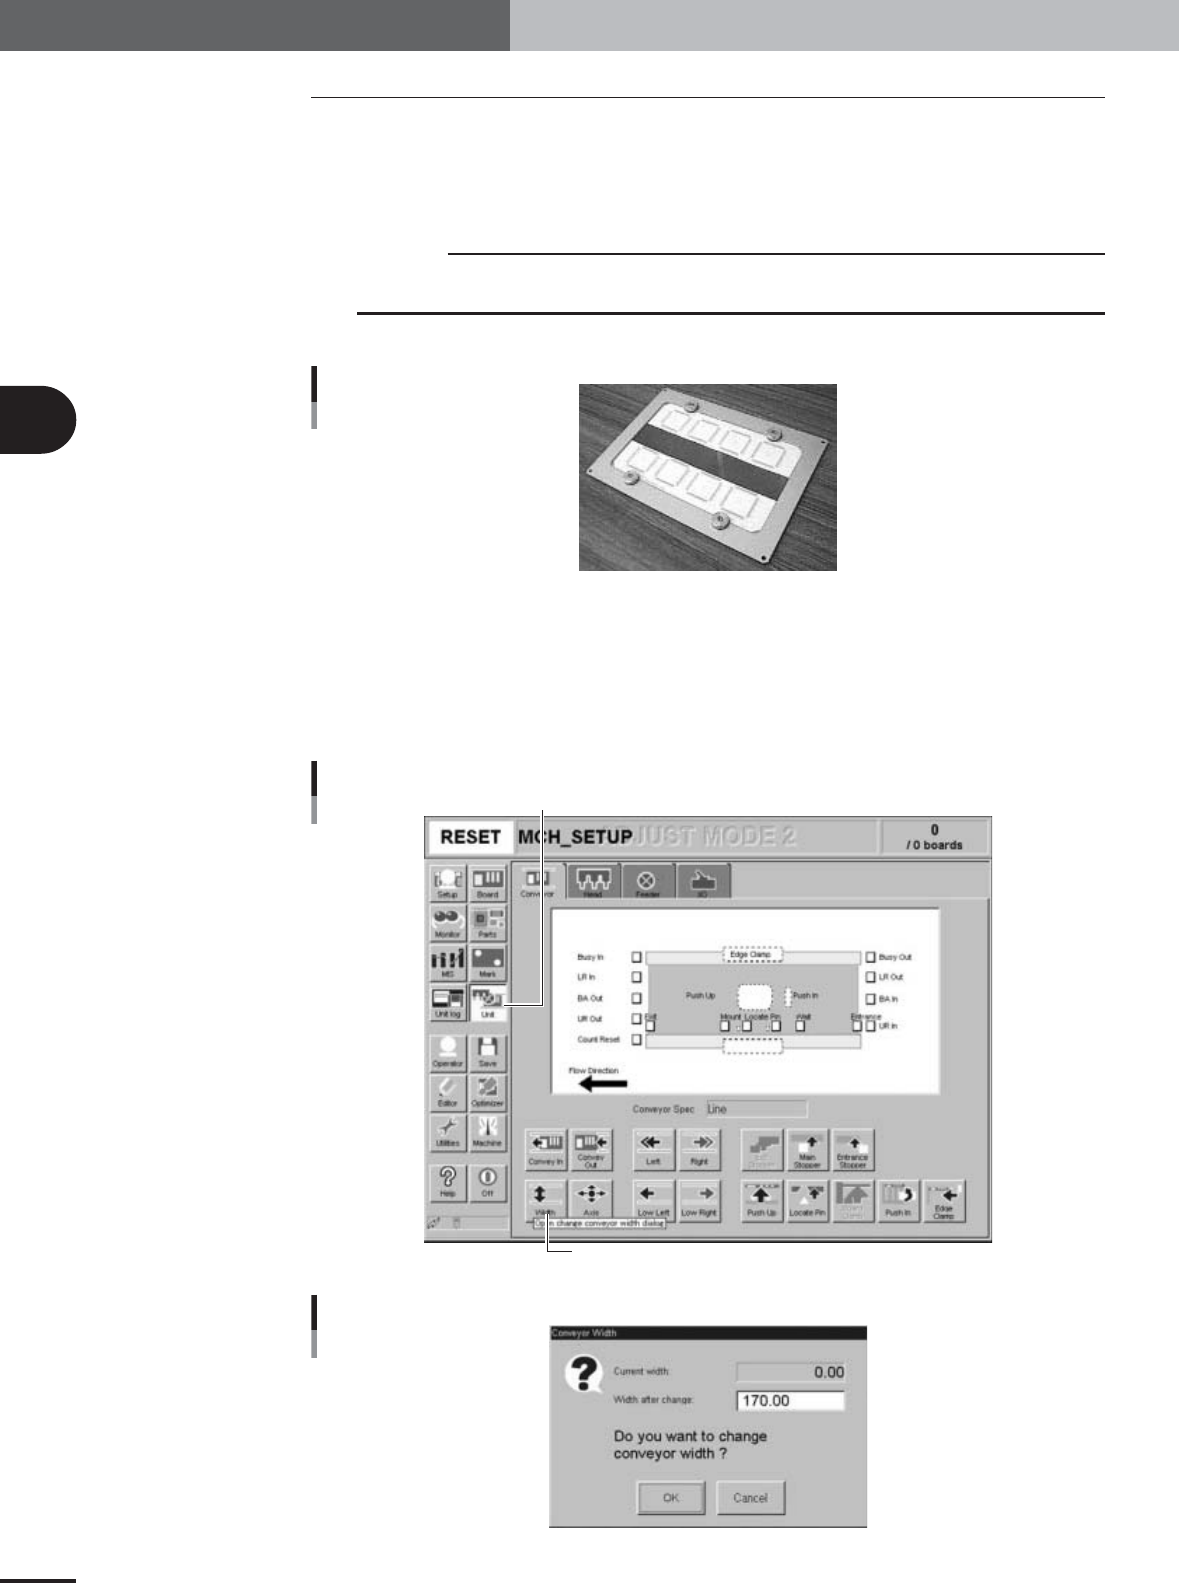
To calibrate the moving camera scale, a custom-designed glass PCB is used. The machine
must be set to "Adjust Mode2" (see sections 2.5 and 2.6 in Chapter 2) and the
"MCH_SETUP" PCB data loaded into the machine (see section 2.7 in Chapter 2).
c
CAUTION
Before starting the camera scale calibration, the machine should be warmed up for 30 minutes
or more. (See section 2.3, " Warming up the machine".)
1
Have the glass PCB ready.
Glass PCB
28012-X9-00
2
Adjust the conveyor width.
1.Open the [Unit]-[Conveyor] tab screen and press the [Conveyor] button.
The Conveyor Width dialog box appears.
2.Check that the conveyor width after change is set to "170" (mm) and press the
[OK] button.
The conveyor rail changes to the specified width.
[Unit]-[Conveyor] tab screen
[Unit] button
[Width] button
27065-X9-00
Conveyor width dialog box
27066-X9-00
3
Basic adjustments
3-19
1. Camera parameter adjustments
3
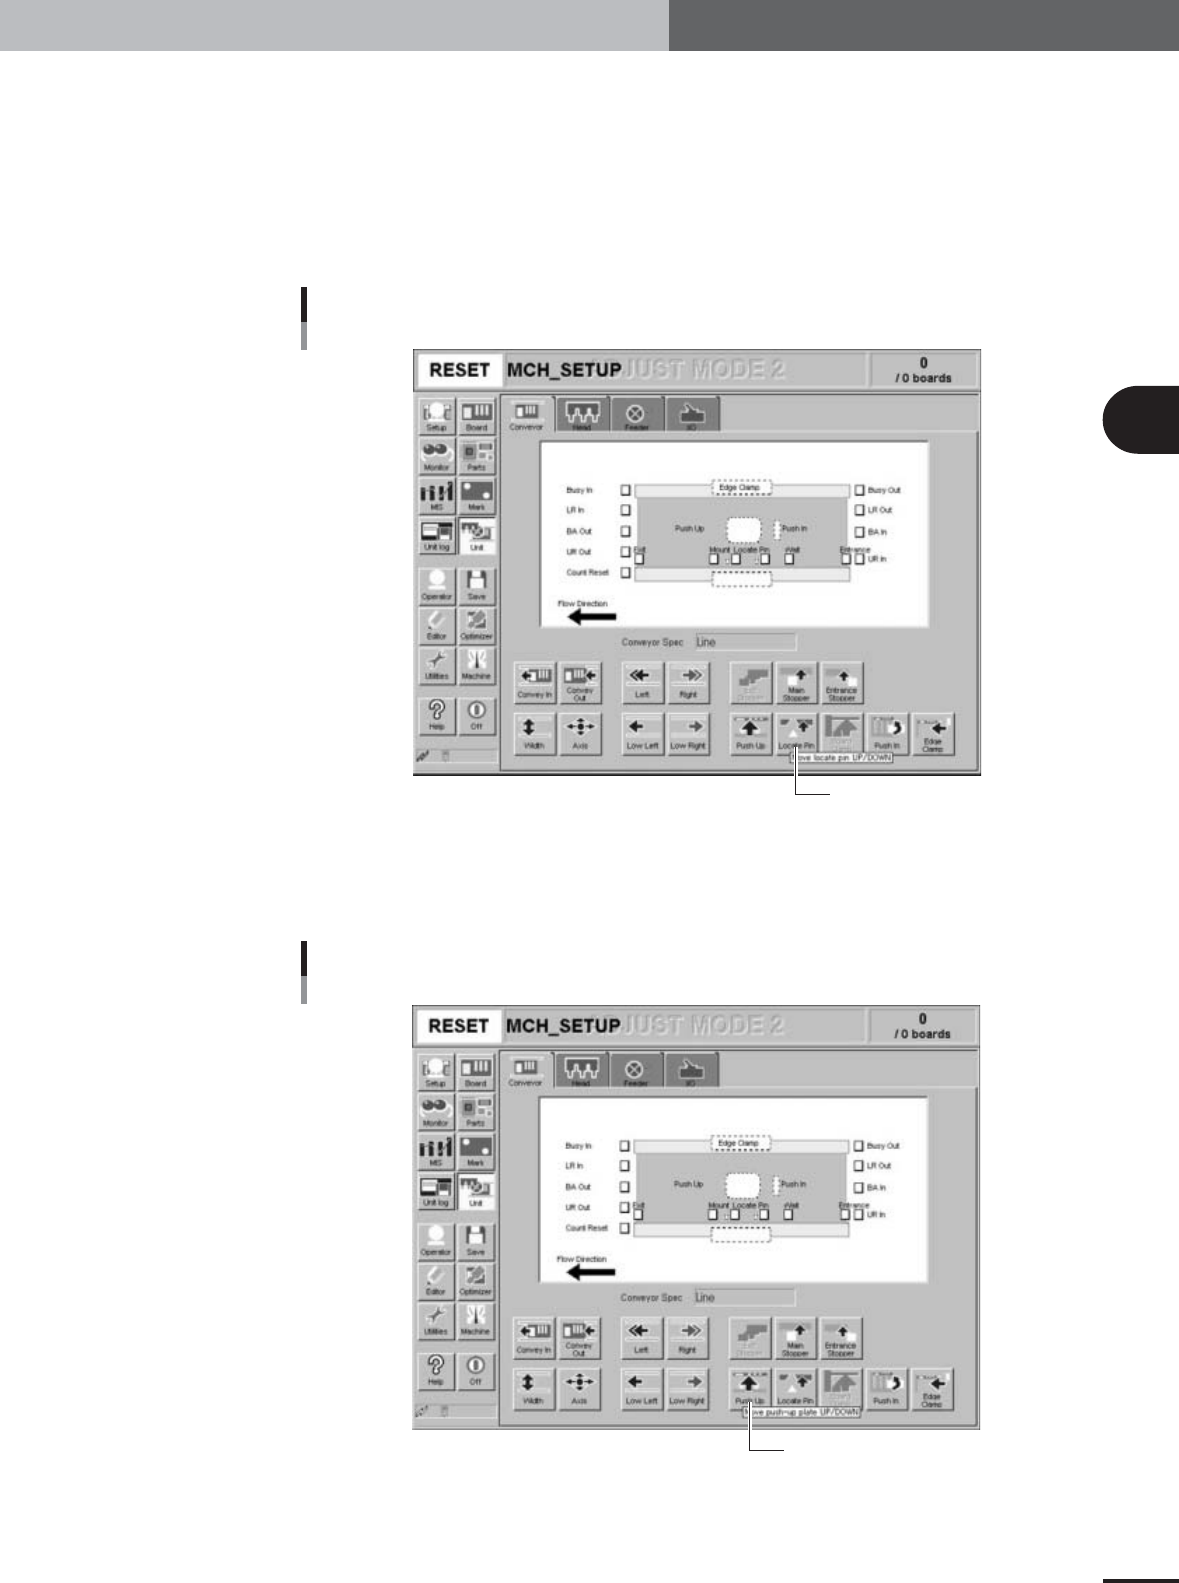
Set the glass PCB on the conveyor.
1.Press the emergency stop button and unclamp the locate pins by loosening the
lever.
2.Place the glass PCB on the conveyor, and adjust the movable locate pin position so
that the distance between the locate pins exactly matches the distance between the
positioning holes in the metal frame of the glass PCB.
3.Clamp the locate pins and press the [Locate Pin] button to raise the locate pins so
that they engage with the positioning holes in the metal frame of the glass PCB.
[Locate Pin] button
[Locate Pin] button
27067-X9-00
4
Set push-up pins to support the glass PCB from the bottom.
1.Cancel emergency stop and press the [Push Up] button.
The Conveyor Pushup dialog box appears.
[Push Up] button
[Push Up] button
27068-X9-00
e