Xg系列调整手册.pdf - 第27页
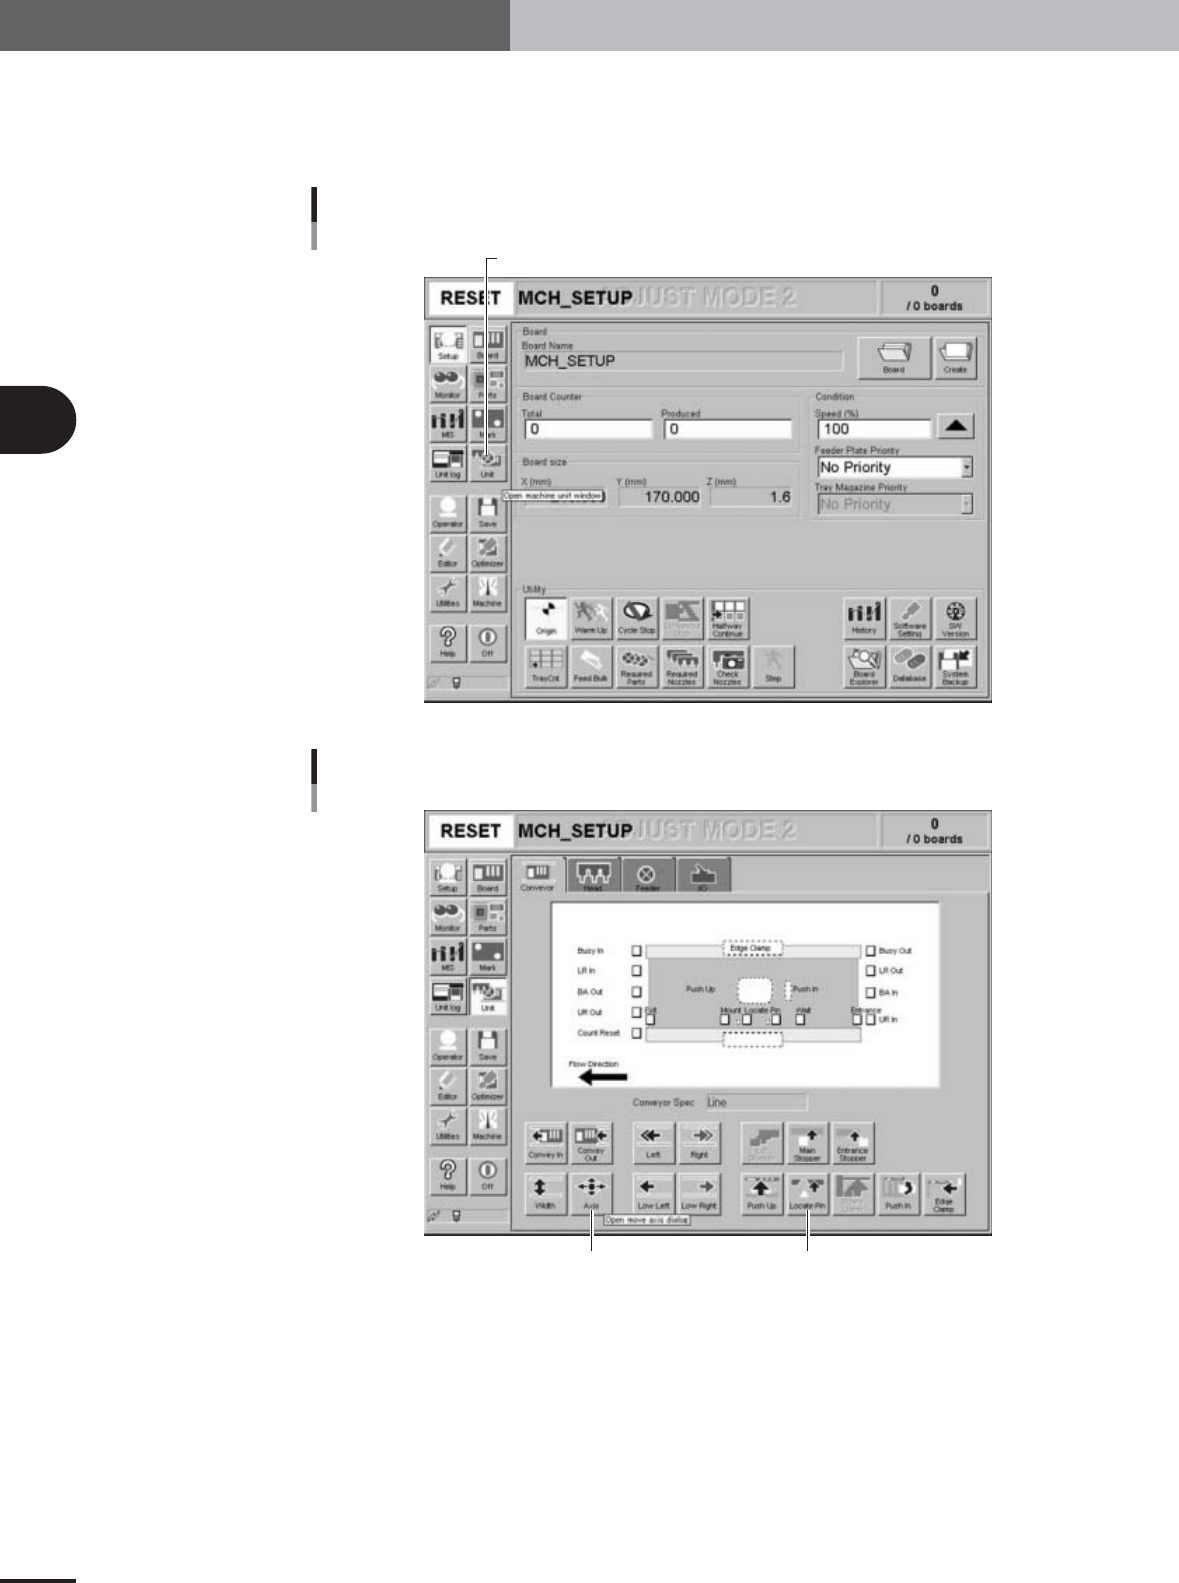
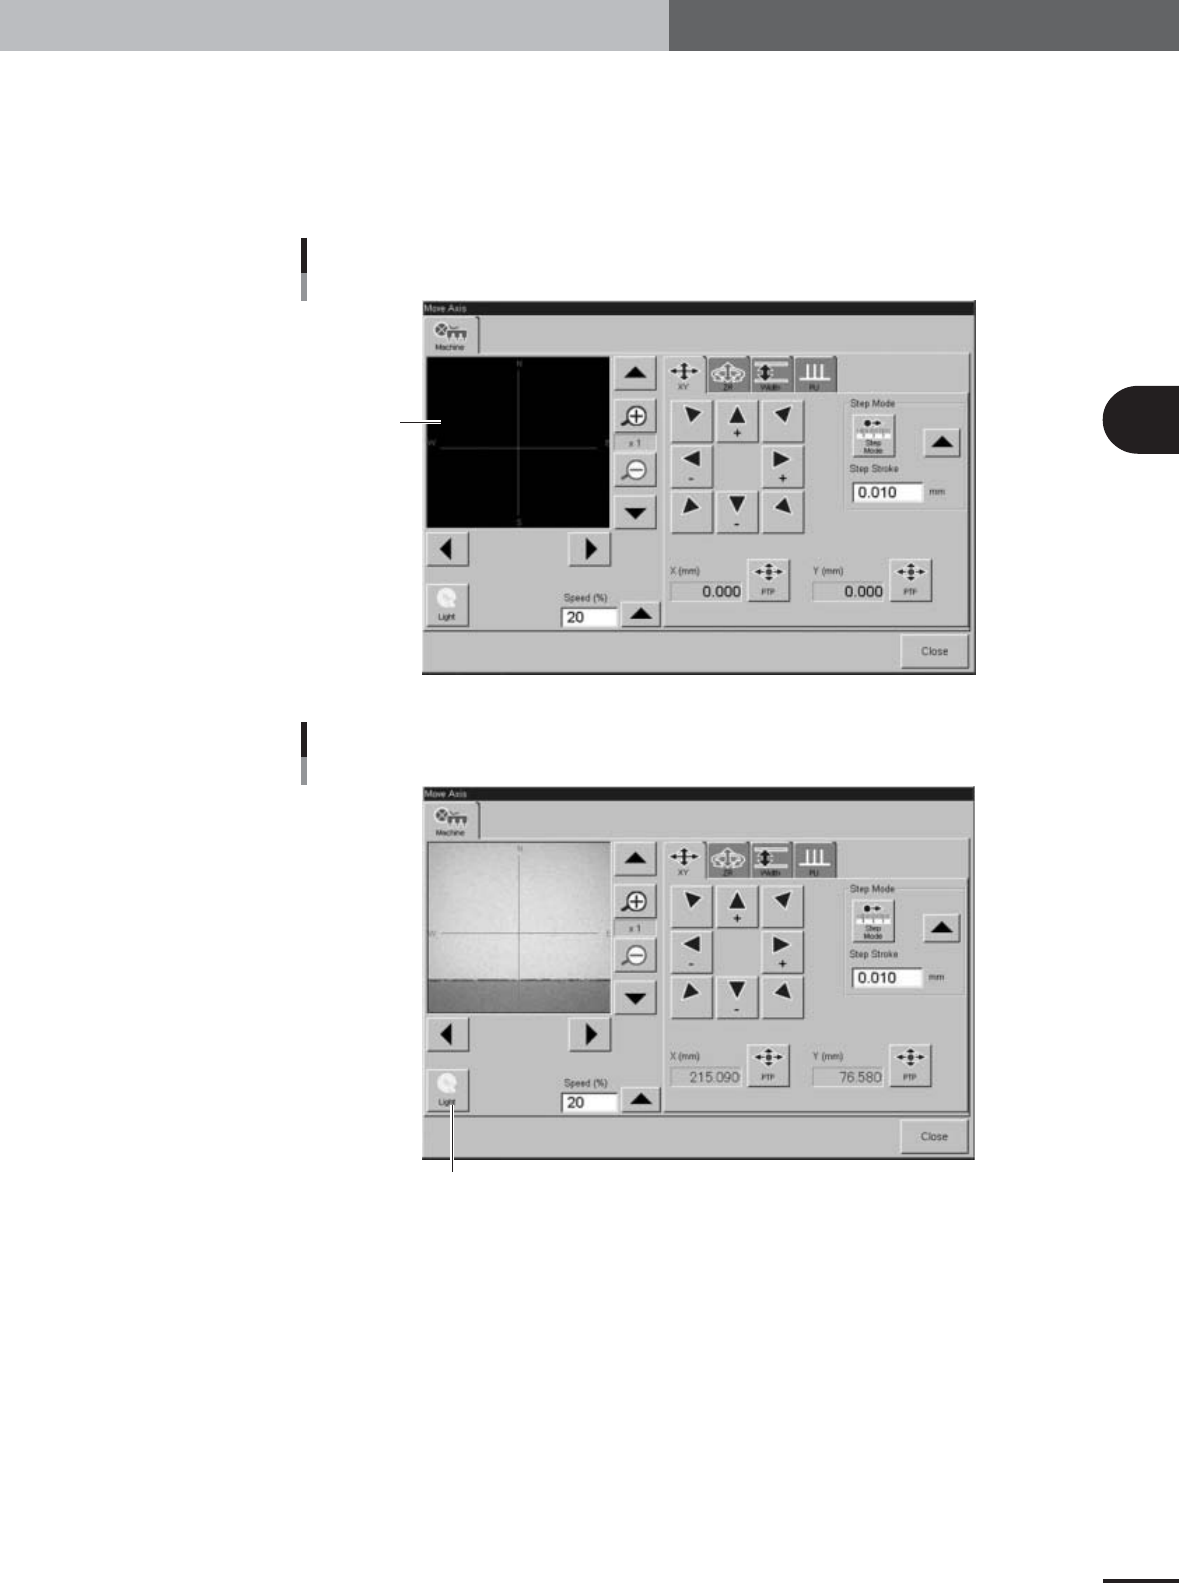
3 Basic adjustments 3- 5 1. Camer a parameter adjustments 3 Move the moving camera to a position above the light adjuster plate. 1. Cancel emergency stop and press the [Axis] button on the [Unit]-[Conveyor] tab to open t…
3
Basic adjustments
3-4
1. Camera parameter adjustments
2
Clamp the light adjuster plate on the conveyor.
Open the [Unit]-[Conveyor] tab screen and press the [Locate Pin] button so that the
light adjuster plate is clamped between the PCB edge support plate and the locate
pin.
[Unit] button
[Unit] button
27027-X9-00
[Unit]-[Conveyor] tab
[Axis] button [Locate Pin] button
27028-X9-00
3
Basic adjustments
3-5
1. Camera parameter adjustments
3
Move the moving camera to a position above the light adjuster plate.
1.Cancel emergency stop and press the [Axis] button on the [Unit]-[Conveyor] tab to
open the Move Axis window.
2.Use the arrow buttons to move the moving camera to a position above the light
adjuster plate, so that the light gray area of the light adjuster plate is displayed over
the entire vision monitor in the Move Axis window.
Move Axis window
Vision monitor
27029-X9-00
Aligning the camera with the light adjuster plate
[Light] button
27030-X9-00
3
Basic adjustments
3-6
1. Camera parameter adjustments
n
NOTE
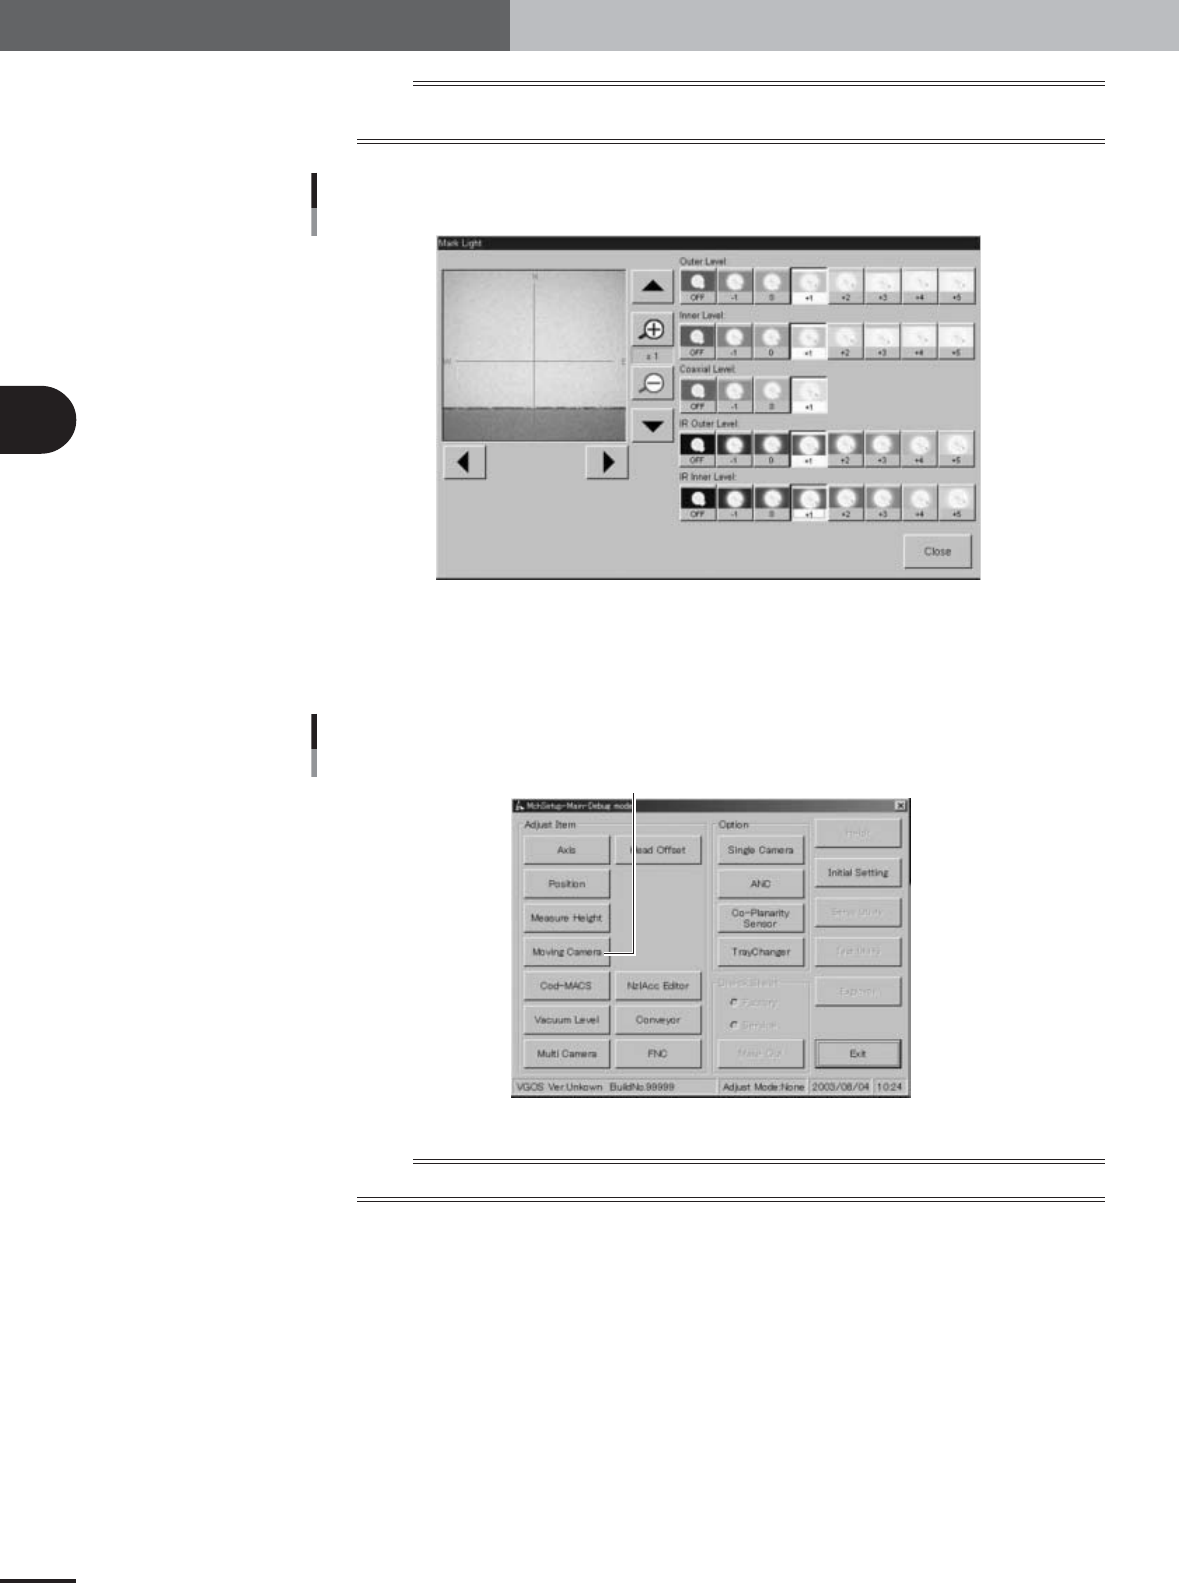
When aligning the camera with the light adjuster plate, it will be easier to view the image on the vision monitor
by setting the lighting levels to a plus (+) value in the Mark Light window that opens with the [Light] button.
Mark Light window
27031-X9-00
4
Start the adjustment utility.
After closing the Move Axis window, press the [Utilities] button to start the adjustment
utility. The adjustment utility menu window appears.
Adjustment utility menu window
[Moving Camera] button
27021-X9-00
n
NOTE
For how to start the adjustment utility, see section 2.4 in Chapter 2.