Xg系列调整手册.pdf - 第43页
3 Basic adjustments 3- 21 1. Camer a parameter adjustments 6 Select "Mark No.1" and press the [Mark Adj] button. The Mark Adjust window opens. [Mark Adj] button and Mark Adjust windo w [Mark Adj] button 27071-X…
3
Basic adjustments
3-20
1. Camera parameter adjustments
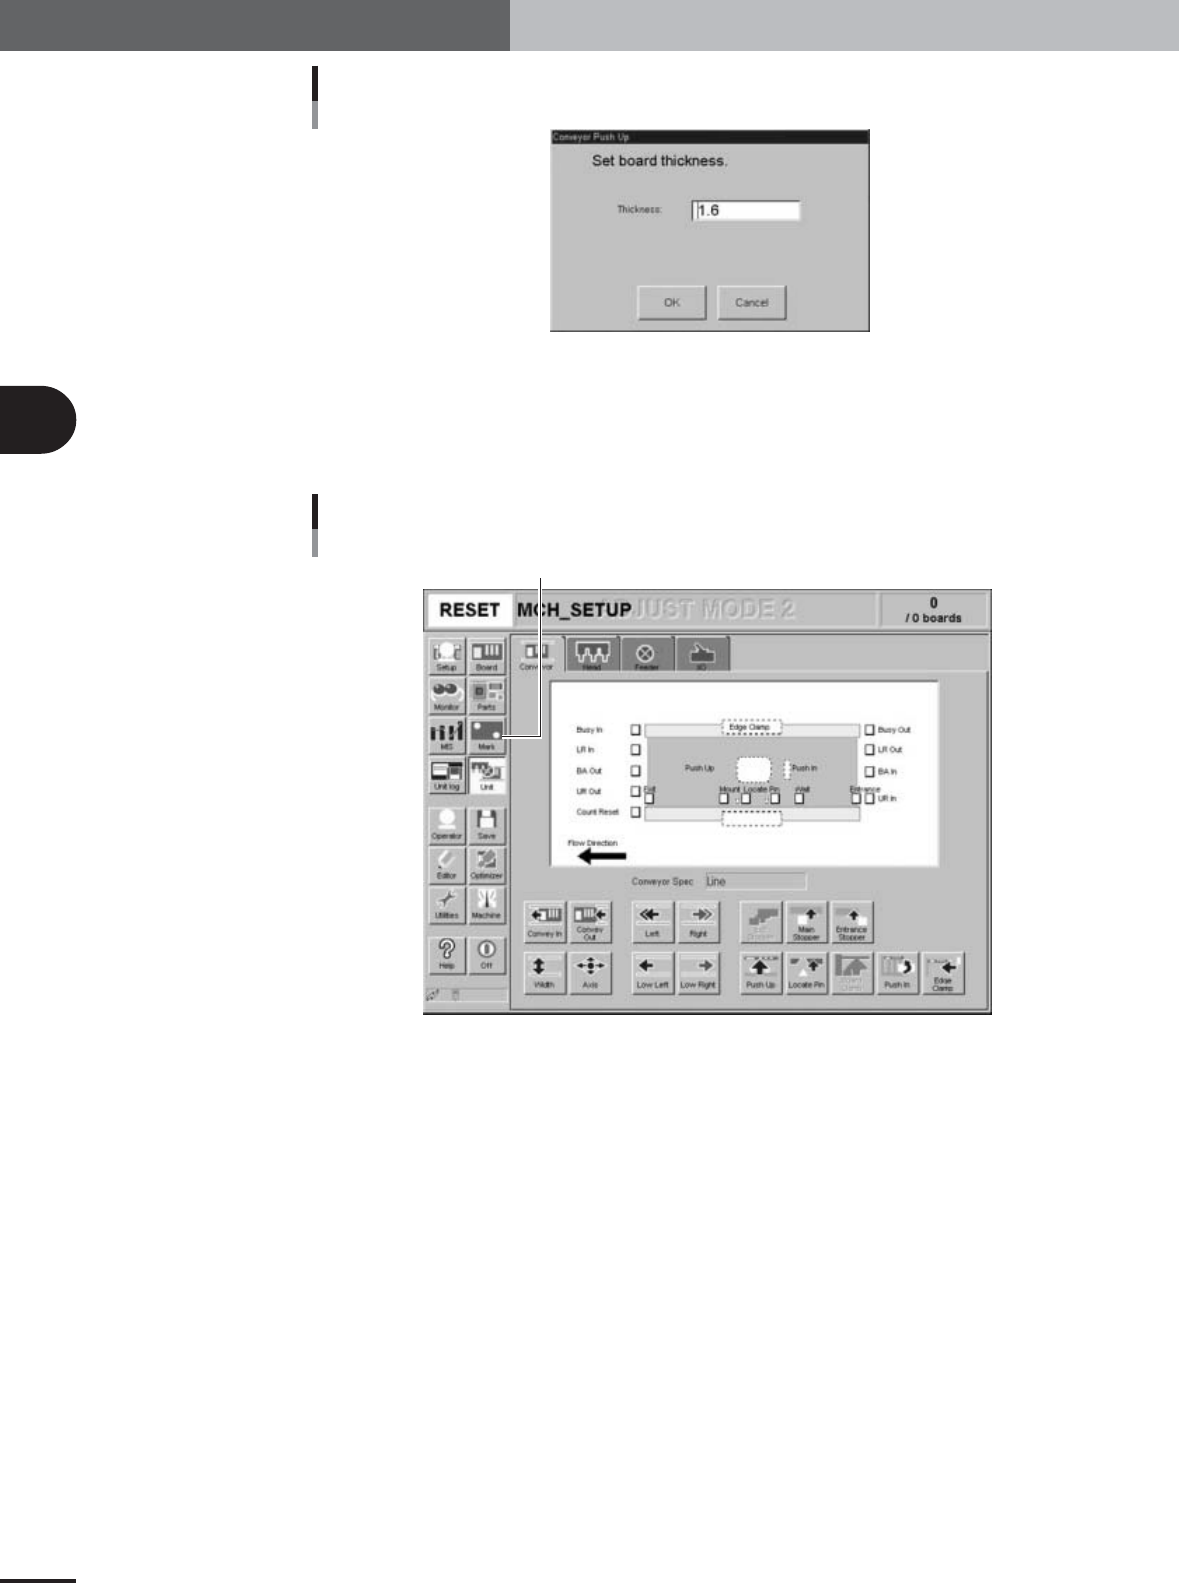
Conveyor Pushup dialog box
27069-X9-00
2.Press the [OK] button in the Conveyor Pushup dialog box to raise the push-up plate.
3.Set four push-up pins on the push-up plate just under each of the four corners of
the glass PCB.
5
Press the [Mark] button to open the Mark information screen.
[Mark] button
[Mark] button
27070-X9-00
3
Basic adjustments
3-21
1. Camera parameter adjustments
6
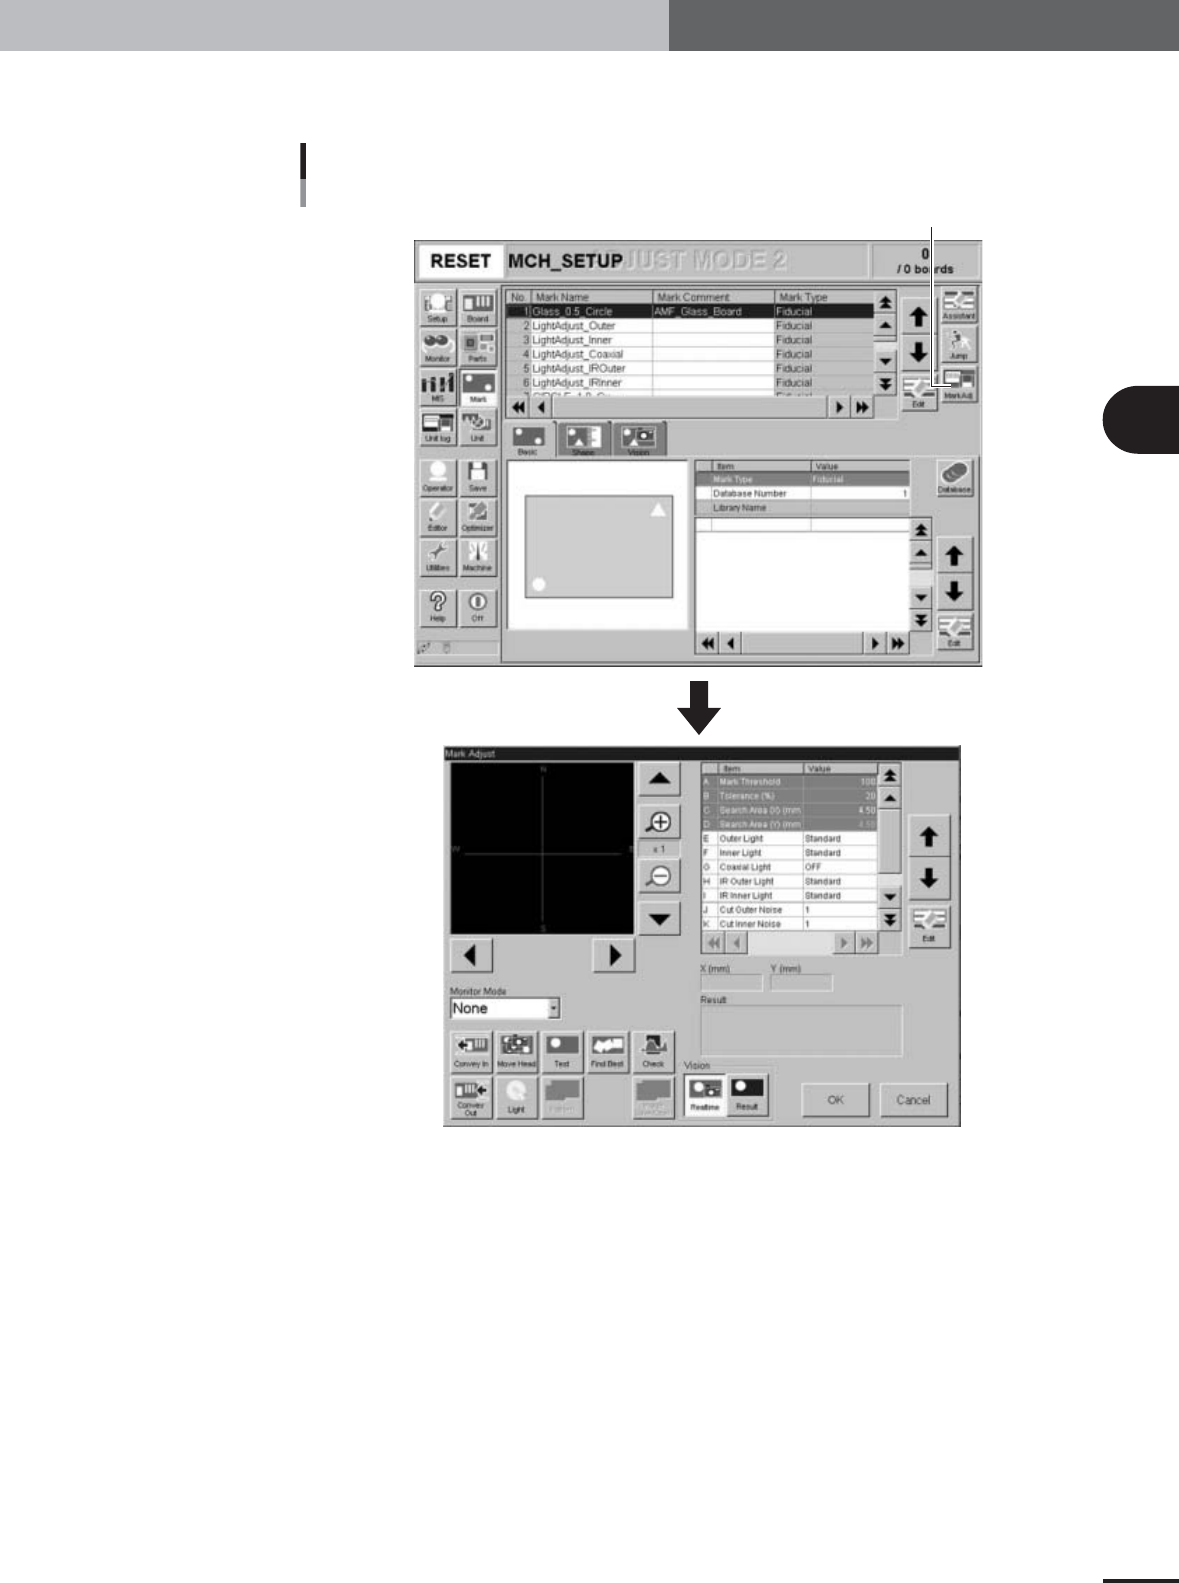
Select "Mark No.1" and press the [Mark Adj] button.
The Mark Adjust window opens.
[Mark Adj] button and Mark Adjust window
[Mark Adj] button
27071-X9-00
3
Basic adjustments
3-22
1. Camera parameter adjustments
7
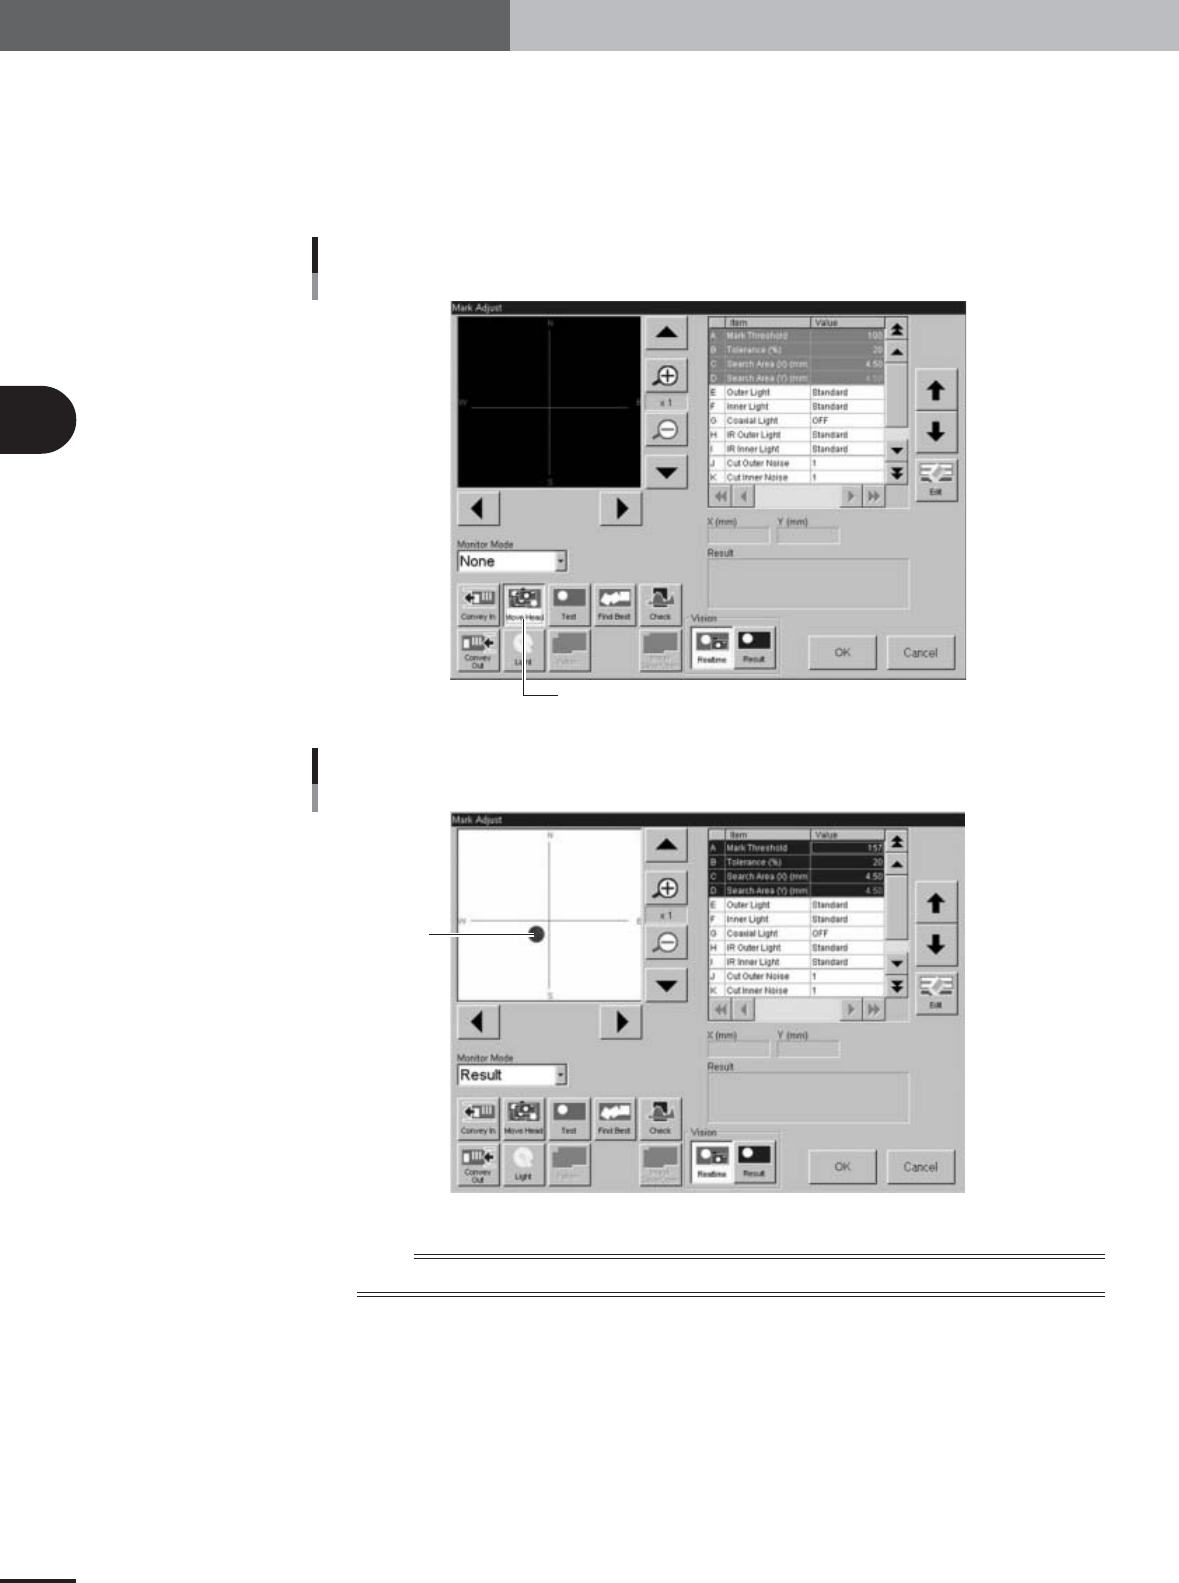
Perform teaching for the mark on the glass PCB.
1.Cancel emergency stop and press the [Move Head] button in the Mark Adjust
window to open the Move Head window.
2.Use the arrow buttons to move the moving camera so that the mark on the glass
PCB is displayed near the center of the vision monitor. Then press the [OK] button
to close the Move Head window.
[Move Head] button
[Move Head] button
27073-X9-00
Teaching window
Mark
27074-X9-00
n
NOTE
The mark should be positioned near the center of the vision monitor.