Xg系列调整手册.pdf - 第67页
3 Basic adjustments 3- 45 3. Head offset adjustments 7 Check the feeder set position. Open the [Pick] tab and make sure the "Feeder Set No." is set to "9" where you installed the tape feeder in step 1…
3
Basic adjustments
3-44
3. Head offset adjustments
4
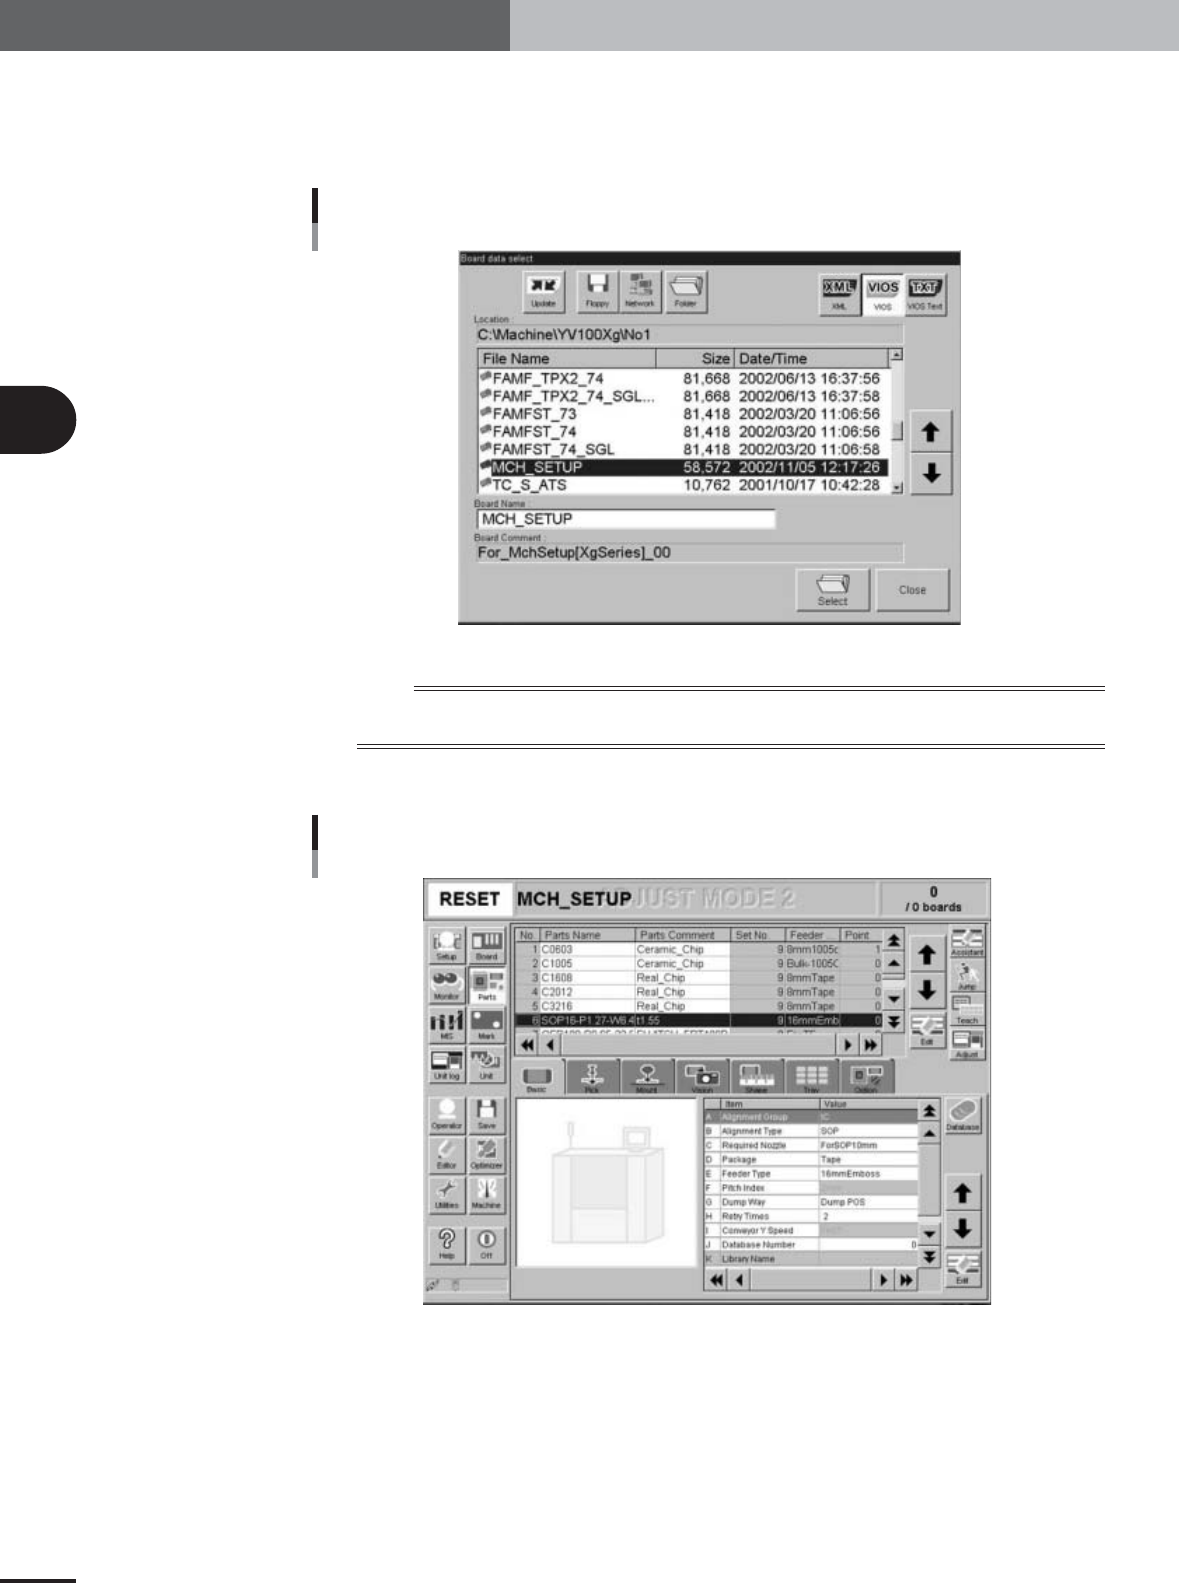
Reload the PCB data.
Open the Setup screen, press the [Board] button and select the "MCH_SETUP" PCB
data (even if it is currently loaded), to enable the changes you have made to the
machine setting.
Board Data Select dialog box
27024-X9-00
n
NOTE
After changing the machine setting, be sure to load PCB data again to enable the changes you have made to the
machine setting.
5
Press the [Parts] button to open the Parts information screen.
Parts information screen
27113-X9-00
6
Select "SOP16" (No. 6) in the upper display of the Parts information
screen.
3
Basic adjustments
3-45
3. Head offset adjustments
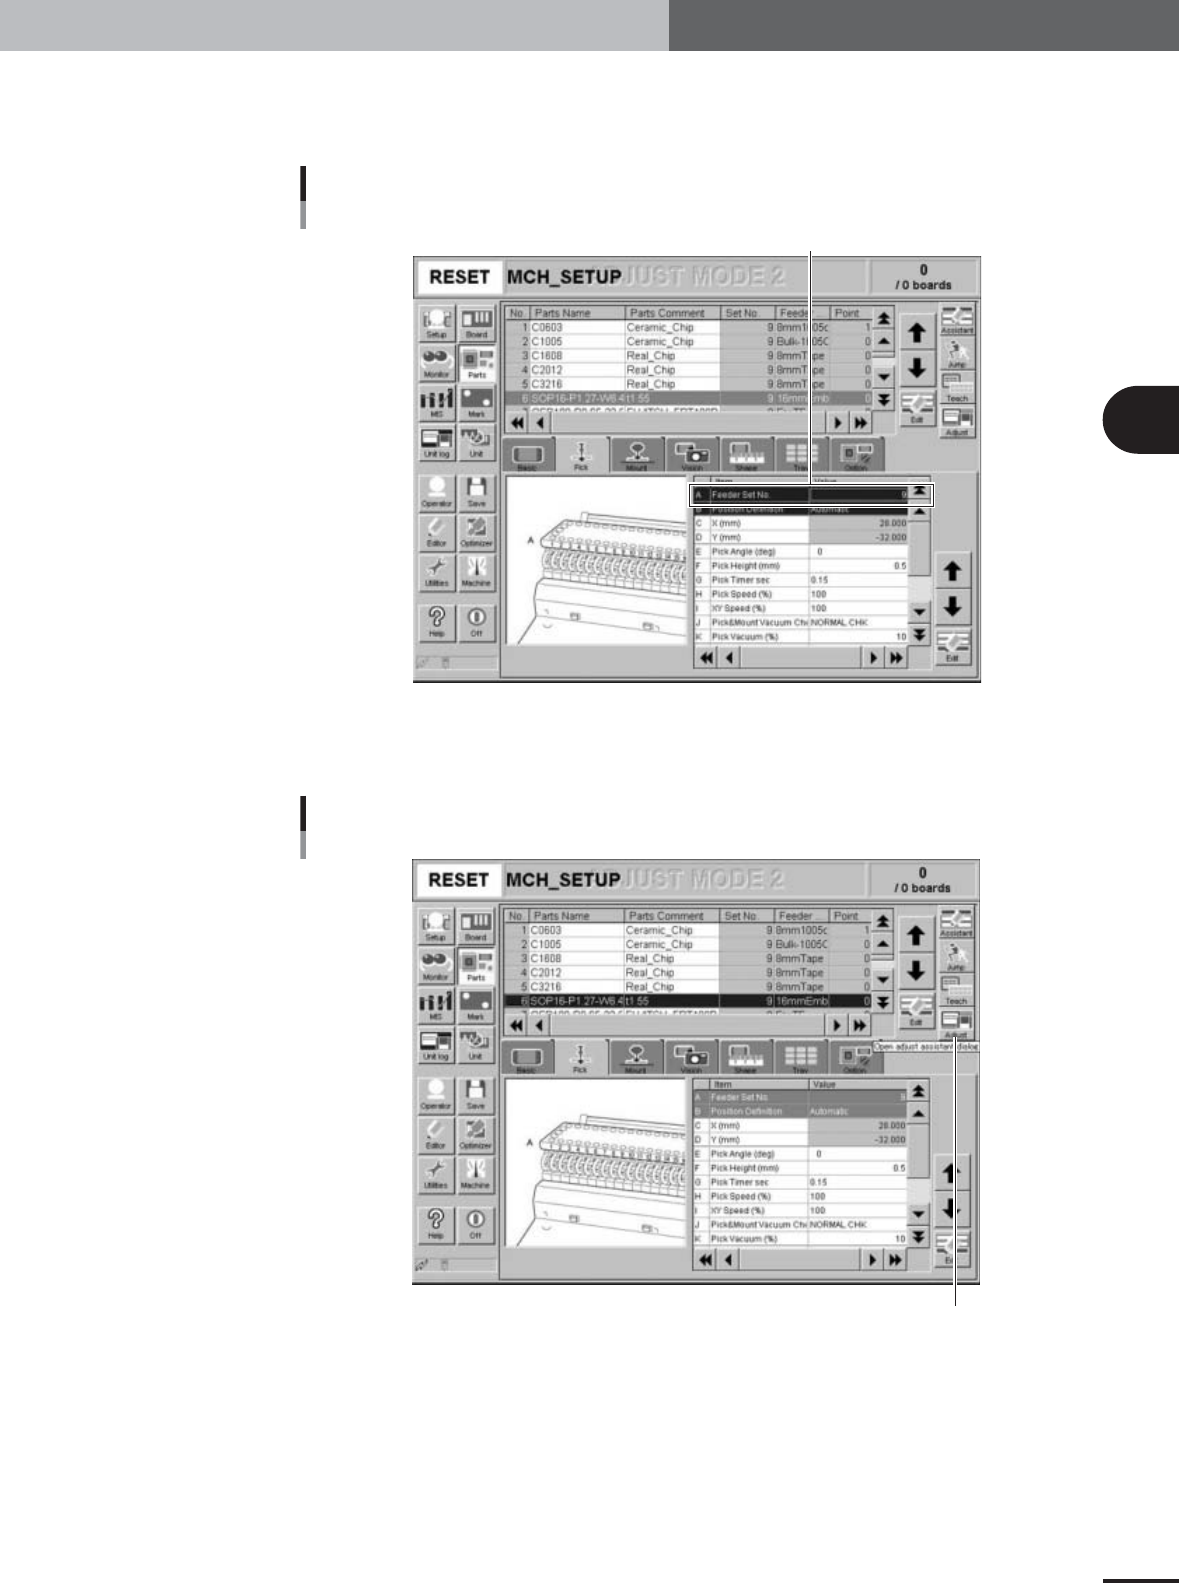
7
Check the feeder set position.
Open the [Pick] tab and make sure the "Feeder Set No." is set to "9" where you
installed the tape feeder in step 1.
Feeder Set No. parameter
Check for the feeder set No.
27114-X9-00
8
Press the [Adjust] button to enter the Parts Adjust mode.
The Parts Adjust window opens.
[Adjust] button
[Adjust] button
27115-X9-00
3
Basic adjustments
3-46
3. Head offset adjustments
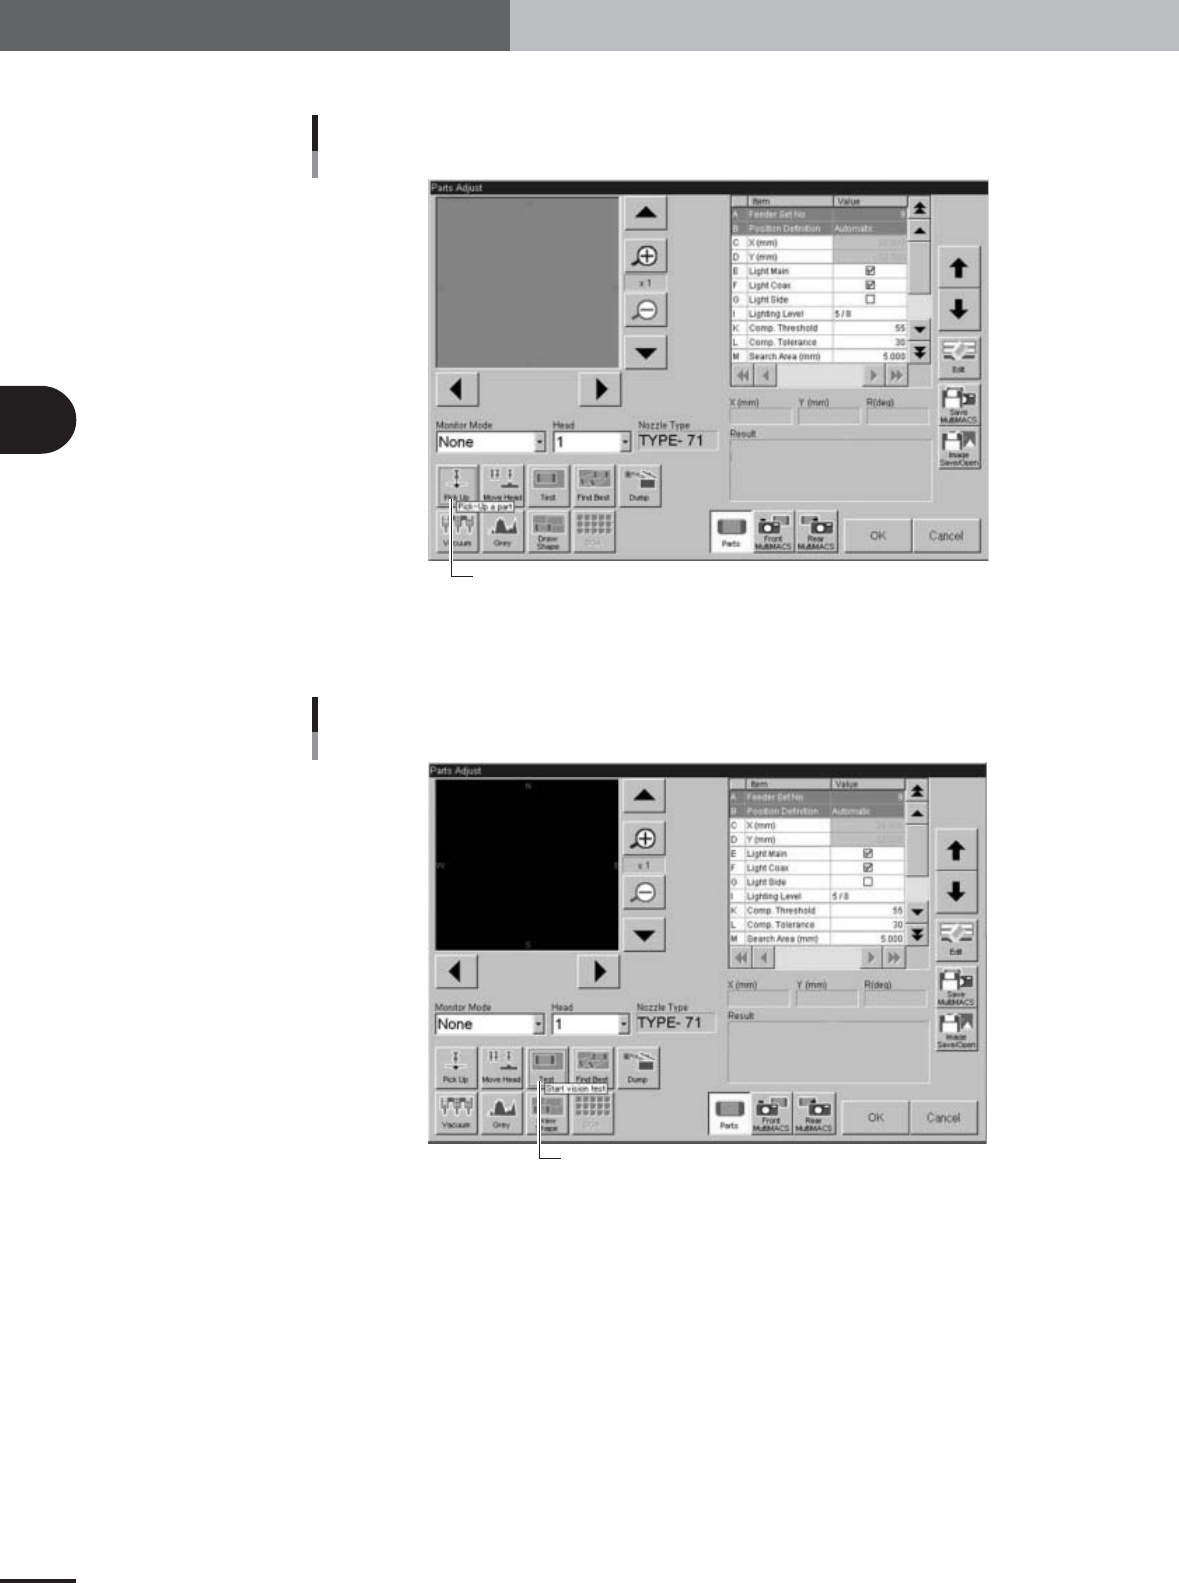
9
Press the [Pick] button to pick up a component.
[Pick Up] button
[Pick Up] button
27116-X9-00
0
Press the [Test] button to execute a vision test.
This test checks whether the component is recognized correctly.
[Test] button
[Test] button
27117-X9-00