Dual Simultaneous Programmable Pitch Rev 02.pdf - 第33页
Dual-Simultaneous Pr ogrammable Pitch Owner ’s Manual Operation © 2024 Nordson Corporation 29 17. Click E xit in the RunACL wind ow. 18. Restart EasyCoat. 4.5.2 Perform Calibration Routine The calibration routin e should…
Dual-Simultaneous Programmable Pitch Owner’s Manual Operation
28 © 2024 Nordson Corporation
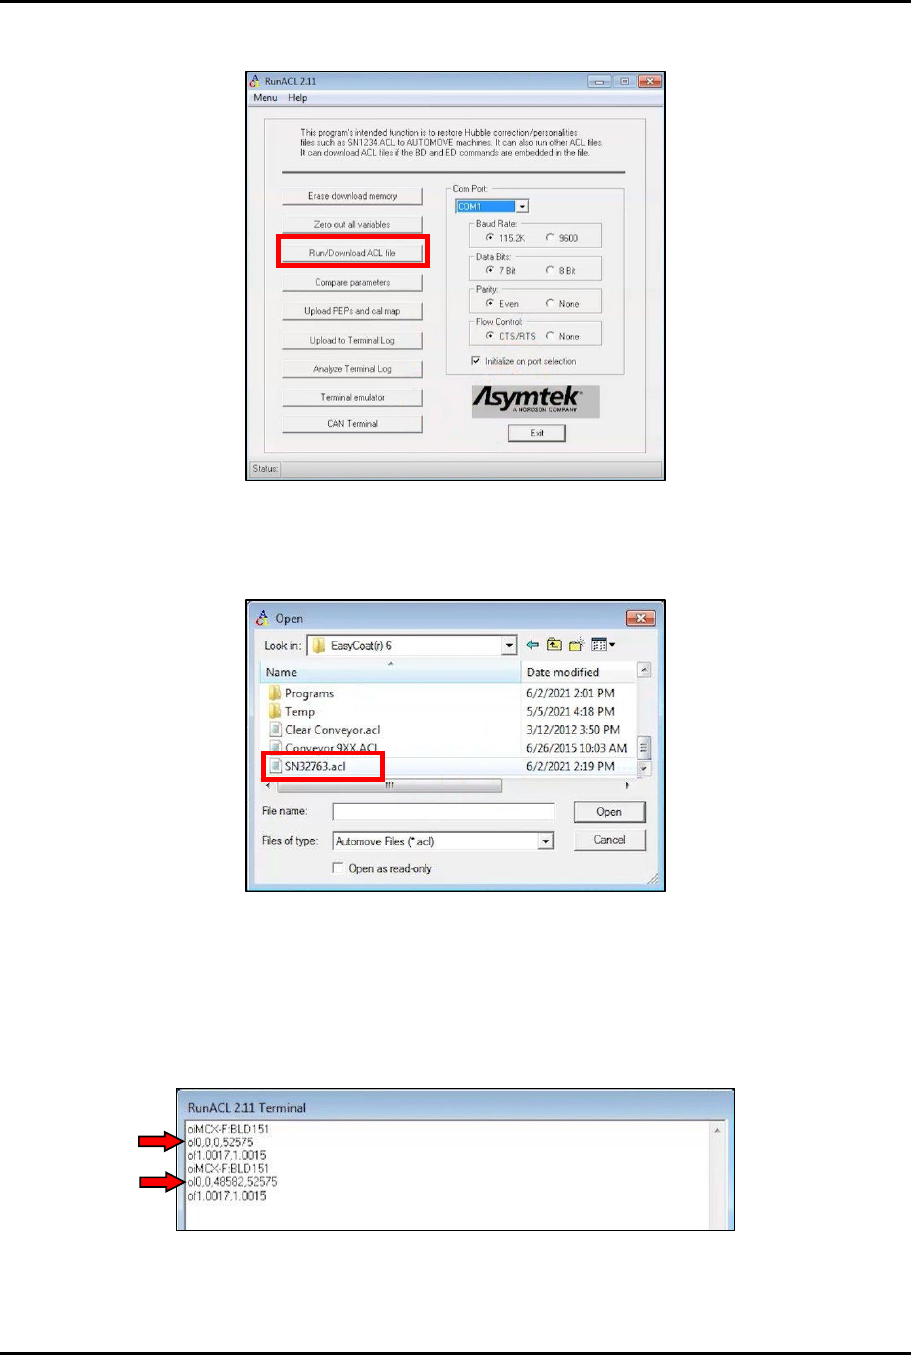
11. In the RunACL window, click on Run/Download ACL file (Figure 4-9).
Figure 4-9 Run/Download ACL File
12. In the Open window, navigate to the EasyCoat(r)6 directory and click on the SNXXXXX.acl
file (Figure 4-10).
Figure 4-10 Open SNXXXXX.acl File
13. Click Open.
14. In the RunACL window, click on Terminal emulator (Figure 4-7).
15. Make sure that the machine values have been updated by typing the following codes into
the Terminal emulator screen and checking the response (Figure 4-11): oi, ol, of.
Figure 4-11 Check Updates
16. Click Exit in the Terminal window.

Dual-Simultaneous Programmable Pitch Owner’s Manual Operation
© 2024 Nordson Corporation 29
17. Click Exit in the RunACL window.
18. Restart EasyCoat.
4.5.2 Perform Calibration Routine
The calibration routine should be performed at initial startup and any time the home flag, home sensor, or
applicators are removed or replaced.
To perform the calibration routine:
1. Open the EasyCoat software.
2. In the Operator Screen, select Edit > Edit Mode.
3. In the Edit Screen, select View > Macro Program.
4. In the Edit Screen, click on the Open icon, select Macro auto pitch_3.ECM from the
programs menu and click Open (Figure 4-12).
Figure 4-12 Open Macros
5. In the Edit Screen, locate and click on the procedure Cal & Verify (Figure 4-13).
Figure 4-13 Select Cal & Verify Procedure
Dual-Simultaneous Programmable Pitch Owner’s Manual Operation
30 © 2024 Nordson Corporation
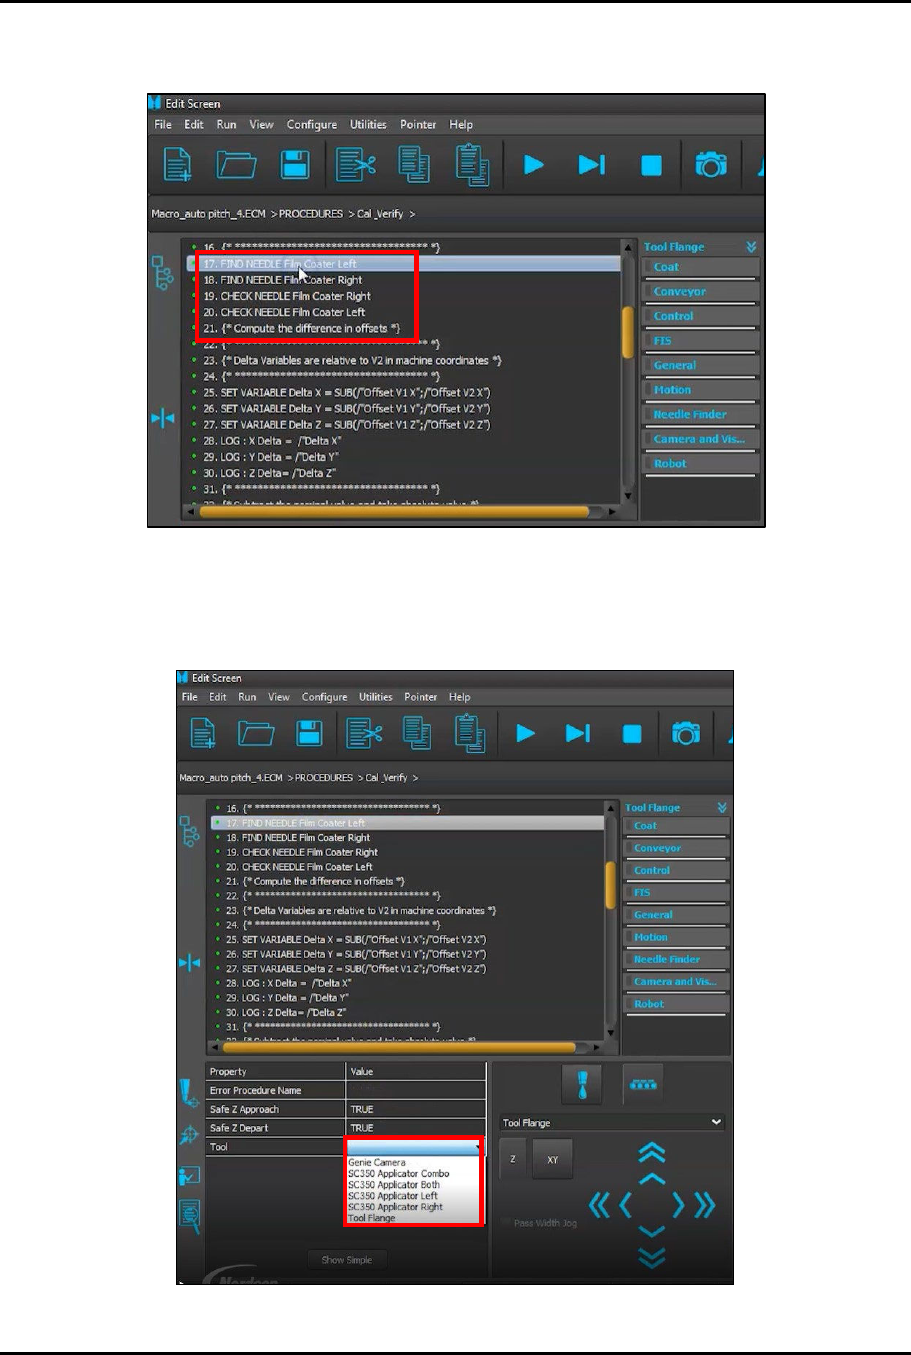
6. Scroll through the Cal & Verify procedure until you locate the applicator names
(Figure 4-14). Click on the first applicator name to highlight it.
Figure 4-14 Locate Applicator Names
7. Click on the Value for Tool to activate the drop-down list (Figure 4-15).
?
NOTE
Make a note of the exact name of each applicator on the drop-down list.
Figure 4-15 Activate Drop-Down Menu