Dual Simultaneous Programmable Pitch Rev 02.pdf - 第44页
Dual-Simultaneous Pr ogrammable Pitch Owner ’s Manual Operation 40 © 2024 Nordson Corporation 9. Place the c ursor over the circle in t he center of the l ine, click-and-drag to move th e program start point t o a differ…

Dual-Simultaneous Programmable Pitch Owner’s Manual Operation
© 2024 Nordson Corporation 39
4. Save and close the ECW.ini file.
5. Start the EasyCoat software.
6. In the Operator Screen, click on Edit > Edit Mode to enter the Edit Screen.
7. In the Edit Screen, load the Dual Simultaneous Testing.ECW procedure (Figure 4-35).
Figure 4-35 Load Dual Simultaneous Testing.ECW Procedure
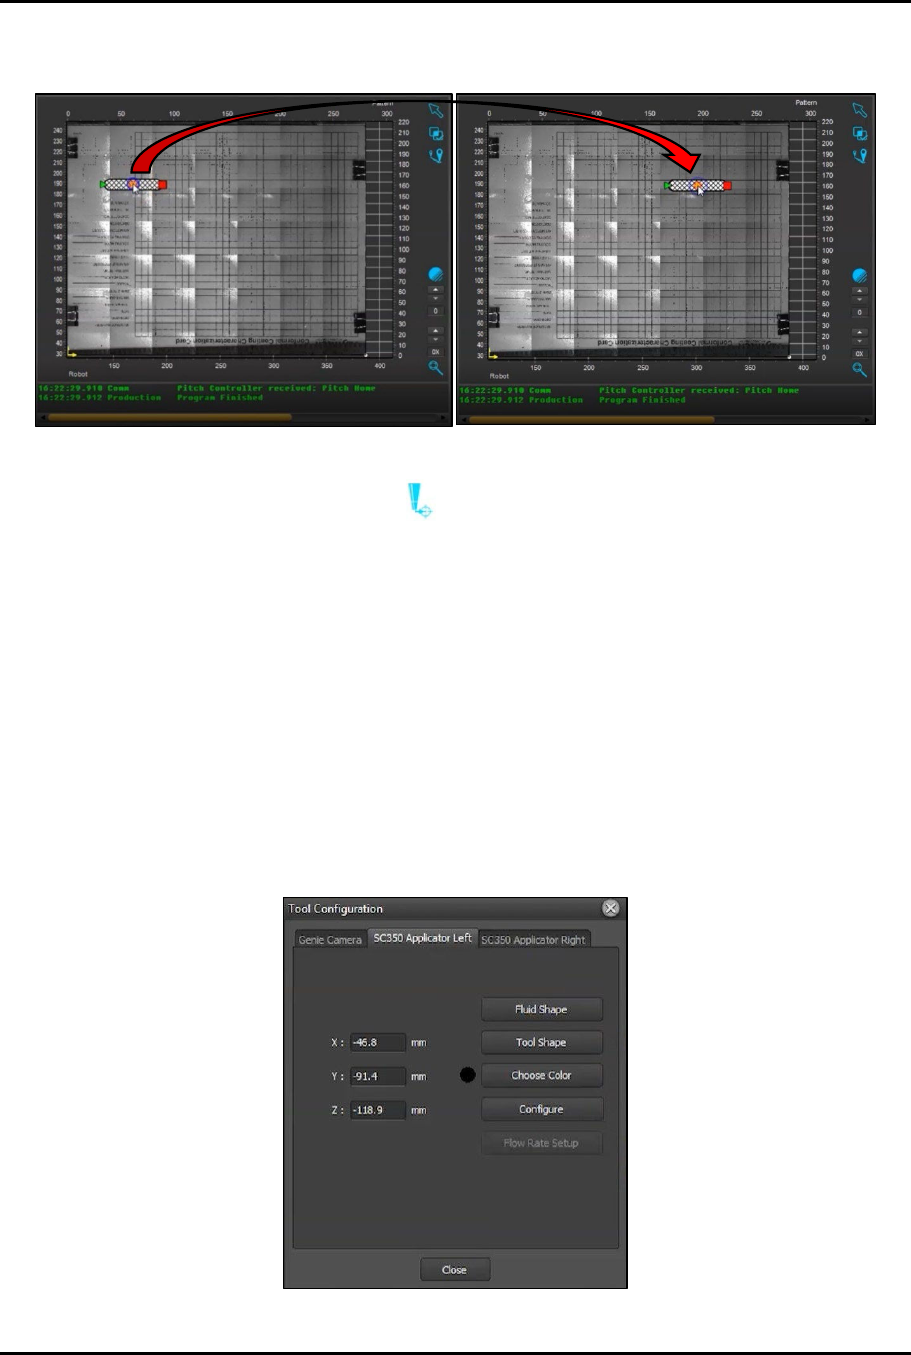
8. Under PATTERNS, click on Part (Figure 4-35) and then click on 1. COAT with SC350…
(Figure 4-36).
Figure 4-36 Select Program to Test Master Valve
Dual-Simultaneous Programmable Pitch Owner’s Manual Operation
40 © 2024 Nordson Corporation
9. Place the cursor over the circle in the center of the line, click-and-drag to move the program
start point to a different location within the screen (Figure 4-37).
Figure 4-37 Move Starting Location
10. Click on the Go To (Tool) button and make sure that the right (master) valve moves to
the new starting point.
> If the right (master) valve does not move to the new starting point, contact Technical
Support.
4.5.4 Perform Characterization Process
The characterization and programming procedure should be performed at initial startup and any time the
home flag, home sensor, or applicators are removed or replaced.
To perform the characterization process:
1. Open the EasyCoat software.
2. In the Operator Screen, select Edit > Edit Mode.
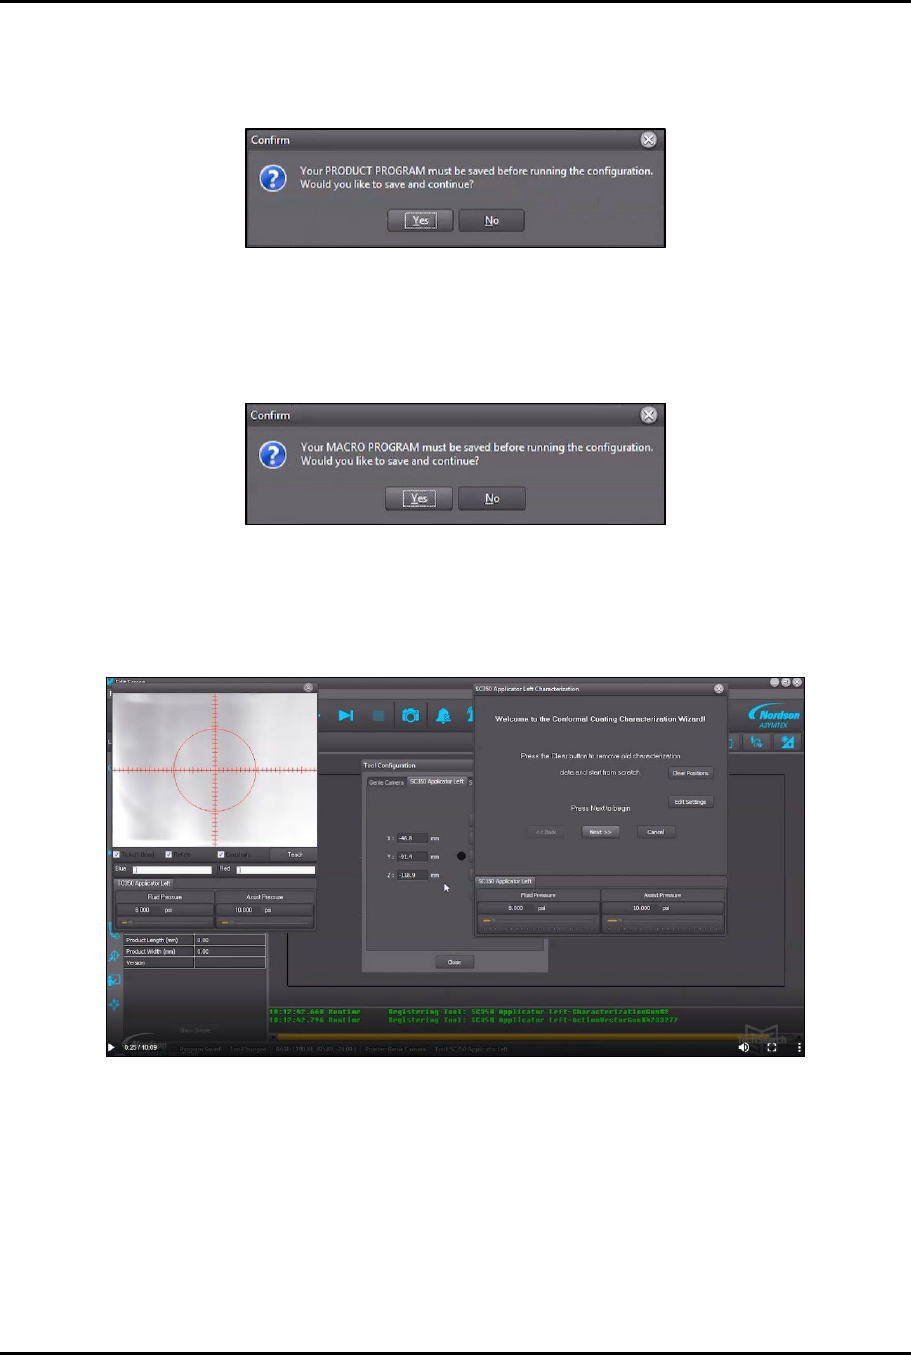
3. In the Edit Screen, click Configure > Tools to open Tool Configuration (Figure 4-38).
Figure 4-38 Tool Configuration
Dual-Simultaneous Programmable Pitch Owner’s Manual Operation
© 2024 Nordson Corporation 41
4. In Tool Configuration, select Applicator Left and click on Configure.
> A box will open the product program must be saved before running configuration
(Figure 4-39).
Figure 4-39 Save Program Before Running
5. Click Yes.
6. Another box will open indicating that the macro program must be saved before running
configuration (Figure 4-40).
Figure 4-40 Save Macro Before Running
7. Click Yes.
> The Characterization Wizard opens along with a view screen with hash mark overlays
(Figure 4-41).
Figure 4-41 Characterization Wizard
8. In the Characterization Wizard, click on Clear Positions to remove any existing
characterization data.
9. Click Next to begin characterization.
?
NOTE
If this is the first time that the characterization process has been performed, you
will be asked to teach the substrate height.
10. Click Yes.