Dual Simultaneous Programmable Pitch Rev 02.pdf - 第46页
Dual-Simultaneous Pr ogrammable Pitch Owner ’s Manual Operation 42 © 2024 Nordson Corporation 11. Use the jog contro ls to lower the dispense hea d until t he tip of the appl icator touches the substrate. 12. In th e Tea…
Dual-Simultaneous Programmable Pitch Owner’s Manual Operation
© 2024 Nordson Corporation 41
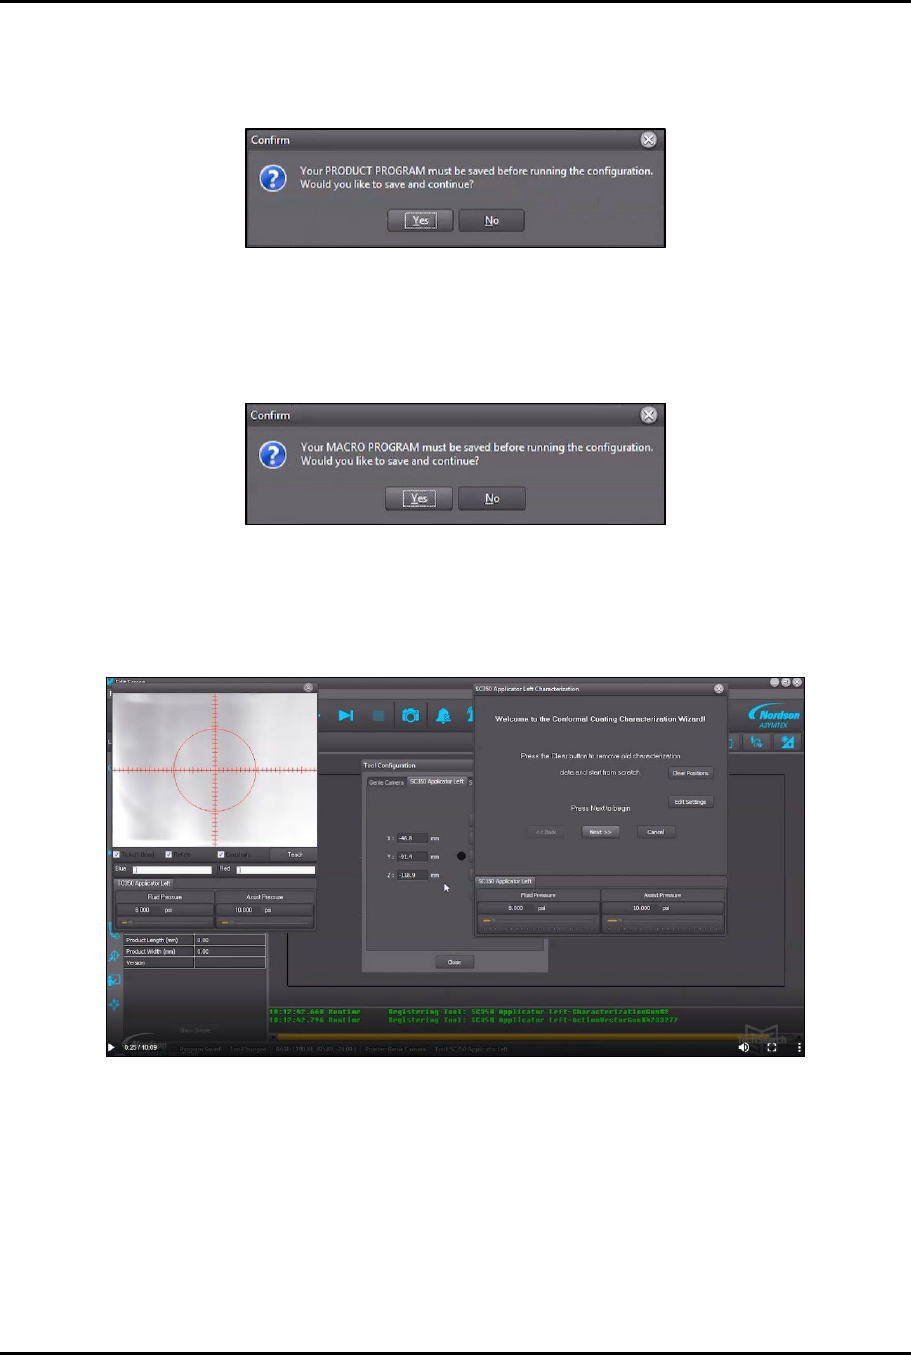
4. In Tool Configuration, select Applicator Left and click on Configure.
> A box will open the product program must be saved before running configuration
(Figure 4-39).
Figure 4-39 Save Program Before Running
5. Click Yes.
6. Another box will open indicating that the macro program must be saved before running
configuration (Figure 4-40).
Figure 4-40 Save Macro Before Running
7. Click Yes.
> The Characterization Wizard opens along with a view screen with hash mark overlays
(Figure 4-41).
Figure 4-41 Characterization Wizard
8. In the Characterization Wizard, click on Clear Positions to remove any existing
characterization data.
9. Click Next to begin characterization.
?
NOTE
If this is the first time that the characterization process has been performed, you
will be asked to teach the substrate height.
10. Click Yes.
Dual-Simultaneous Programmable Pitch Owner’s Manual Operation
42 © 2024 Nordson Corporation
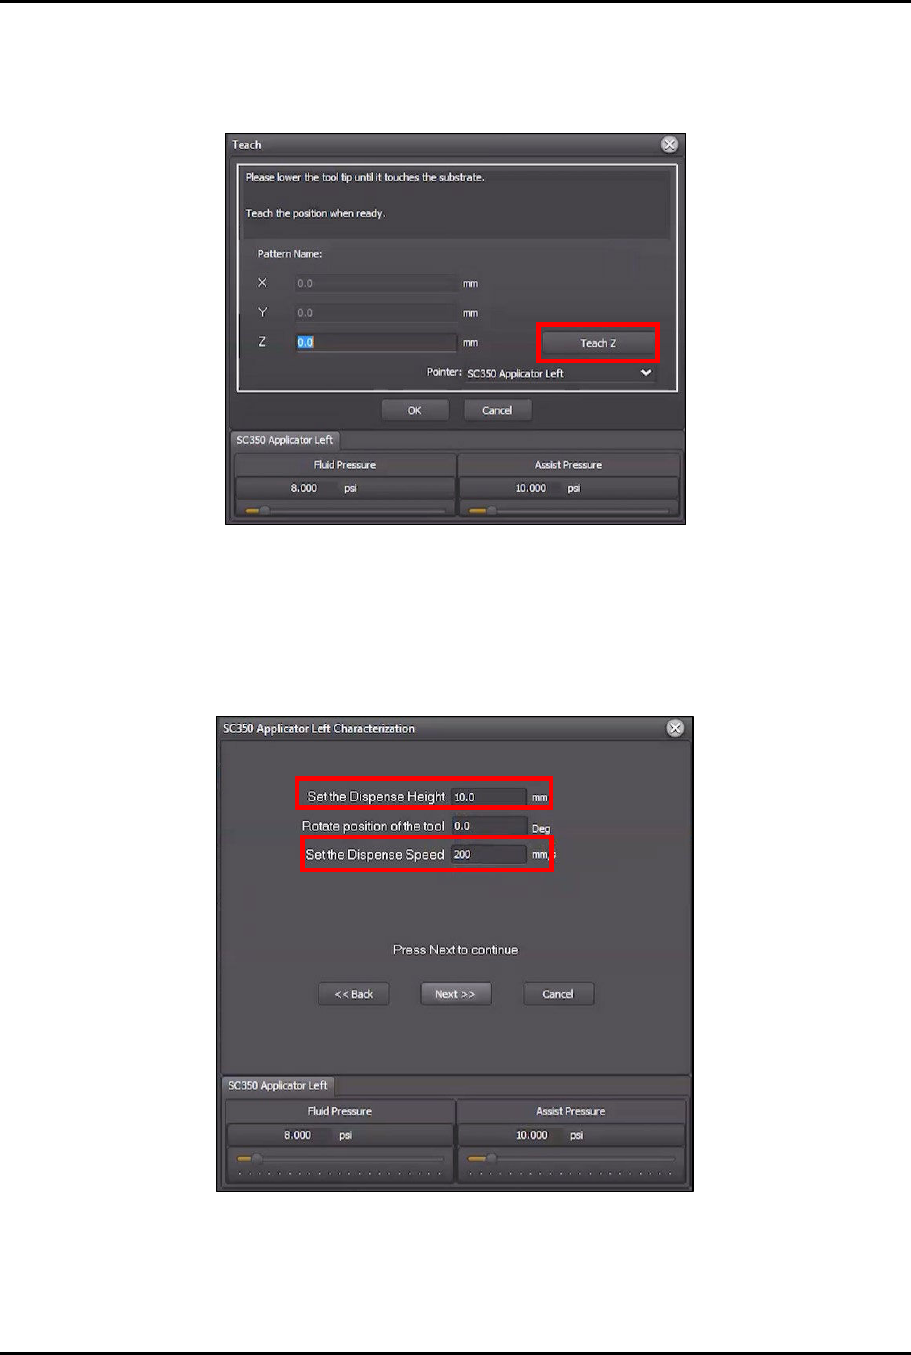
11. Use the jog controls to lower the dispense head until the tip of the applicator touches the
substrate.
12. In the Teach window, click Teach Z (Figure 4-42).
Figure 4-42 Teach Z
> The Z value should change to a negative number.
13. Click OK to close the Teach window.
14. In the Characterization Wizard, change the Set the Dispense Height to 10 mm, and
change the Set Dispense Speed to 200 mm/s (Figure 4-43).
Figure 4-43 Change Height and Speed
15. Click Next.
> The Characterization Wizard will ask you to center the applicator over the intersection of
dotted lines in the lower left corner of the screen.
Dual-Simultaneous Programmable Pitch Owner’s Manual Operation
© 2024 Nordson Corporation 43
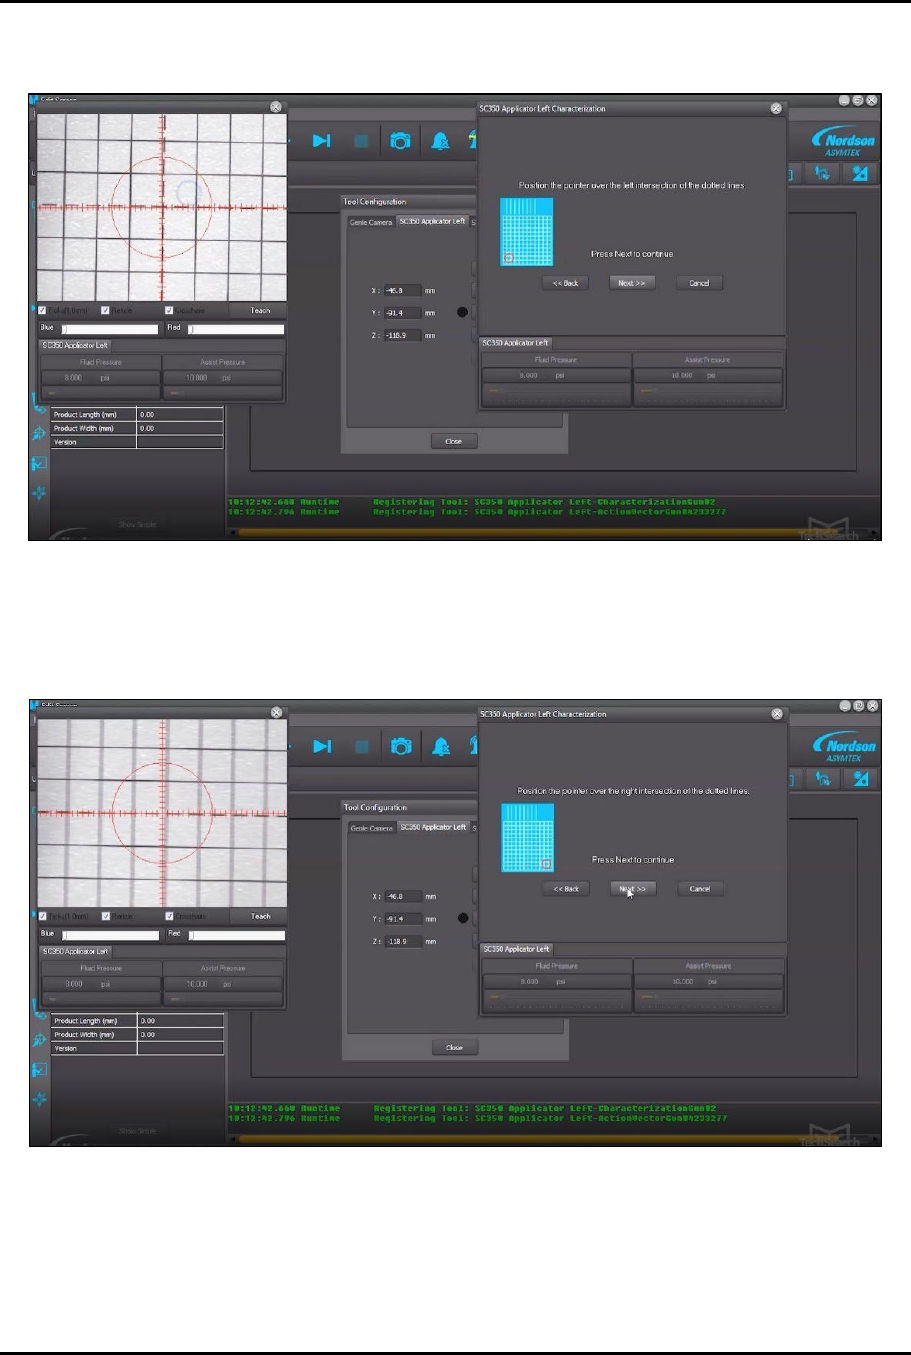
16. Move the dispense head to center the applicator over the lower left intersection of dotted
lines on the characterization card (Figure 4-44).
Figure 4-44 Lower Left Corner
17. Click Next.
18. Move the dispense head to center the applicator over the lower right intersection of dotted
lines (Figure 4-45).
Figure 4-45 Lower Right Corner
19. Click Next.