M3plus_OperationManual_e.pdf - 第145页
4 - 10 4 Using the adv anced functions 3. Mark parameters 4 Press the [Adjust] button to open the Mark Adjust screen. Mark Adjust screen 27453-5E-20 5 Set the PCB on the conveyor and clamp it. 6 Move the head so the patt…

4 -9
4
Using the advanced functions
3. Mark parameters
3.1.1 Pattern registration
To utilize pattern matching, you must register the reference pattern in the template.
1
Decide on the pattern.
Decide which pattern you want to use for pattern matching. Select a pair of patterns
that meet the conditions explained previously.
2
Enter the pattern name in the mark information.
Open the Mark screen and, in the Mark Name column, enter the name that you can
easily identify as a pattern.
3
Set the parameters.
Set the parameters as follows.
1.Set "Mark Type" of the Basic parameters to "Fiducial".
2.Set "Algorithm Type" of the Vision parameters to "PTRN Outline" or "PTRN
GrayLev".
• PTRN Outline:
In most cases, select this parameter for pattern matching. When the outline is
definite, the pattern can be recognized even if uneven brightness portions are
present inside the pattern.
• PTRN GrayLev:
Selecting this parameter is more effective in recognizing a pattern whose brightness
is uniform inside the pattern. Since the entire pattern is recognized, this parameter
setting requires a longer time than in the "PTRN Outline" setting and also the data
size will be larger.
• PTRN Whole:
Selecting this parameter is effective in acquiring details of a pattern image. Since
the entire pattern is recognized and less compressed, this parameter setting requires
a longer time than in the "PTRN GrayLev" setting and also the data size will be
even more larger.
Enter the pattern name.
Pattern setting
Set to "PTRN Outline", "PTRN GrayLev" or "PTRN Whole".
27451-5E-20
Pattern recognition types
PTRN outline
Brightness is uneven inside the pattern
but the outline is clearly defined.
PTRN GrayLev
PTRN Whole
Brightness is uniform inside the pattern.
23443-5E-20
4 -10
4
Using the advanced functions
3. Mark parameters
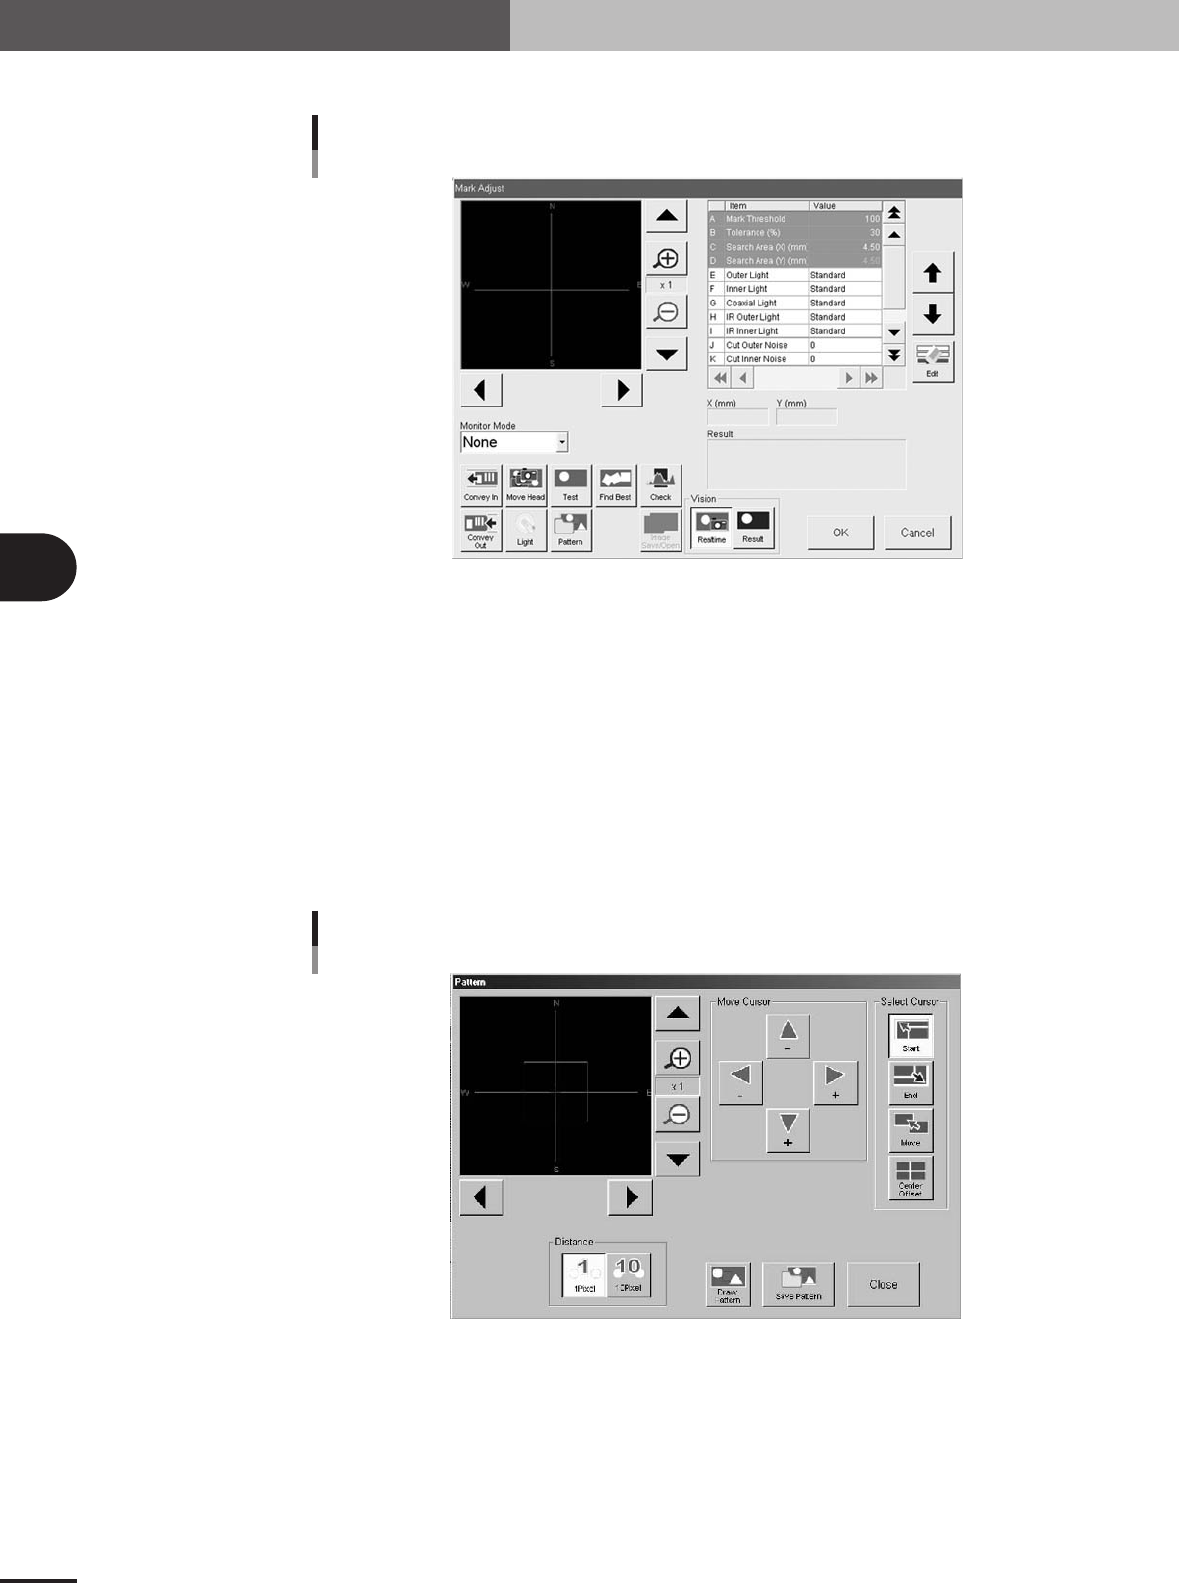
4
Press the [Adjust] button to open the Mark Adjust screen.
Mark Adjust screen
27453-5E-20
5
Set the PCB on the conveyor and clamp it.
6
Move the head so the pattern is displayed in the center of the vision
monitor.
Use the Move Head button to move the head. When the head is positioned, press the
[OK] button to return to the Mark Adjust screen.
7
Adjust the mark lighting levels.
Press the [Light] button and adjust the mark lighting levels so that the pattern can be
clearly seen.
8
Press the [Pattern] button.
The Pattern registration screen appears as shown below.
Pattern registration screen
27454-5E-20
4 -11
4
Using the advanced functions
3. Mark parameters
9
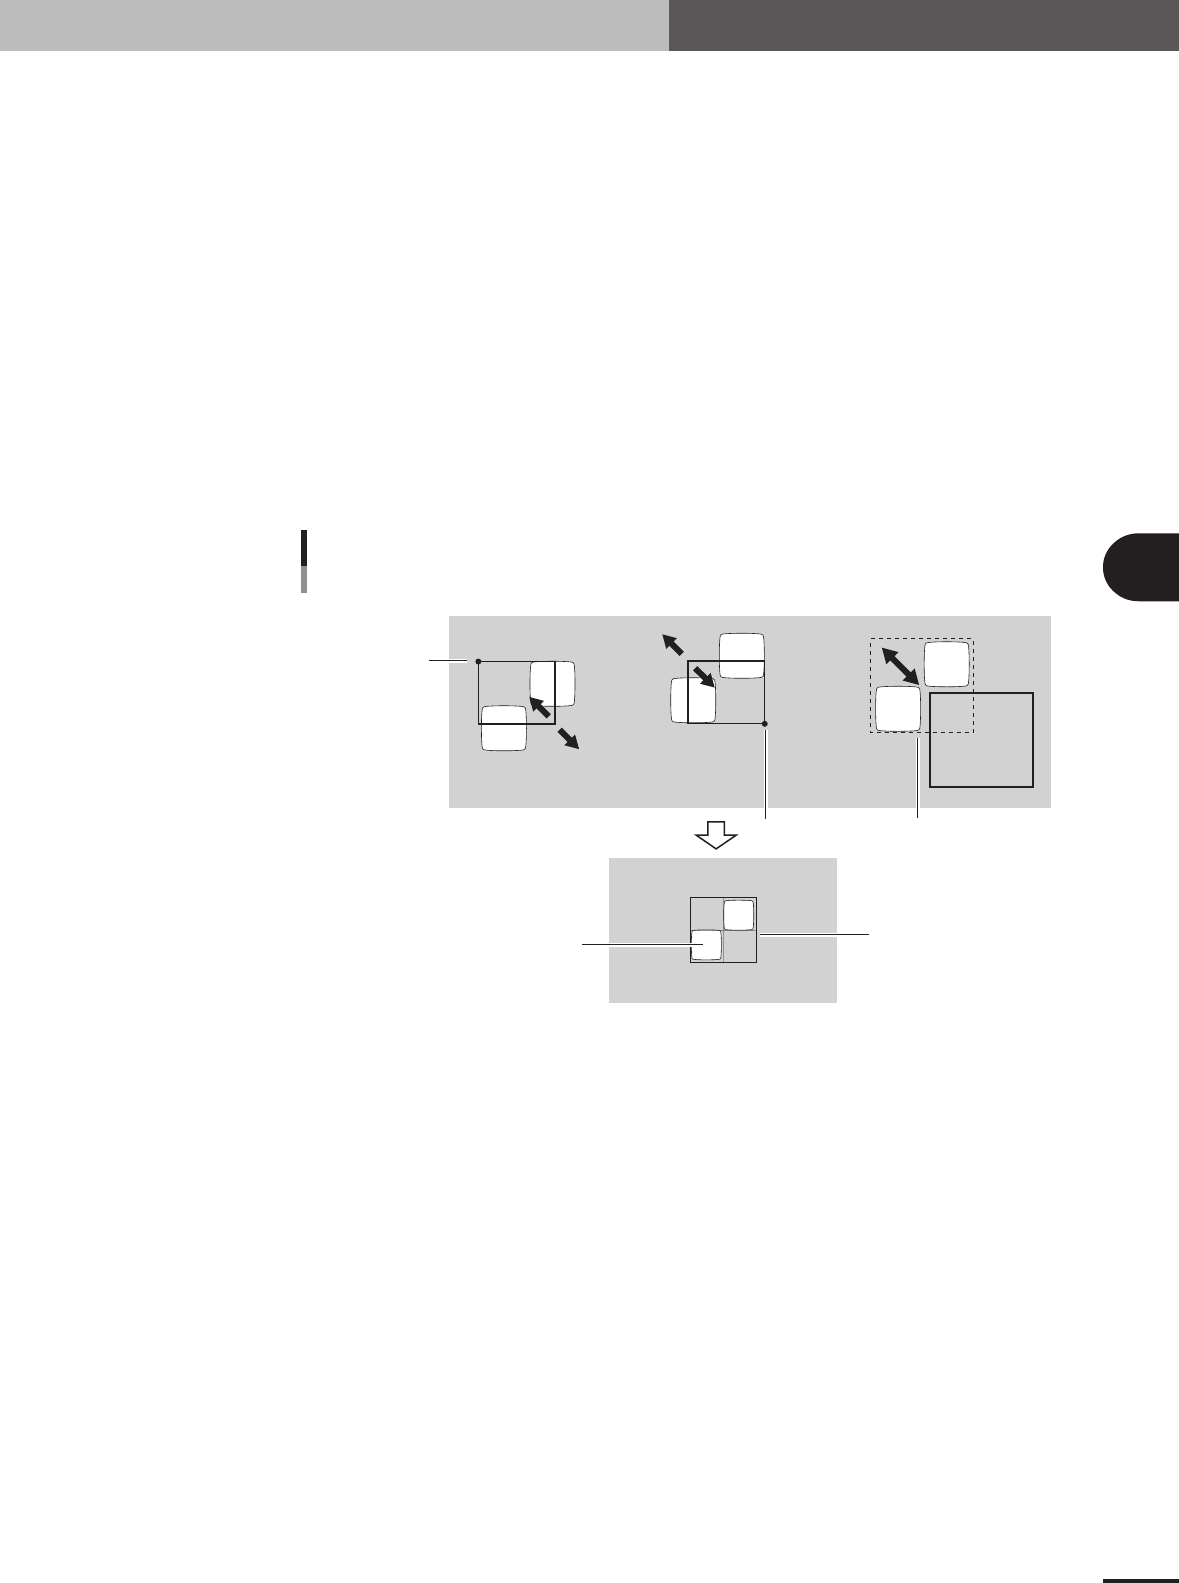
Decide on the pattern size.
By using the cursor selection buttons and arrow buttons, adjust the window size and
position to enclose the entire pattern. The function of each button is as follows.
[Start] button
The window can be enlarged or reduced with the arrow keys, using the lower right
corner of the window as a start point.
[End] button
The window can be enlarged or reduced with the arrow keys, using the upper left
corner of the window as a start point.
[Move] button
The entire window moves with the arrow keys.
[Center Offset] button
Press this button when you want to shift the reference position from the center of
the window. (The reference position is displayed as a pink cross cursor.)
[1 Pixel / 10 Pixel] buttons
Press these buttons to change the distance that the window moves each time you
press an arrow button.
Window movement and adjustment
Stationary point
Stationary point
Entire window moves
[End] button [Start] button [Move] button
Pattern
Enclose the pattern.
23444-5E-20
0
Set the reference position in the pattern.
If you want to shift the reference position from the center of the window, proceed as
follows.
1.Press the [Center Offset] button.
2.Use the arrow buttons to move the cross cursor indicating the reference position
(pink cross cursor) to the desired point.
q
Save the pattern data as a template.
Check that the center of the pattern is within the window and then press the [Save
Pattern] button.
w
Check the pattern image.
Pressing the [Draw Pattern] button displays the pattern image that has been obtained.
Check the shape.
e
Return to the Mark Adjust screen.
Press the [Close] button to return to the Mark Adjust screen.