M3plus_OperationManual_e.pdf - 第248页
2 - 3 2 Ho w to handle and operate the TSF1 2.2 Setting up the component tray 1 Open the TSF1 upper safety cover. After pressing the emergency stop button on the TSF1, open the TSF1 upper safety cover. 2 Release the hold…
2 -2
2
How to handle and operate the TSF1
2
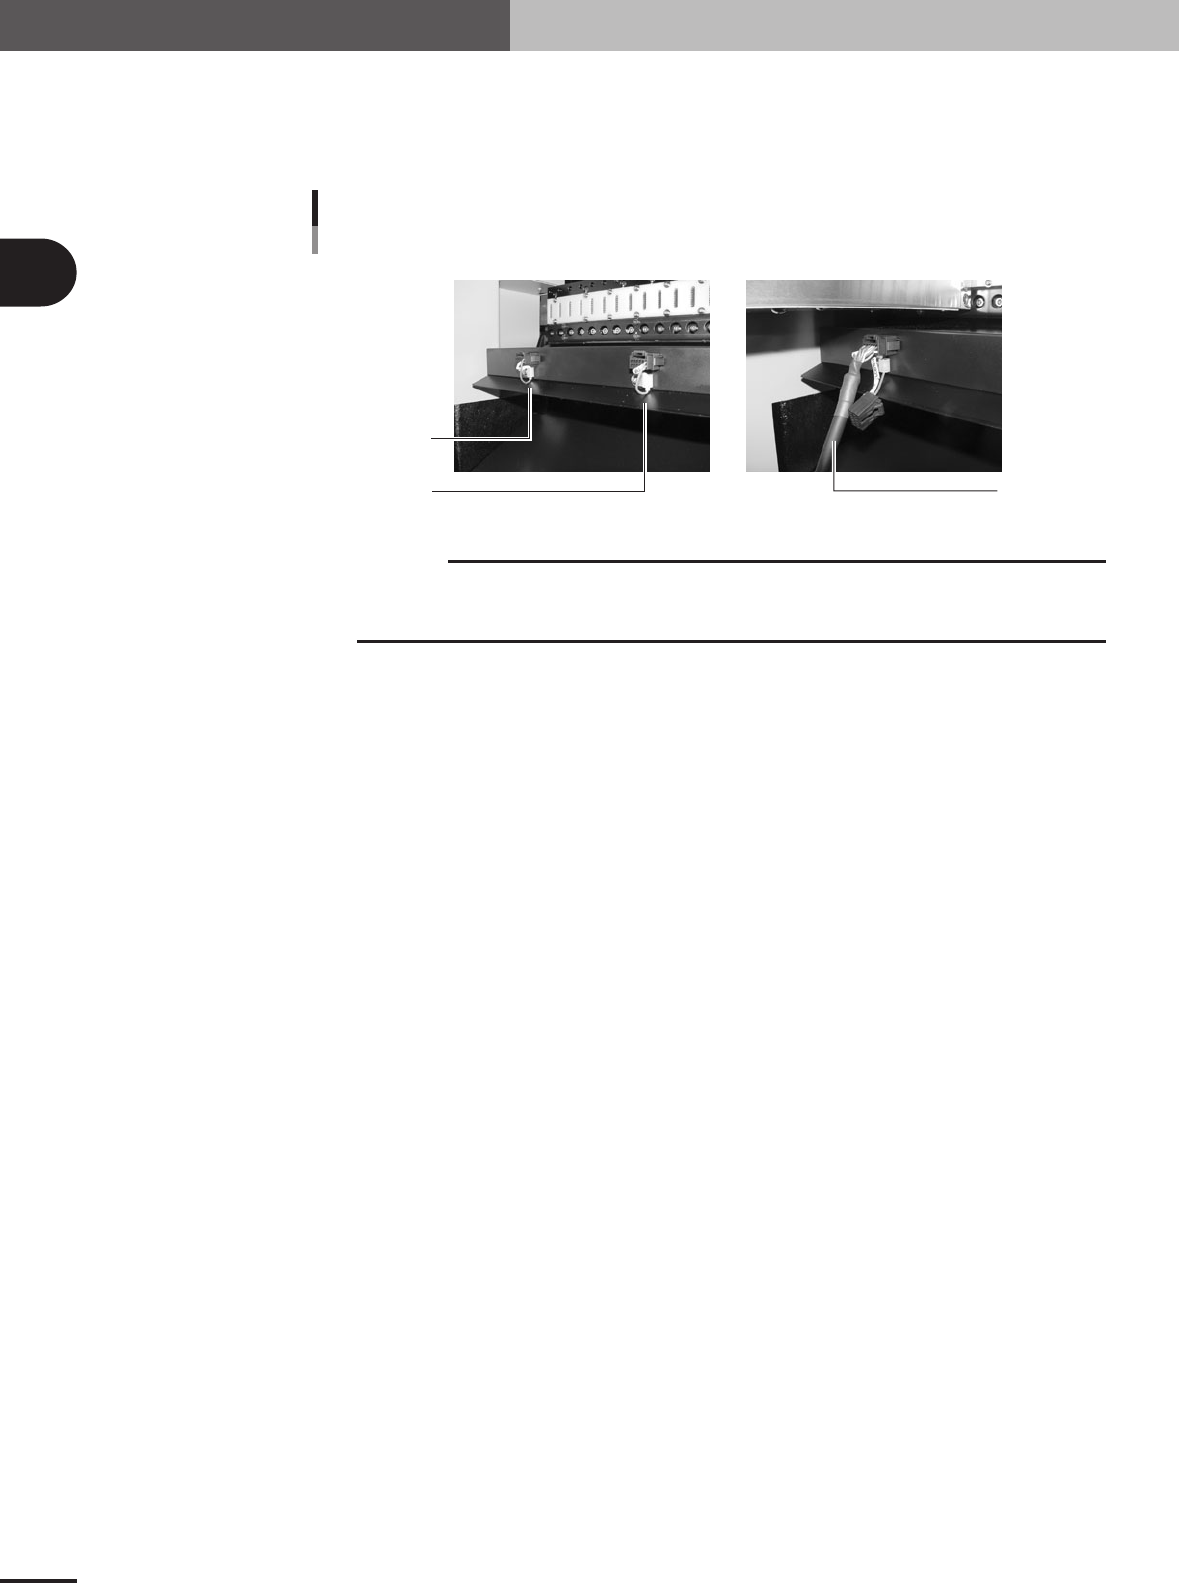
Connect the signal cable.
Unplug the shorting connector (LC2-M51FK-XXX) from the feeder plate connector
located under the feeder position where you are gong to install the TSF1. Then plug in
the TSF1 signal cable connector.
Short connector and signal connector
Shorting connector
Signal cable
For position 1
For position 2
73200-5V-00
c
CAUTION
Shorting connectors are connected by a nylon tie to the side panel of the feeder plate. After
unplugging a shorting connector, leave it connected to the side panel of the feeder plate to
avoid losing it.
3
Start the mounter and TSF1.
Use the following steps to start the mounter and TSF1.
1. Make sure the safety covers for the mounter and TSF1 are all closed.
2. Release the emergency stop button on the TSF1.
3.Start the mounter. (The TSF1 will also start automatically.)
4.Return the mounter to the origin position. (The TSF1 will also return to its origin
position.)
2 -3
2
How to handle and operate the TSF1
2.2 Setting up the component tray
1
Open the TSF1 upper safety cover.
After pressing the emergency stop button on the TSF1, open the TSF1 upper safety
cover.
2
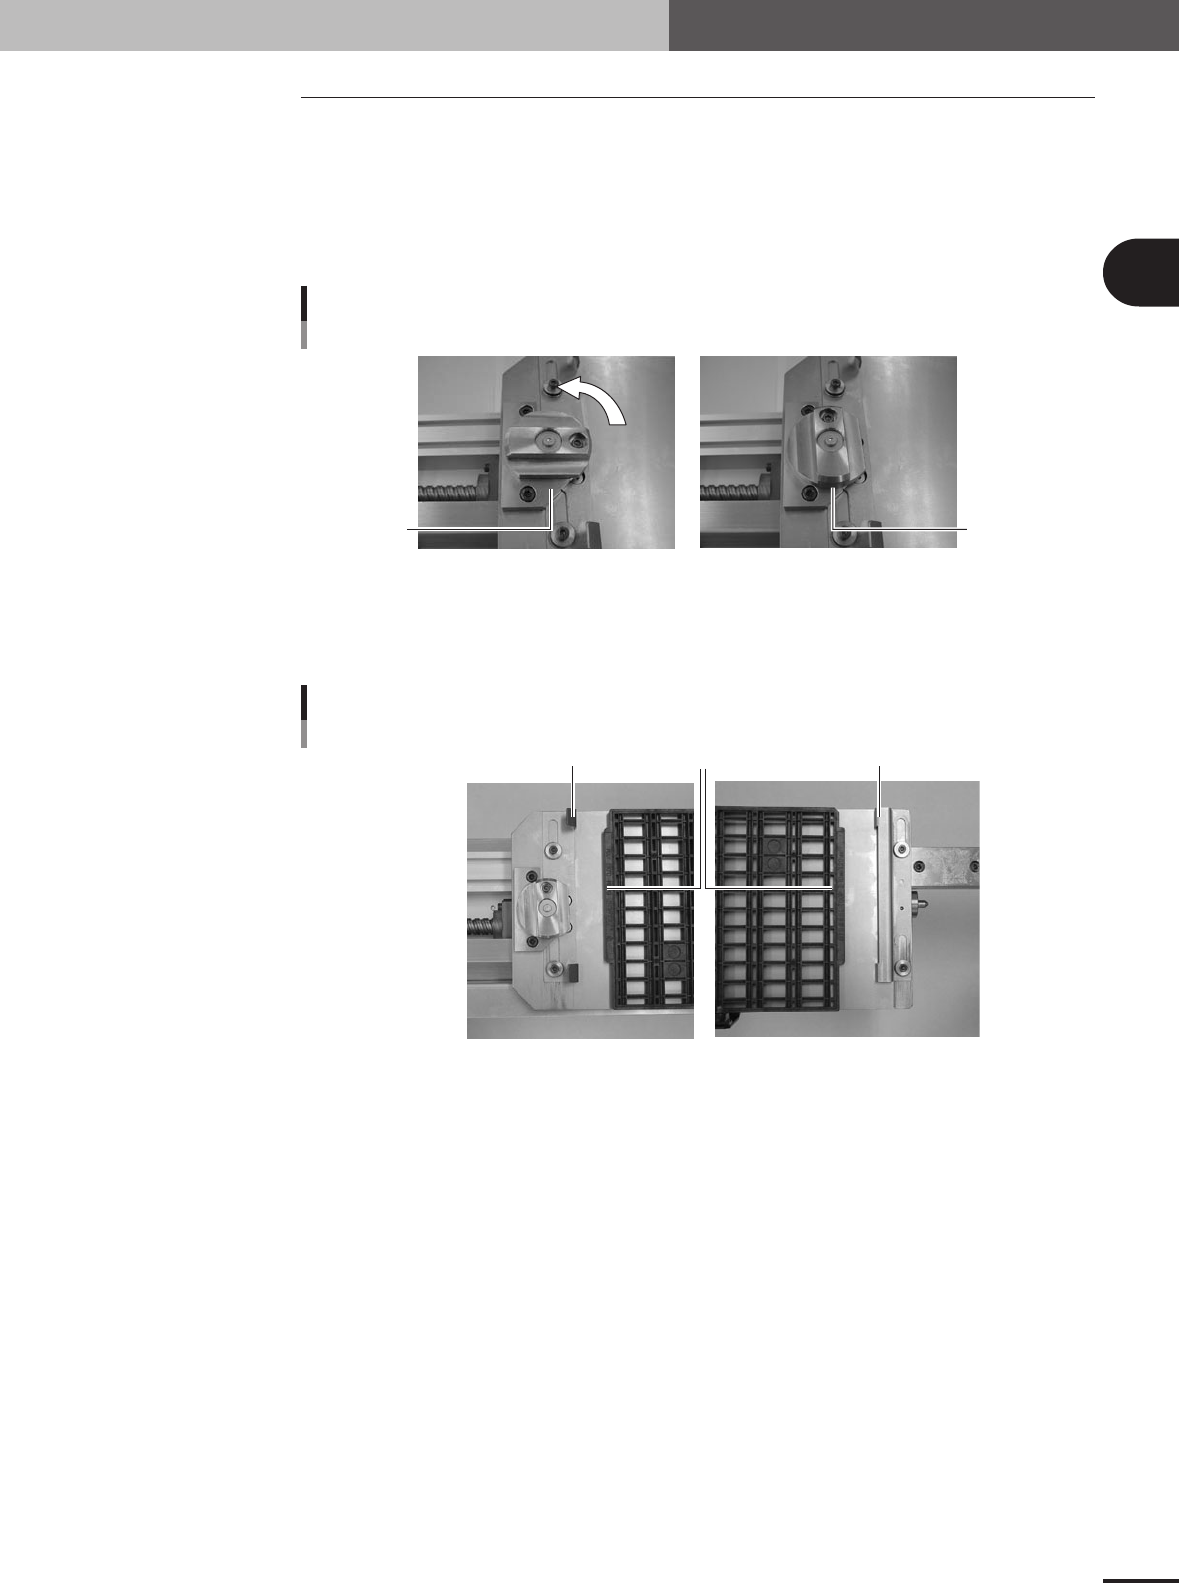
Release the hold knob.
Turn the hold knob to the release position.
Releasing the hold knob
Release position
Hold position
73201-5V-00
3
Adjust the tray guide positions.
Slide the tray guides F and R right or left so that they align with the protruding edges
of the tray.
Tray guide alignment
Tray protruding edge
Tray guide F
Tray guide R
73202-5V-00
e
2 -4
2
How to handle and operate the TSF1
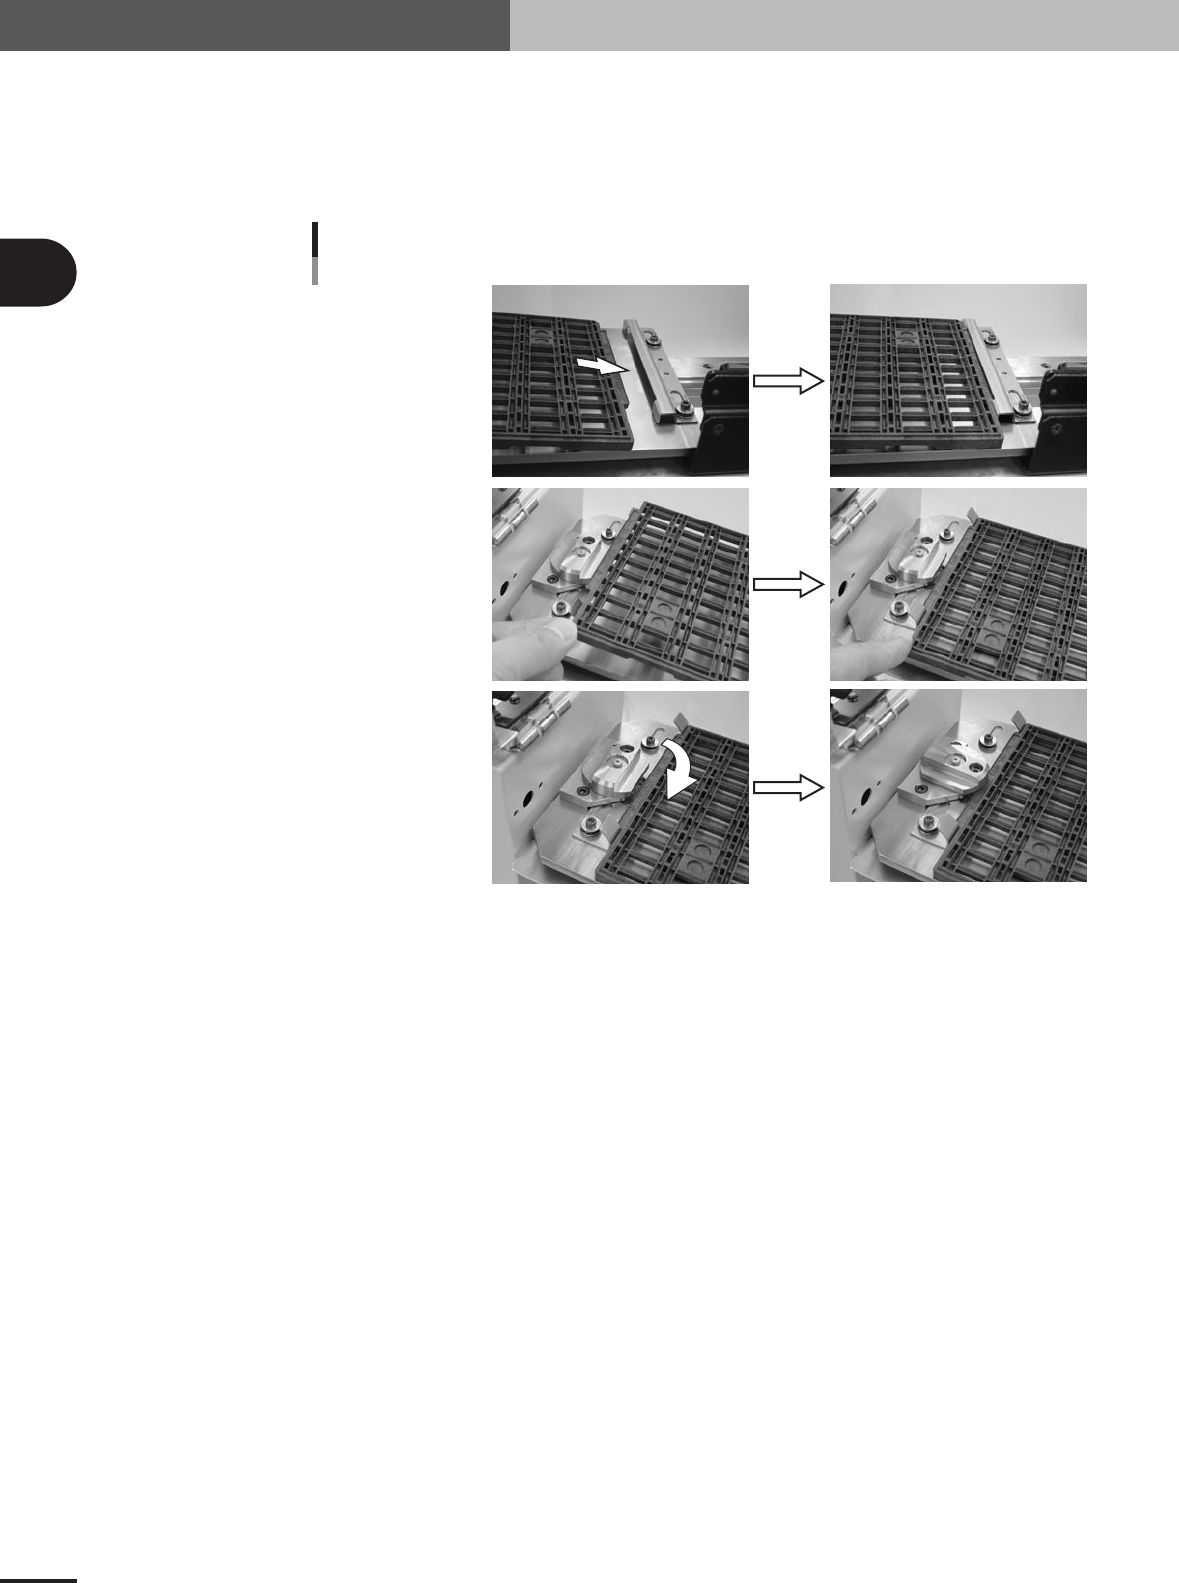
4
Set the tray on the shuttle.
1.Gently insert the mounter-side protruding edge of the tray into the tray guide F.
2.Gently place the opposite protruding edge of the tray between the bent up metal
pieces of the tray guide R.
3.Turn the hold knob to clamp the tray.
Insert into tray guide F.
Securing the tray
Set the tray in tray guide R.
Tu rn the hold knob.
73203-5V-00
5
Close the TSF1 upper safety cover.
Make sure the tray is securely clamped on the shuttle and then close the TSF1 upper
safety cover.
6
Release the emergency stop button on the TSF1.