M3plus_OperationManual_e.pdf - 第249页
2 - 4 2 Ho w to handle and operate the TSF1 4 Set the tray on the shuttle. 1. Gently insert the mounter-side protruding edge of the tray into the tray guide F. 2. Gently place the opposite protruding edge of the tray bet…
2 -3
2
How to handle and operate the TSF1
2.2 Setting up the component tray
1
Open the TSF1 upper safety cover.
After pressing the emergency stop button on the TSF1, open the TSF1 upper safety
cover.
2
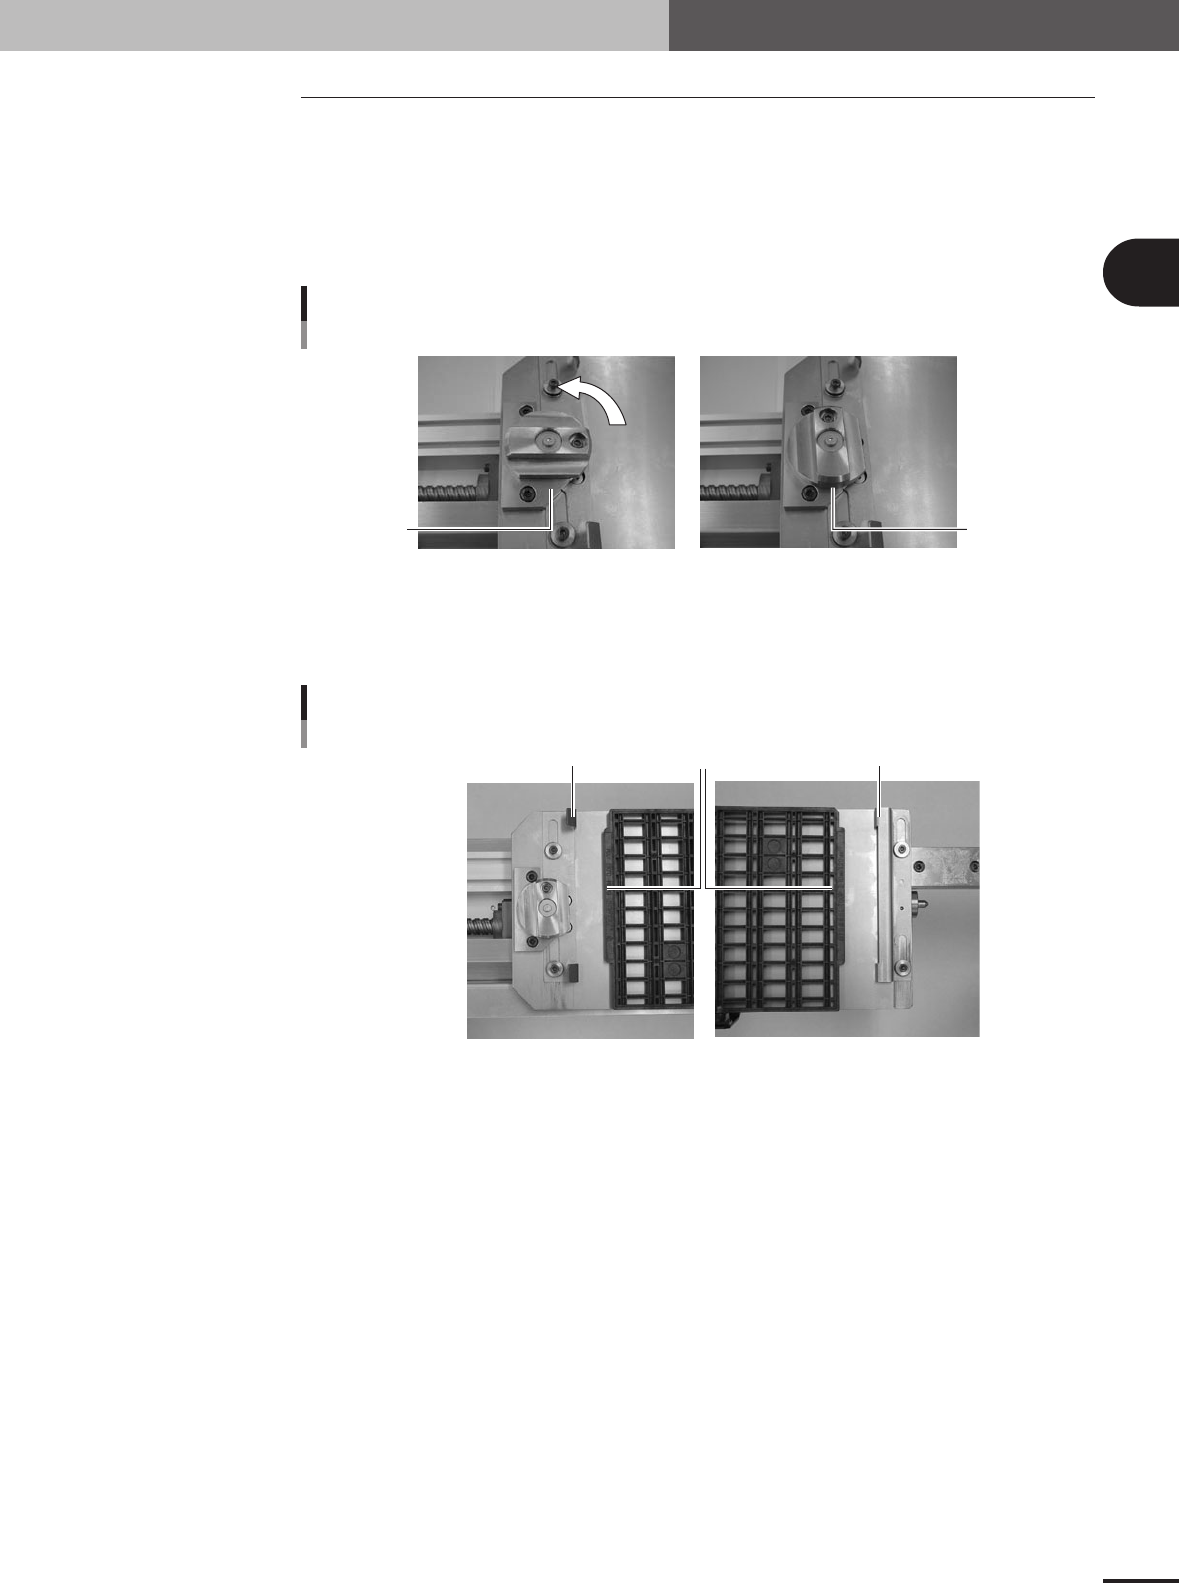
Release the hold knob.
Turn the hold knob to the release position.
Releasing the hold knob
Release position
Hold position
73201-5V-00
3
Adjust the tray guide positions.
Slide the tray guides F and R right or left so that they align with the protruding edges
of the tray.
Tray guide alignment
Tray protruding edge
Tray guide F
Tray guide R
73202-5V-00
e
2 -4
2
How to handle and operate the TSF1
4
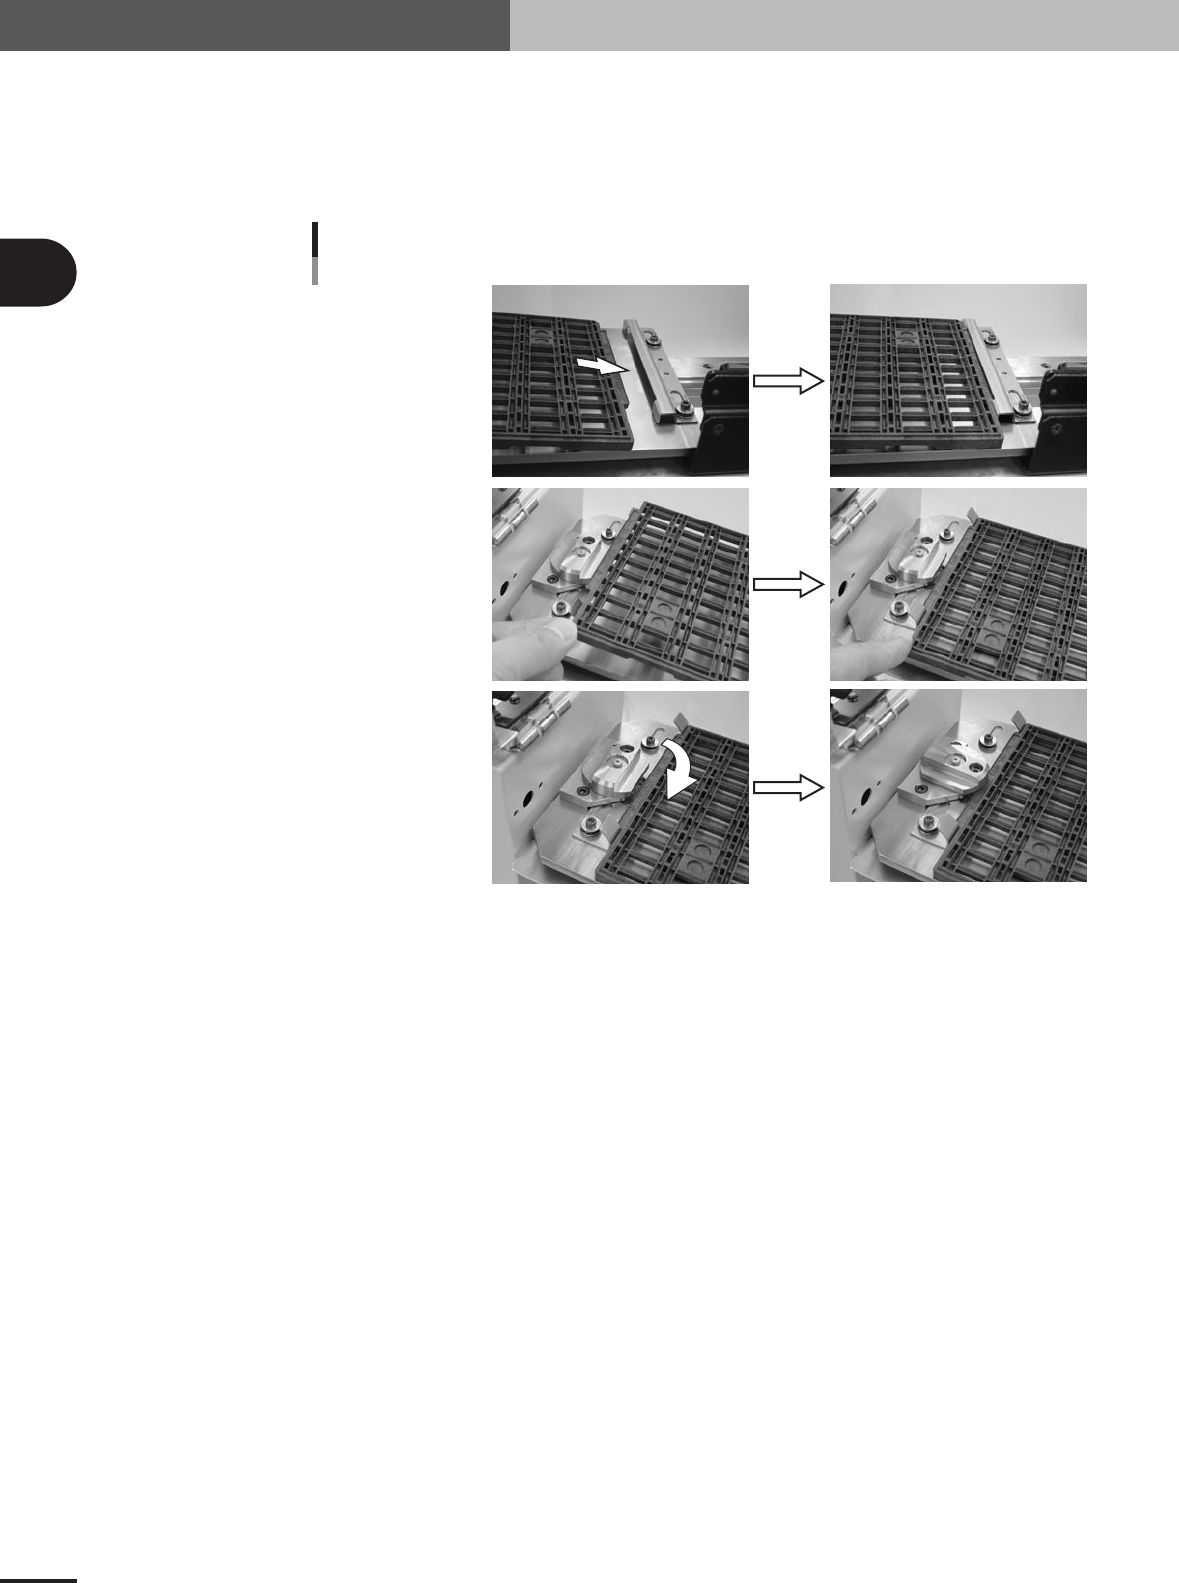
Set the tray on the shuttle.
1.Gently insert the mounter-side protruding edge of the tray into the tray guide F.
2.Gently place the opposite protruding edge of the tray between the bent up metal
pieces of the tray guide R.
3.Turn the hold knob to clamp the tray.
Insert into tray guide F.
Securing the tray
Set the tray in tray guide R.
Tu rn the hold knob.
73203-5V-00
5
Close the TSF1 upper safety cover.
Make sure the tray is securely clamped on the shuttle and then close the TSF1 upper
safety cover.
6
Release the emergency stop button on the TSF1.

2 -5
2
How to handle and operate the TSF1
2.3 Detaching the TSF1
1
Turn off the mounter power switch.
n
NOTE
After production is finished, the shuttle automatically moves to the tray replacement position. If the shuttle is not
at the tray replacement position when you start the shutdown process with the servo turned on, the shuttle will
automatically move to the tray replacement position during the process of turning the power off. However, if you
start the shutdown process with the servo turned off, the shuttle will fail to move to the tray replacement position.
If that happens, wait until the mounter power completely turns off, and then move the shuttle by hand to the tray
replacement position.
2
Remove the component tray.
1.Open the TSF1 upper safety cover.
2. Remove the tray in the reverse of the above procedure explained in section 2.2,
"Setting up the component tray".
3. Close the TSF1 upper safety cover.
3
Disconnect the signal cable.
Unplug the TSF1 signal cable connector from the feeder plate connector, and then
plug in the shorting connector (LC2-M51FK-XXX).
4
Detach the TSF1 from the feeder plate.
While pulling up the clamp lever to unclamp the TSF1, gently detach the entire unit of
the TSF1 from the feeder plate.
n
NOTE
When not using the TSF1 after detaching it, reattach the feeder plate safety hoods of the mounter and change the
machine setting to specifications that do not use the TSF1. (For information on how to change the specifications,
see Chapter 3, "Setup".)