M3plus_OperationManual_e.pdf - 第203页
6 - 8 6 Managing the data 3. Creating XML library 3.2 Setting the PCB data links This section explains how to establish links with the "Parts" and "Mark" libraries. There are two ways of setting links…
6 -7
6
Managing the data
3. Creating XML library
3
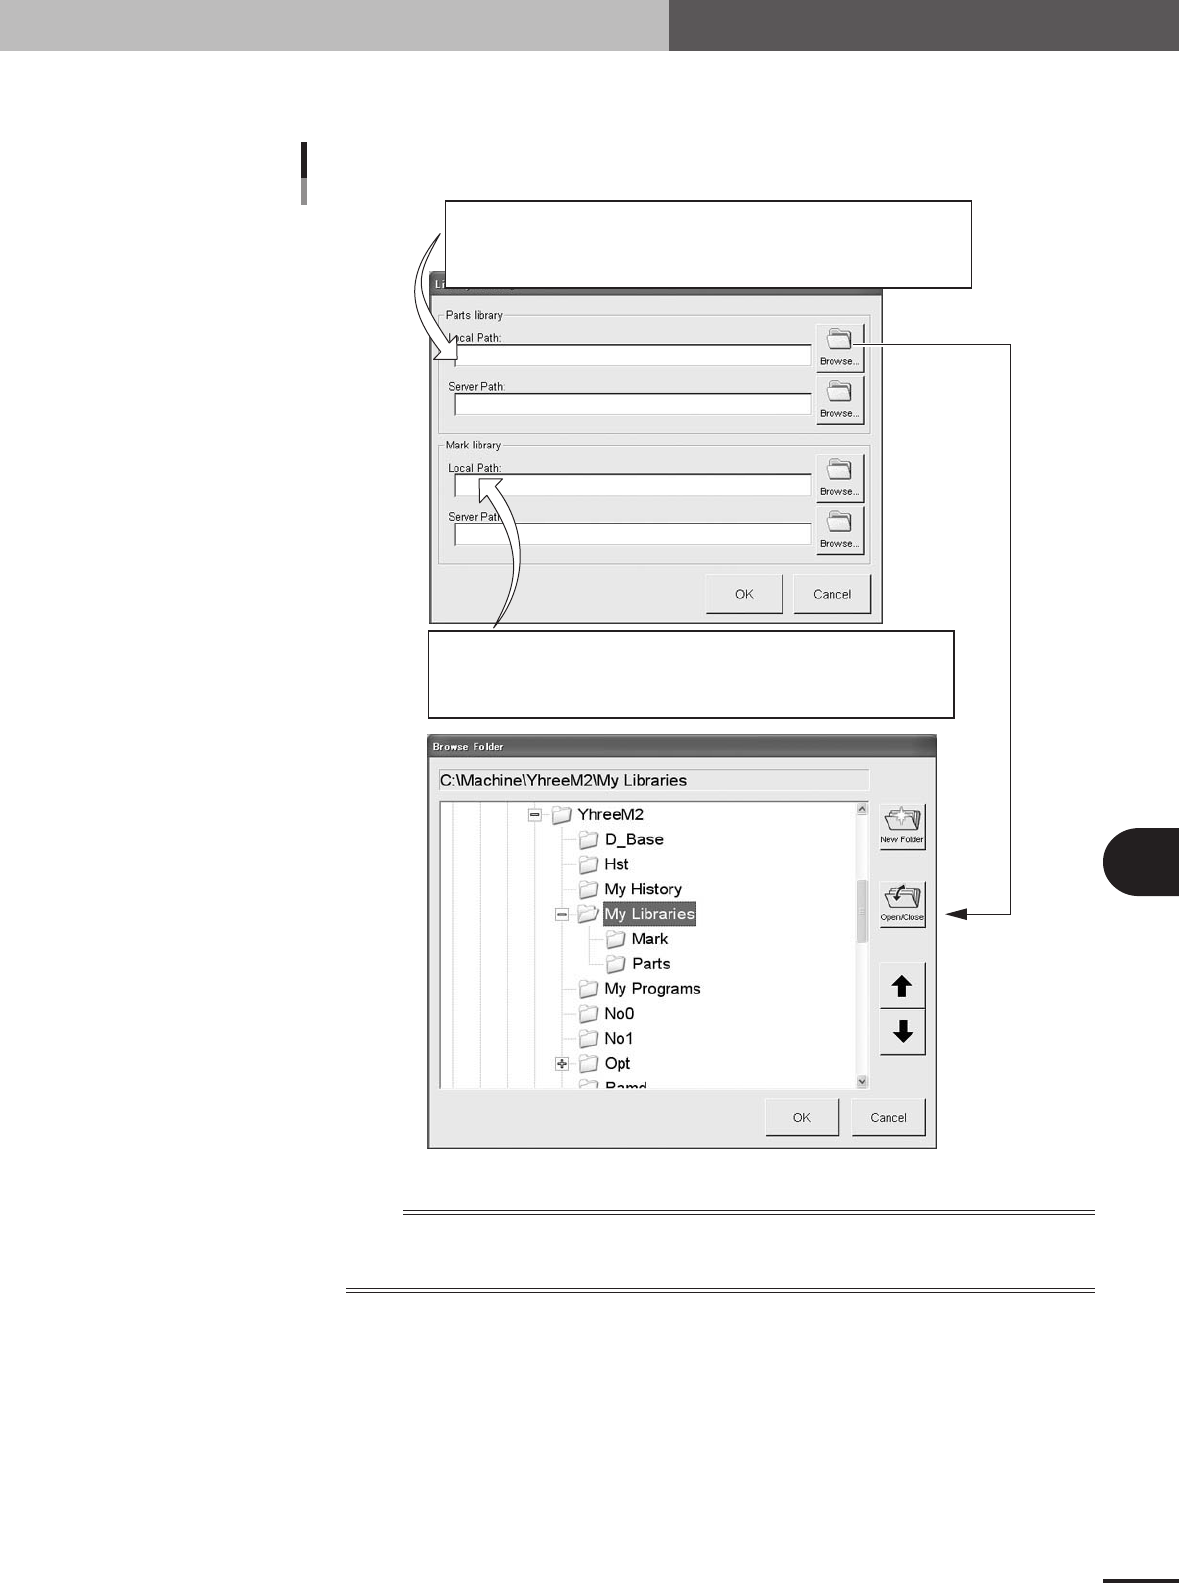
Enter the path to the library.
Set the path to the library as follows.
: \\(PC name)\YGOS\COMMON\May Library\Parts
: \\(PC name)\(shared folder name)\May Library\Parts
: D\Machine\(machine name)\May Library\Parts
Off-line software
PC on LAN
Machine
Path setting
: \\(PC name)\YGOS\COMMON\May Library\Mark
: \\(PC name)\(shared folder name)\May Library\Mark
: D\Machine\(machine name)\May Library\Mark
Off-line software
PC on LAN
Machine
27601-5E-20
n
NOTE
Two types of path "Local Path" and "Server Path" can be set.
Normally, the "Local Path" becomes valid when the library is selected. But, set the same path for both "Local
Path" and "Server Path" to avoid misoperation.
4
Use the [Browse] button as needed to set the path.
Pressing the [Browse] button opens the Browse Folder dialog box as shown above.
You can set the path without directly typing in the Local or Server box. After setting
the path, press the [OK] button.
6 -8
6
Managing the data
3. Creating XML library
3.2 Setting the PCB data links
This section explains how to establish links with the "Parts" and "Mark" libraries. There
are two ways of setting links from the VGOS or from the Editor.
3.2.1 Setting links from the VGOS
1
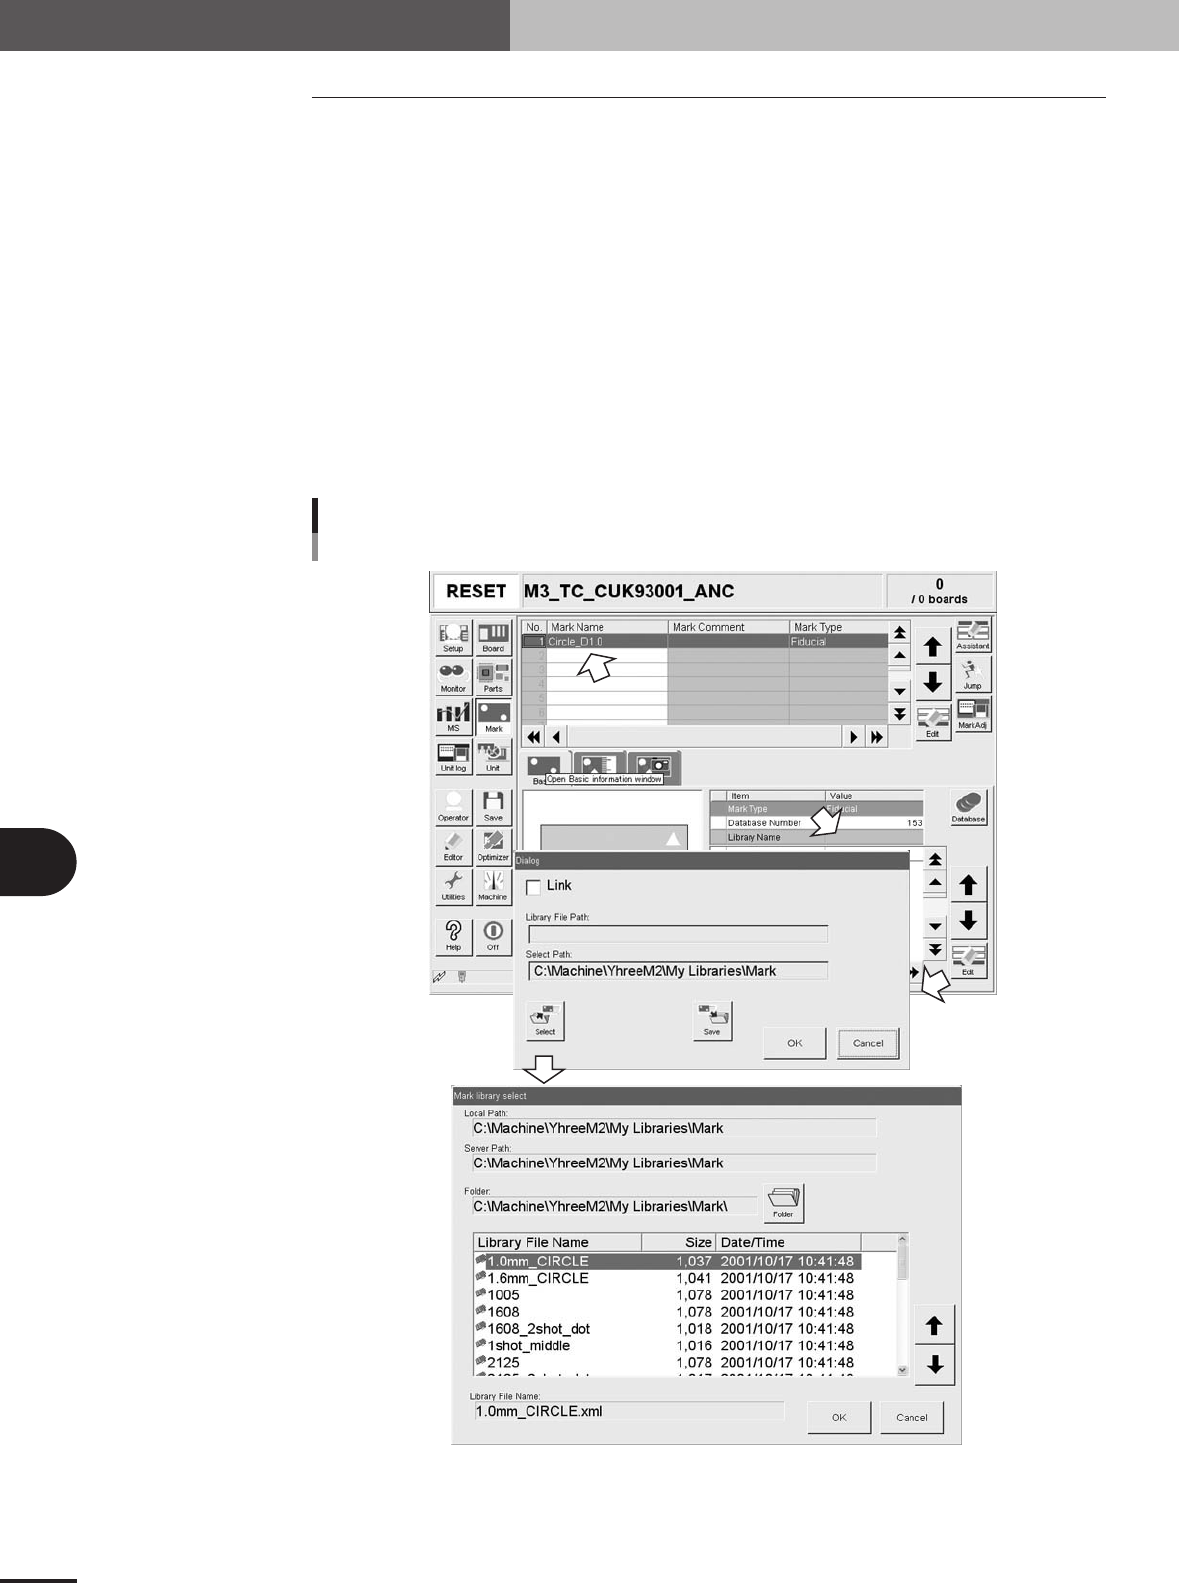
Line up the cursor with the mark or component data to be linked.
On the Mark or Parts screen, line up the cursor with the data to be linked. The mark
name or component name should be input beforehand.
2
Open the Mark or Parts Basic Information dialog box.
Select "Library Name" on the [Basic] tab and press the [Edit] button.
A dialog box appears for link setting.
3
Press the [Select] button to select a library file.
A list of mark or parts library file names appears. Select the applicable file name and
press the [OK] button.
Manual link setting
VGOS side
27602-5E-20
6 -9
6
Managing the data
3. Creating XML library
4
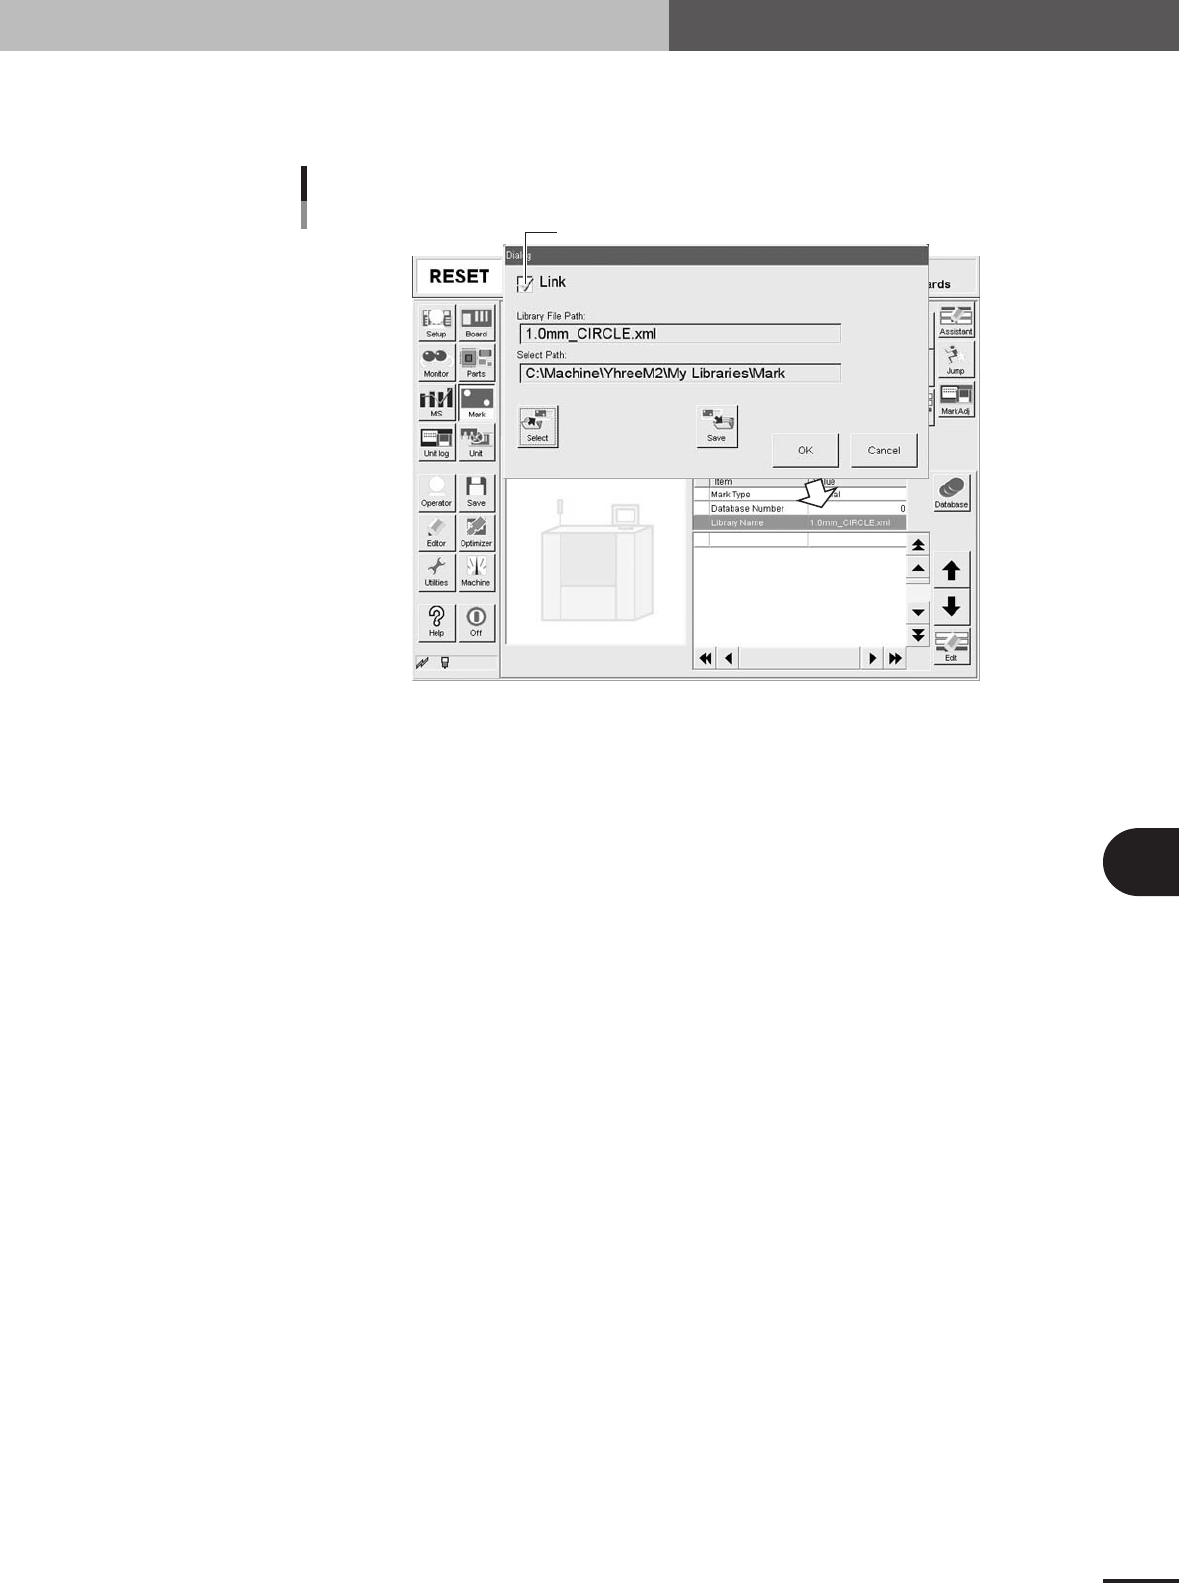
Enable the link.
Place a checkmark in the "Link" checkbox on the dialog box and press the [OK]
button.
Enabling the link
Place a checkmark here.
27603-5E-20