M3plus_OperationManual_e.pdf - 第60页
2 - 27 2 Basic oper ation 4. Starting and finishing production Monitor: Retry The [Retry] tab screen displays the history for the past 100 errors. Monitor: Retry 27309-5E-20 Monitor: Badmark Badmark recognition results a…
2 -26
2
Basic operation
4. Starting and finishing production
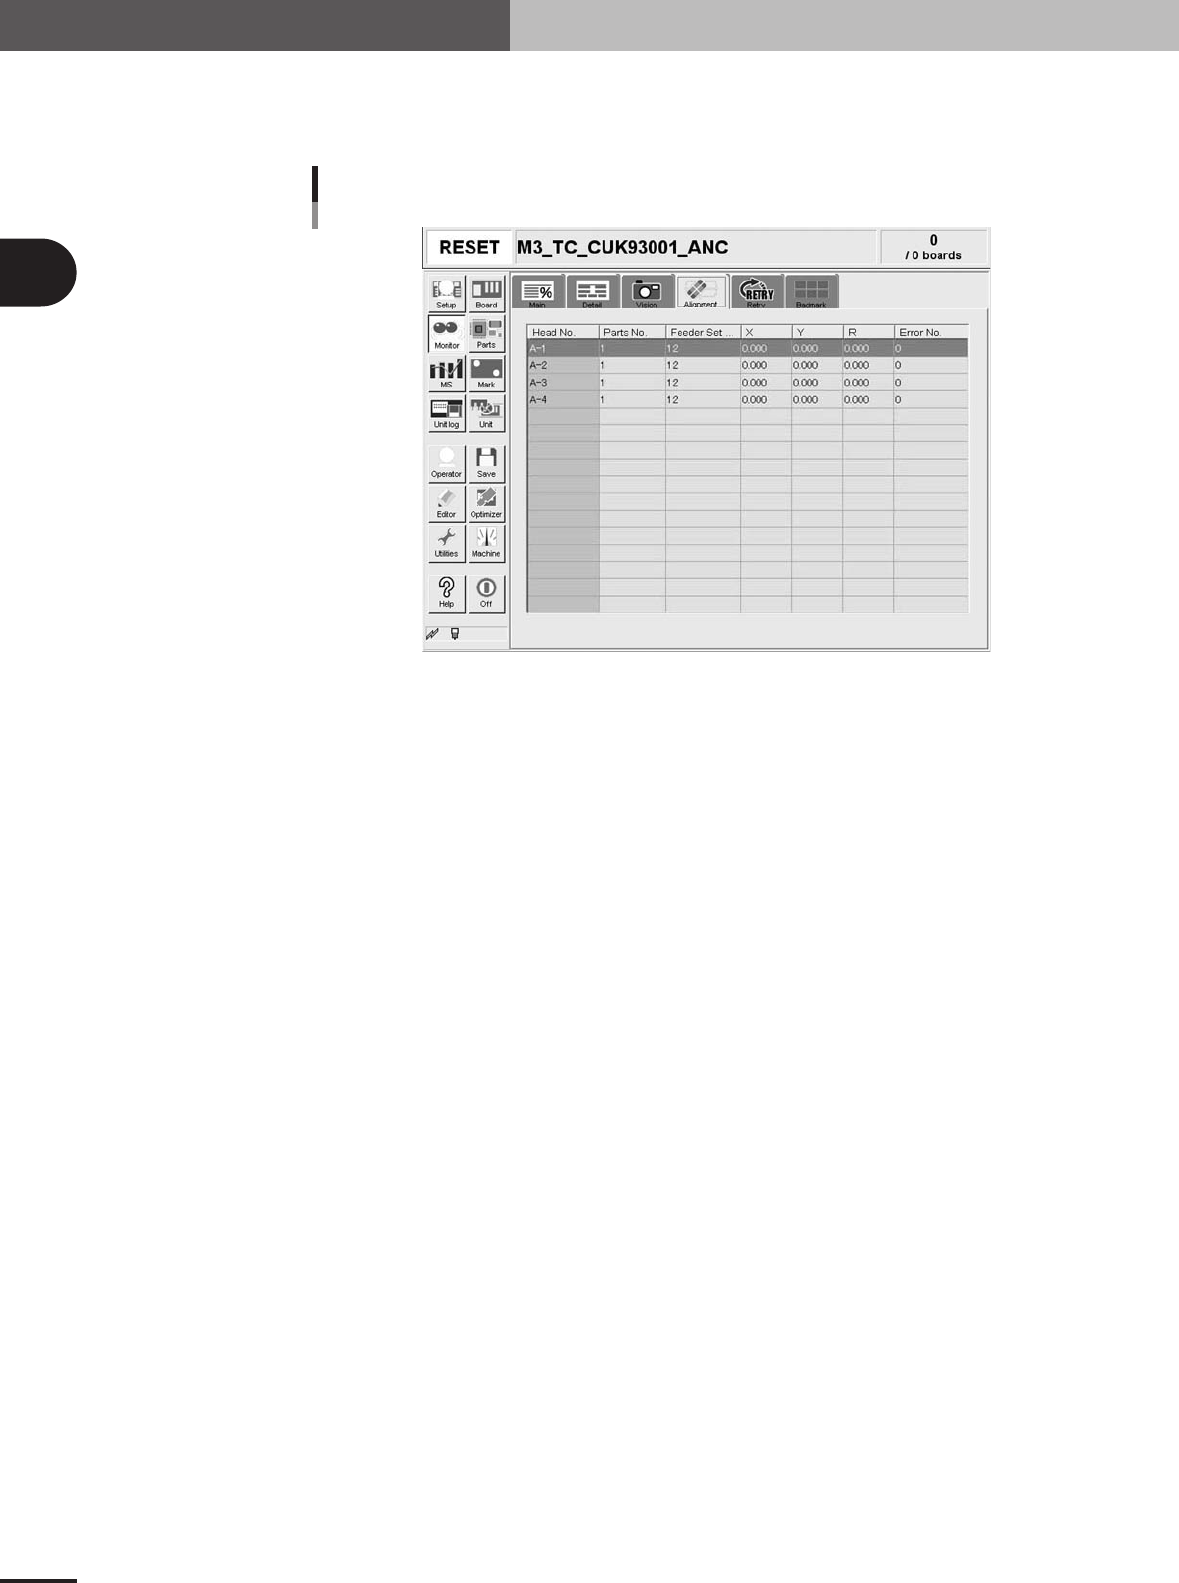
Monitor: Alignment
The [Alignment] tab screen shows you the offset amount of each head calculated from the
recognition results obtained during automatic operation as well as error numbers.
Monitor: Alignment
27308-5E-20
Head No.
Shows the head No. used in the machine. The recognition results of the head No. used in the
sequence that starts from the current pickup are displayed. Note that the display is made after the
camera image recognition has completed.
Parts No.
Shows the number of the component picked up by the head and recognized with the camera.
Feeder Set No.
Shows the feeder set number of the component picked up by the head and recognized with the
camera.
X, Y, R
Displays the offset amount of each head calculated from the recognition results obtained during
automatic operation. This offset is the positional deviation from the center of the nozzle.
Error No.
Shows an error number when the head fails to make a recognition.
2 -27
2
Basic operation
4. Starting and finishing production
Monitor: Retry
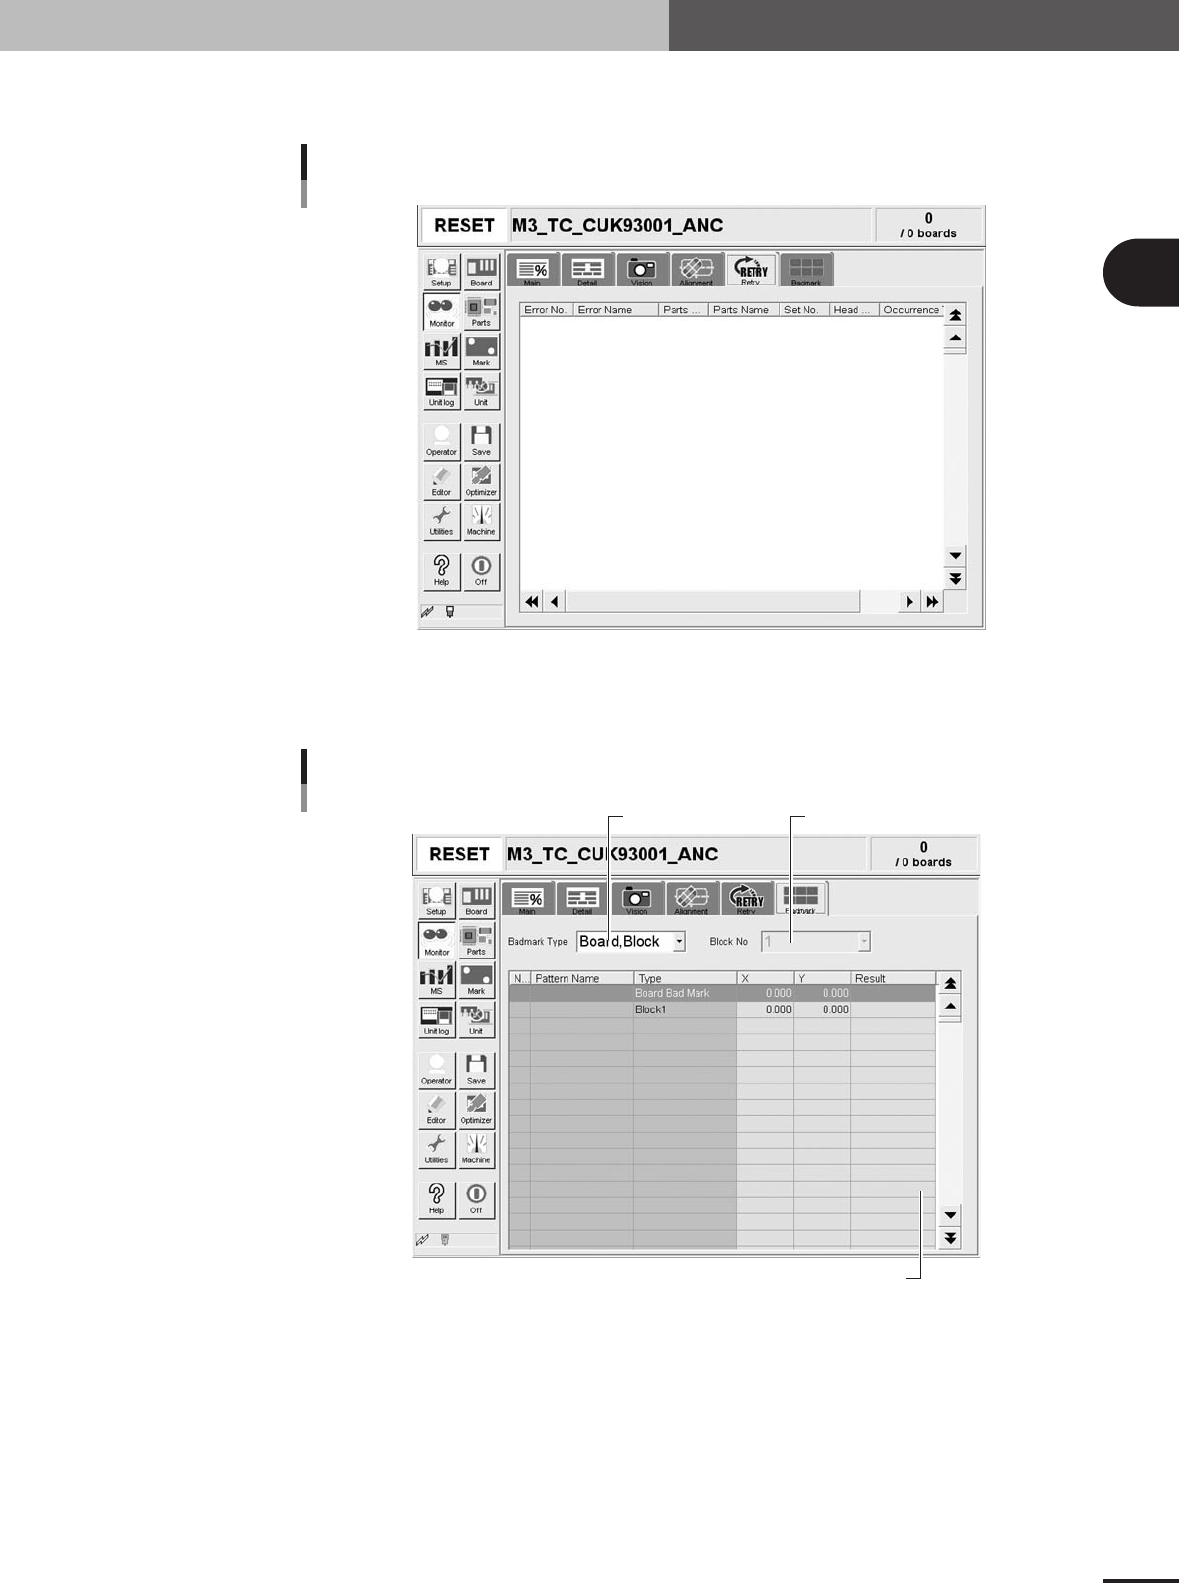
The [Retry] tab screen displays the history for the past 100 errors.
Monitor: Retry
27309-5E-20
Monitor: Badmark
Badmark recognition results are shown on the [Badmark] tab during operation.
Shows badmark recognition results.
Badmark
Select badmark type. "Block No." selection box.
27314-5E-20
2 -28
2
Basic operation
4. Starting and finishing production
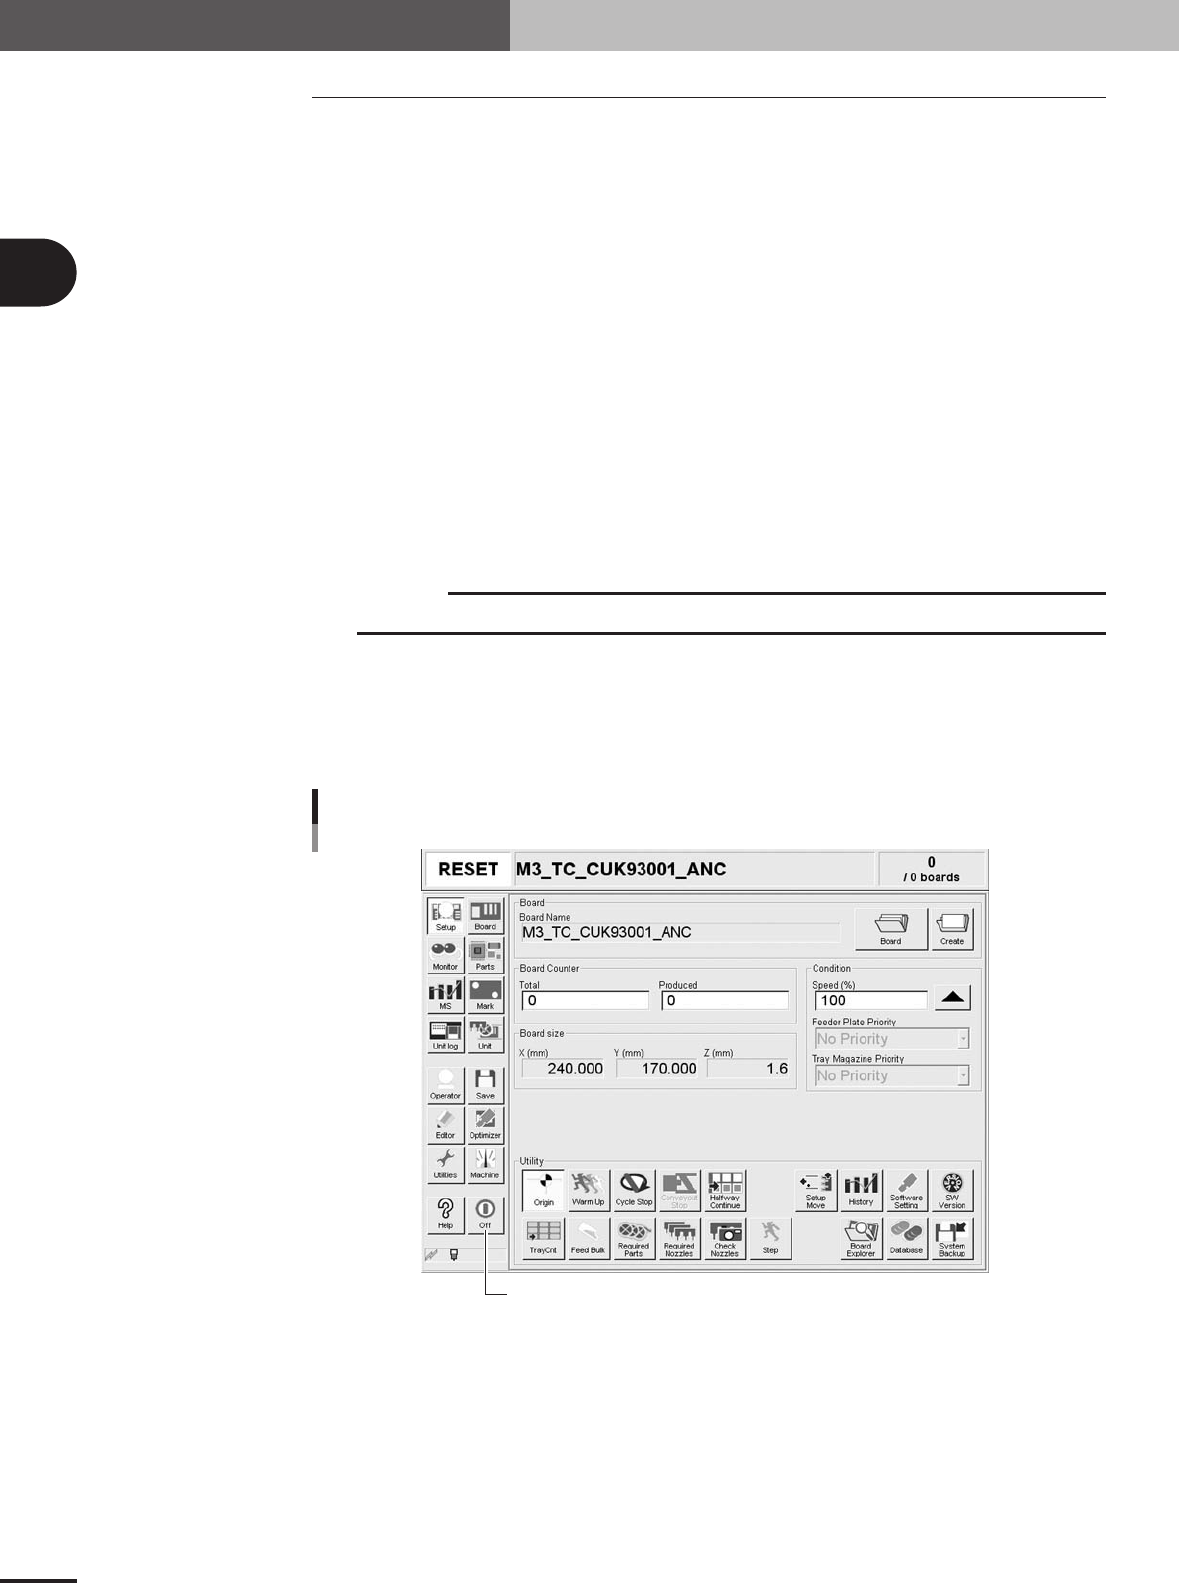
4.2 Finishing PCB production
To finish PCB production, follow these steps.
1
Stop machine operation.
There are four methods for stopping the machine.
1. Emergency stop button:
Press this button to trigger emergency stop. Do not use this button in normal
operation.
2. [STOP] button (operation panel):
Pressing the [STOP] button stops the machine immediately. To resume operation,
press the [START] button on the operation panel.
3. [Cycle Stop] button:
Pressing this button stops the machine operation just after component mounting on
the current PCB has been completed.
4. [Convey-out stop] button:
Use this button when you want to finish production just after components have
been mounted on the PCB currently on the conveyor. All PCBs on the conveyor are
carried out after component mounting, but new PCBs are not carried in from the
upstream side
c
CAUTION
Do not press the emergency stop button during operation except in case of emergency.
2
Reset the operation.
Press the [RESET] button on the operation panel. The machine returns to the PCB
production standby status.
3
Press the [Off] button on the screen.
[Off] button
[Off] button
27201-5E-2A