M3plus_OperationManual_e.pdf - 第147页
4 - 12 4 Using the adv anced functions 3. Mark parameters r Perform the vision test. Press the [Test] button and check to see if the pattern is correctly recognized. Repeat this test several times. When no error occurs, …
4 -11
4
Using the advanced functions
3. Mark parameters
9
Decide on the pattern size.
By using the cursor selection buttons and arrow buttons, adjust the window size and
position to enclose the entire pattern. The function of each button is as follows.
[Start] button
The window can be enlarged or reduced with the arrow keys, using the lower right
corner of the window as a start point.
[End] button
The window can be enlarged or reduced with the arrow keys, using the upper left
corner of the window as a start point.
[Move] button
The entire window moves with the arrow keys.
[Center Offset] button
Press this button when you want to shift the reference position from the center of
the window. (The reference position is displayed as a pink cross cursor.)
[1 Pixel / 10 Pixel] buttons
Press these buttons to change the distance that the window moves each time you
press an arrow button.
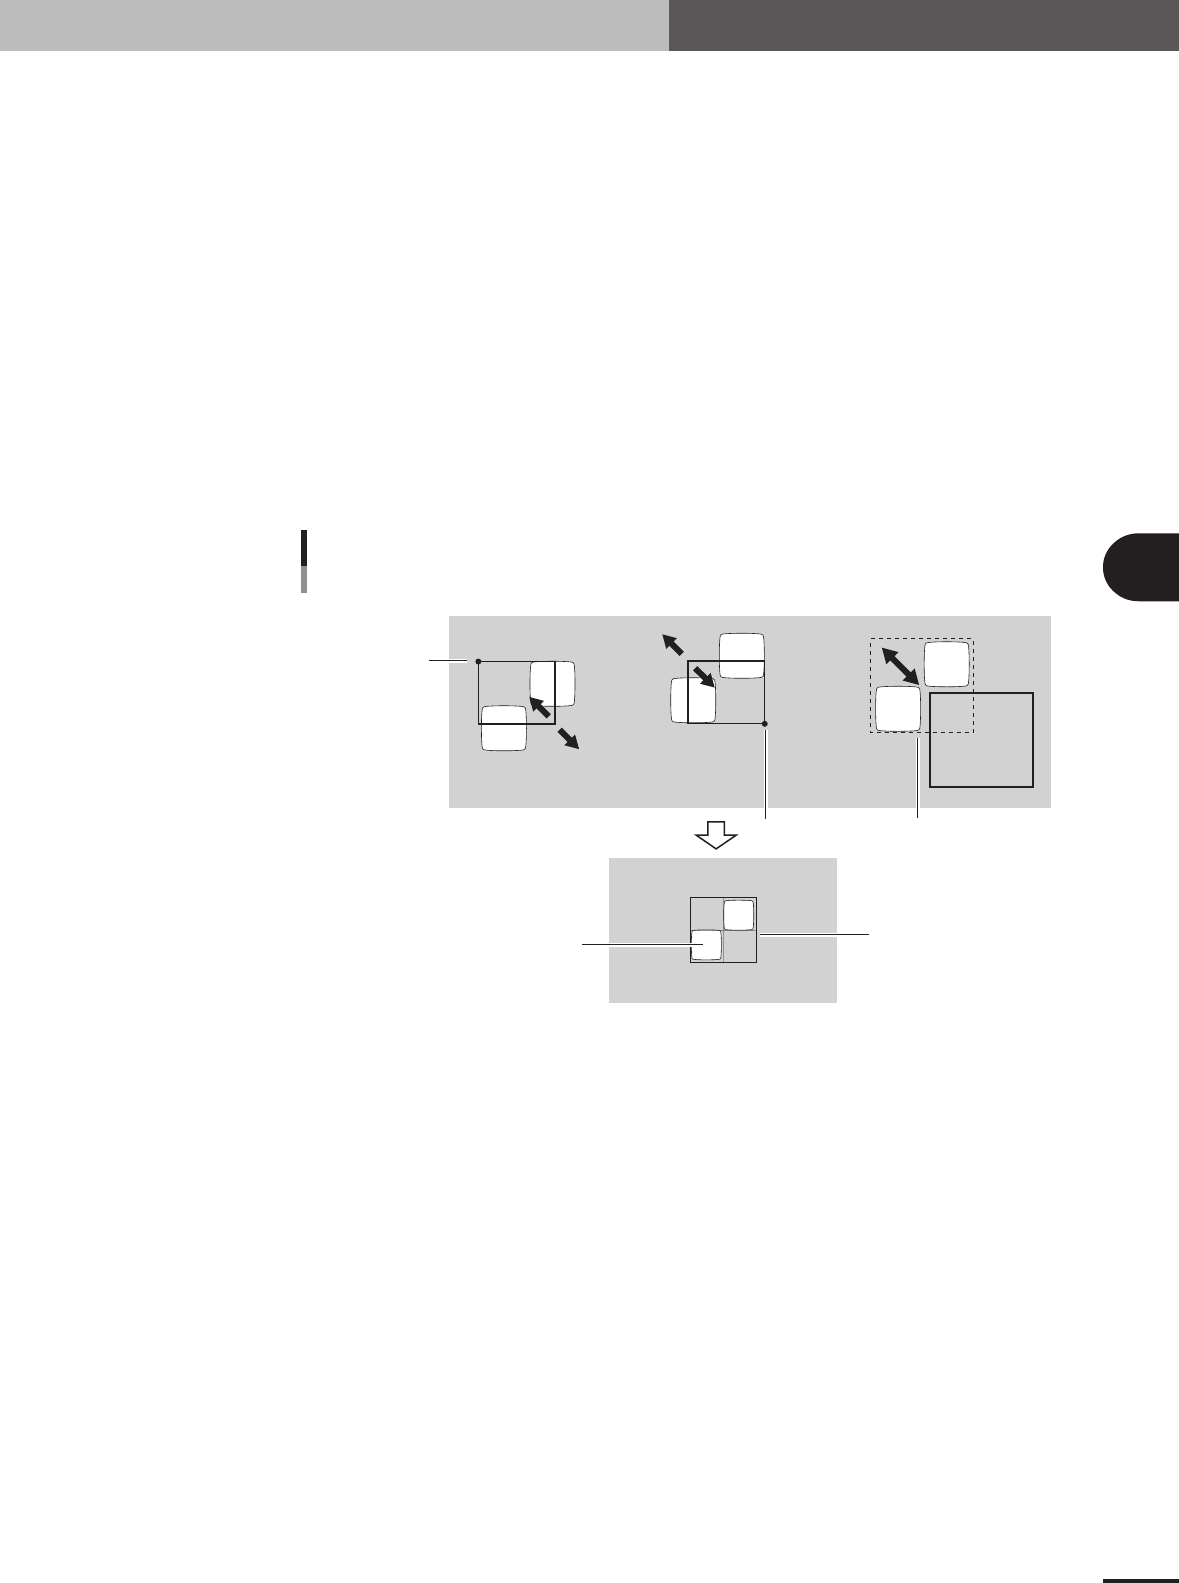
Window movement and adjustment
Stationary point
Stationary point
Entire window moves
[End] button [Start] button [Move] button
Pattern
Enclose the pattern.
23444-5E-20
0
Set the reference position in the pattern.
If you want to shift the reference position from the center of the window, proceed as
follows.
1.Press the [Center Offset] button.
2.Use the arrow buttons to move the cross cursor indicating the reference position
(pink cross cursor) to the desired point.
q
Save the pattern data as a template.
Check that the center of the pattern is within the window and then press the [Save
Pattern] button.
w
Check the pattern image.
Pressing the [Draw Pattern] button displays the pattern image that has been obtained.
Check the shape.
e
Return to the Mark Adjust screen.
Press the [Close] button to return to the Mark Adjust screen.
4 -12
4
Using the advanced functions
3. Mark parameters
r
Perform the vision test.
Press the [Test] button and check to see if the pattern is correctly recognized. Repeat
this test several times. When no error occurs, the pattern data is appropriate.
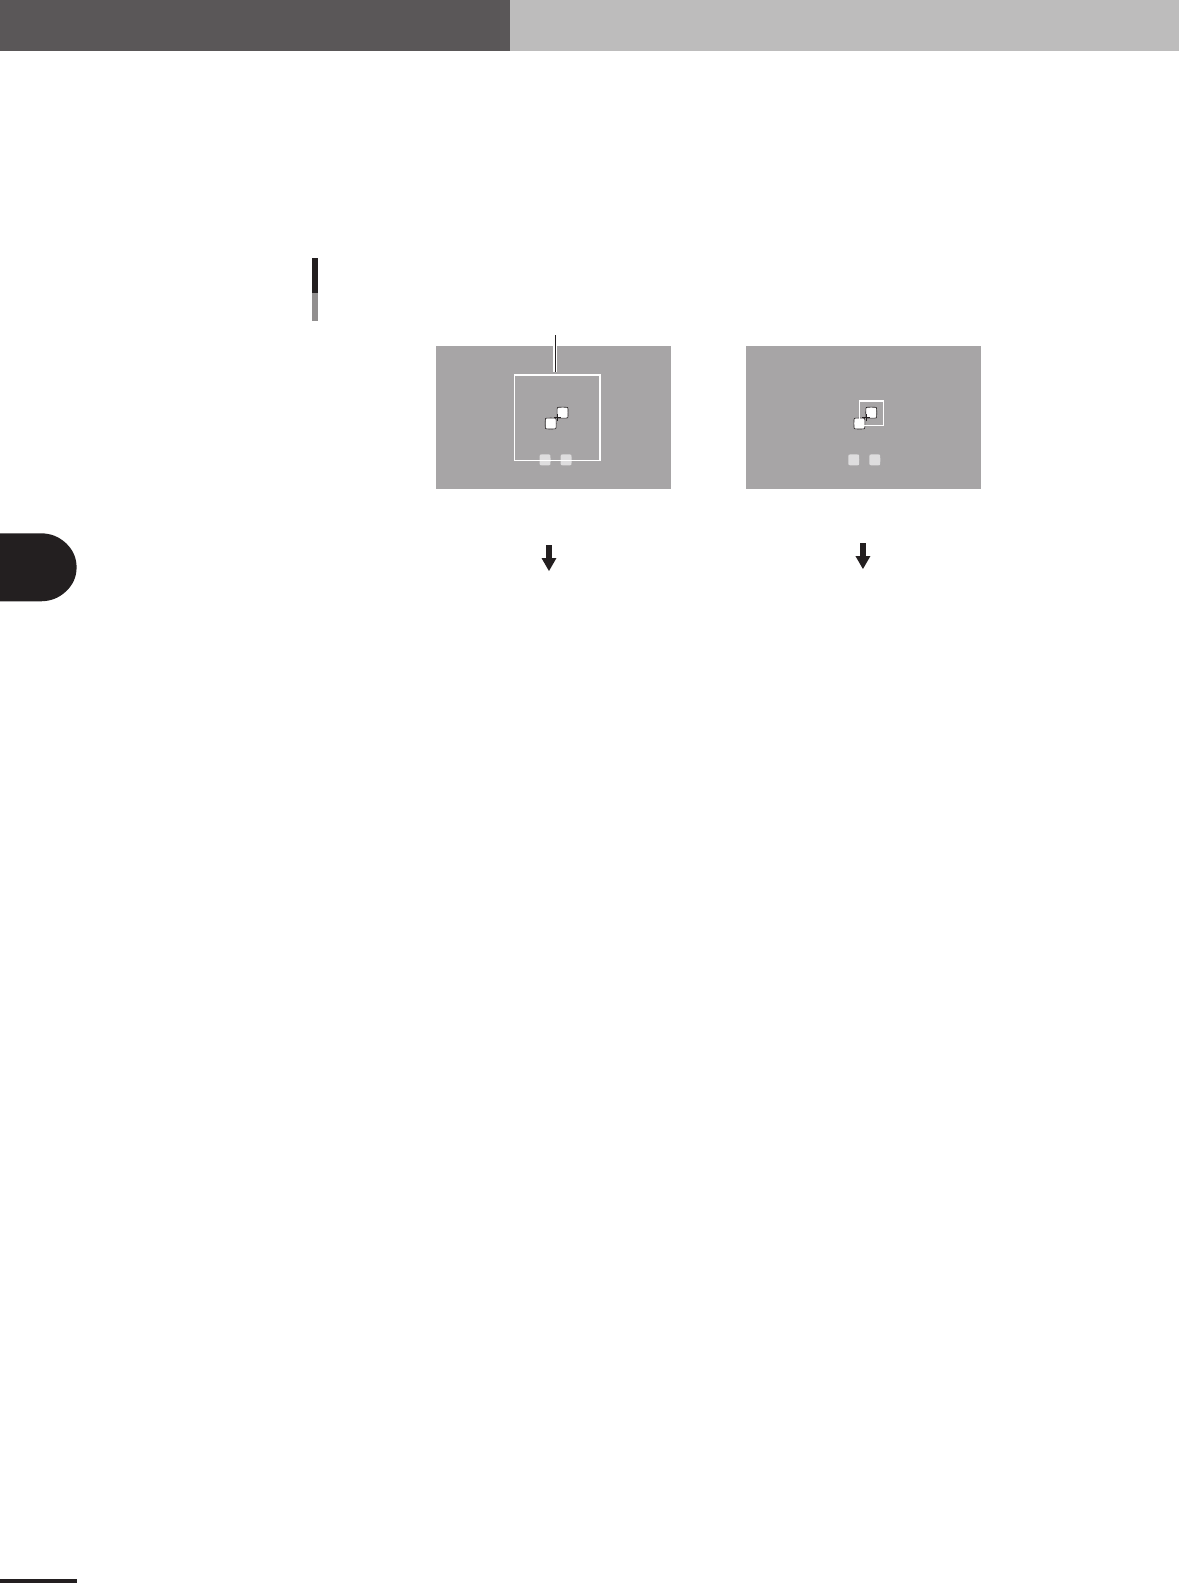
If an error occurs, check whether "Search Area" of the Vision parameters is appropri-
ate. If the search area is too large so that other marks are located within the search
area, then reduce the search area. Conversely, if the search area is too small, then
enlarge the search area.
Search area
Search area adjustment
Search area is too large, so
other marks are recognized.
Search area is too small, so the target
pattern is not inside the search area.
Reduce the search area
Enlarge the search area.
23446-5E-20
t
Close the Mark Adjust screen.
Press the [OK] button to close the Mark Adjust screen.
y
Save the data.
Press the [Save] button in the main menu button area and save the data.
4 -13
4
Using the advanced functions
3. Mark parameters
3.1.2 Using the data for pattern matching
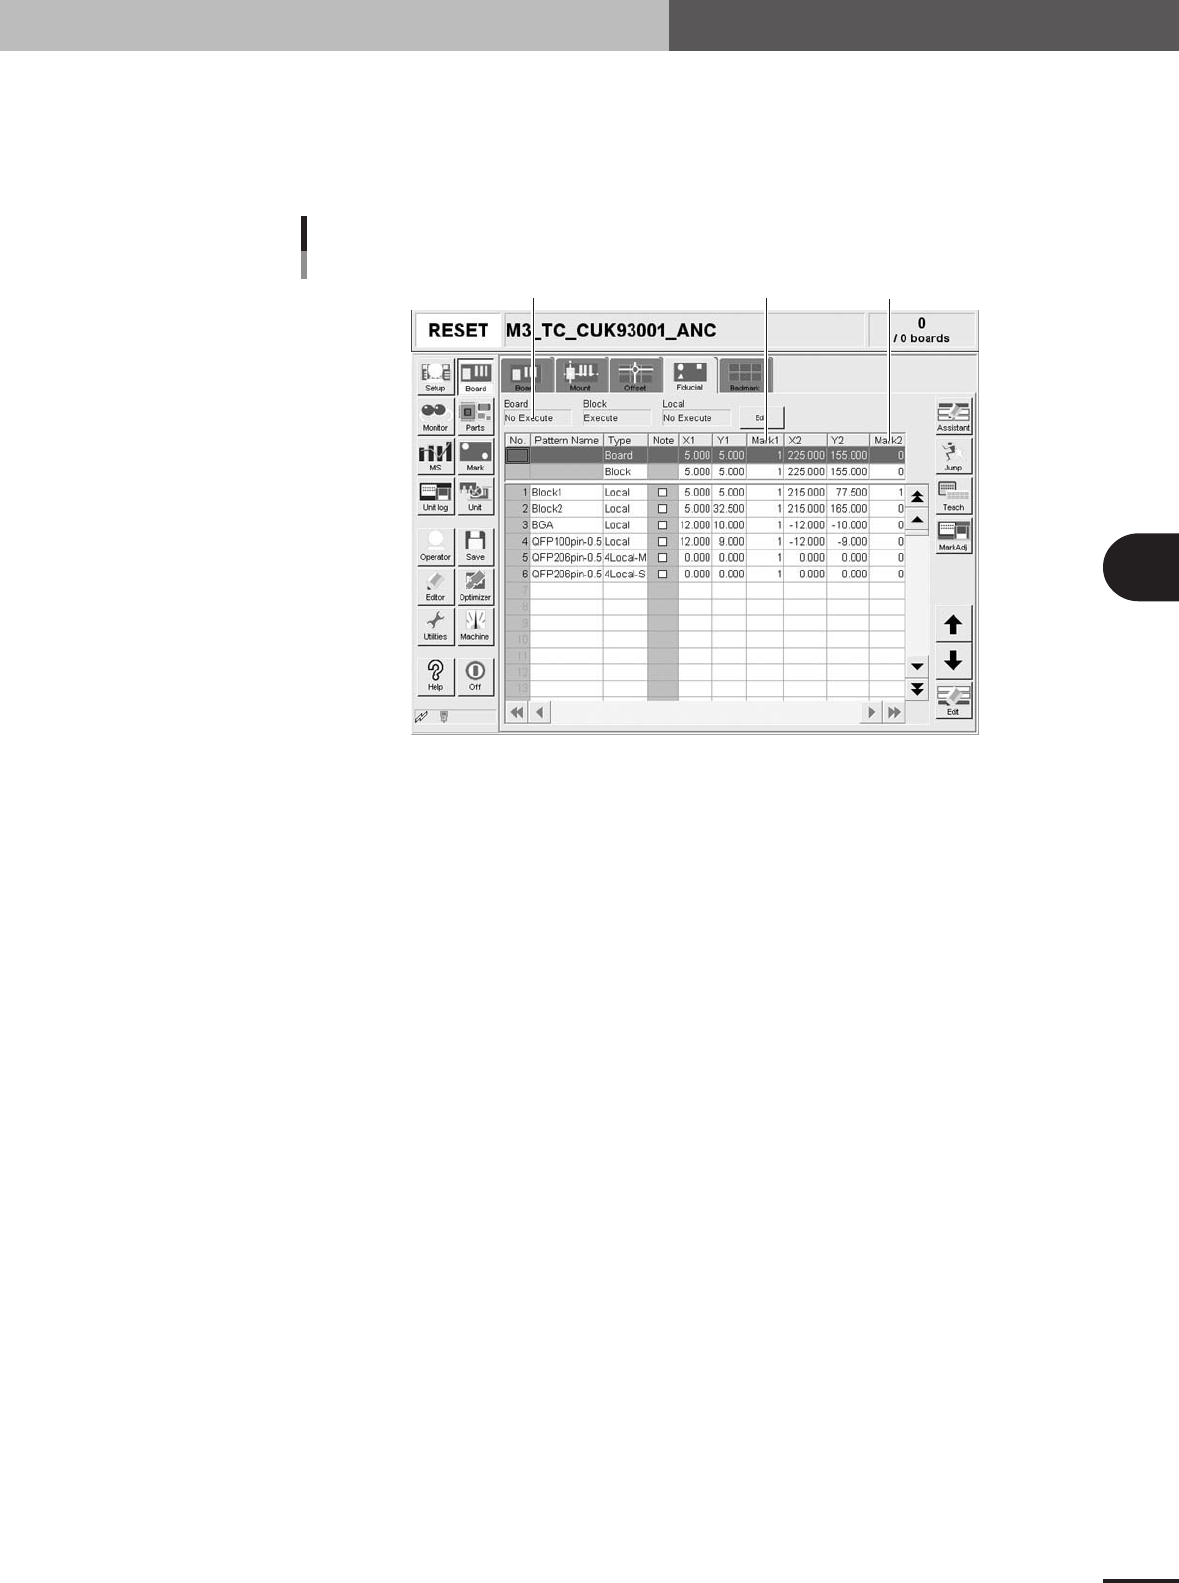
Pattern matching can be used in the same way as the fiducial marks. In this case, enter
the mark No. registered as the pattern in the Mark 1 and Mark 2 columns on the [Board] -
[Fiducial] tab screen. (The figure below shows an example when using pattern matching
as PCB fiducial marks.)
Set mark No. registered as pattern in
"Mark 1" and Mark 2" columns.
Set to "Execute".
Example of using pattern matching
27455-5E-20