YSM20R_YSM20WR_Mainte_E.pdf - 第130页
3-69 3 Periodic maintenance items 4 Detach side-vie w camera assembly . 1. Remove 2 mounting bolts of side-view camera assembly with hex wrench (4). 2. Detach side-view camera assembly. n NOTE The knock pin is installed …
3-68
3
Periodic maintenance items
5.6 Recognition equipment
5.6.1 FM Head: Cleaning inside of side-view camera
The simple cleaning of the side-view camera described in "4.1.4 FM head: Simple cleaning of side-view
camera" in this chapter is performed. However, if the recognition error related to the side-view camera occurs
frequently, it is recommended to clean the inside of the reflector plate.
c
CAUTION
Do not apply strong force or shock to the camera unit and lighting unit during cleaning. Optical axis adjustment might
become unreliable.
c
CAUTION
When a trouble related to lighting, etc. occurred, contact YAMAHA sales representatives. The disassembly and
cleaning of the machine made by the customer is beyond the coverage of the warrantee.
1
Power off the machine.
1. If the machine is carriage type, detach
carriage to access to the head unit.
2. Exit the software.
3. Power off the machine.
2
Move the head unit forward.
1 Open the machine safety cover.
2. Move the head unit forward.
3. Place a square cloth under the head
unit.
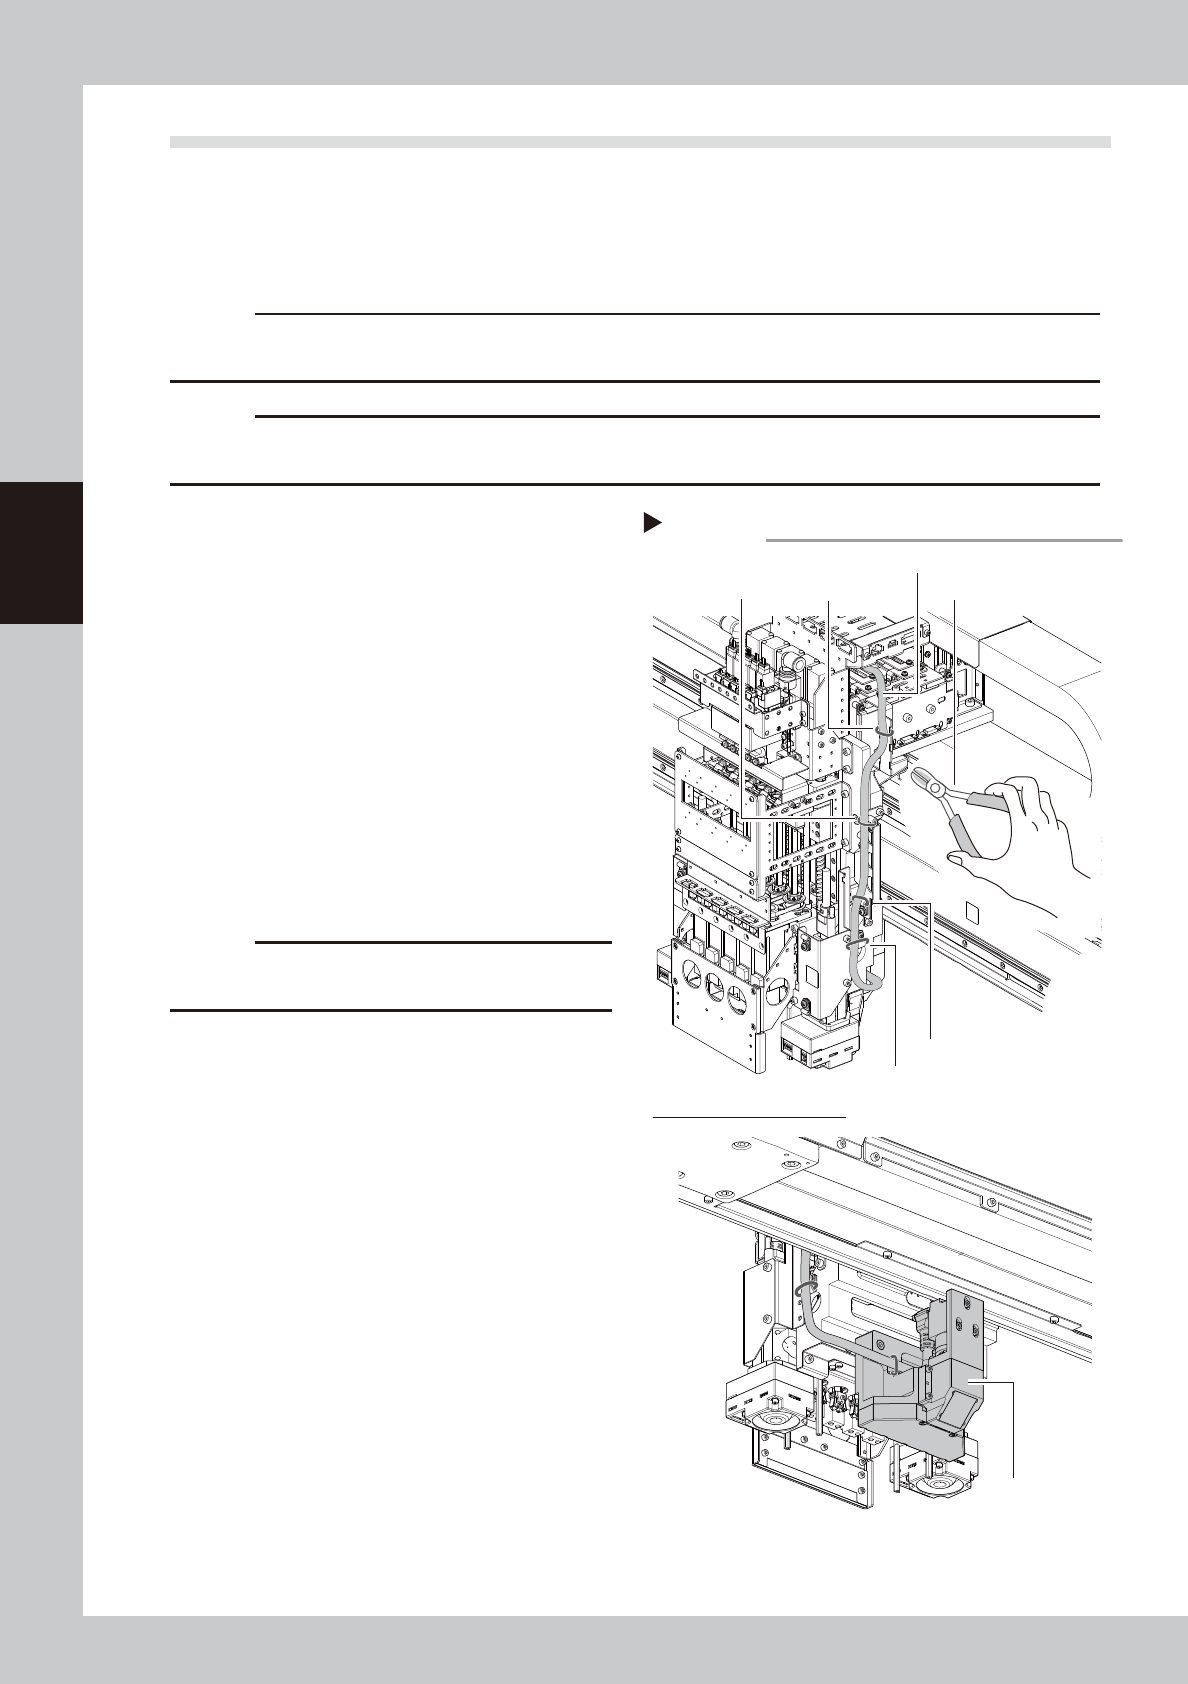
3
Cut cable ties fixing side-view
camera cable.
Cut 4 cable ties fixing side-view camera
cable with cutting pliers.
c
CAUTION
Make sure not to damage the cable when cutting
cable ties.
Cutting cable ties
Step 3
Cable tie 1 Cutting pliersCable tie 2
Cable tie 3
Cable tie 4
Lower side of FM head unit
Side-view camera cable
Side-view camera
assembly
53386-KMK-00
3-69
3
Periodic maintenance items
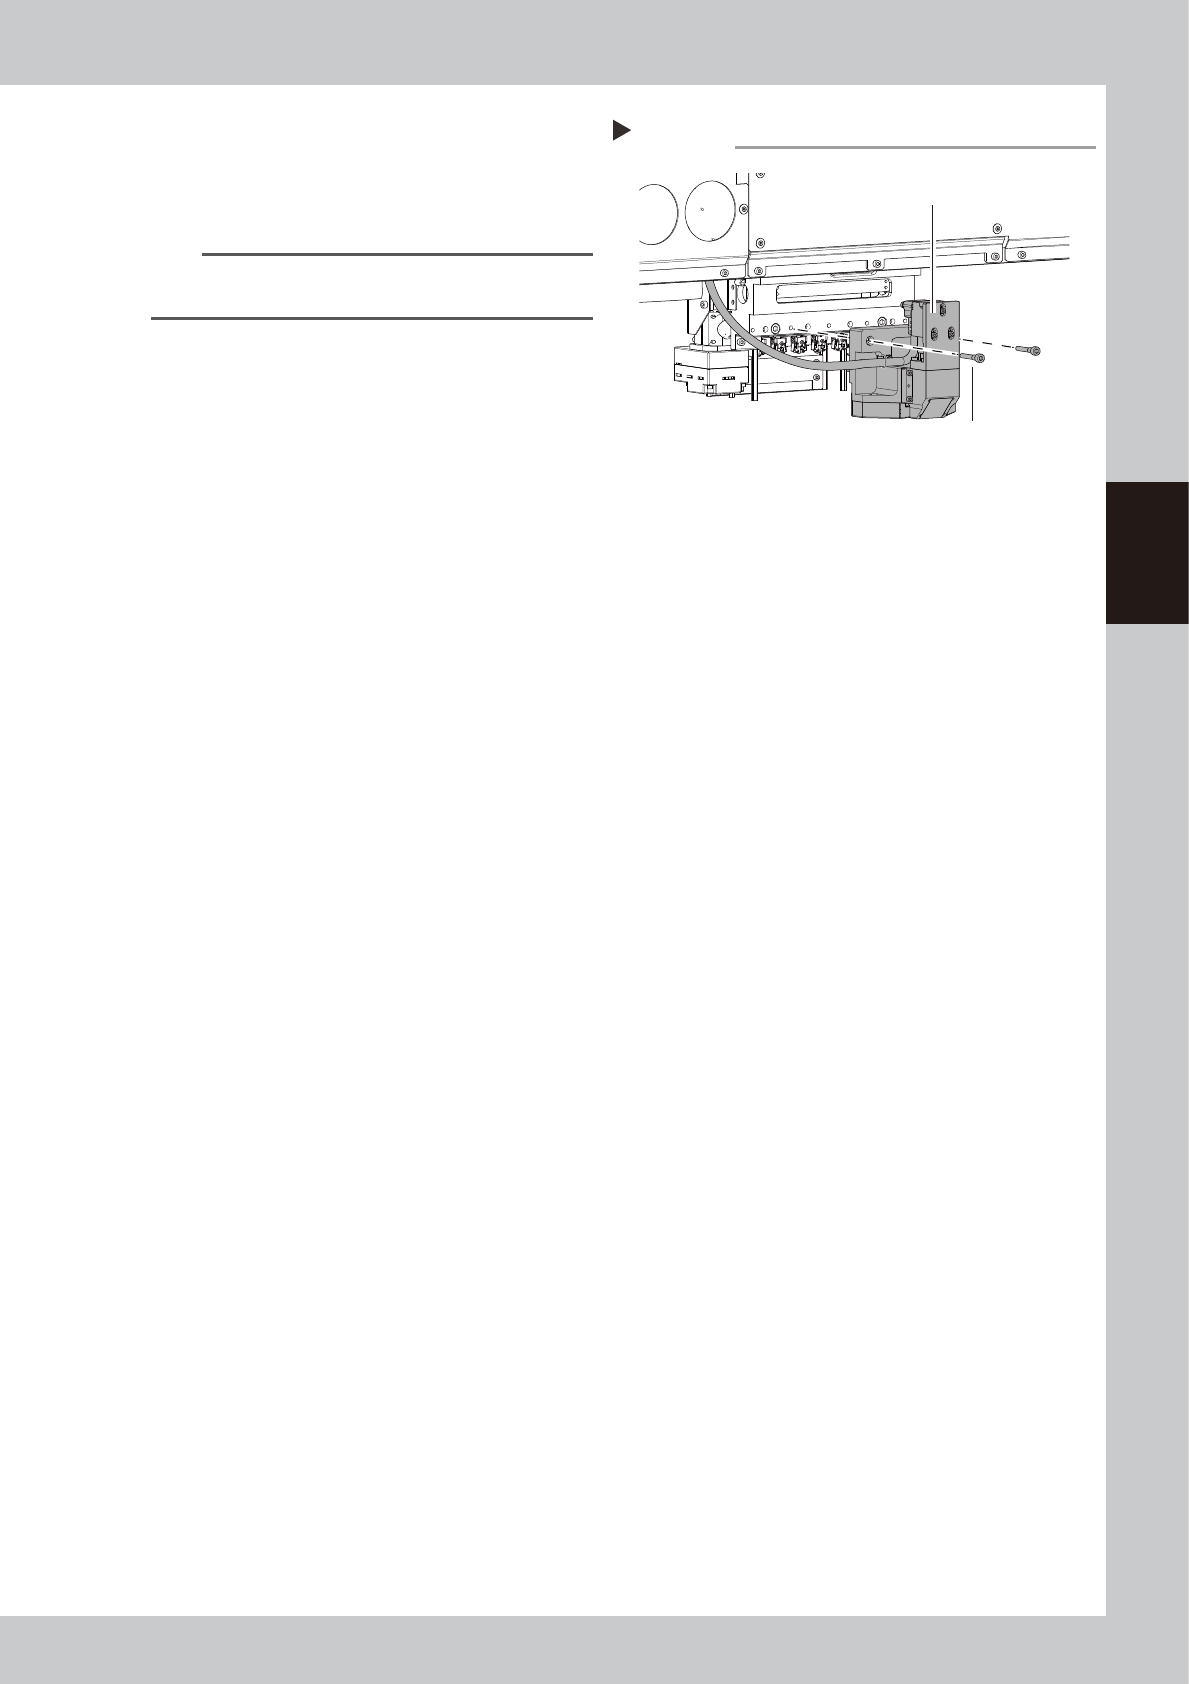
4
Detach side-view camera assembly.
1. Remove 2 mounting bolts of side-view
camera assembly with hex wrench (4).
2. Detach side-view camera assembly.
n
NOTE
The knock pin is installed to the side-view camera
assembly for positioning.
Detaching side-view camera assembly
Step 4
Side-view camera assembly
Mounting bolt
53387-KMK-00
3-70
3
Periodic maintenance items
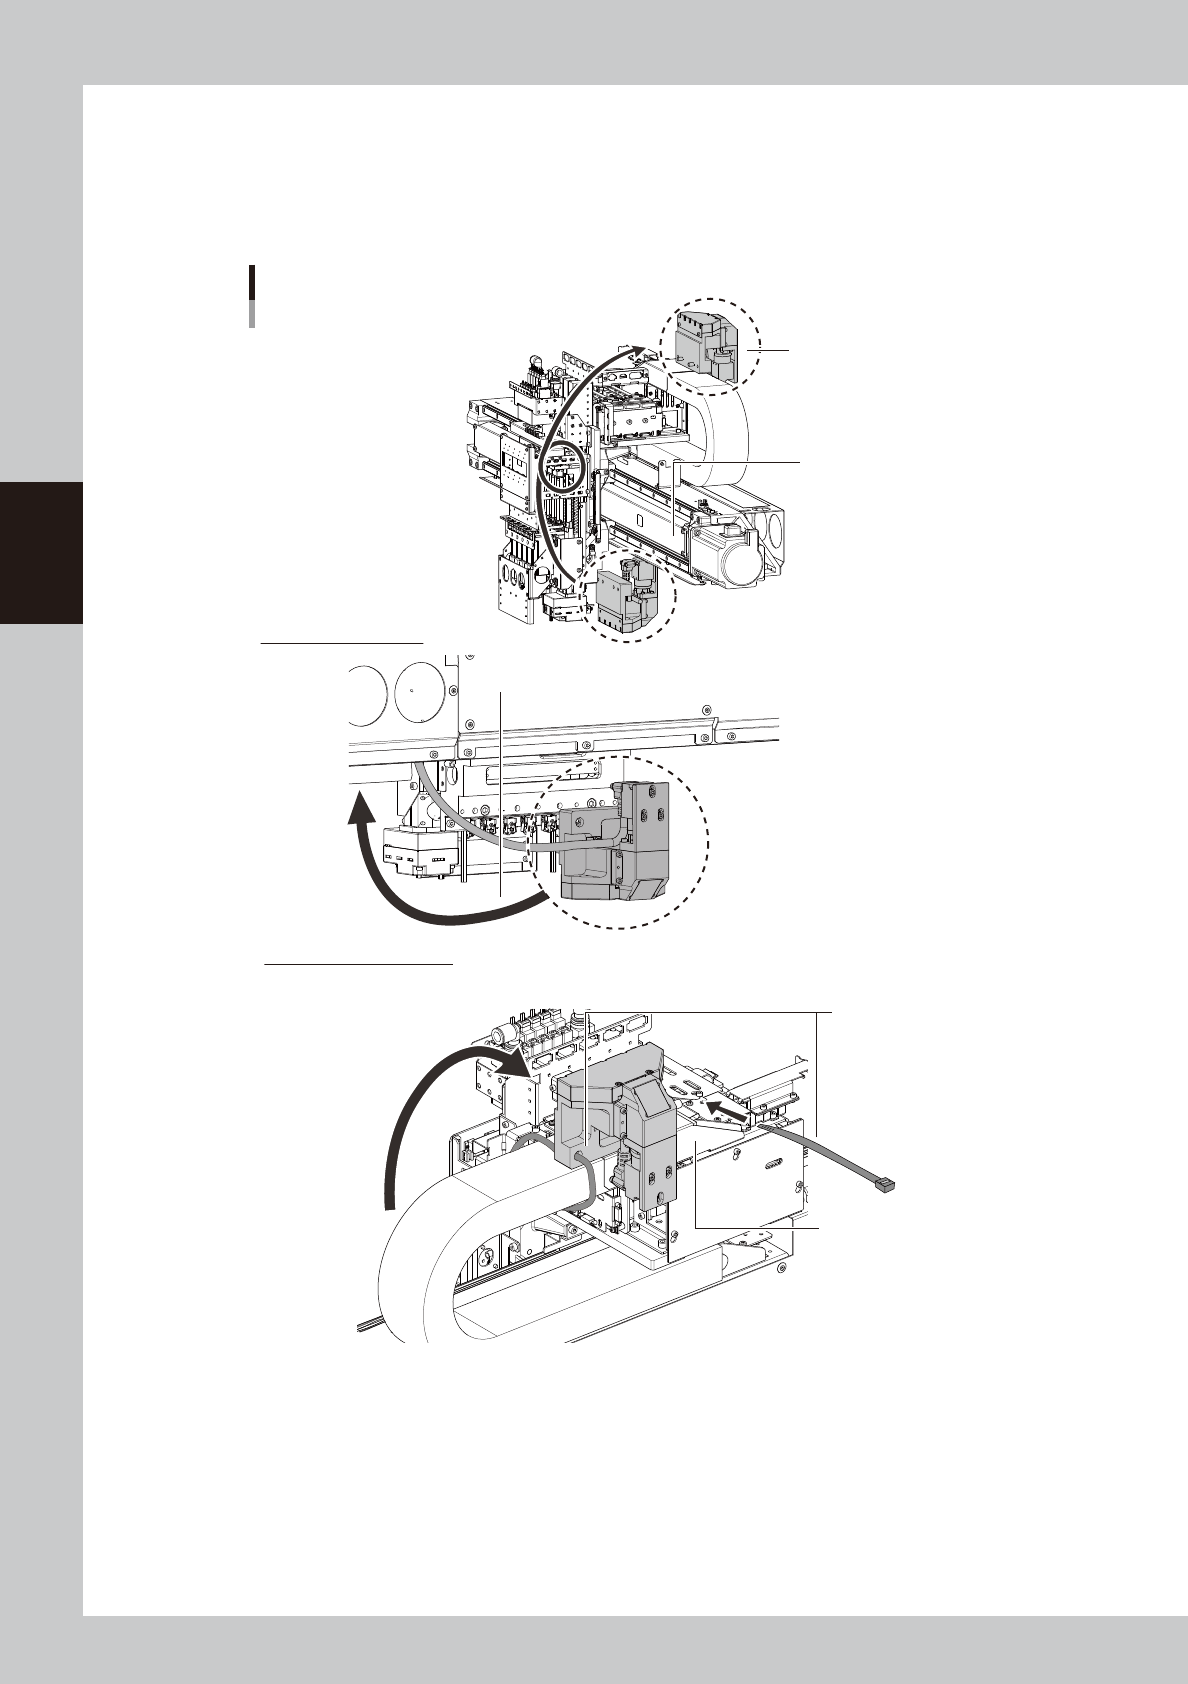
5
Mount side-view camera temporarily.
Mount side-view camera temporarily on the X-axis cable duct cover for easier maintenance work.
1. Pass the side-view camera assembly under the X-axis frame. Turn over the side-view camera and
mount it on the X-axis cable duct cover.
2. Mount the side-view camera assembly with cable ties (250 mm or longer) temporarily.
Mounting side-view camera temporarily
Mount with cable ties
temporarily.
Lower side of FM head
Pass under X-axis frame.
X-axis cable duct cover
X-axis frame
Side-view camera assembly
Upper side of X axis frame
53388-KMK-00