YSM20R_YSM20WR_Mainte_E.pdf - 第78页
3-17 3 Periodic maintenance items 2.2 Y -axis T his section explains the Y -axis inspection, cleaning, and lubricating procedures. F or details regarding lubrication points and the lubrication condition, see "Chapte…
3-16
3
Periodic maintenance items
2.1.2 Cleaning and lubricating X-axis guide
1
Prepare for work.
1. Take off all accessories susceptible to the
magnetic fields, such as a wristwatch
and/or magnetic ID card.
e
2. Press the emergency stop button and
then open the machine safety cover.
3. Detach the carriage if the machine is the
carriage type.
4. Place a square cloth on the Y-axis linear
area and the push-up plate.
2
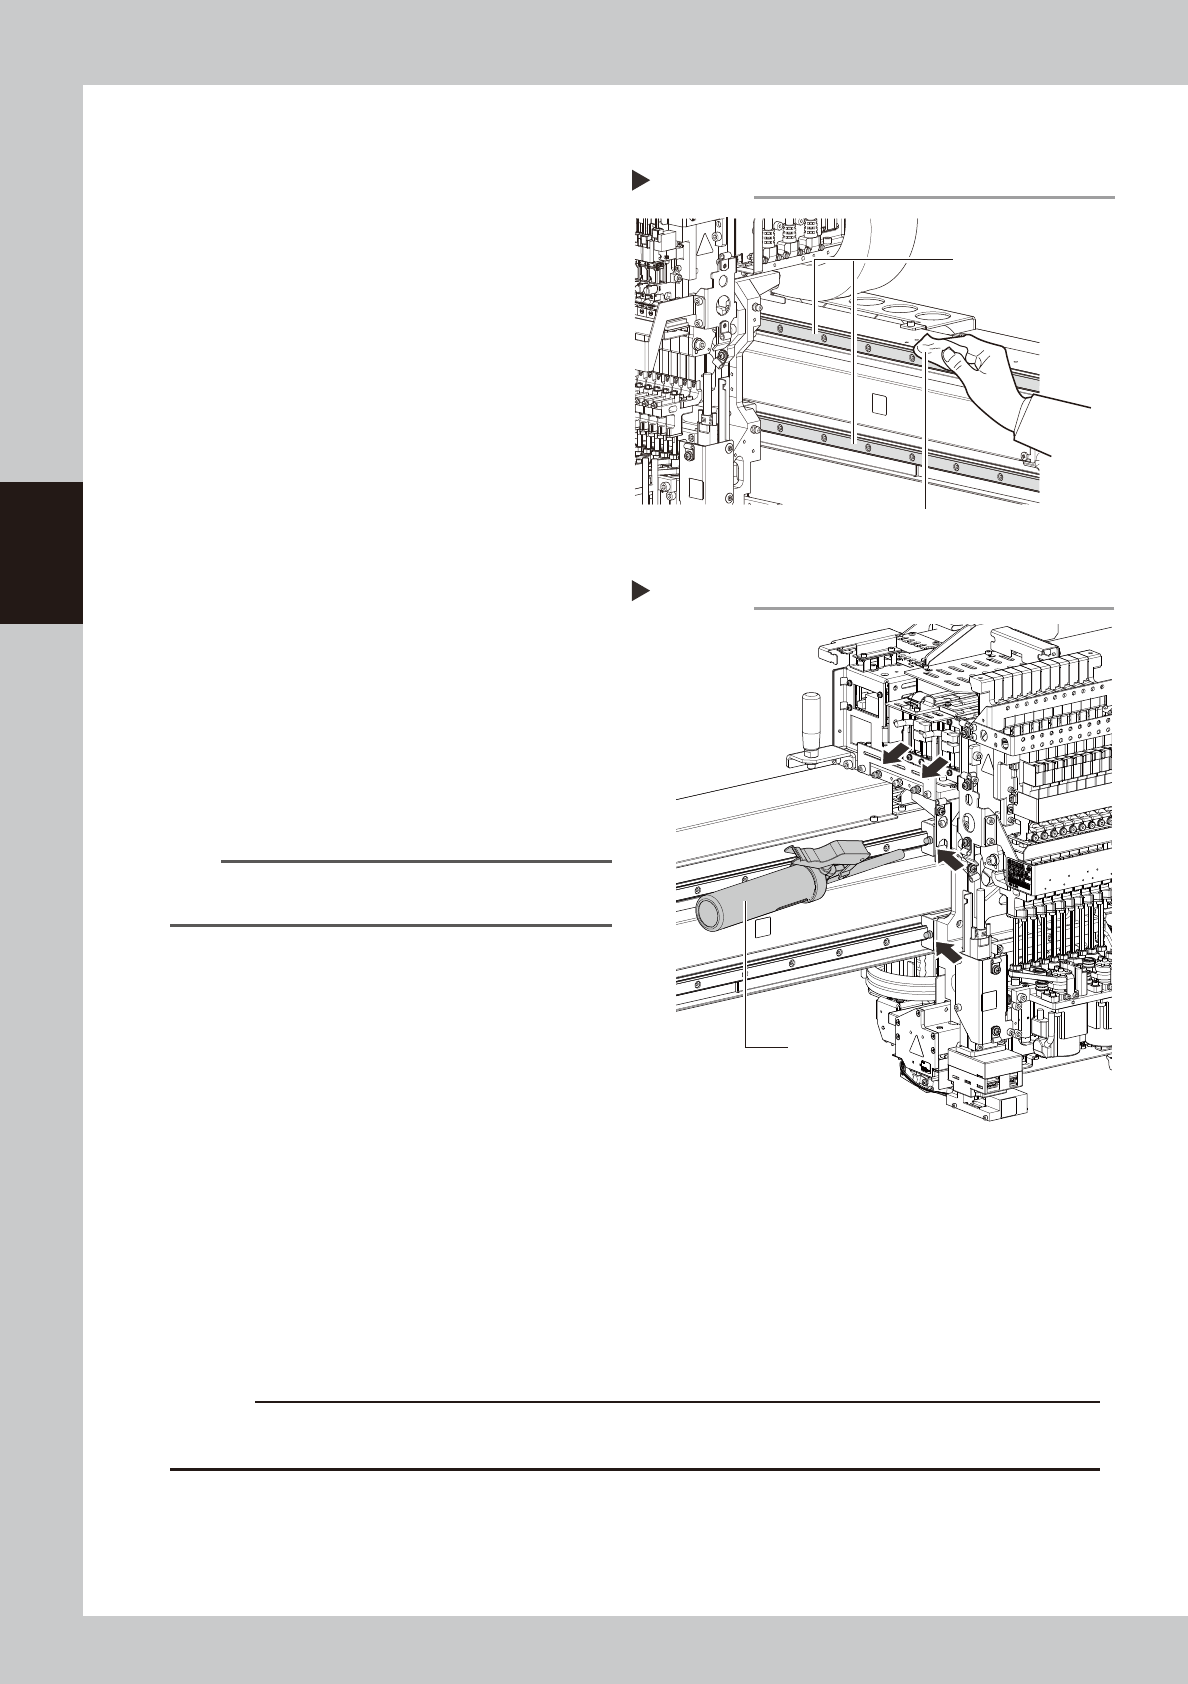
Clean the guide.
1. Grasp the movement handle and move
the head unit to one end.
2. Using lint-free cloth, wipe the old grease
and soiling on the entire guide.
3. Move the head unit to the opposite side,
then clean the opposite-side guide.
3
Inject the grease.
Using a grease gun (standard type), inject
the prescribed grease (NSL) at the X-axis
guide's grease nipples (4 nipples).
4
Spread the grease.
Move the head unit left and right several
times manually to spread the grease.
n
NOTE
The grease you have injected through the nipple oozes
to the guide when moving the axis.
5
Wipe off the excess grease.
Wipe off the excess grease from both ends
of the guide.
6
Apply the grease again.
Repeat Steps 3 to 5 twice again.
After that, visually check that the grease is
applied to the entire guide.
7
Perform a warm-up.
1. Remove the square cloth.
2. Close the machine safety cover and cancel the emergency stop. Attach carriage if the machine is
the carriage type,
e
3. Open the "Warm-up" screen and perform the warm-up operation for approximately 8 minutes.
4. After stopping warming up, press the emergency stop button and then open the machine safety
cover.
5. Wipe the grease accumulated on the guide end surface.
c
CAUTION
Repeat Step 7 until grease accumulations no longer occur. Beginning production with grease accumulations present
could cause the grease to spatter.
Cleaning the guide
Step 2
Cloth
Guide
53324-KMK-00
Injecting the grease
Step 3
Grease gun
(standard type)
53325-KMK-00
3-17
3
Periodic maintenance items
2.2 Y-axis
This section explains the Y-axis inspection, cleaning, and lubricating procedures. For details regarding
lubrication points and the lubrication condition, see "Chapter 5 Lubrication points".
2.2.1 Cleaning/lubricating Y-axis guide and cleaning linear scale
1
Prepare for work.
1. Take off all accessories susceptible to the
magnetic fields, such as a wristwatch
and/or magnetic ID card.
e
2. Press the emergency stop button and
then open the machine safety cover.
3. Detach the carriage if the machine is the
carriage type.
4. Place a square cloth on the push-up
plate.
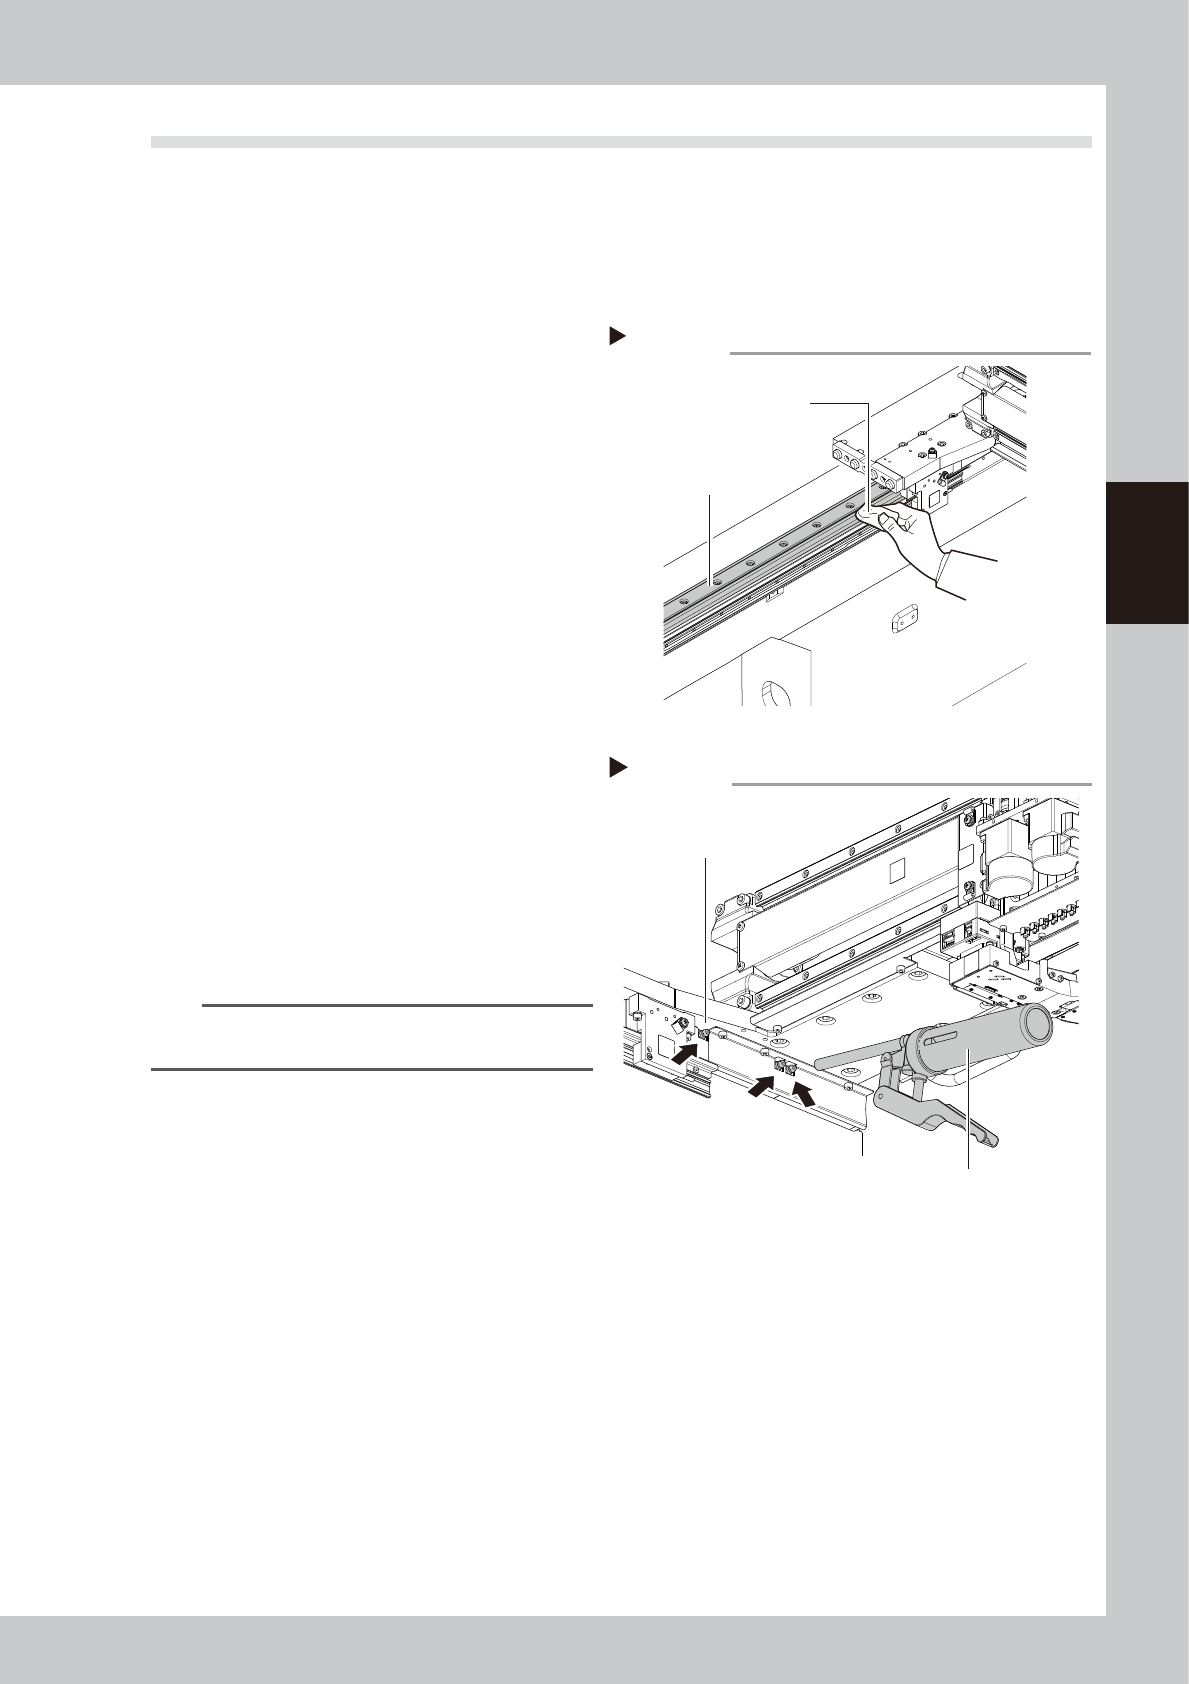
2
Clean the guide.
1. Move the head unit to one end manually.
2. Use lint-free cloth to wipe the entire
guide.
3. Move the head unit forward manually.
Wipe the positions where cleaning could
not be performed in 2.
3
Inject the grease.
Use a grease gun (bent type nozzle) to inject
the specified grease (NSL) from the grease
nipples (6 locations/table) for the Y-axis
guide.
4
Spread the grease.
Move the head unit back and forth several
times manually to spread the grease.
n
NOTE
The grease injected through the nipple oozes to the
guide when moving the axis.
5
Wipe off the excess grease.
Wipe off the excess grease from both ends
of the guide.
6
Apply the grease again.
Repeat Steps 3 to 5 twice again.
After that, visually check that the grease is
applied to the entire guide.
Cleaning the guide
Step 2
Cloth
Guide
53326-KMK-00
Injecting the grease
Step 3
Grease gun (Standard type)
Grease nipple
53327-KMK-00
3-18
3
Periodic maintenance items
7
Perform a warm-up.
1. Remove the square cloth.
2. Close the machine safety cover and
cancel the emergency stop. Detach the
carriage if the machine is carriage type.
e
3. Open the Warm-up screen, and perform
the warm-up operation for approximately
8 minutes.
4. After stopping warming up, press the
emergency stop button and then open
the machine safety cover.
5. Wipe the grease accumulated on the
guide end surface.
c
CAUTION
Repeat Step 7 until grease accumulations no longer
occur. Beginning production with grease accumulations
present could cause the grease to spatter.
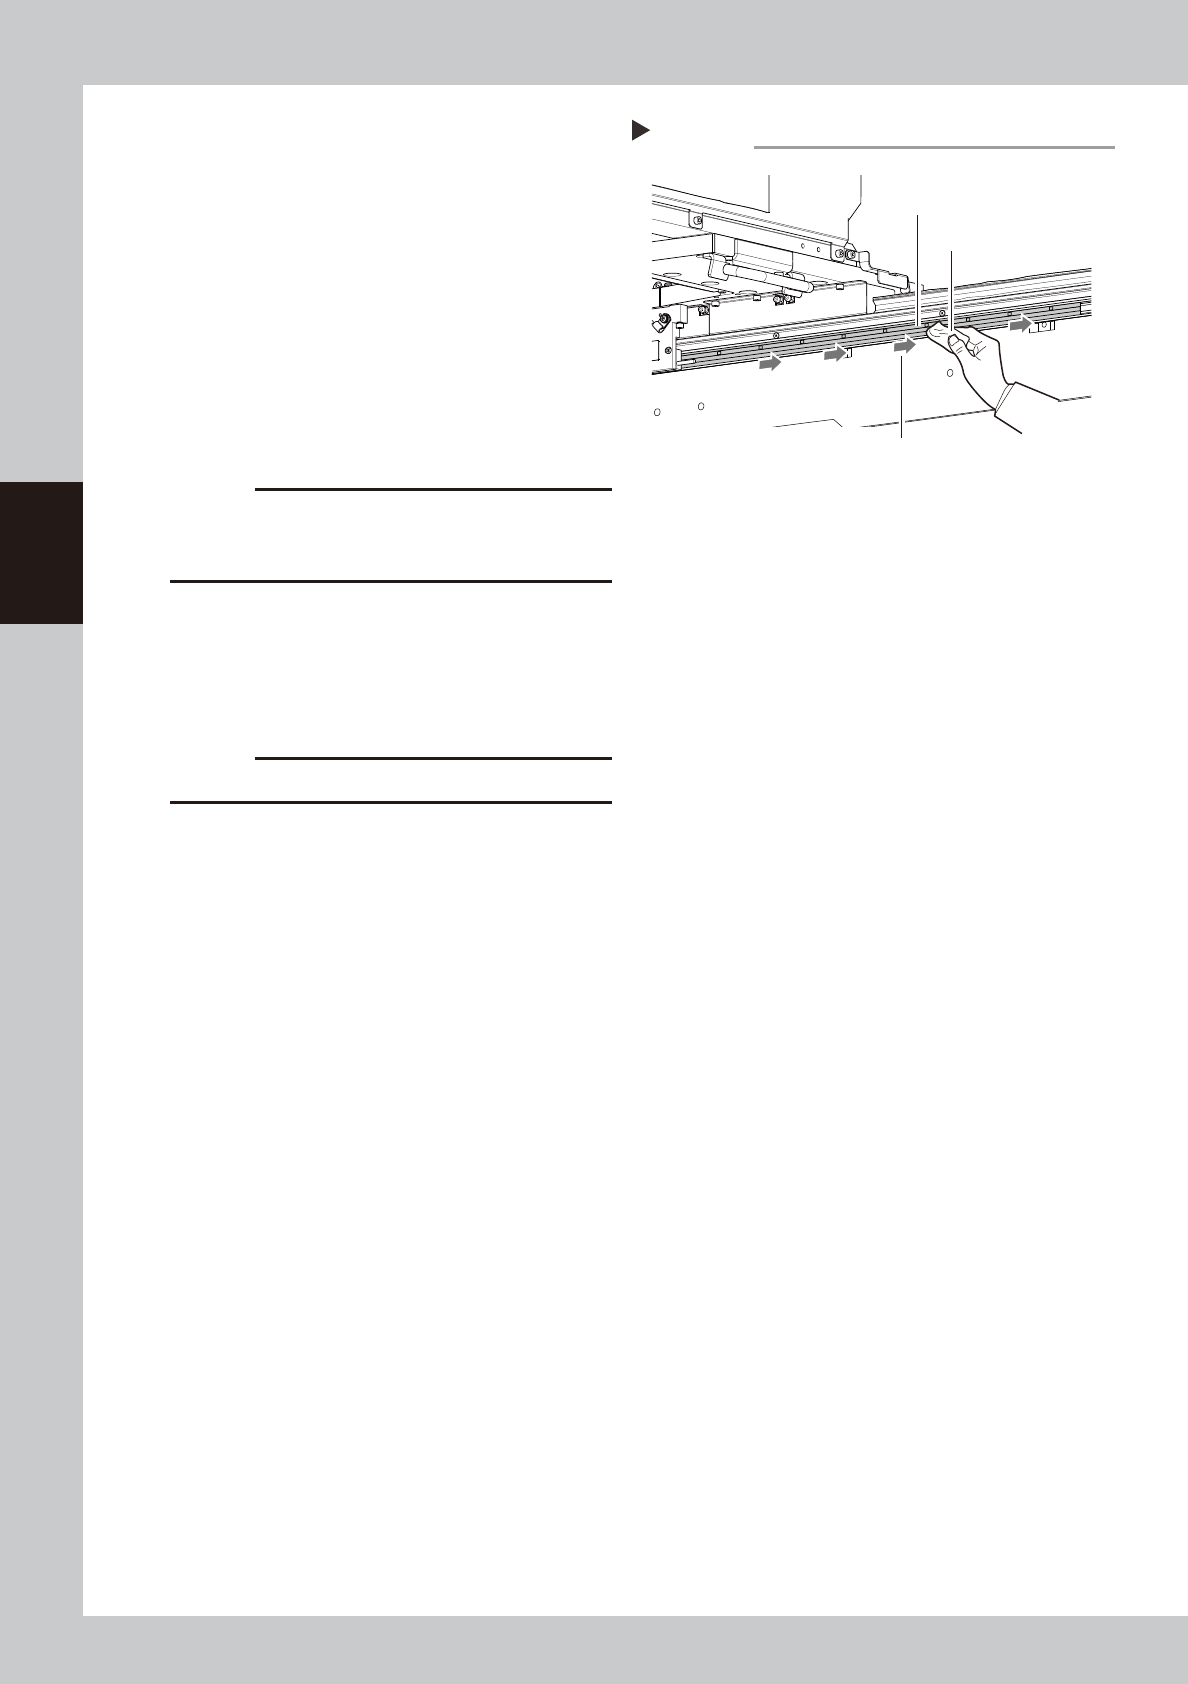
8
Clean the linear scale.
Use dry and lint-free cloth to dry-wipe the
linear scale. If significant soiling exists, apply
ethanol to cloth slightly and wipe it in one
direction. Then dry-wipe the area.
c
CAUTION
Do not dry-wipe the linear scale strongly.
Cleaning the linear scale
Step 8
Cloth
Linear scale
Wipe in one direction.
53328-KMK-00