YSM20R_YSM20WR_Mainte_E.pdf - 第51页
Chapter 2 Daily maintenance items Contents Before beginning work 2-1 1. Checking the nozzle 2-2 1.1 Checking with software 2-2 1.1.1 V acuum level when nozzle is open 2-4 1.2 Checking the nozzles visually 2-5 2. Cleaning…

1-17
1
Maintenance
2.4 Required tools
Prepare the following tools and items necessary for maintenance.
n
Tool list
: Supplied with machine, : Options
Name Description
Phillips screwdriver Large, small
Flat-head screwdriver Large, small
Phillips precision screwdriver #0, #1 (Used to replace nozzle leaf springs and air valves.)
Flat-head precision screwdriver Used to remove O-ring or replace circlip.
Hex wrench set 1 set
Cutting pliers Used to cut cable ties when cleaning inside of side-view camera.
Precision wrench Used to maintain spline shaft.
Grease gun Used to apply grease.
Air blow tool Used for cleaning.
Ultrasonic cleaner Used to clean nozzles.
Oil syringe for nozzle holder Used to apply turbine oil (VG32).
Nozzle cleaning wire Used to clean nozzle holes.
Vacuum assembly Used to clean feeder plate surface, etc.
Plastic spatula and brush Used to clean belt guide and pulley.
n
Other tool list
: Supplied with machine, : Options
Name Description
Cloth Use lint-free cloth that does not leave dust or residue.
Square cloth Used to prevent parts from being lost or contaminated. (2 sheets)
Cleaning alcohol Use absolute ethanol.
Paper cup or tray Used to clean inside of spline shaft.
Cable ties (100 mm, 250 mm) Used to clean inside of side-view camera.
Cotton swab (15 cm) Used to clean the camera prism, lighting unit, etc.
Lens cleaner Used to clean camera lighting unit.
Blower brush Used to clean camera lighting unit.
Cleaning kit Used to clean spline shaft.
Leaf spring positioning tool for HM head Used to attach the leaf springs of the HM head.
ANC nozzle attaching/detaching tool Up to 10 nozzles at the nozzle station can be attached/detached at once.
n
Safety goggles and mask
Name Description
Dust-proof goggles
Always wear these goggles and mask when using alcohol, such as
absolute ethanol or an air blow.
Dust-proof mask
Protective gloves Use when applying lubricant as needed.

2-1
2
Daily maintenance items
Before beginning work
In most cases, maintenance should be performed after powering off the machine.
However, some maintenance tasks are performed under emergency stop conditions powering on the machine.
In such cases, ensure adequate safety and press the emergency stop before beginning the maintenance.
Power on the machine during maintenance when any servo-axis must be operated or machine operation
checked. In this case, also ensure adequate safety before beginning the maintenance.
When operating the machine, make sure the following conditions are met.
n
Operating conditions
1. Supply air pressure is kept at correct pressure.
2. All safety covers are closed.
3. When the machine is equipped with exchange carriages, all exchange carriages are clamped.
4. Nozzles and other units are attached in place.
n
NOTE
The description "Cancel the emergency stop." is in the procedures of this manual. It means "releasing the emergency
stop and pressing the [Ready] button to turn the servo on".
n
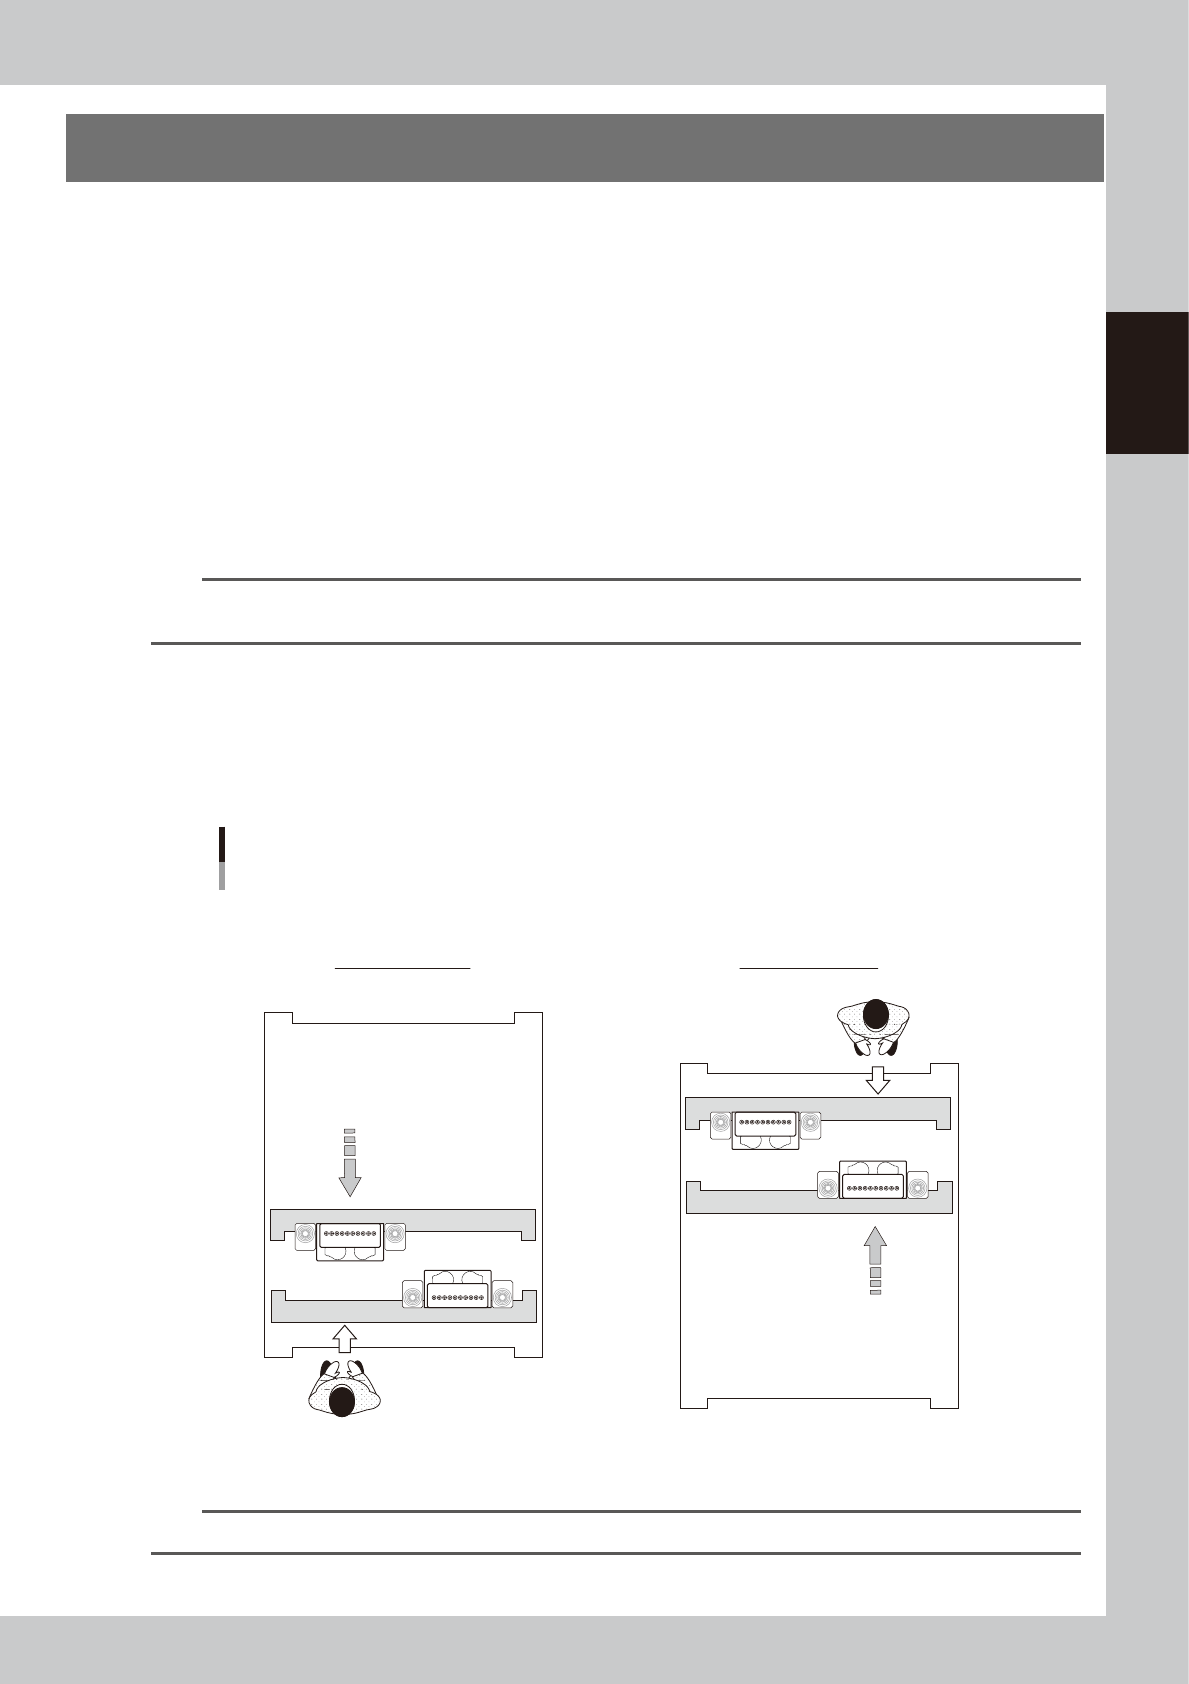
Maintaining head units
When maintaining 2-beam head units, move the front head unit to rear and move the rear head unit to front to easily
access to the head unit.
Head units
2-beam type (Example: front/rear HM heads)
■ Maintaining head units
Machine front
Maintaining rear head
Maintaining front head
Machine front
Move head unit.
Move head unit.
53204-KMK-00
n
NOTE
The [Head Pos. Front] and [Head Pos. Rear] buttons on "Setup" screen are convenient to move head units.