00196497-07_SM_SXDX12_en.pdf - 第222页
Service Work Conveyor COT inse rt 3.10.10 Replacing the Waste Tape Chute 222 Service Manual SIPLACE SX1/SX2/DX1/DX2 FS02 Installation ► Hook the waste tape chute into place. SXDX12V1V2 – Tap e Cutter – Was te T ape Chute…
Service Work Conveyor
3.10.10 Replacing the Waste Tape Chute COT insert
Service Manual SIPLACE SX1/SX2/DX1/DX2 FS02 221
3.10.10
3.10.10 Replacing the Waste Tape Chute
Replacing the Waste Tape Chute
Parts, Equipment and Tools
Select the appropriate waste tape chute:
You may need the following parts in addition:
▪ Protection waste chute DX1/2 left [03094519-xx]
▪ Protection waste chute DX1/2 right [03094522-xx]
Removal
Component Supply - Manual Tables - Dismantling Protections - Color Version
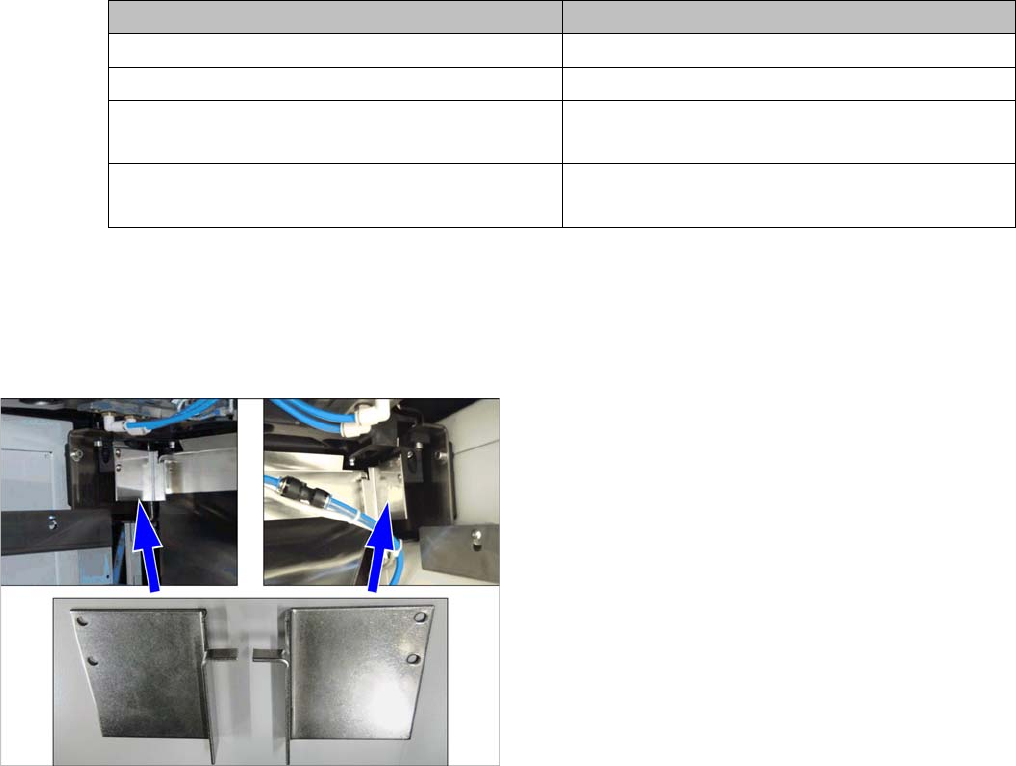
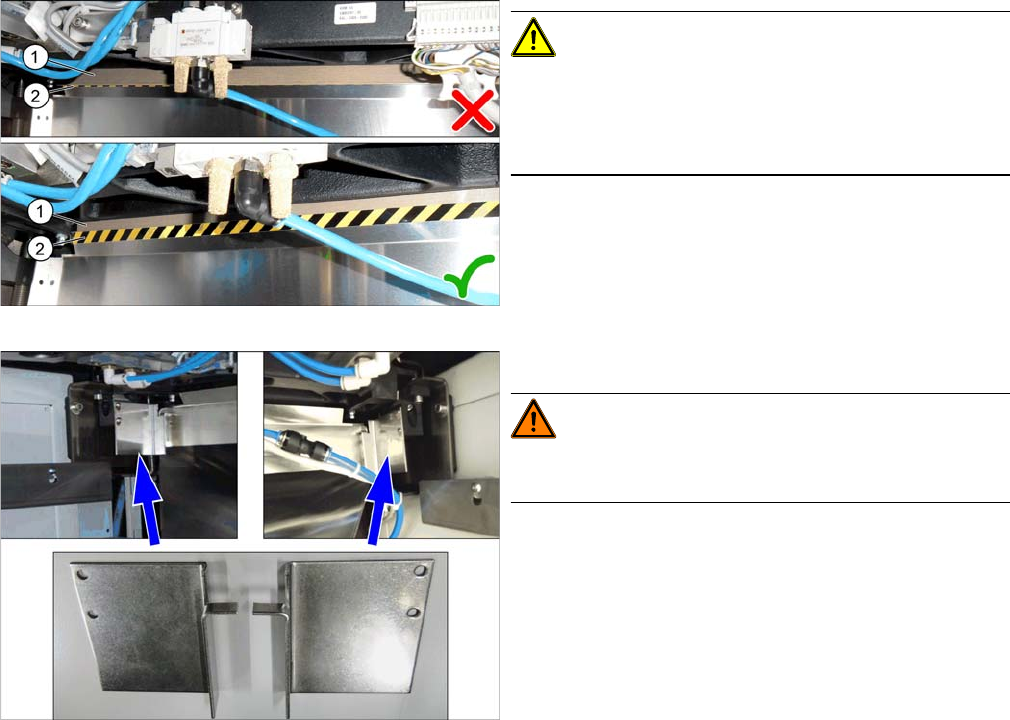
► Unhook the waste tape chute.
Assembly Waste tape chute
Manual table MT 60 [03081652-xx] Waste chute DX1/2 COT60 [03088958-xx]
Manual table MT 30 [03082686-xx] Waste chute DX1/2 COT30 [03088960-xx]
COT insert 60 / P001 [03059353-xx]
COT insert 60/2-slots [03089843-xx]
Waste chute SX1/2 COT60 [03064026-xx]
COT insert 30 / P001 [03067206-xx]
COT insert 30/2-slots [03089844-xx]
Waste chute SX1/2 COT30 [03073312-xx]
Manual tables only:
► Dismantle the protections:
– Protection waste chute DX1/2 left [03094519-xx]
– Protection waste chute DX1/2 right [03094522-
xx]
Service Work Conveyor
COT insert 3.10.10 Replacing the Waste Tape Chute
222 Service Manual SIPLACE SX1/SX2/DX1/DX2 FS02
Installation
► Hook the waste tape chute into place.
SXDX12V1V2 – Tape Cutter – Waste Tape Chute – Pay Attention to the Plastic Strips – Color Version
Compone nt Supply - Manual Tables - Fitting Pr otections - Color Version
CAUTION!
Make sure that the plastic strips (1) (if present) are locat-
ed behind the plate (2).
The black-yellow hatched label must be completely visi-
ble.
Manual tables only:
WARNING!
There is a risk of injury on manual tables without the two
protections.
► Fit the two protections:
– Protection waste chute DX1/2 left [03094519-xx]
– Protection waste chute DX1/2 right [03094522-
xx]
Service Work Conveyor
3.11.1 Replacing the Cutter [03063781Sxx] Cutter
Service Manual SIPLACE SX1/SX2/DX1/DX2 FS02 223
3.11
3.11 Cutter
Cutter
3.11.1
3.11.1 Replacing the Cutter [03063781Sxx]
Replacing the Cutter [03063781Sxx]
Parts, Equipment and Tools
▪ Cutter [03063781Sxx]
▪ Help of second person, if needed
Overview
Removal
► Switch off the machine, disconnect it from the power supply and secure it to prevent unauthorized
reactivation. Observe the instructions in section "1.2 Preparatory Work..." [ ➙ 13].
► Unhook the waste tape chute. Please also observe section "3.10.10 Replacing the Waste Tape
Chute" [ ➙ 221].
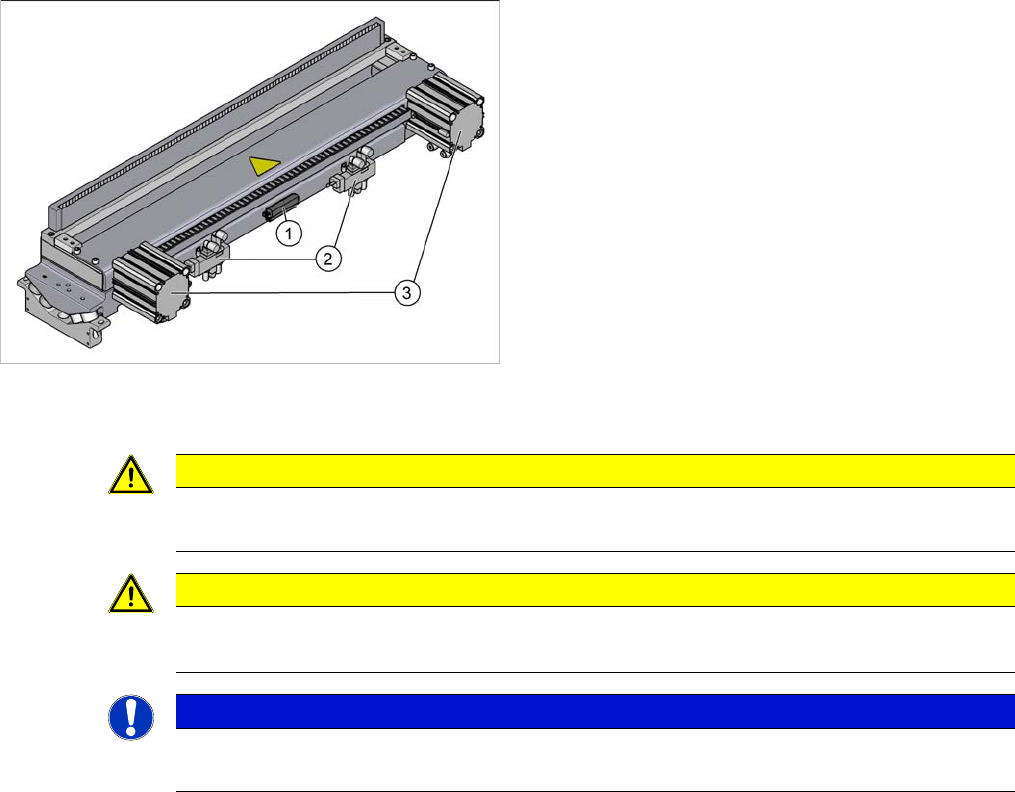
► Unplug all electrical and pneumatic connections to the cutter. You may want to mark their positions,
to make clear assignment easier later on.
1. Connection for control system
2. Solenoid valves
3. Short-stroke cylinder
CAUTION
Switch off the compressed air supply!
When working on the pneumatic system, always switch off the compressed air supply.
CAUTION
There is a risk of injuring yourself on the cutting edge of the blades.
► Do not reach into the cutting area.
NOTICE
COT insert
The cutter can be removed without dismantling the COT insert.