00197369-02_AI_PPW_2te_Reihe_X-Serie-S_de_en.pdf - 第100页
Installation X3 S / X4 S - Installing the NC Row 2 3.2.5 Final work: 100 NC Row 2 - NC in Front of MTC 2/WPC PPW 2te Reihe - PPW vor MTC 2/ WPC
Installation
3.2.5 Final work: X3 S / X4 S - Installing the NC Row 2
NC Row 2 - NC in Front of MTC 2/WPC PPW 2te Reihe - PPW vor MTC 2/WPC 99
3.2.4.8
3.2.4.8 Inserting and Fixing the NC
Inserting and Fixing the NC
3.2.5
3.2.5 Final work:
Final work:
► Push the component trolley back into the relevant location.
► Switch the machine back on and boot the station computer.
► Perform a complete reference run.
► Switch over to the operator level Service.
► Select either Machine Calibration or Single Calibration and then the nozzle changer calibration.
► Calibrate the magazine position, reject position and pickup heights, one after the other.
► Select either Machine Calibration or Single Calibration and then the nozzle changer calibration.
► Calibrate the magazine position, reject position and pickup heights, one after the other.
► Calibrate the nozzle station and, if present, the SPS magazine(s).
3.2.5.1
3.2.5.1 Software Settings
Software Settings
► Add the second nozzle changer for the setup in SIPLACE Pro.
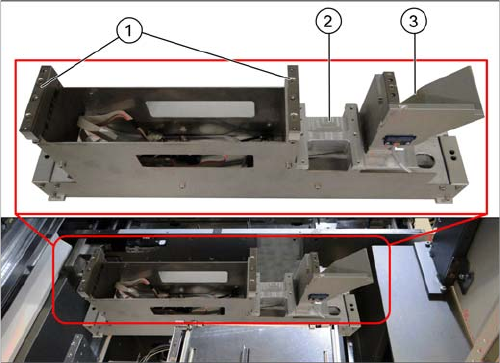
Inserting the NC
1. Basic assembly NC row 2
2. Installation point W5 magazine
3. Nozzle station
► Insert the nozzle changer and screw this to its
mounts.
► Insert the relevant magazine.
⇨ The installation is now complete.
► If you do not want to install another nozzle changer,
continue with section "3.2.5 Final work:" [ ➙ 99].
Installation
X3 S / X4 S - Installing the NC Row 2 3.2.5 Final work:
100 NC Row 2 - NC in Front of MTC 2/WPC PPW 2te Reihe - PPW vor MTC 2/WPC
Appendix
4.1.1 Jumpers on the Nozzle Changer Excerpts from the Service Manual
NC Row 2 - NC in Front of MTC 2/WPC PPW 2te Reihe - PPW vor MTC 2/WPC 101
4
4 Appendix
Appendix
4.1
4.1 Excerpts from the Service Manual
Excerpts from the Service Manual
The following chapters are excerpts from the service manual. For more information, refer to the full ser-
vice manual for your machine.
4.1.1
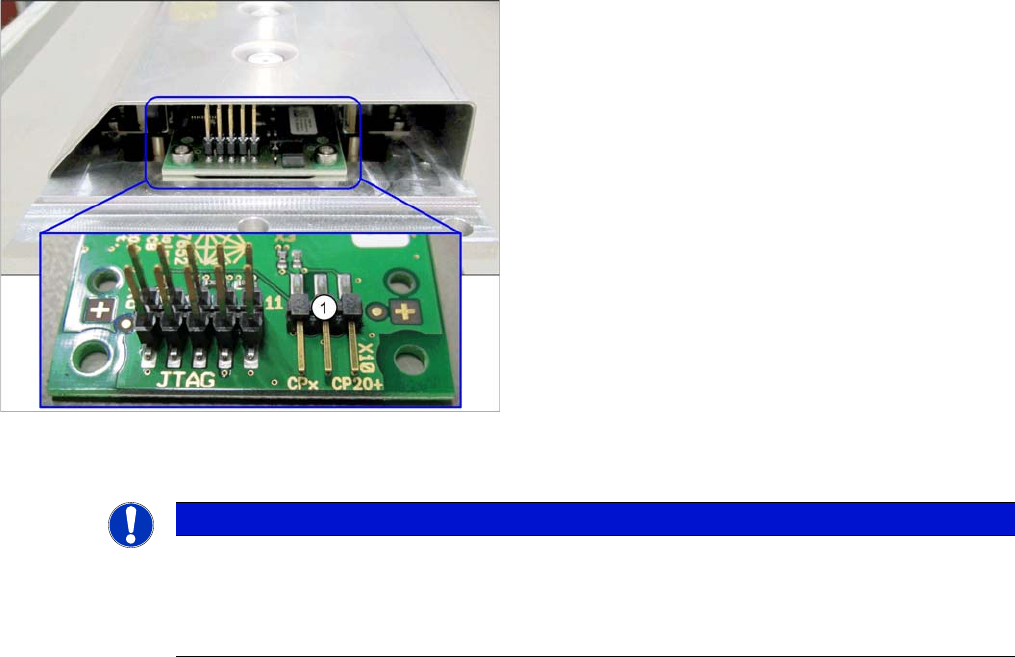
4.1.1 Jumpers on the Nozzle Changer
Jumpers on the Nozzle Changer
The jumper X10 needs to be set at the following nozzle changers:
▪ Nozzle changer basic structure CPx/all assembly - short [03103649-xx]
▪ Nozzle changer basic structure CPx/all assembly - long [03103514-xx]
Overview
Preparation
1. Jumper X10
NOTICE
Before installation
Due to the design, this setting must be performed before installation in the machine.
► If the new nozzle changer is being fitted as a spare part in a machine with I/O module con-
trol, you will need to reconnect the jumper to pin 1-2.