00197369-02_AI_PPW_2te_Reihe_X-Serie-S_de_en.pdf - 第69页
Installation 3.1.1 Preparatory Steps X4i S - Installing the NC Row 2 NC Row 2 - NC in Front of MTC 2/WPC PPW 2te Reihe - PPW vor MTC 2/WPC 69 3.1.1.4 3 . 1 . 1 . 4 M o v in g t h e C O T I n s e r t t o t h e S e c o n d…
Installation
X4i S - Installing the NC Row 2 3.1.1 Preparatory Steps
68 NC Row 2 - NC in Front of MTC 2/WPC PPW 2te Reihe - PPW vor MTC 2/WPC
3.1.1.3
3.1.1.3 Adjusting the Hand Guard
Adjusting the Hand Guard
Before the COT insert can be moved to position 2, you need to replace the original hand guard at the
relevant location with the shorter cover on the left and right.
Parts required
Quantity Designation Item number
1 Short cover, right on location 1 and 3 03086067-xx
1 Short cover, left on location 2 and 4 03086070-xx
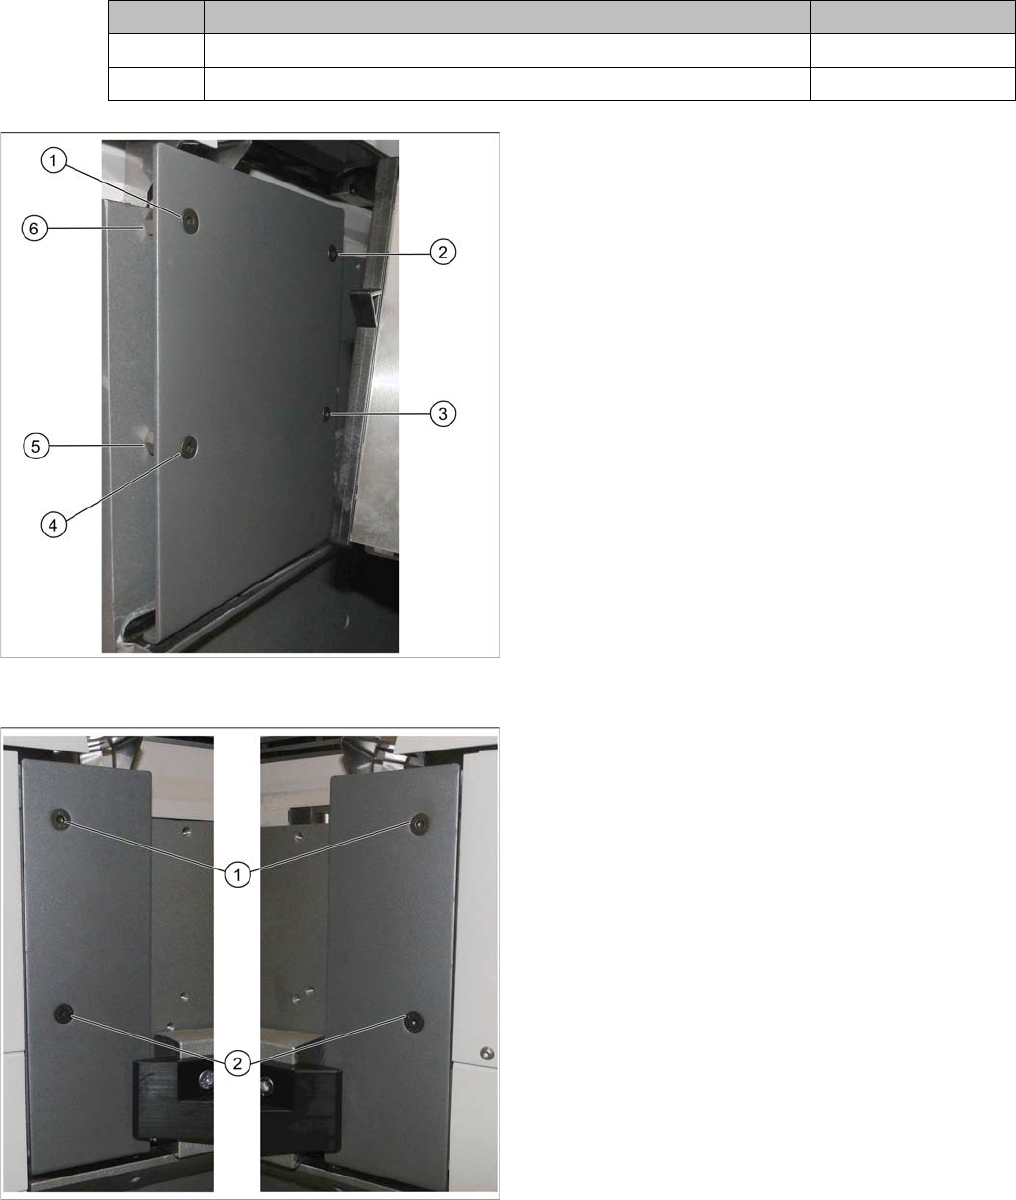
Hand guard on left at table position 1
► Remove the screws at (1) to (4).
► Remove the spacer bolts underneath points (2) and
(3).
The two spacer bolts at (5) and (6) remain.
Short covers on left and right at table position 2
► Insert the short cover:
⇨ Short cover, right on location 1 and 3
⇨ Short cover, left on location 2 and 4
► Use the spacer bolts to screw the cover into place at
(1) and (2).
Installation
3.1.1 Preparatory Steps X4i S - Installing the NC Row 2
NC Row 2 - NC in Front of MTC 2/WPC PPW 2te Reihe - PPW vor MTC 2/WPC 69
3.1.1.4
3.1.1.4 Moving the COT Insert to the Second Table Position
Moving the COT Insert to the Second Table Position
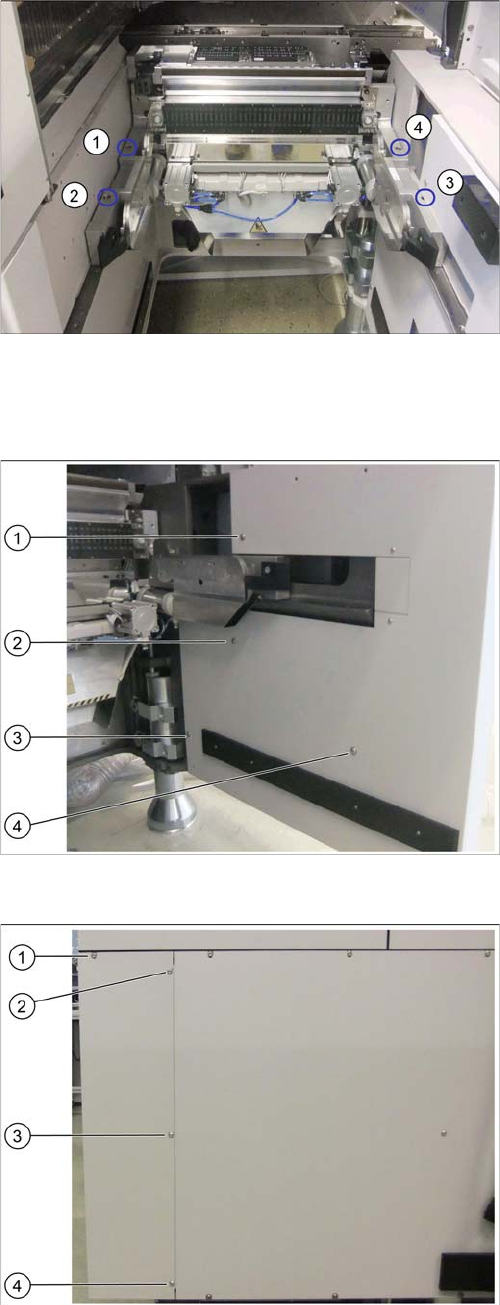
Removing the side cover
Location 4 on the X4i S – at first table position
(1) to (4): Fastening screw positions of the COT insert
To gain access to the screw at (3), you need to remove
the outer side cover.
See also"4.1.2 Installation Positions of COT Insert and
Manual Table (Table Positions)" [ ➙ 102]
Location 4 on X4i S – inner side cover
(1) to (4): Positions of fastening screws
► Remove the screws at (1) to (4).
Location 4 on X4i S – outer side cover
(1) to (4): Positions of fastening screws
► Remove the screw at (1).
► Loosen the screws at (2) to (4).
► Remove the side cover.
Installation
X4i S - Installing the NC Row 2 3.1.1 Preparatory Steps
70 NC Row 2 - NC in Front of MTC 2/WPC PPW 2te Reihe - PPW vor MTC 2/WPC
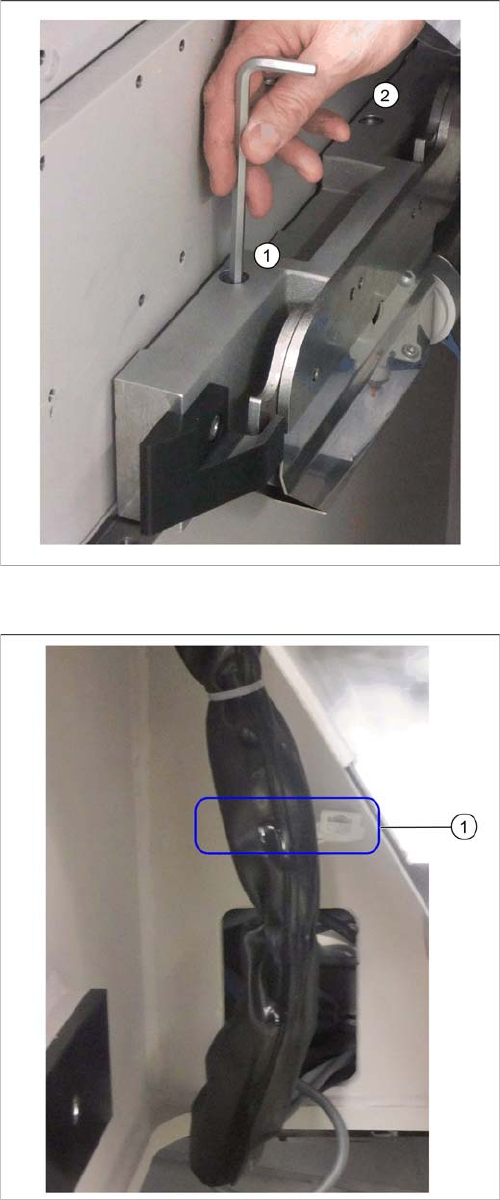
Moving the COT insert
Fastening screws
(1) and (2): Fastening screws on the left of the COT insert
► Remove the two fastening screws on both the left and
the right of the COT insert using an Allen key or a T-
handle.
Fixture point on machine frame
► Remove the cable ties at (1).