BM料架治具使用手册.pdf - 第70页
4.2 T ape Feeder Operation Check Feeder Inspection Unit 4.2−1 1 DX1OEC−31−250−A0 =REMARKS= • Refer to the ‘Operation Manual of the T ape Feeder ’ for details on the cylinder mode. • When the motorized feeder in the cylin…
Feeder Inspection Unit
4.2 Tape Feeder Operation Check
4.2−10
DX1OEC−31−250−A0
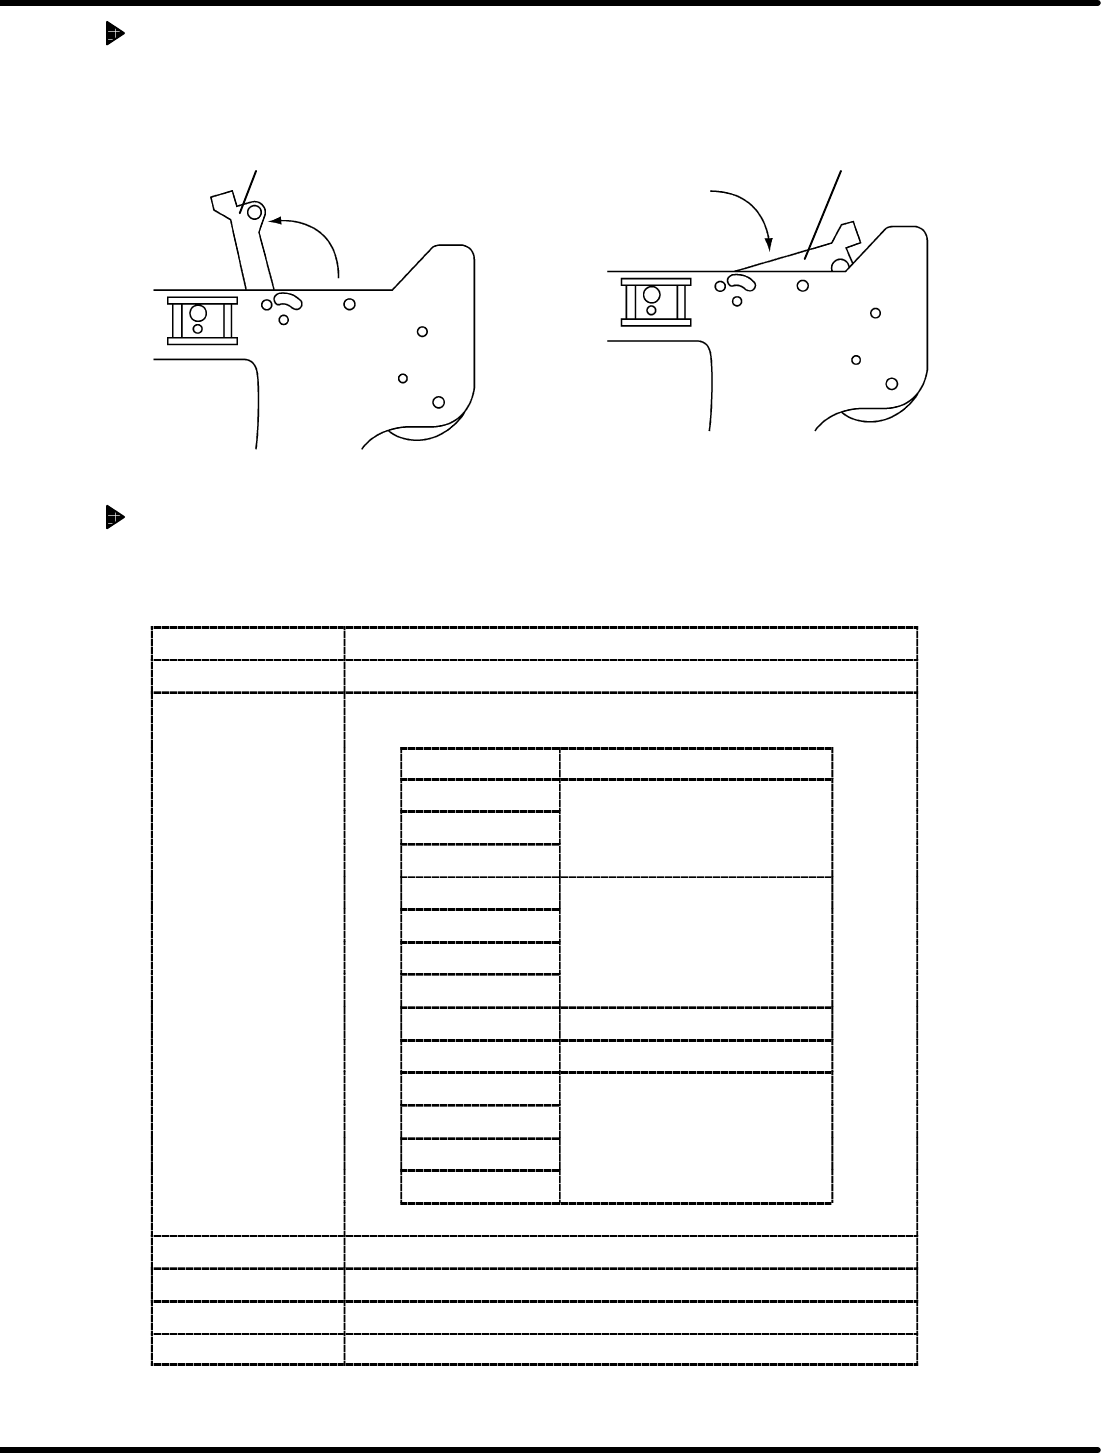
Operation Check for the Tape Exhaust Detection Sensor
If the tape in the feeder is exhausted, the ‘TAPE’ lamp will come on.
As shown in the drawing below, check the sensor for proper operation by using the tape end detection
lever.
‘TAPE’ lamp goes out.
‘TAPE’ lamp comes on (When tape exhaustion
occurs.)
Tape end detection lever
Tape end detection lever
Motorized Feeder (Pneumatic Feeder Mode)
The motorized feeder includes the cylinder mode which enables the same operation signal as the
pneumatic feeder to be received.
When using the motorized feeder in the cylinder mode, set the switches on the control panel as follows:
Switch
Setting
CASSETTE TYPE Set to “1”.
FEED TIMES Can be set between 1 and 4 according to the feed pitch
specified on the feeder side.
Feed pitch (mm) ‘FEED TIMES’ value
4
8
1
12
16
20
2
24
2
28
32 4
36 3
44
48
4
52
4
56
PEEL SELECT Set to “0”.
LED ON OFF (Do not push.)
FEED OFF (Do not push.)
PEEL OFF (Do not push.)
4.2 Tape Feeder Operation Check
Feeder Inspection Unit
4.2−11
DX1OEC−31−250−A0
=REMARKS=
• Refer to the ‘Operation Manual of the Tape Feeder’ for details on the cylinder mode.
• When the motorized feeder in the cylinder mode has been set to the clamp stand, pressing “AUTO”
will result in an operation error if the ‘FEED TIMES’ values have not been set properly. (The
‘ERROR’ lamp will come on.)
When this happens, detach the motorized feeder once from the clamp stand and set the ‘FEED
TIMES’ values correctly.
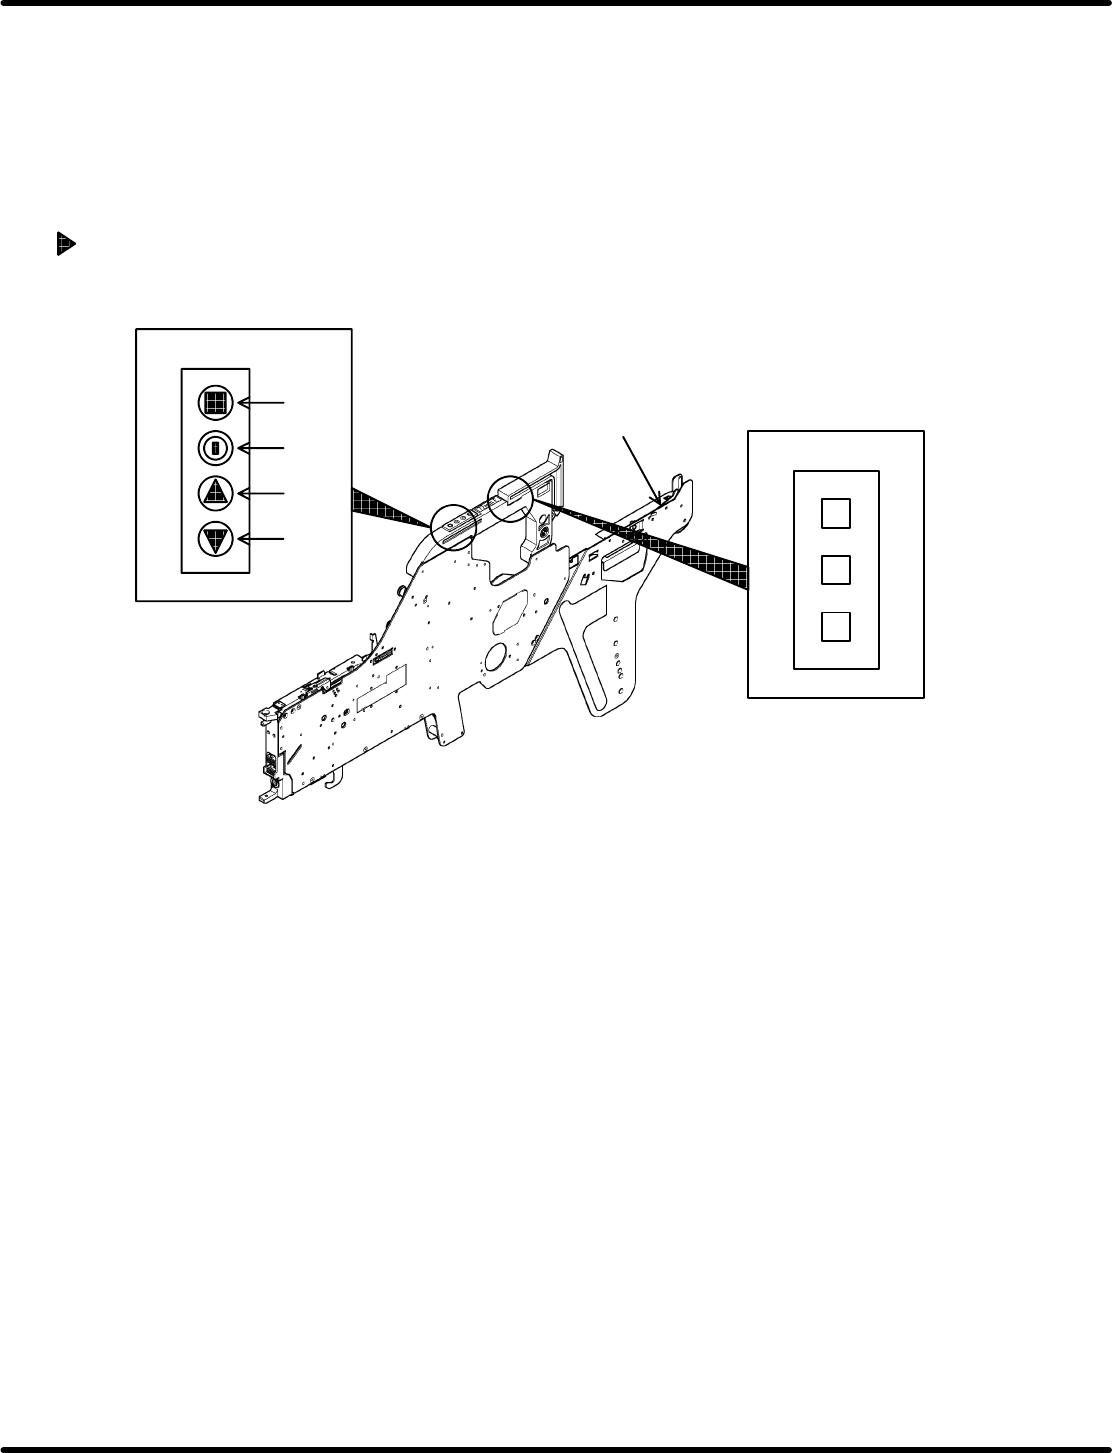
Changing the Feed Pitch of the Motorized Feeder (Reference)
Here following describes how to change the feed pitch with the motorized feeder loaded to the feeder
adjust unit.
4
Dial switches
Control switches
Motorized feeder
Tape end detection lever
−
+
(1)
(2)
(3)
(4)
1. Using the dial switches on the motorized feeder, change the feed pitch to the desired value.
(At this time, the button (2) LED flashes in red four times.)
2. Press the button (1) on the motorized feeder (for more than two seconds) to determine the pitch.
The button (2) LED stops flashing.
3. This completes the setting.
=HINT=
The feed pitch can be changed with the dial switches with the motorized feeder detached from the
clamp stand.
Feeder Inspection Unit
4.2 Tape Feeder Operation Check
4.2−12
DX1OEC−31−250−A0
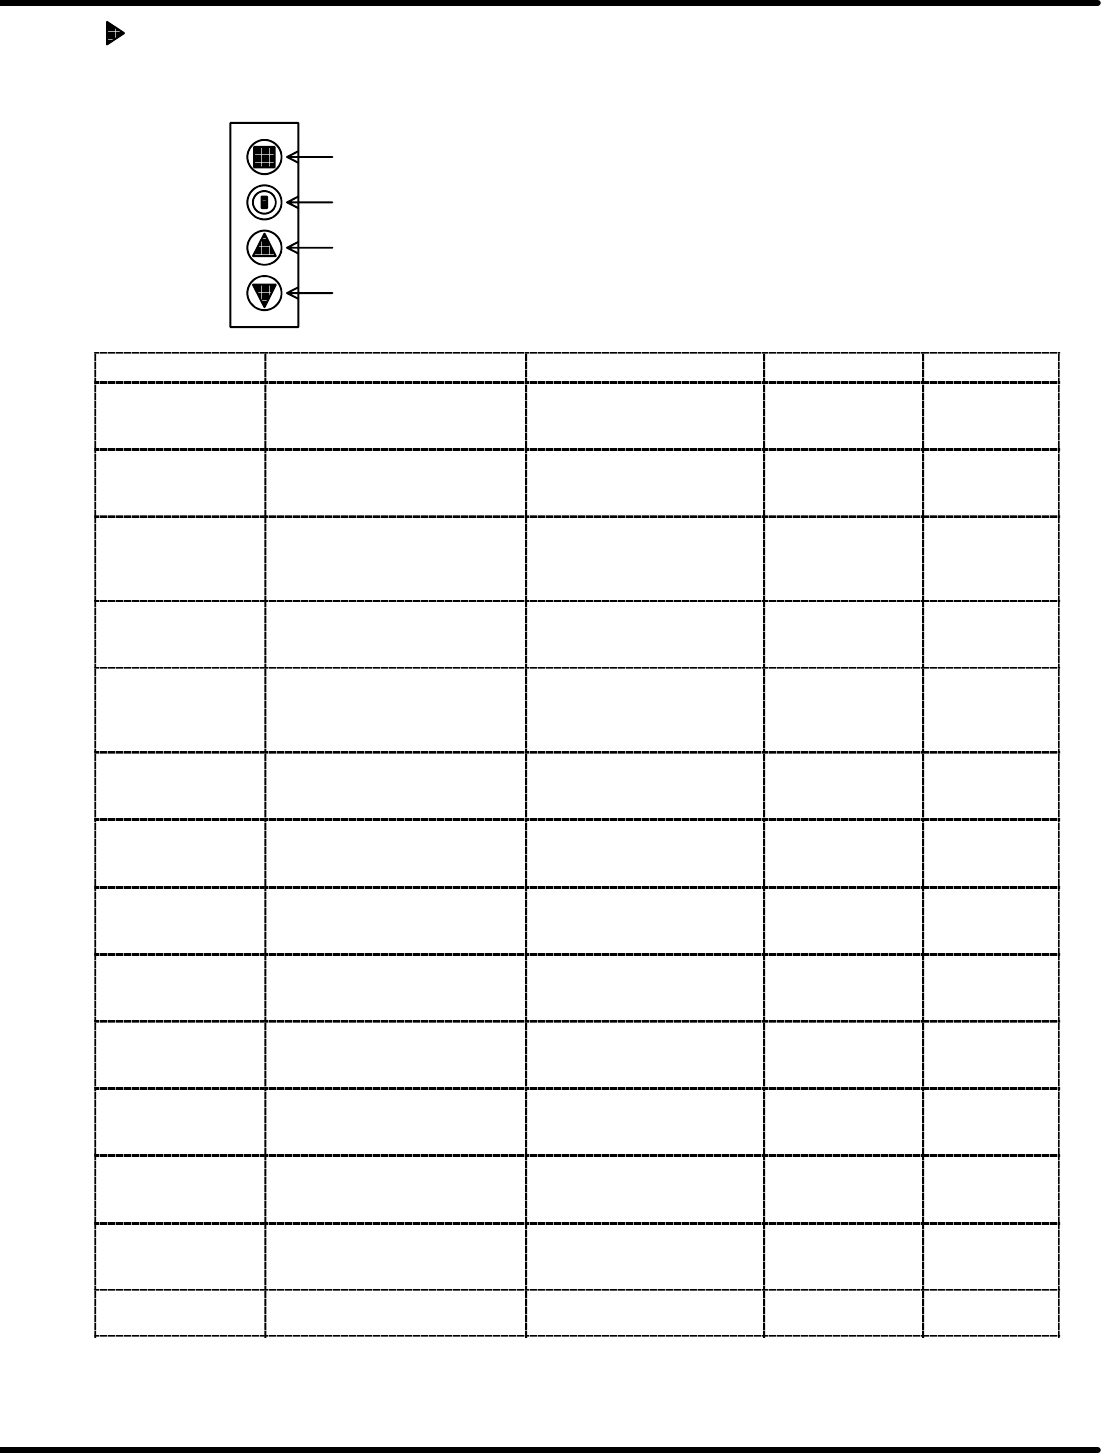
Error Indication of the Motorized Feeder (Reference)
The LEDs on the control switches vary with the status as shown in the table below.
Control switches
(1)
(2)
(3)
(4)
Status Description Cause/Countermeasure How to reset LED
Feed overload
Stops operation if the torque
command of the feed motor
exceeds the setting value.
Feeding has been stopped due
to jammed component, etc.
Press the reset
switch on the
feeder.
Flashes in red 2
times
Servo position
overdeviation
Stops operation if the position
deviation of the feed motor
exceeds the setting value.
Check the reel turn resistance
or tape for jamming, etc.
Press the reset
switch on the
feeder.
Flashes in red 2
times
Origin OFF
Stops operation if an origin sensor
signal will not be sent within 2
turns of the feed motor when
returning to its origin.
The origin sensor may be
defective.
Press the reset
switch on the
feeder.
Flashes in red 2
times
Cylinder setting error
Checks feed count by the feed
pitch in the cylinder mode and
stops operation if an error occurs.
Modify the feed count value in
the parts library on the machine
side.
Press the reset
switch on the
feeder.
Flashes in red 3
times
Winding timeout 1
Stops operation if a winding limit
signal does not turn OFF even
after the tape is wound for the
specified length.
Check if the tape is exhausted
or take−up motor is locked.
Press the reset
switch on the
feeder.
Flashes in red 4
times
Winding timeout 2
Stops operation if no winding
command is issued during two
feeding operations.
Check if the tape is not
jammed, etc.
Press the reset
switch on the
feeder.
Flashes in red 4
times
Illegal function
changeover
Issues a warning if the setting
switch is changed when the power
is ON.
Check the setting value and
press RESET for more than 2 s
to determine.
Press the reset
switch on the
feeder.
Flashes in red 4
times
Servomotor
overcurrent
Stops operation if overcurrent is
detected in the feed motor.
The servomotor is damaged or
improper connection, etc.
Press the reset
switch on the
feeder.
Lit red *
Servo sensor error
Stops operation if a sensor input
error is detected in the feed motor.
The encoder cable may be
broken.
Press the reset
switch on the
feeder.
Lit red *
Feed signal error
Stops operation if a feed signal
does not turn OFF after feeding is
finished.
Trouble occurred in the
machine.
Press the reset
switch on the
feeder.
Lit red *
Overvoltage
Stops operation if the power
voltage (24V) is over the allowed
range.
Trouble occurred in the supply
power.
Press the reset
switch on the
feeder.
Lit red *
Undervoltage
Stops operation if the power
voltage (24V) is under the allowed
range.
Trouble occurred in the supply
power.
Press the reset
switch on the
feeder.
Lit red *
Other
(current detection
error)
Stops operation if the A/D
conversion offset value exceeds
the allowed range.
Trouble occurred in the current
detection circuit.
Press the reset
switch on the
feeder.
Lit red *
Monitor mode
Ignores winding timeout 1 and
receives a feed signal only.
− − Flashes in red