EUKYX-199-4110_G5S2_Instruction_Vol4_E.pdf - 第112页
EUKYX 1-63 199-4100 5.1 V acuum Nozzle Cleaning procedure 5. 1 V acuum No zzle Cleaning procedure Remove Nozzle Filter Refer to "5.3 Nozzle Filter Removal Procedure" in this chapter for details. Blow air to Vac…
EUKYX
1-62199-4100
5. Cleaning of vacuum nozzles
• Vacuum Nozzle Cleaning Tool List
Nozzle
Type
Section Dirtiness Type
Masking
tape
Pin
gauge
+
Insertion
Jig Drill
Air Blow
Jig +
Water
Washing
Hydraulic
Cleaning
Machine
Wiping
using a
Cloth,
etc.
Cleaning
Frequency
Spring
Nozzle
for 0201
to 0402
Nozzle Tip Attached Solder
Paste
Required Required
Appropriately
Nozzle Tip
Hole
Flux, Clogged
with Foreign
Object
Required Required Required
Nozzle
Inside Hole
Flux
Required
Once a week
Spring
Sliding
Section
Air
Contamination
Paper Fiber
Required Required
Nozzle
Outside
Required
Filter
Change
Spring
Nozzle
for 0603
to 1608
Nozzle Tip Attached Solder
Paste
Required Required
Appropriately
Nozzle Tip
Hole
Flux, Clogged
with Foreign
Object
Required Required Required
Nozzle
Inside Hole
Flux
Required
Once a week
Spring
Sliding
Section
Air
Contamination
Paper Fiber
Required Required
Nozzle
Outside
Required
Filter
Change
Rigid
Nozzle
Nozzle Tip Attached Solder
Paste
Required Required
Once a week
Nozzle Tip
Hole
Flux, Clogged
with Foreign
Object
Required Required Required
Nozzle
Inside Hole
Flux
Required
Nozzle
Outside
Required
Filter
Change
EUKYX
1-63199-4100
5.1 Vacuum Nozzle Cleaning procedure
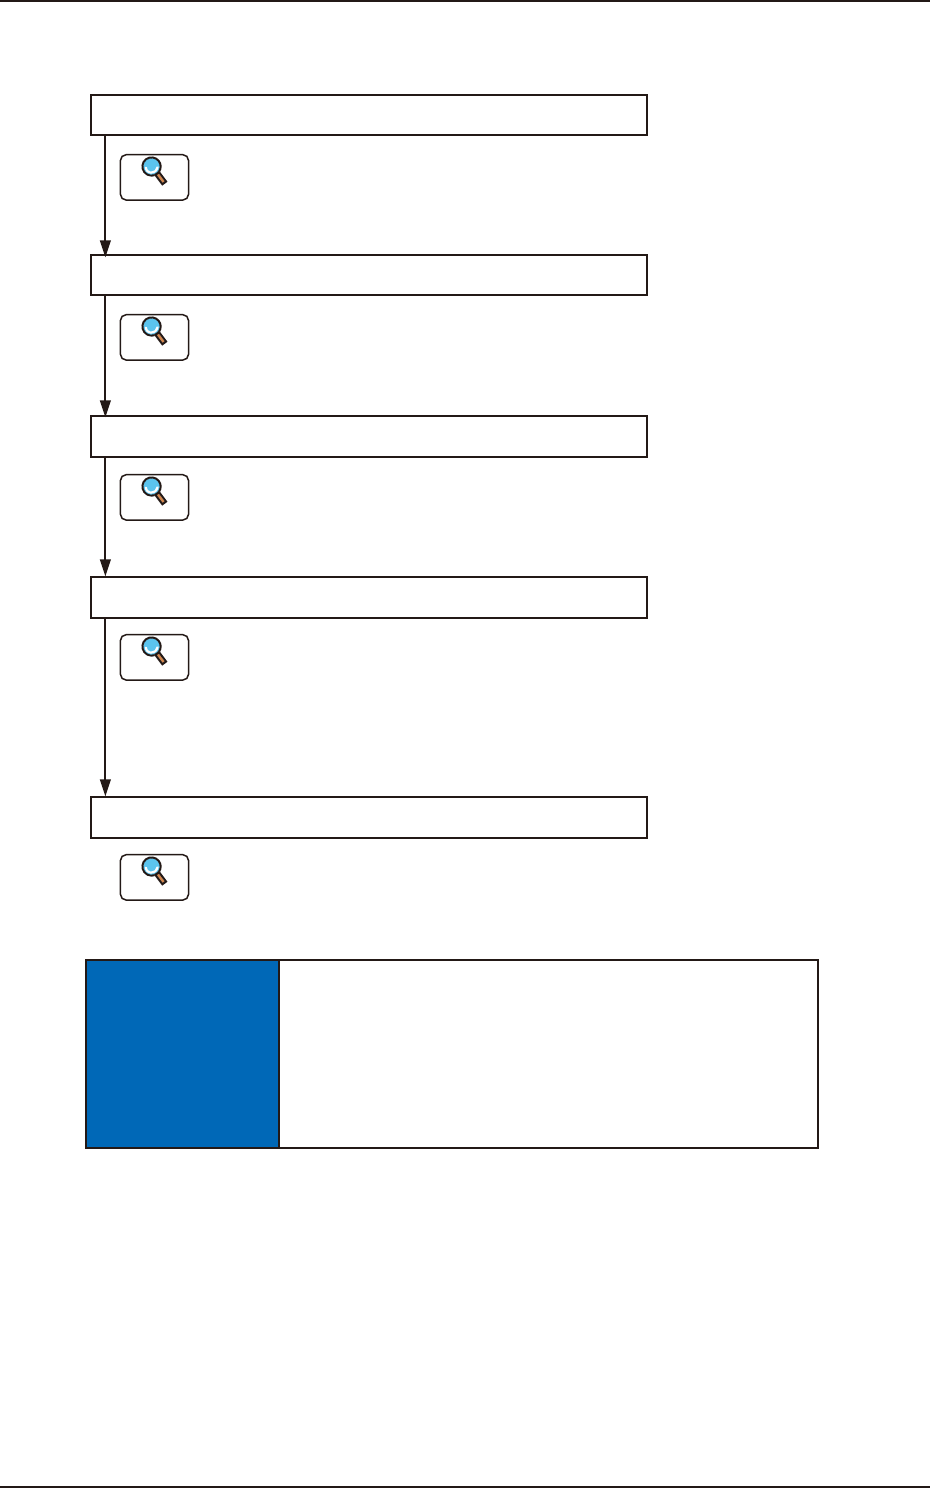
5.1 Vacuum Nozzle Cleaning procedure
Remove Nozzle Filter
Refer to "5.3 Nozzle Filter Removal Procedure"
in this chapter for details.
Blow air to Vacuum Nozzle
Confirm that there is no clog in pick-up hole
Refer to "5.4 Method of Blow air" in this chapter
for details.
Confirm the clog in the top of pick-up hole by
the magnifying glass.
Refer to "5.5 Cleaning of high-speed nozzle
hole part with pin gauge" in this chapter for details.
Remove Vacuum Nozzle
Refer to "5.2 Method of detaching vacuum
nozzle" in this chapter for details.
Insert the nozzle filter
Refer to "5.7 Nozzle Filter Insertion Procedure"
in this chapter for details.
Reference
Reference
Reference
Reference
Reference
F4A47
NOTICE
In the case that the ultra-sonic cleaning and solvent
are used for the nozzle cleaning, the adhesive
applied onto the nozzle joint section would be
degraded, which could cause adhesive ablation and
damage to the nozzle unit.
EUKYX
1-64199-4100
5.2 Method of detaching vacuum nozzles
5.2 Method of detaching vacuum nozzles
• Store the nozzles in the nozzle stocker (housing) through window navigations and take out the
nozzle stocker (housing).
(a) Do not take out a nozzle from the head by hand. Otherwise, the nozzle does not
conform to the nozzle data.
(b) Do not blow air to the vacuum nozzle attached to the head.
The filter may fly out and the head may be damaged.
(c) Demagnetize the vacuum nozzle after the detachment.
Keep the head section free of any magnetic field.
As an example,
• Do not bring a magnet close to the head section.
• Do not bring any demagnetizer to the head section.
Demagnetize the vacuum nozzle each unit.
Refer to “5. “NOZ.CHG.” Window” in "Chapter 6 (Vol. 2)" for the procedure of nozzle
storage.
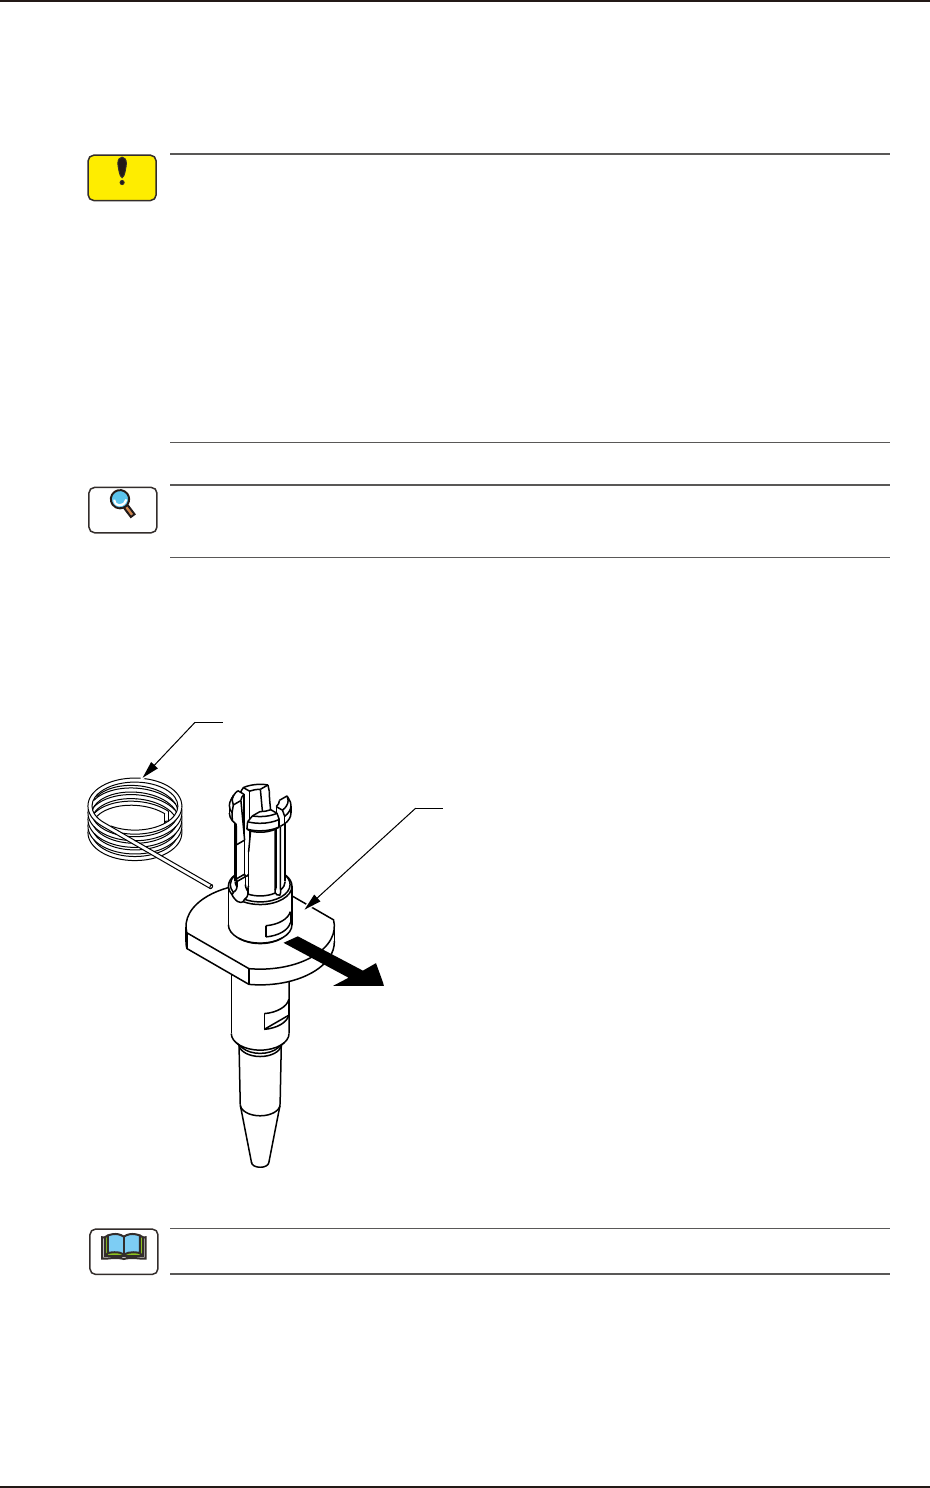
5.3 Nozzle Filter Removal Procedure
Push out the nozzle filter using the filter removal jig as shown in the following figure.
Filter Removing Jig
Vacuum Nozzle
Push
Pushing out the nozzle filter.
F4A48
Do not re-use the removed nozzle filter.
Notice
Reference
Note