EUKYX-199-4110_G5S2_Instruction_Vol4_E.pdf - 第162页
EUKYX 2-33 199-4100 4. “Error“ Window 4. “Error“ W indo w When the mach ine detec ts an error , the fol low in g error win dow appears. [7] [10] [11] [12] [13] [14] [1] [2] [3] [6] [4] [5] F4B4 [7] [8] [9] [10] [11] [12]…
EUKYX
2-32199-4100
3.2 Machine Information list
Err Code
(HEX)
Display Area A Display Area B
80f901 Nozzle auto. Replace
Nozzle is replaced automatically because of a lowering of pick-up
rate.
80f902 Nozzle auto. Replace
Pick-up rate of nozzle went down, and nozzle was replaced
automatically. But nozzle position teaching failed.
80f903 Nozzle auto. Replace
Pick-up rate of nozzle went down, but it is interrupted to replace
nozzle automatically.
80f904 Nozzle auto. Replace
Pick-up rate of nozzle went down. It planned to replace nozzle
automatically, but there was no place to store it.
80f905 Nozzle auto. Replace
Pick-up rate of nozzle went down. It planned to replace nozzle
automatically, but there was no spare nozzle.
80f906 Nozzle auto. Replace
Nozzle is replaced automatically because of a lowering of pick-up
rate. There is not spare nozzle anymore.
80fa01
Automatic correction of
missed standard mark
Standard mark position offset is automatically corrected.
80fb01 Comp. Insertion error A component could not insert it in a PCB. Recovery is performed.
80fc01 Auto Retry Start Auto retry mode is starting.
80fd01 Label Feeder Check Check the label holding bracket is closed.
EUKYX
2-33199-4100
4. “Error“ Window
4. “Error“ Window
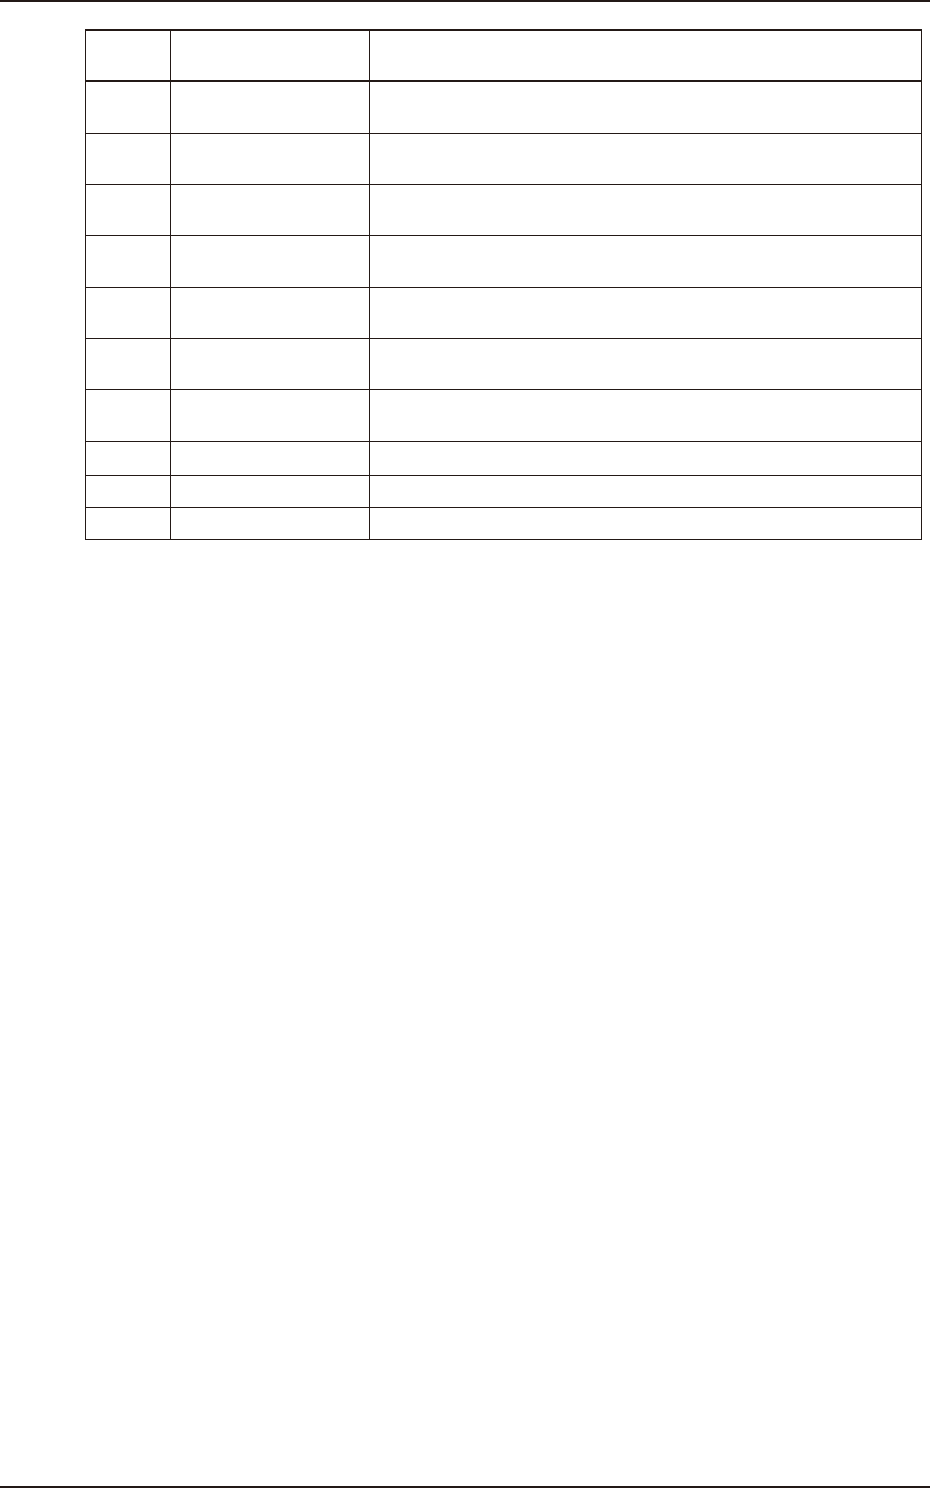
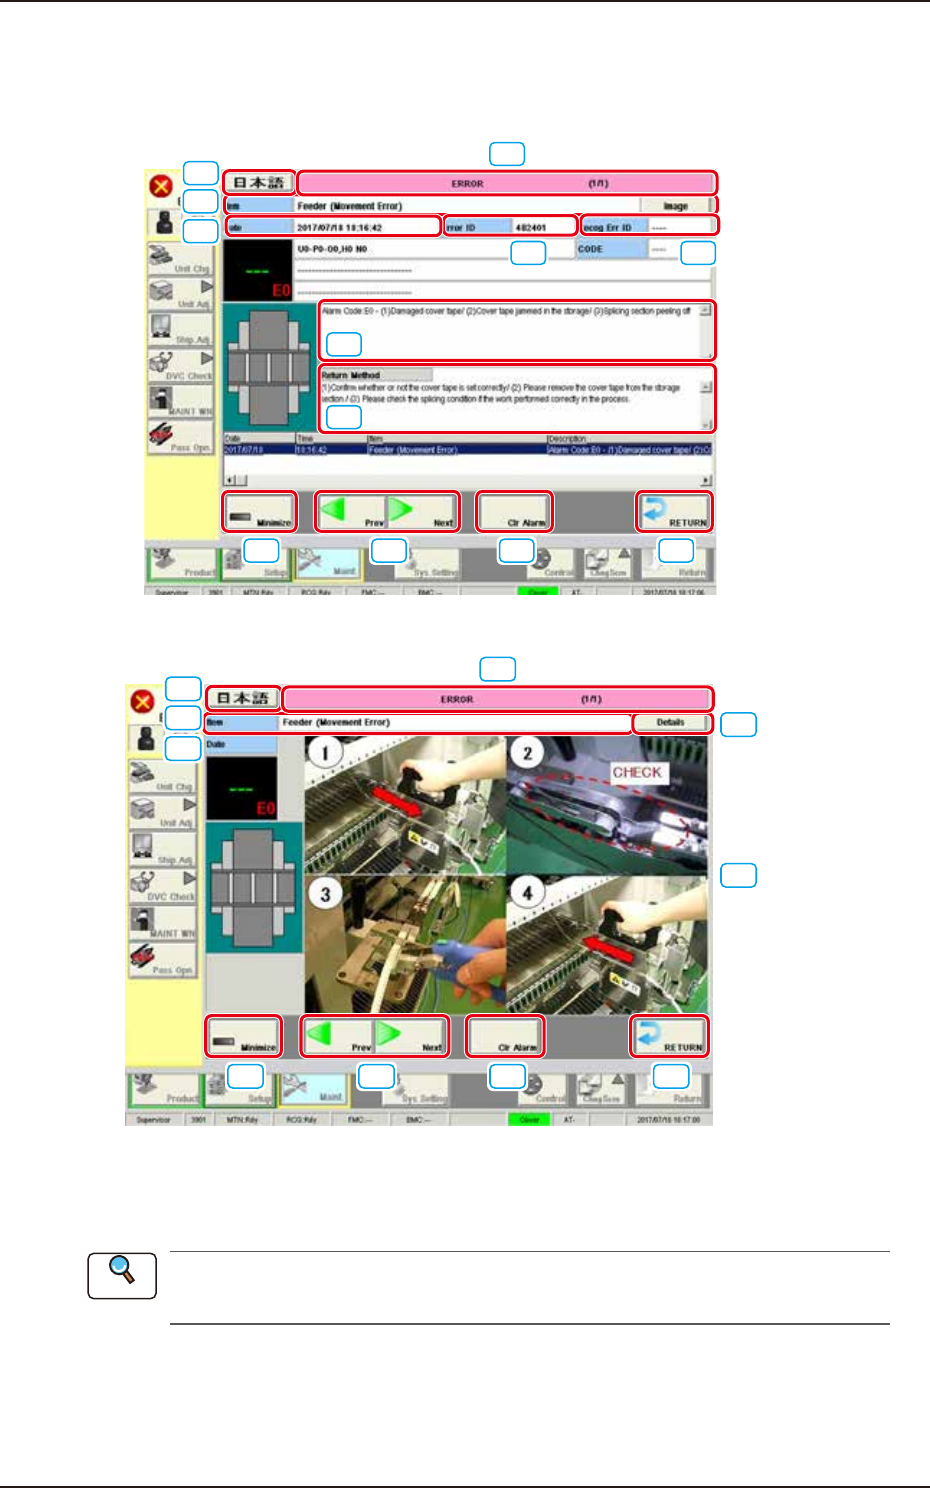
When the machine detects an error, the following error window appears.
[7]
[10]
[11] [12] [13] [14]
[1] [2]
[3]
[6]
[4]
[5]
F4B4
[7]
[8]
[9]
[10]
[11] [12] [13] [14]
[3]
[6]
F4B5
[1] Error ID
The error type is displayed using a 6-digit figure.
When an error has occurred, use this ID as an index and refer to “Chapter 3 Troubleshooting
from Error ID” for details.
[2] Recognition Error ID
In this text box, the error type is displayed using an 8-digit figure.
Reference

EUKYX
2-34199-4100
4. “Error“ Window
[3] Error Name
In this text box, the error category is displayed.
[4] Description
In this text box, the error description is displayed.
[5] Remedy
In this text box, the error name, description, cause and remedial procedure are described.
[6] Date, Time
In this text box, the data and time when the error occurred are described.
[7] Error Description Page
The total pages for the error description and current page are displayed.
Example (3/5)
Total Pages : 5
Current Page : 3
[8] [Details] button
This button changes to the text display.
[9] Image display
The images of the error contents are displayed.
[10] Language button
This button switches the languages.
[11] [Minimize] button
This button minimizes the window.
[12] Page Change
[Previous error] Button : The previous page is displayed.
[Next error] Button : The next page is displayed.
[13] [Clr Alarm] Button
When this button is pressed, only the alarm buzzer is canceled.
[14] [RETURN] Button
When this button is pressed, the alarm buzzer and error display are canceled and returns to the
previous window.
• Reset Procedure from “ERROR” Window
(1) Take notes of the descriptions under “Error ID / Error Name / Description”.
If you forget to make a note of the error description, refer to error description saved in the
“Recall” submenu in the “Product” menu.
(2) Press the [RETURN] button to resume the original window.
(3) Perform the correct remedial procedure referring to “Chapter 3 Troubleshooting from Error
ID” using the error ID as an index, or referring to the remedial procedure in your note.
Notice