EUKYX-199-4110_G5S2_Instruction_Vol4_E.pdf - 第84页
EUKYX 1-35 199-4100 4.6 Cutter Section (7) Inject ap prox . 5 cc new grease a t grease nipples wit h a grease gun (3 locatio ns ) . (1) Insert the nozzle into the hole on the side to lubricate. (2) Wipe off the spilled g…
EUKYX
1-34199-4100
4.6 Cutter Section
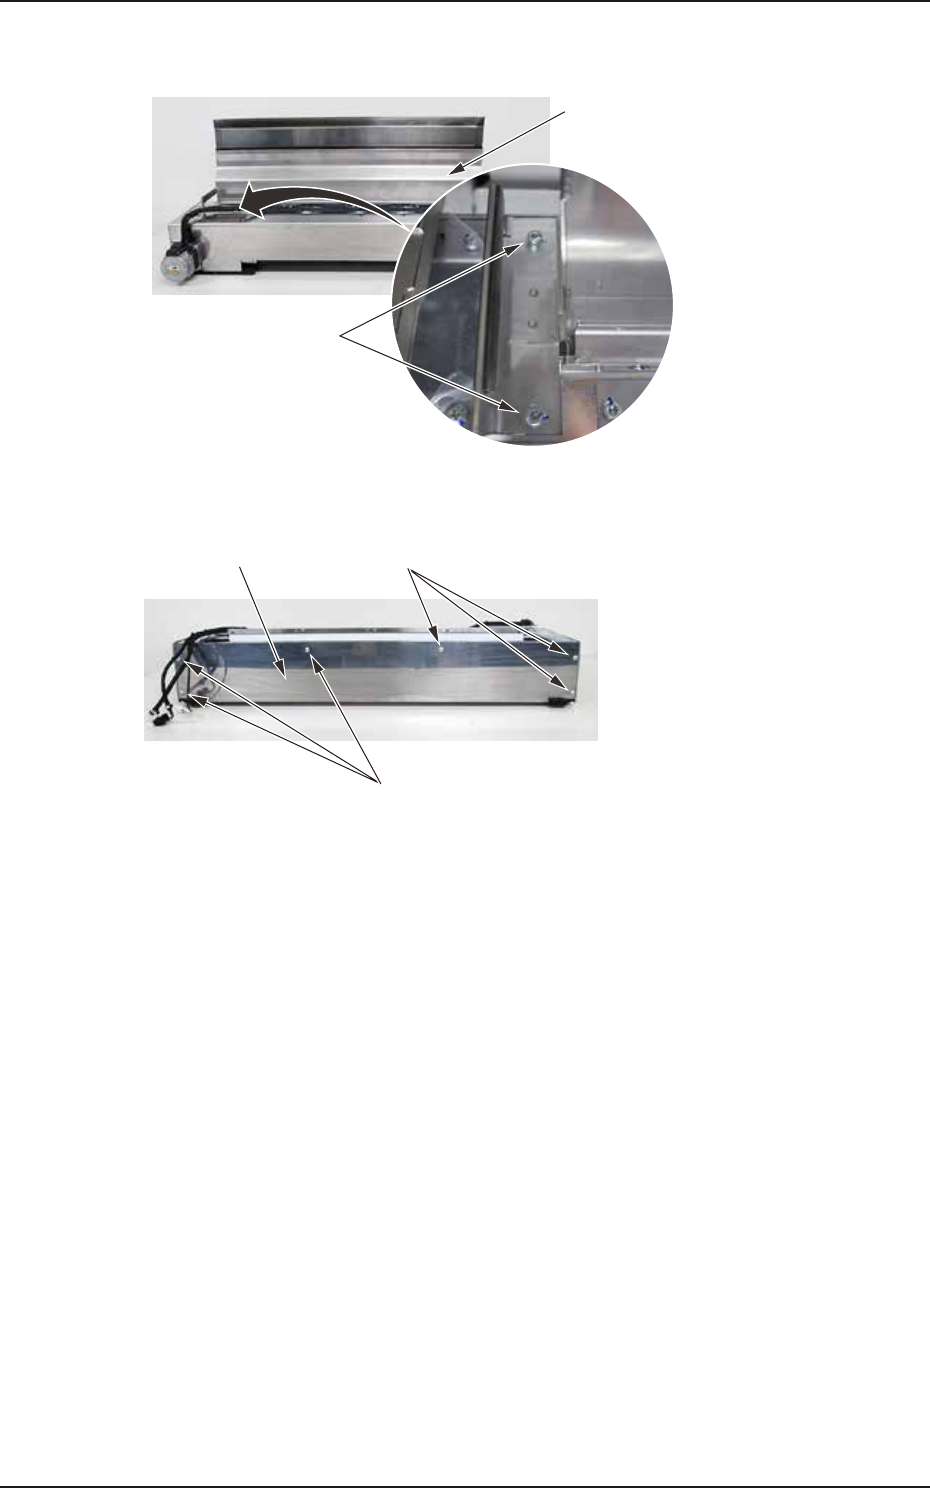
(5) Remove hex socket head cap screws (2 each on left and right) mounting the upper slope.
Detach the upper slope.
Hex socket head cap screws
Upper slope
F4A27D
(6) Remove 6 truss head screws mounting the rear cover. Detach the rear cover.
Rear cover
Truss head screws
Truss head screws
F4A27G
EUKYX
1-35199-4100
4.6 Cutter Section
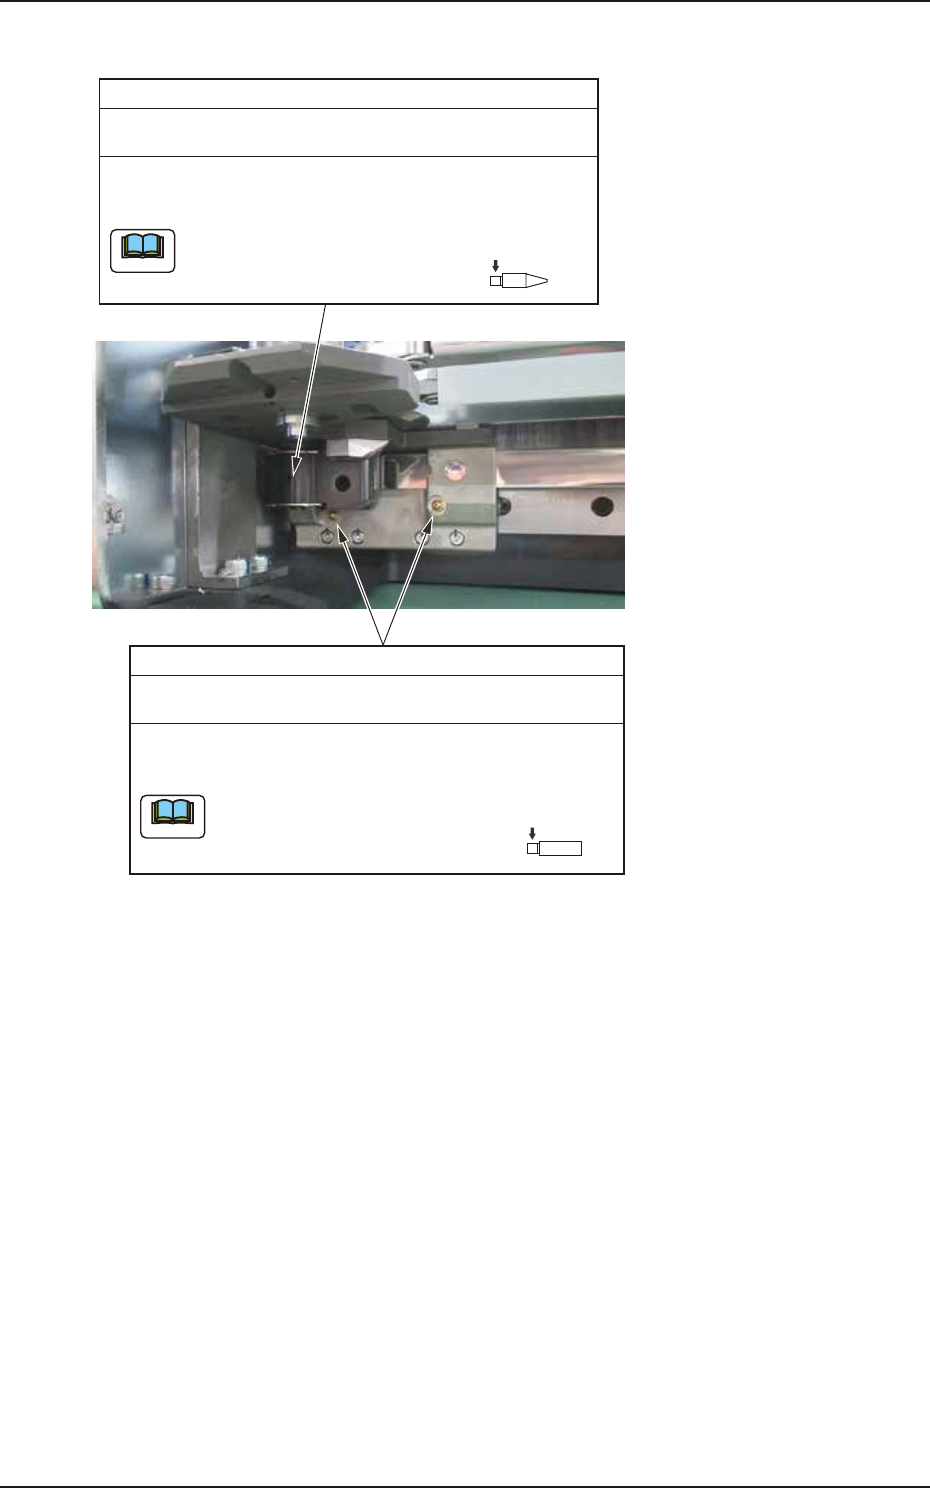
(7) Inject approx. 5 cc new grease at grease nipples with a grease gun (3 locations).
(1) Insert the nozzle into the hole on the side to lubricate.
(2) Wipe off the spilled grease.
(DAPHNE EPONEX GREASE No. 1)
Every 3 months / Lubrication
Needle Bearing
Use Type P nozzle.
Type P
M5 × 0.5
Note
Wipe off the old grease with a rag. Apply new grease to
the upper and bottom of the linear guide grease nipples.
Linear Guide Grease Nipple
(DAPHNE EPONEX GREASE No. 1)
Every 3 months / Lubrication
Use Type N nozzle.
Type N
M5 × 0.5
Note
F4A27GH
EUKYX
1-36199-4100
4.6 Cutter Section
4.6.3 Parts replacement of the cutter unit
WARNING
Pay special attention to the cutter blade when maintaining.
•
You may cut your hand or nger with a cutter blade.
Make sure to wear gloves and maintain with caution.
•
Make sure to attach a cutter blade cover when
maintaining a cutter for protection.
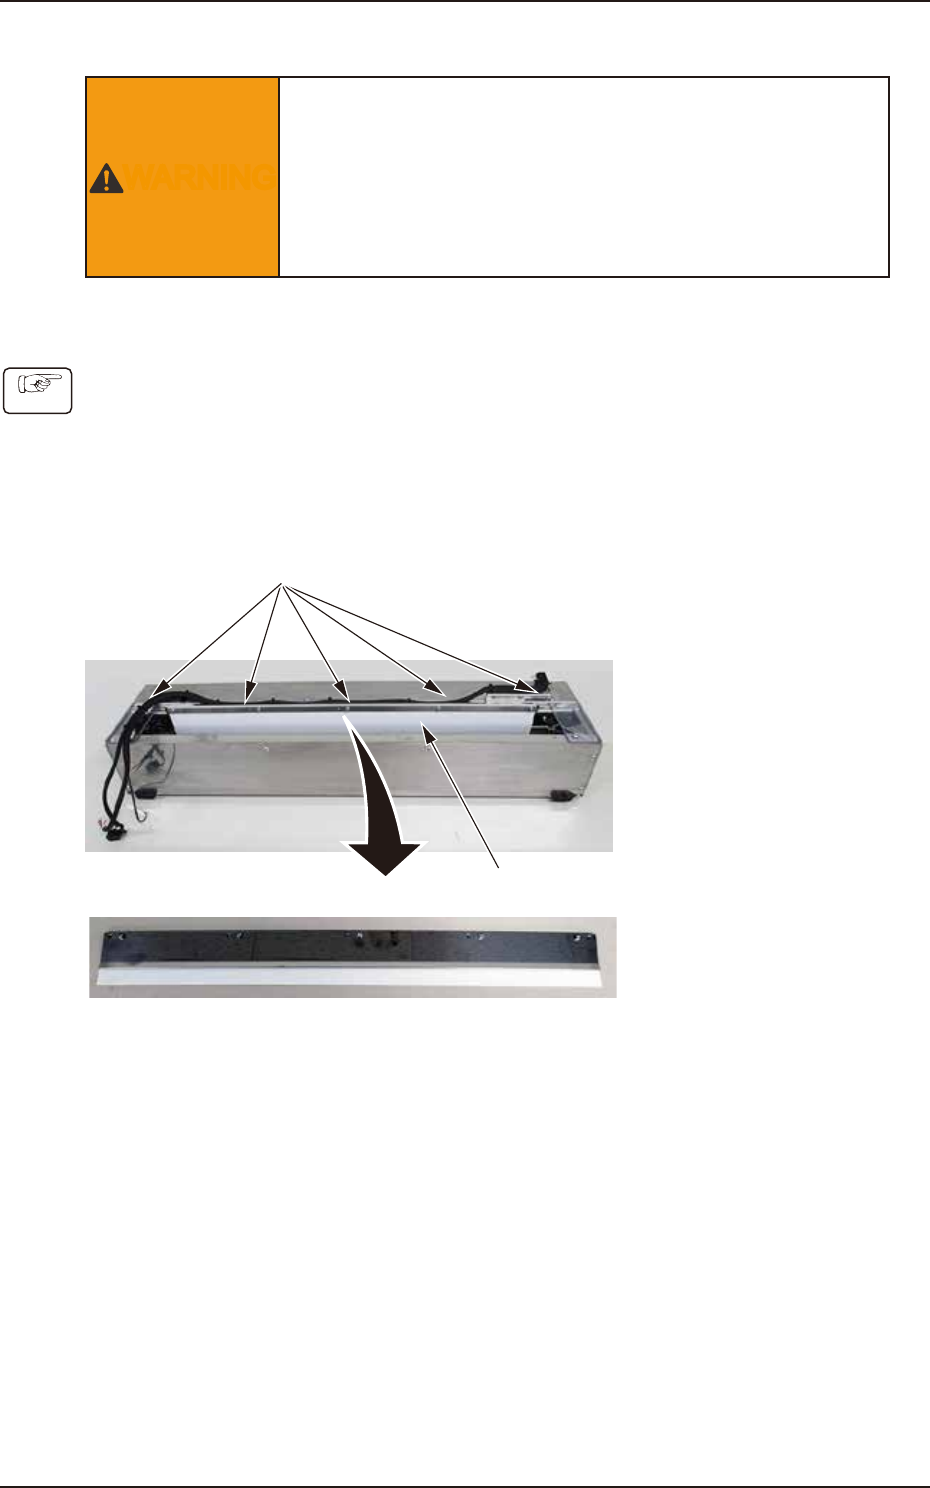
Replacing fluorine Sheet
Cycle: 1 year (Required Time : 35 minutes)
(1) Remove the cutter from the main unit.
Refer to “4.6.1 Cutter Unit cleaning” for the procedure.
(2) Remove the slope from the cutter unit.
Refer to “4.6.1 Cutter Unit cleaning” for the procedure.
(3) Remove 5 hex socket head cap screws mounting the fluorine sheet assembly from the cutter
unit.
Hex socket head cap screws
Fluorine sheet assembly
Removed fluorine sheet assembly
F4B23A
Procedure