EUKYX-199-4110_G5S2_Instruction_Vol4_E.pdf - 第123页
EUKYX 1-74 199-4100 5.7 Nozzle Filter Insertion Procedure (6 ) Return t he acr y lic block t o the filter rep lacem ent jig . Set th e high- spee d nozzle st ocker which shut ter is op en to the filt er repla cement jig.…
EUKYX
1-73199-4100
5.7 Nozzle Filter Insertion Procedure
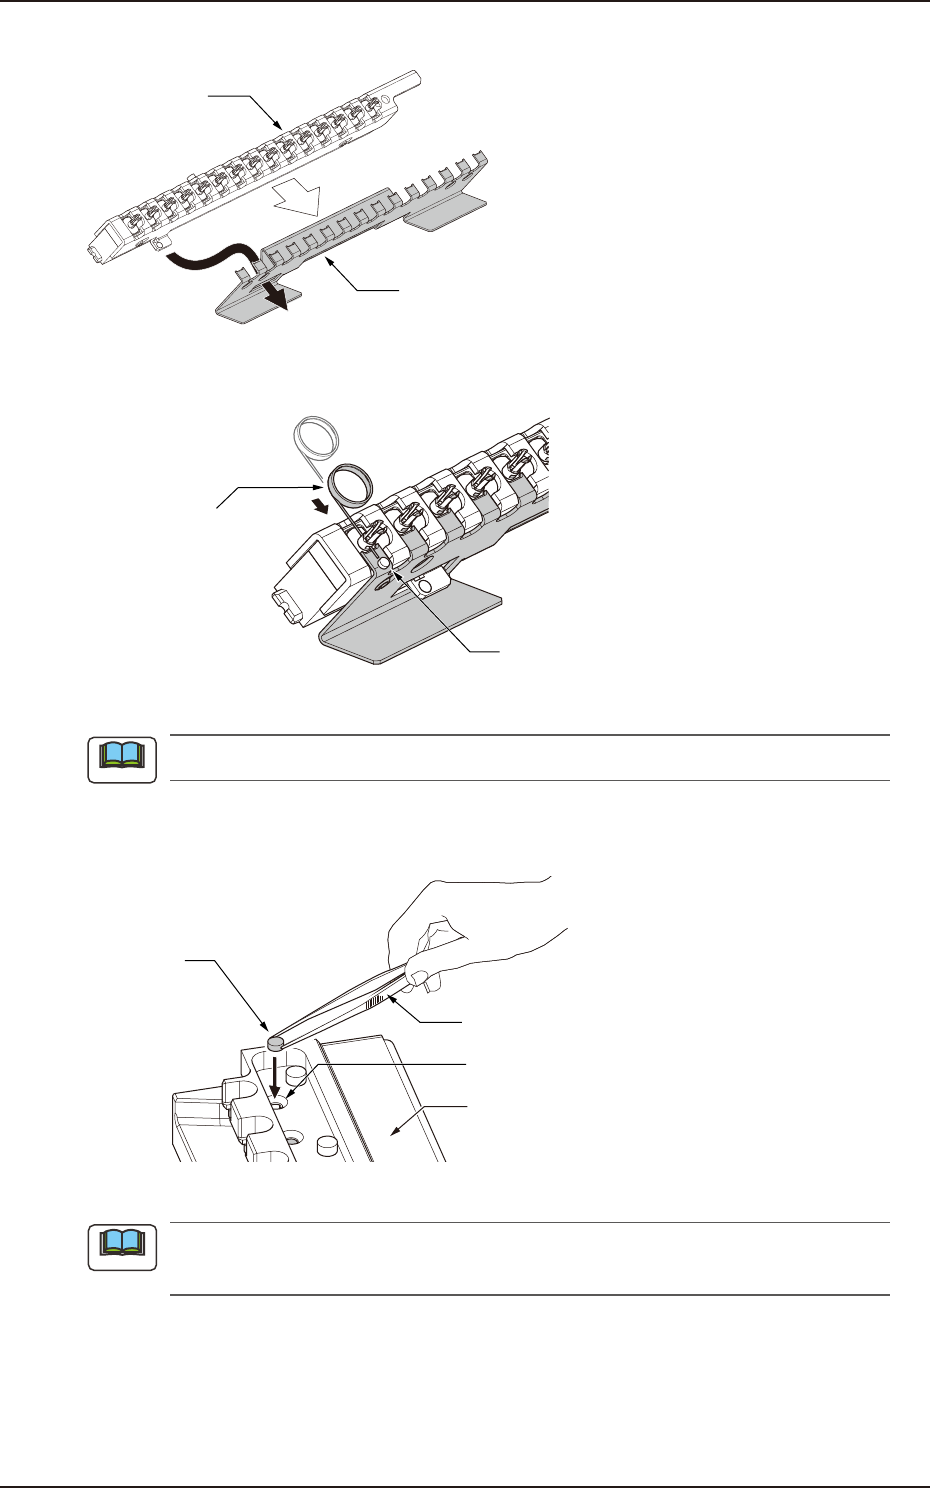
(3) Set the high-speed nozzle stocker which shutter is open to the filter remove support jig.
High-speed
nozzle stocker
Filter remove support jig
F4A73A
(4) Insert filter remove pin into the hole on nozzle to push out air filter in the nozzle.
Air filter
Filter remove pin
F4A74
Do not reuse removed air filter.
(5) Detach acrylic block of filter replacement jig. Set new air filters in the filter positioning
holes in the jig.
Tweezers
Filter positioning hole
Air filter
Filter replacement jig
F4A75A
Insert air filter fully into the hole with tweezers for line accessory (KYB-M380Y-000) or similar
tool.
Note
Note
EUKYX
1-74199-4100
5.7 Nozzle Filter Insertion Procedure
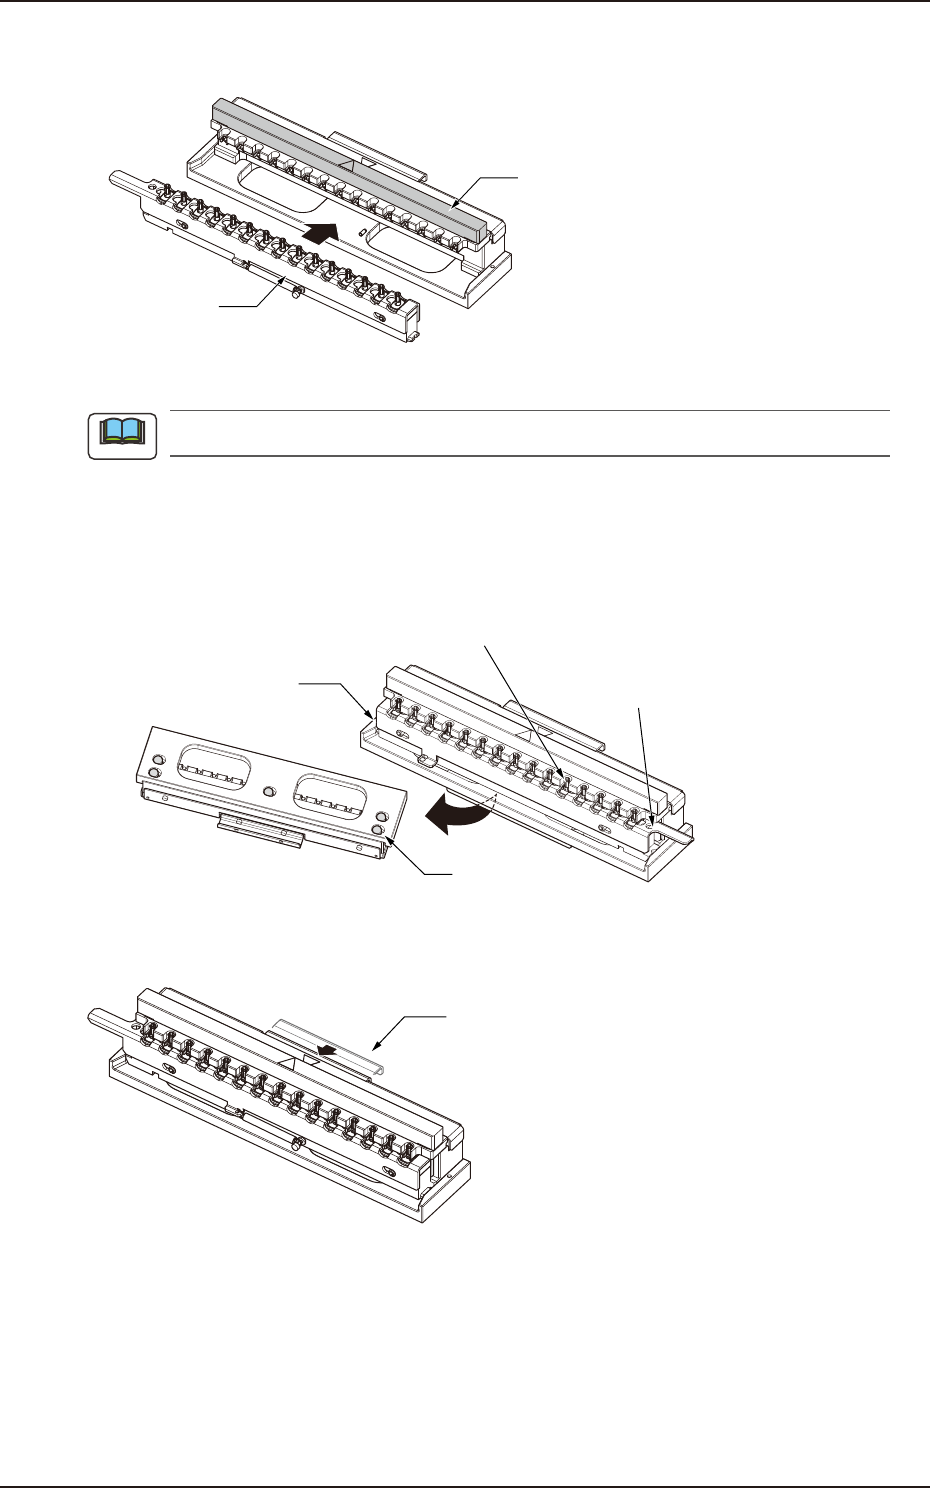
(6) Return the acrylic block to the filter replacement jig. Set the high-speed nozzle stocker
which shutter is open to the filter replacement jig.
Acrylic block
High-speed
nozzle stocker
F4A76A
Check that no air filter remains in nozzles once again before replacing with new air filters.
If nozzles are set in the opposite direction;
If setting nozzles in the opposite direction, loosen 5 bolts on bottom of filter replacement jig.
Attach the block mount surface of nozzle stocker to the opposite side.
Nozzle stocker
(opposite direction)
Bottom of jig
Block mount surface
5 bolts
Pin hole
(opposite direction)
F4A78
(7) Press the metal pusher of filter replacement jig to insert air filters into nozzles.
Metal pusher
F4A77A
(8) Check that air filters are fully inserted.
Note
EUKYX
1-75199-4100
6. Using Procedure of Diffusion Plate Setup Jig
6. Using Procedure of Diffusion Plate Setup Jig
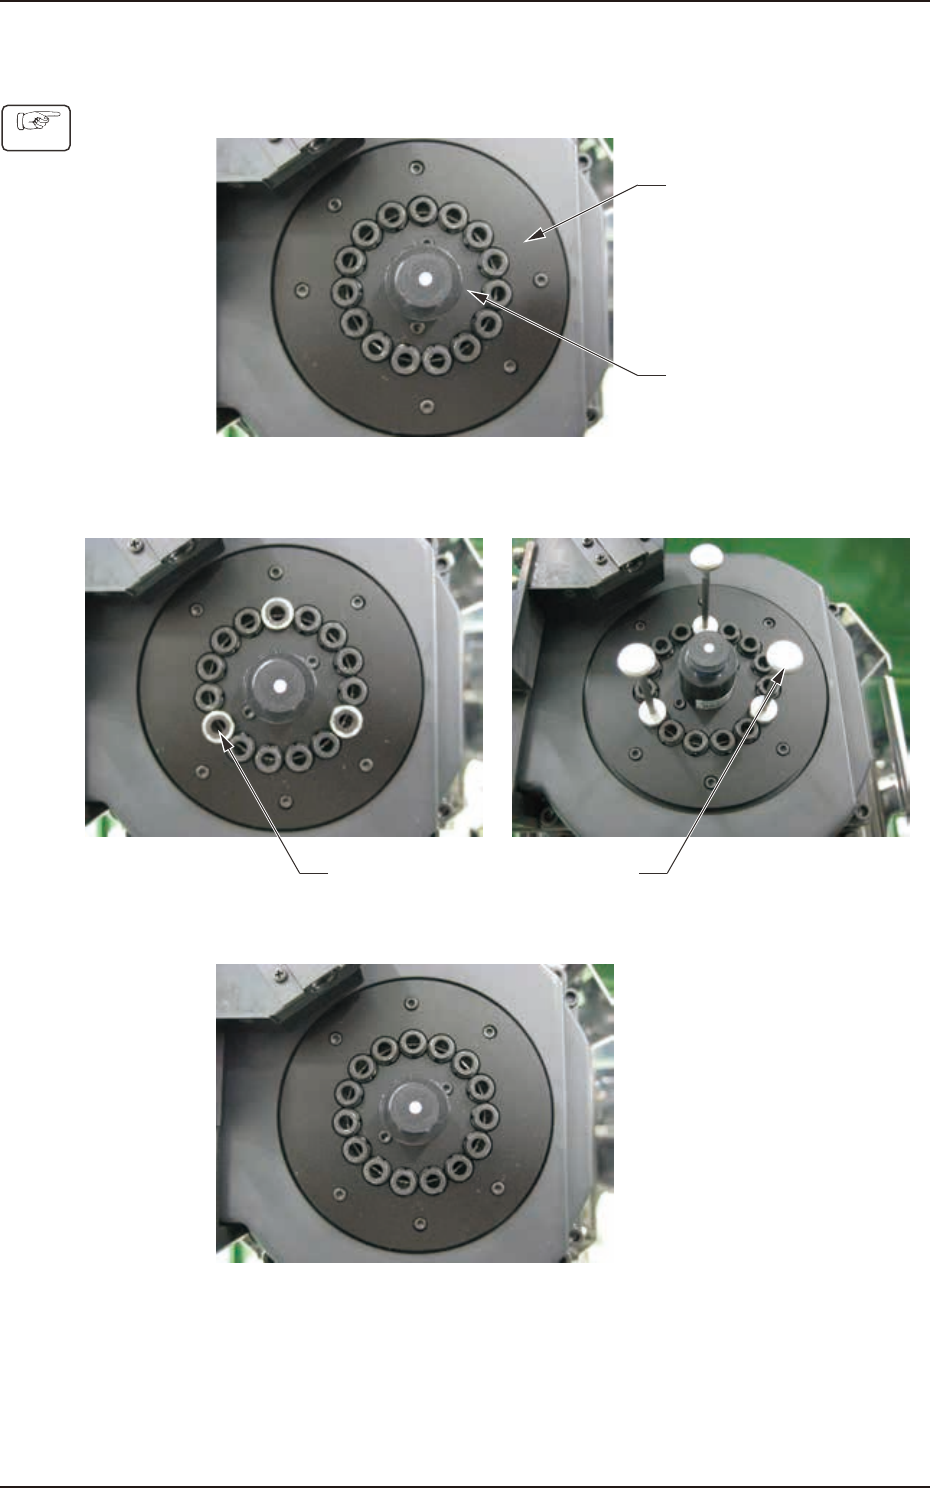
(1) Set the both inner and outer diffusion plates temporarily.
Outer Diffusion Plate
Inner Diffusion Plate
F4A65
(2) Attach the Jigs No. 1 and No. 2 onto the 3 locations shown in the figure below. Take care
not to damage the side view camera.
Jig 1 Jig 2
F4A66
(3) After fixing the diffusion plates using bolts, remove the jigs No. 1 and No. 2.
F4A67
Procedure