Forte Max Manual.pdf - 第30页
ForteMAXDispensingSystemAddendum Recipe Creation 26 © 2023 Nordson Corpo ration 4.4 Dual Simultane o us D ispensing The following steps are required to create a dual simultaneous dispensing recipe: • Create the recip…
© 2023 Nordson Corporation 25
4 Recipe Creation
4.1 Overview
This section outlines the steps required to create both a dual simultaneous recipe and a dual-action
recipe in the Canvas dispensing software. The procedures in this section assume the layout has been
defined, the slide bracket has been installed in the appropriate position, and a dry valves offsets
procedure has been performed. Refer to Section 3 – Installation and Setup for detailed information.
This section covers the following topics:
• Theory of Operation
• Dual Simultaneous Dispensing
• Dual Action Dispensing
• Running Production
4.2 Safety First
Operation of the dispensing system involves heat, air pressure, electrical power, mechanical devices, and
the use of hazardous materials. It is essential that every person servicing or operating the dispensing
system fully understands all hazards, risks, and safety precautions. Refer to Section 2 – Safety in this
manual and to the Forte Dispensing System Installation, Operations, and Maintenance Manual for
important safety information.
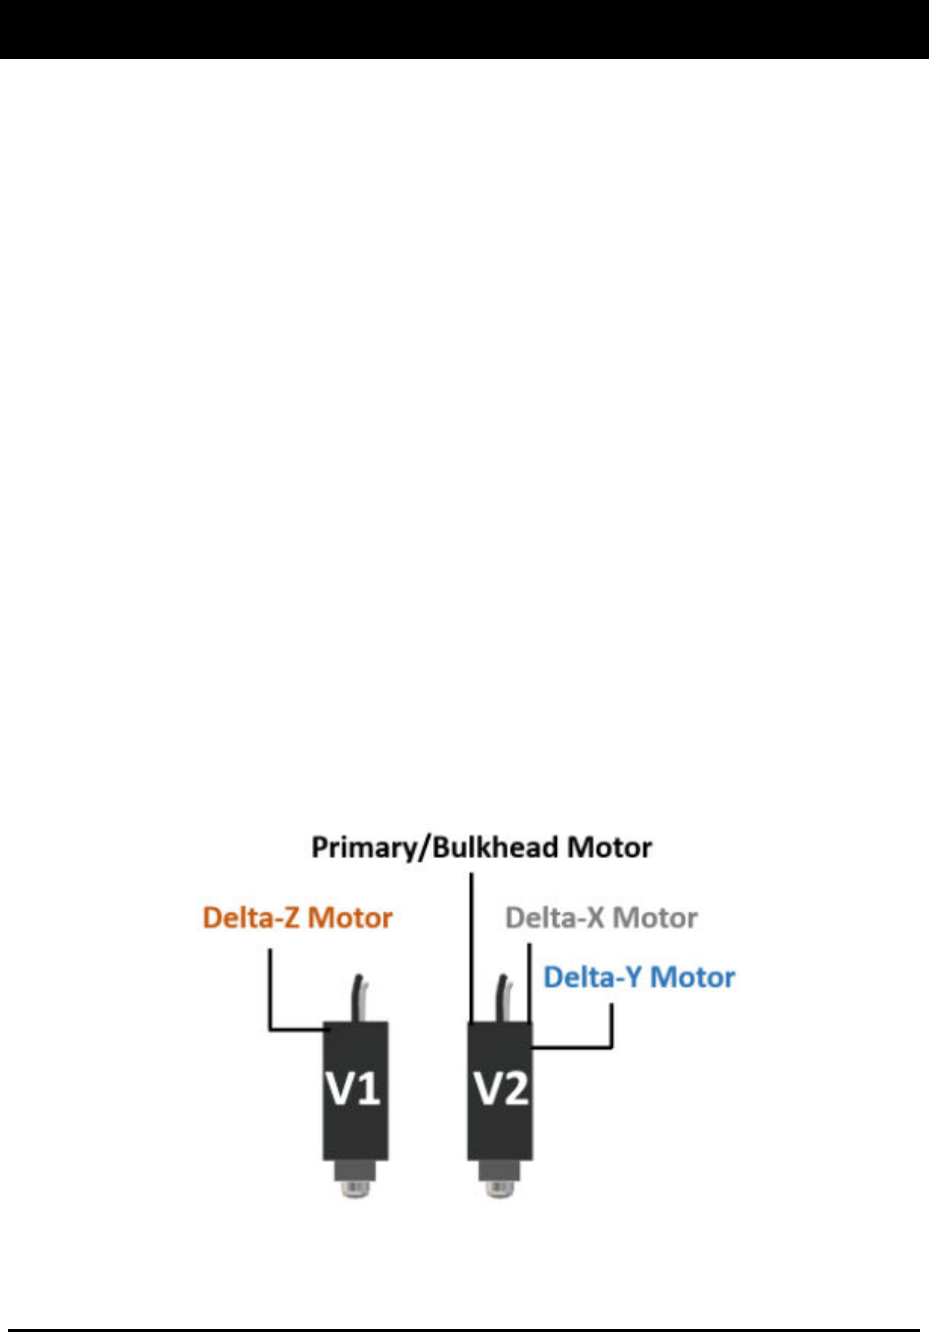
4.3 Theory of Operation
Two valves are mounted on a dual dovetail mounting bracket that is mechanically controlled to provide
X, Y, and Z position correction. Valve 1 (V1) moves up and down (Delta-Z motor) for part height
corrections up to 10 mm. Valve 2 (V2) provides ±2.5 mm of X and Y travel for orientation and translation
corrections (Delta-X motor and Delta-Y motor). Since the Delta XY axis motors for Forte MAX are on V2,
the V1 Z-axis position is automatically adjusted during program execution to compensate for V2 position
changes. Therefore, it is important that V2 has a safe Z height.
Figure 4-1 Theory of Operation
Forte MAX motors can automatically adjust for 250 µm offsets of individual parts within 50 ms or 5 mm/s,
however, this may limit the maximum line speed.
ForteMAXDispensingSystemAddendum Recipe Creation
26 © 2023 Nordson Corporation
4.4 Dual Simultaneous Dispensing
The following steps are required to create a dual simultaneous dispensing recipe:
• Create the recipe
• Create a pattern
• Add dispensing instructions
• Create a Container
• Place the Container
4.4.1 Creating a Recipe for a Multi-up Panel
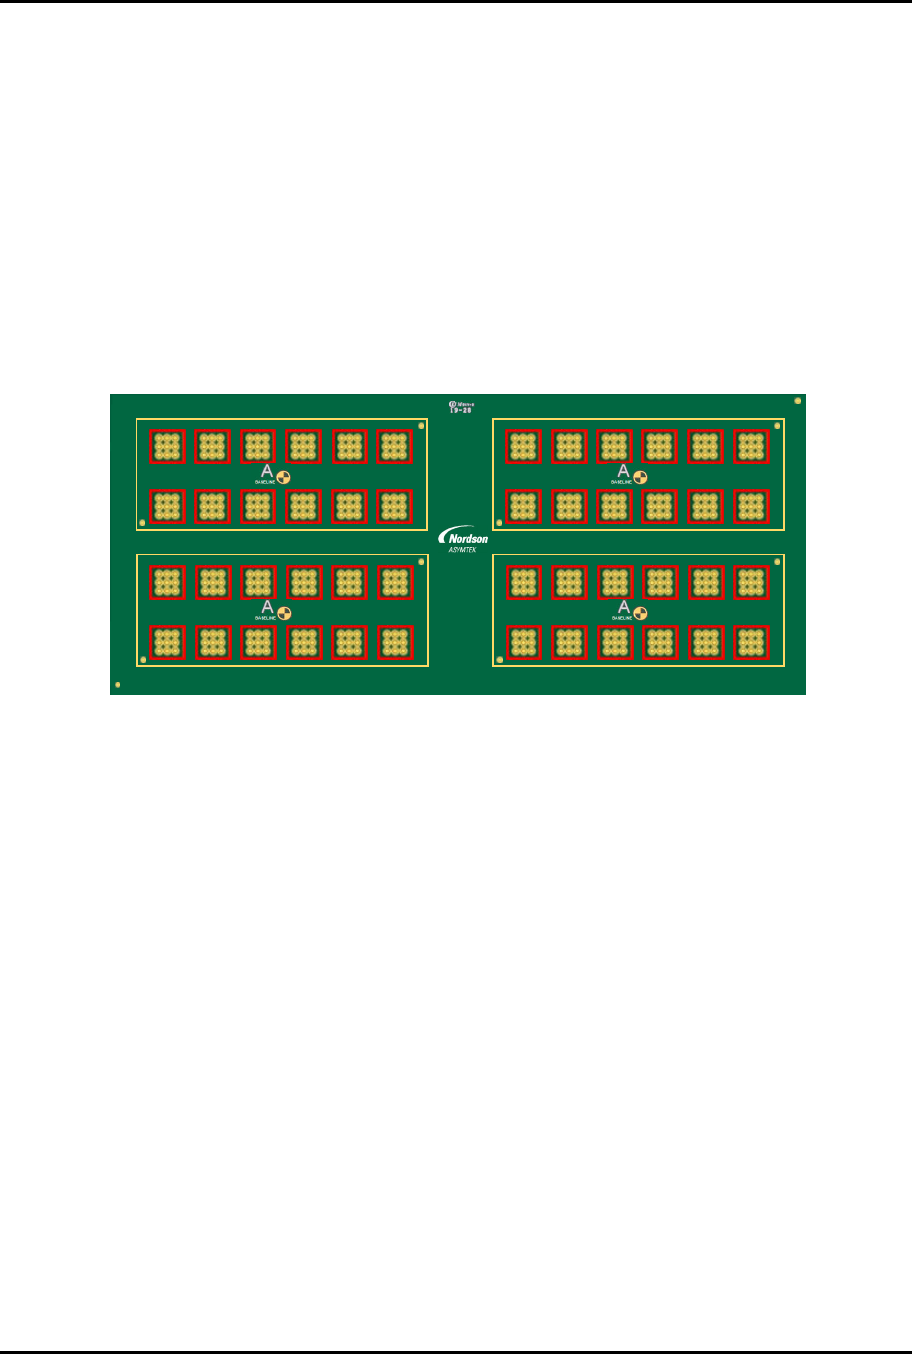
This section outlines the steps required to create the recipe for the multi-up board, layout option 2
(Figure 3-4). The following recipe will dispense a line around all the cells (red squares) shown in
Figure 4-2. For detailed programming information, refer to the Canvas Dispensing Software User Guide.
1 2 3 4 5 6 7 8 9 10 11 12
4
3
2
1
6130139 REV 1
STRAIGHT
B,1
B,2
2,1 2,2 2,3 2,4 2,5 2,6
1,1 1,2 1,3 1,4 1,5 1,6
4,1 4,2 4,3 4,4 4,5 4,6
A2
A1
3,1 3,2 3,3 3,4 3,5 3,6
A2
A1
4,1 4,2 4,3 4,4 4,5 4,6
A2
A1
3,1 3,2 3,3 3,4 3,5 3,6
A2
A1
2,1 2,2 2,3 2,4 2,5 2,6
1,1 1,2 1,3 1,4 1,5 1,6
Figure 4-2 Dual Simultaneous Recipe Requirement
ForteMAXDispensingSystemAddendum Recipe Creation
© 2023 Nordson Corporation 27
4.4.1.1 Creating the Recipe
To create the recipe:
1. Make sure the Canvas dispensing software is configured for dual applicators. Both
applicators must be the same.
2. Select the Recipe button to access the Recipe Editor.
3. Place the substrate on the conveyor.
4. Click on the Load button on the toolbar.
> The substrate will be lifted off the conveyor and clamped into place. The substrate
should be evenly clamped and level so that the board does not move when
programming.
5. Adjust the clamping mechanism as necessary to achieve a level dispensing plane.
?
NOTE
The dispensing sequence MUST be taught with the part raised and clamped as
necessary. Failing to load the substrate in this manner results in the camera
being out of focus.
6. Select Recipe > New from the menu bar.
7. Enter the recipe name and click on OK.
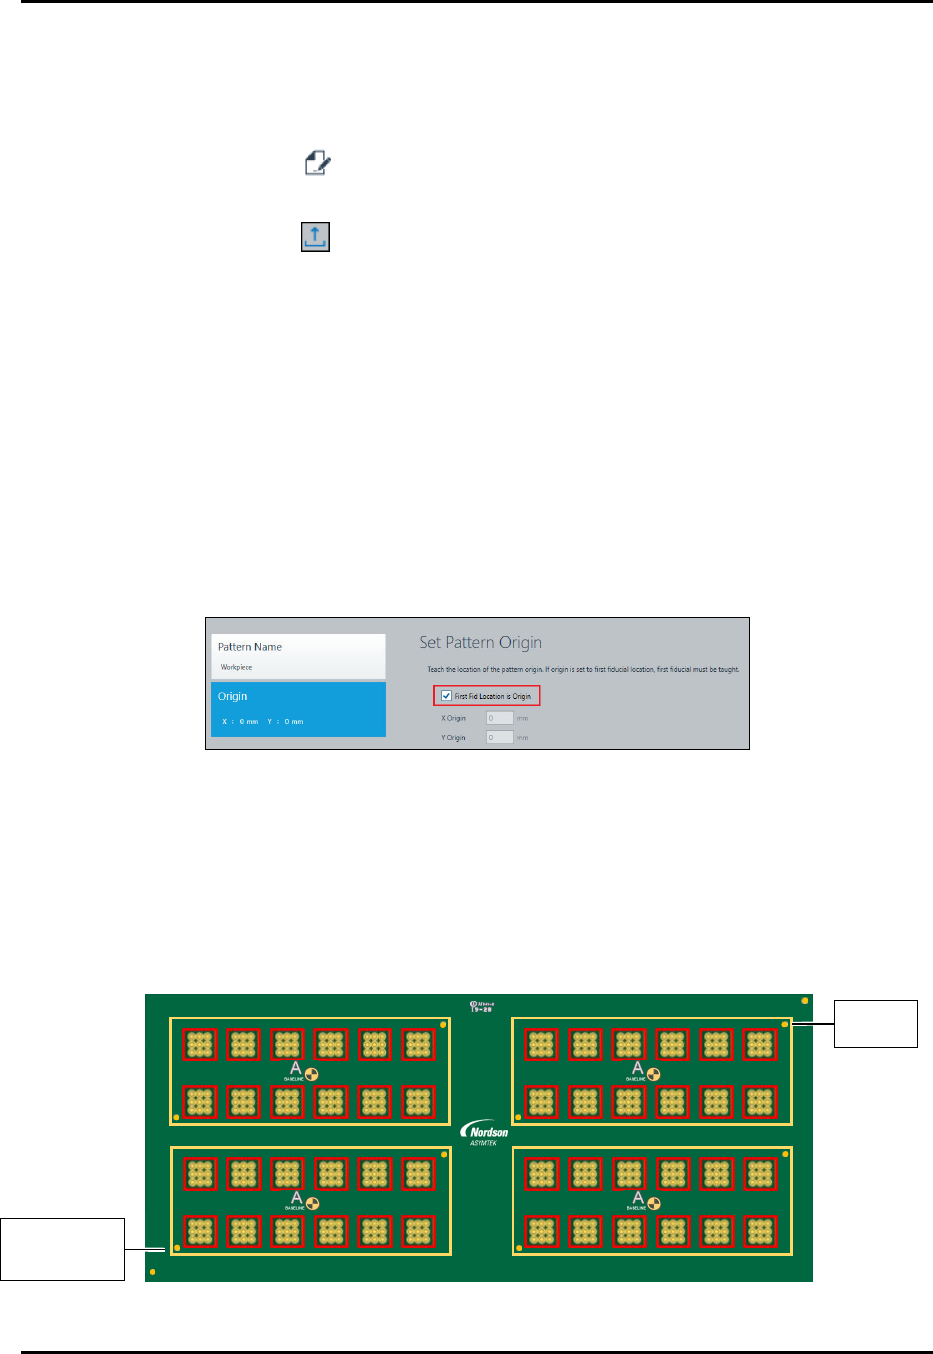
8. When prompted, teach the workpiece origin.
9. Select First Fid Location is origin (Figure 4-3).
Figure 4-3 Set Workpiece Origin
10. Click on Next.
> You will be prompted to set the fiducial properties and teach fiducials.
> In this example, two fiducials will be used (Figure 4-4).
11. Follow the prompts to define two circle finder fiducials. Refer to the Canvas Dispensing
Software User Guide if necessary.
12. Click on Done when finished.
1 2 3 4 5 6 7 8 9 10 11 12
2
1
6130139 REV 1
STRAIGHT
B,1
B,2
2,1 2,2 2,3 2,4 2,5 2,6
1,1 1,2 1,3 1,4 1,5 1,6
4,1 4,2 4,3 4,4 4,5 4,6
A2
A1
3,1 3,2 3,3 3,4 3,5 3,6
A2
A1
4
3
4,1 4,2 4,3 4,4 4,5 4,6
A2
A1
3,1 3,2 3,3 3,4 3,5 3,6
A2
A1
2,1 2,2 2,3 2,4 2,5 2,6
1,1 1,2 1,3 1,4 1,5 1,6
Figure 4-4 Workpiece Origin and Workpiece Fiducials
W
o
r
k
p
i
e
c
e
O
r
i
g
i
n
and Workpiece
F
i
d
u
c
i
a
l
1
W
o
r
k
p
i
e
c
e
F
i
d
u
c
i
a
l
2