Forte Max Manual.pdf - 第60页
ForteMAXDispensingSystemAddendum Maintenance 56 © 2023 Nordson Corpo ration 11. Grease the right X ball screw by insert ing the syringe through the hole and inje c ting a small amount of ISOFLEX TOPAS NCA-52 grease (…
ForteMAXDispensingSystemAddendum Maintenance
© 2023 Nordson Corporation 55
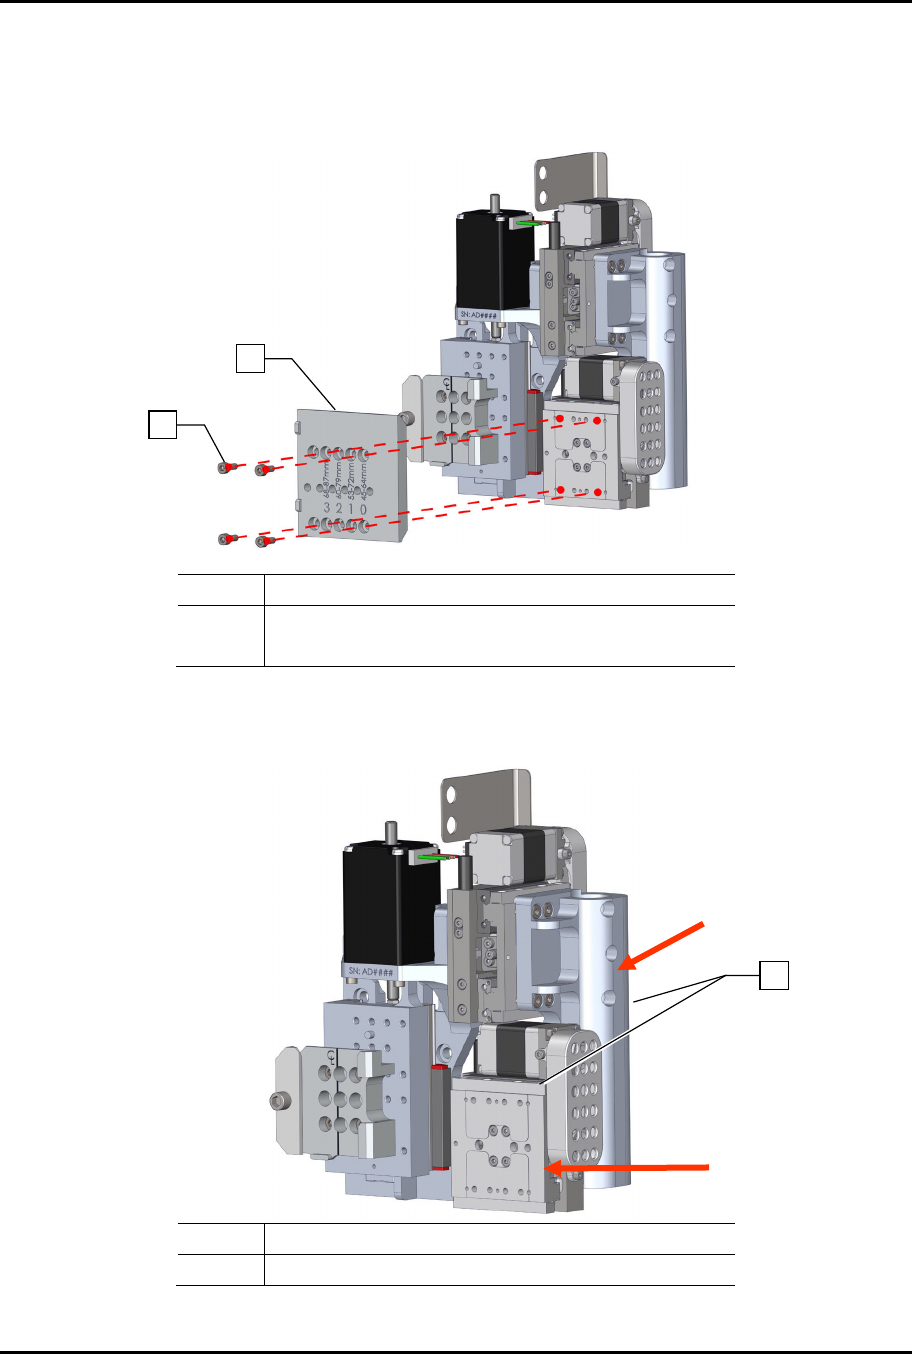
7. Note the slide bracket position.
8. Remove the four (4) screws securing the slide bracket to the dispense head (Figure 5-2).
9. Remove the slide bracket.
Item Description
1 Screws
2 Slide Bracket
Figure 5-2 Removing the Slide Bracket
10. Manually move the Delta XY motors for Valve 2 forward and to the left (Figure 5-3).
Item Description
1 Valve 2 Delta XY Motors
Figure 5-3 Move Valve 2 Delta XY Motors Forward and to the Left
1
2
1

ForteMAXDispensingSystemAddendum Maintenance
56 © 2023 Nordson Corporation
11. Grease the right X ball screw by inserting the syringe through the hole and injecting a small
amount of ISOFLEX TOPAS NCA-52 grease (Figure 5-4).
> The X ball screw is shown in blue.
Figure 5-4 Right X Ball Screw Grease Location
12. Grease the Y ball screw by inserting the syringe through the hole at an angle and injecting a
small amount of ISOFLEX TOPAS NCA-52 grease (Figure 5-5).
> The X ball screw is shown in blue.
Figure 5-5 Y Ball Screw Grease Location
ForteMAXDispensingSystemAddendum Maintenance
© 2023 Nordson Corporation 57
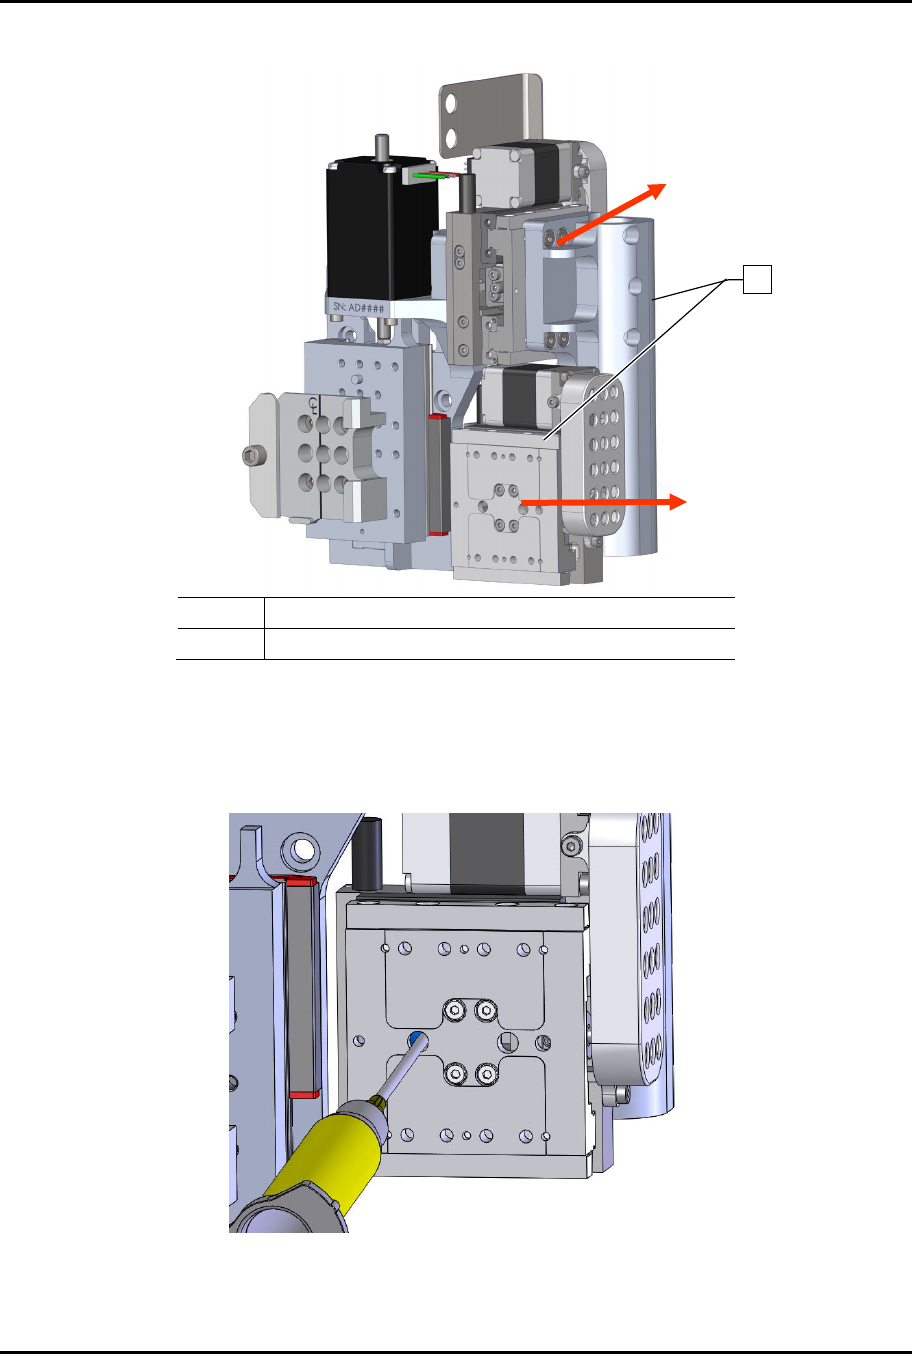
13. Manually move the Delta XY motors for Valve 2 back and to the right (Figure 5-6).
Item Description
1 Valve 2 Delta XY Motors
Figure 5-6 Move Valve 2 Delta XY Motors Back and to the Right
14. Grease the left X ball screw by inserting the syringe through the hole and injecting a small
amount of ISOFLEX TOPAS NCA-52 grease (Figure 5-7).
> The X ball screw is shown in blue.
Figure 5-7 Left X Ball Screw Grease Location
1