Forte Max Manual.pdf - 第47页
ForteMAXDispensingSystemAddendum Recipe Creation © 2023 Nordson Corporation 43 4.5.1.2 Adding Dispense Instructions In this example, we will define five (5 ) line nodes to surround one box and nine dots inside the bo…
ForteMAXDispensingSystemAddendum Recipe Creation
42 © 2023 Nordson Corporation
4.5.1.1 Creating the Pattern
In this section, we will create a pattern that will dispense four (4) lines around each cell and nine (9) dots
into each cell.
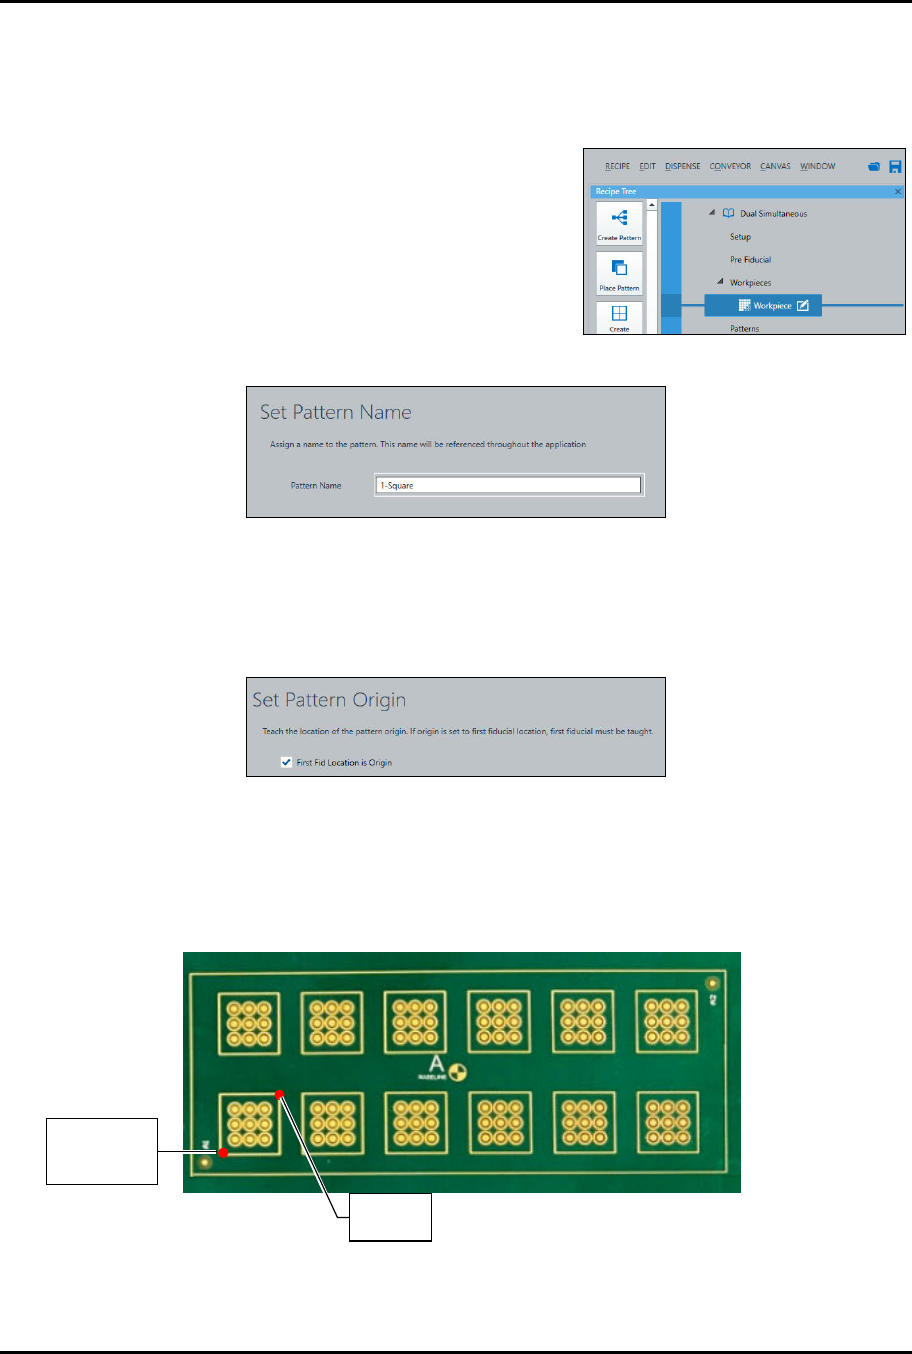
To create pattern:
1. Select the Workpiece pattern in the Recipe Tree
and click on Create Pattern in the Instruction
Panel (Figure 4-33).
> You will be prompted to enter a pattern name.
2. Enter a pattern name and click on Next.
> In this example the pattern name will be
"1-Square" (Figure 4-34).
Fig
ure
4
-
33
C
r
e
a
t
e
a
P
a
t
t
e
r
n
Figure 4-34 Set Pattern Name
3. Click on Next.
> You will be prompted to teach the pattern origin.
4. Select First Fid Location is Origin (Figure 4-35).
Figure 4-35 Set Pattern Origin
5. Click on Next.
> You will be prompted to define the fiducials.
6. Define the pattern fiducials. In this example, it is recommended to use two corner fiducials
(Figure 4-36). Refer to the Canvas Dispensing Software User Guide if necessary.
1,1 1,2 1,3 1.4 1.5 1,6
2,1 2,2 2,3 2.4 2.5 2,6
Figure 4-36 Pattern Origin and Fiducial Locations
7. Click on Done when finished.
P
a
t
t
e
r
n
O
r
i
g
i
n
and Pattern
F
i
d
u
c
i
a
l
1
P
a
t
t
e
r
n
F
i
d
u
c
i
a
l
2
ForteMAXDispensingSystemAddendum Recipe Creation
© 2023 Nordson Corporation 43
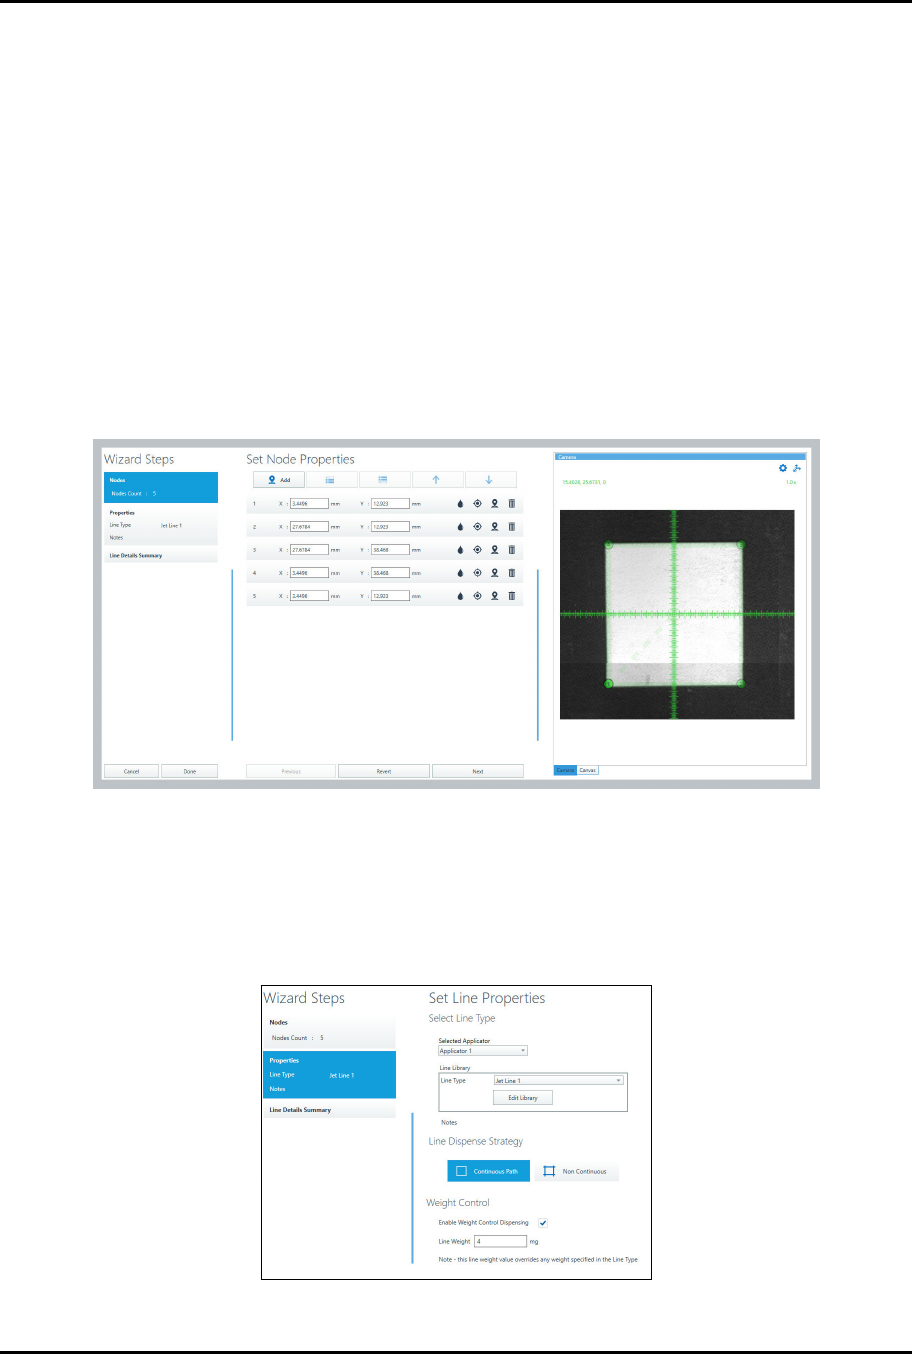
4.5.1.2 Adding Dispense Instructions
In this example, we will define five (5) line nodes to surround one box and nine dots inside the box. We
will also add pass blocks.
To add the line:
1. Make sure the pattern you created is selected in the Recipe Tree.
2. Select Line from the Instruction Panel.
> The Line Instruction Wizard opens (Figure 4-37).
3. Jog the camera crosshairs to the first line point and click Add.
4. Repeat Step 3 until all the nodes have been defined.
5. Click on Next.
> You will be prompted to set the line properties.
Figure 4-37 Line Instruction Wizard – Set Node Properties
6. Select the Applicator, Line Type, Dispense Strategy and Weight Control (Figure 4-38).
> Refer to the Canvas Dispensing Software User Guide if necessary.
?
NOTE
You must select which applicator will dispense. In this case, Applicator 1 will
dispense the lines.
Figure 4-38 Line Instruction Wizard – Set Line Properties
ForteMAXDispensingSystemAddendum Recipe Creation
44 © 2023 Nordson Corporation
7. Click on Done when finished.
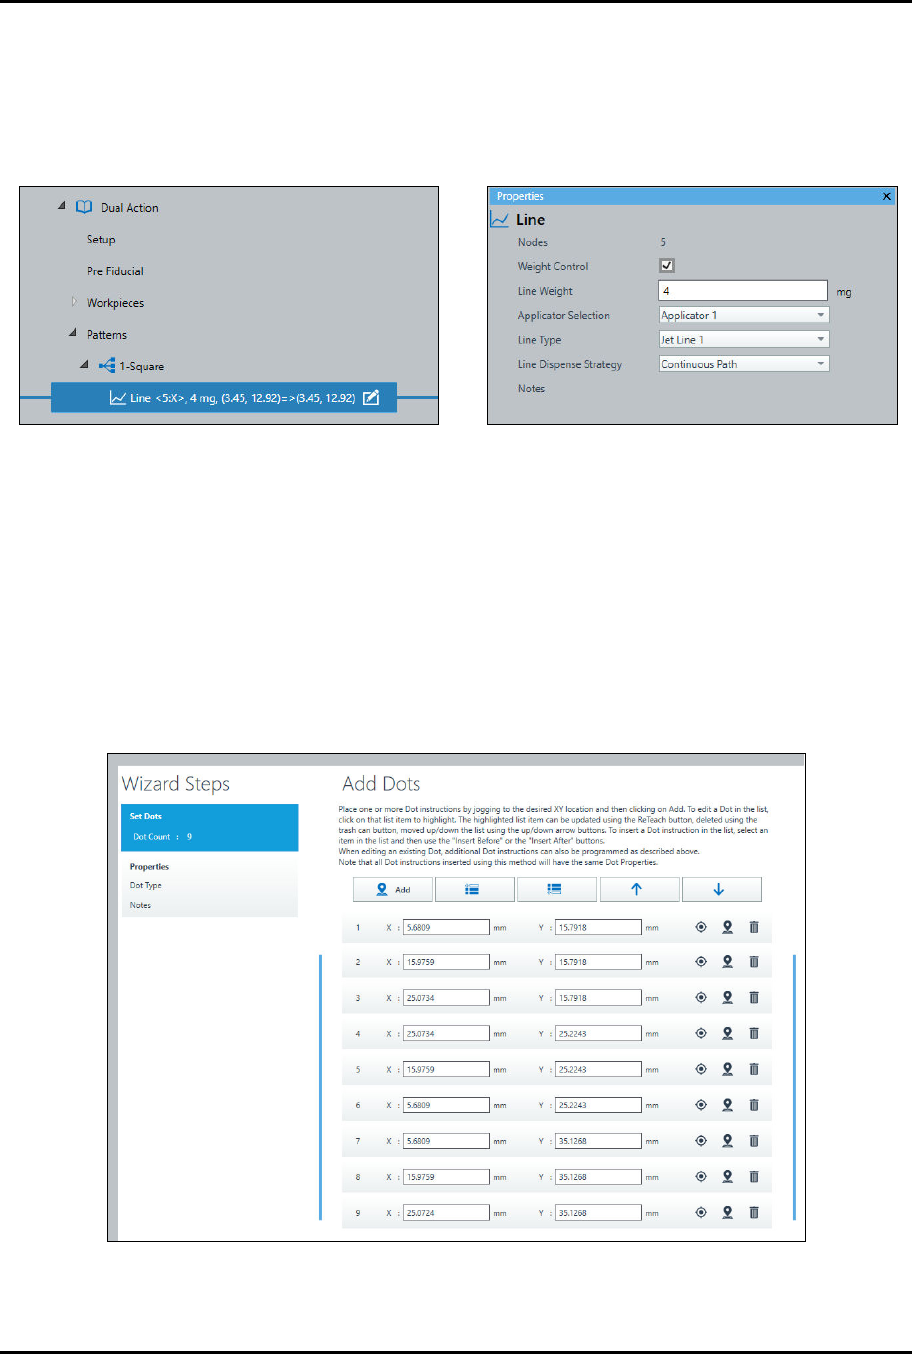
8. The line instruction will appear in the recipe tree (Figure 4-39).
> The Properties Panel on the right of the screen will display the line properties when the
line is selected in the Recipe Tree. Note that the line weight, selected applicator, line
type, and dispense strategy is displayed in the Properties Panel (Figure 4-40).
Figur
e
4
-
39
R
e
c
i
p
e
T
r
e
e
Figur
e
4
-
40
L
i
n
e
P
r
o
p
e
r
t
i
e
s
To add the dots:
1. Select Dot from the Instruction Panel.
> The Dot Instruction Wizard opens (Figure 4-41).
2. Jog the camera crosshairs to the first dot location and click Add.
3. Repeat Step 2 for the remaining dots.
4. When all dots have been added, click on Next.
> You will be prompted to set the dot properties.
Figure 4-41 Dot Instruction Wizard – Add Dots