Forte Max Manual.pdf - 第41页
ForteMAXDispensingSystemAddendum Recipe Creation © 2023 Nordson Corporation 37 Figure 4-24 Dispensing Option 2 Figure 4-25 Dispensing Option 3 Based on the layout design guideli nes described in 3.4 Designing the Dis…
ForteMAXDispensingSystemAddendum Recipe Creation
36 © 2023 Nordson Corporation
4.4.2 Creating a Recipe for a Panel with an Odd Number of Columns
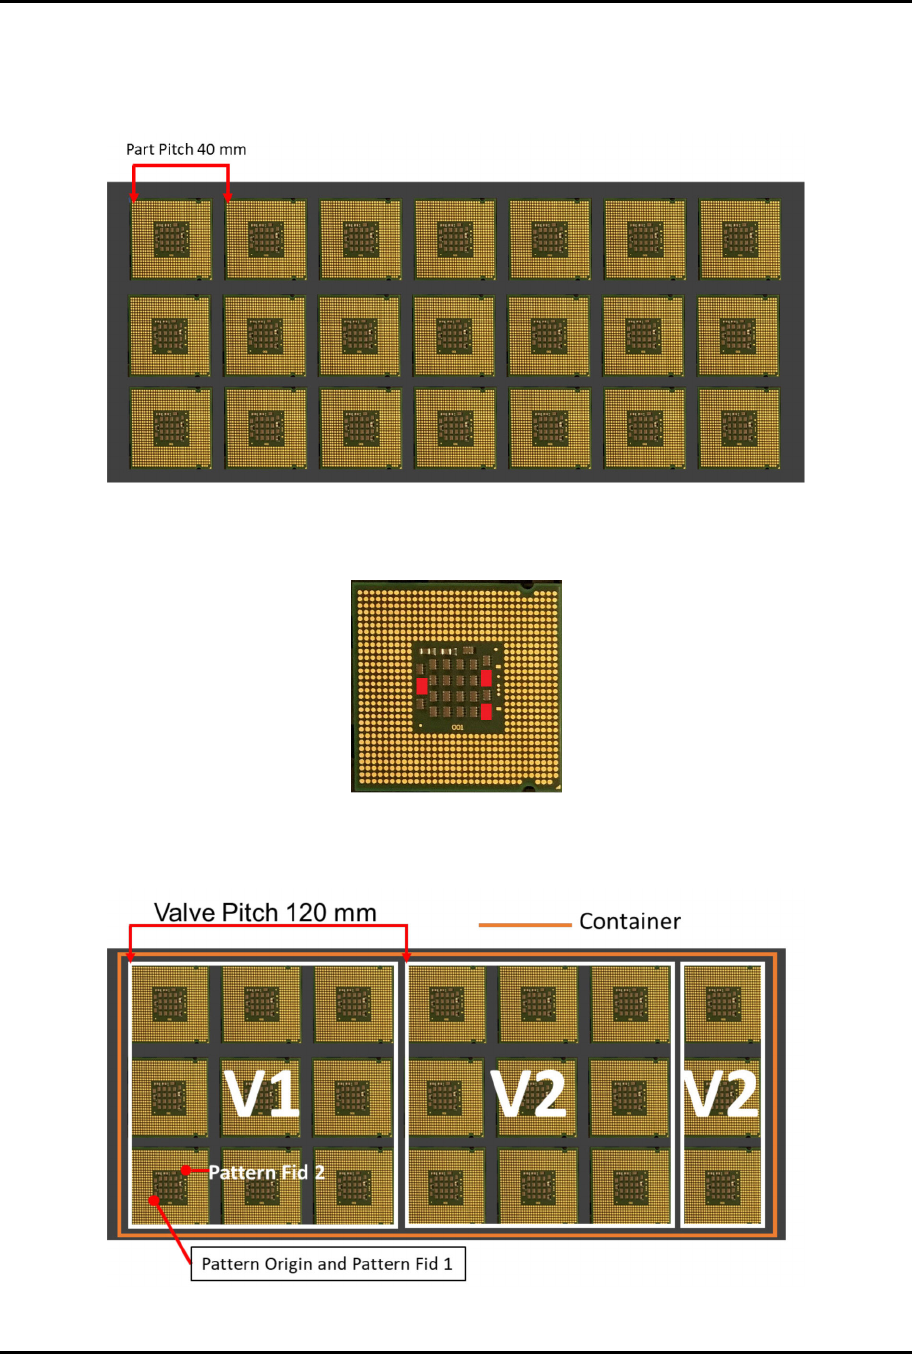
The following panel board (Figure 4-21) is used as an example in the following instructions: 3 x 7 carrier
with 40 mm part pitch.
Figure 4-21 Board with an Odd Number of Columns
The application requirement is to cover the red components on each part (Figure 4-22).
Figure 4-22 Application Requirement
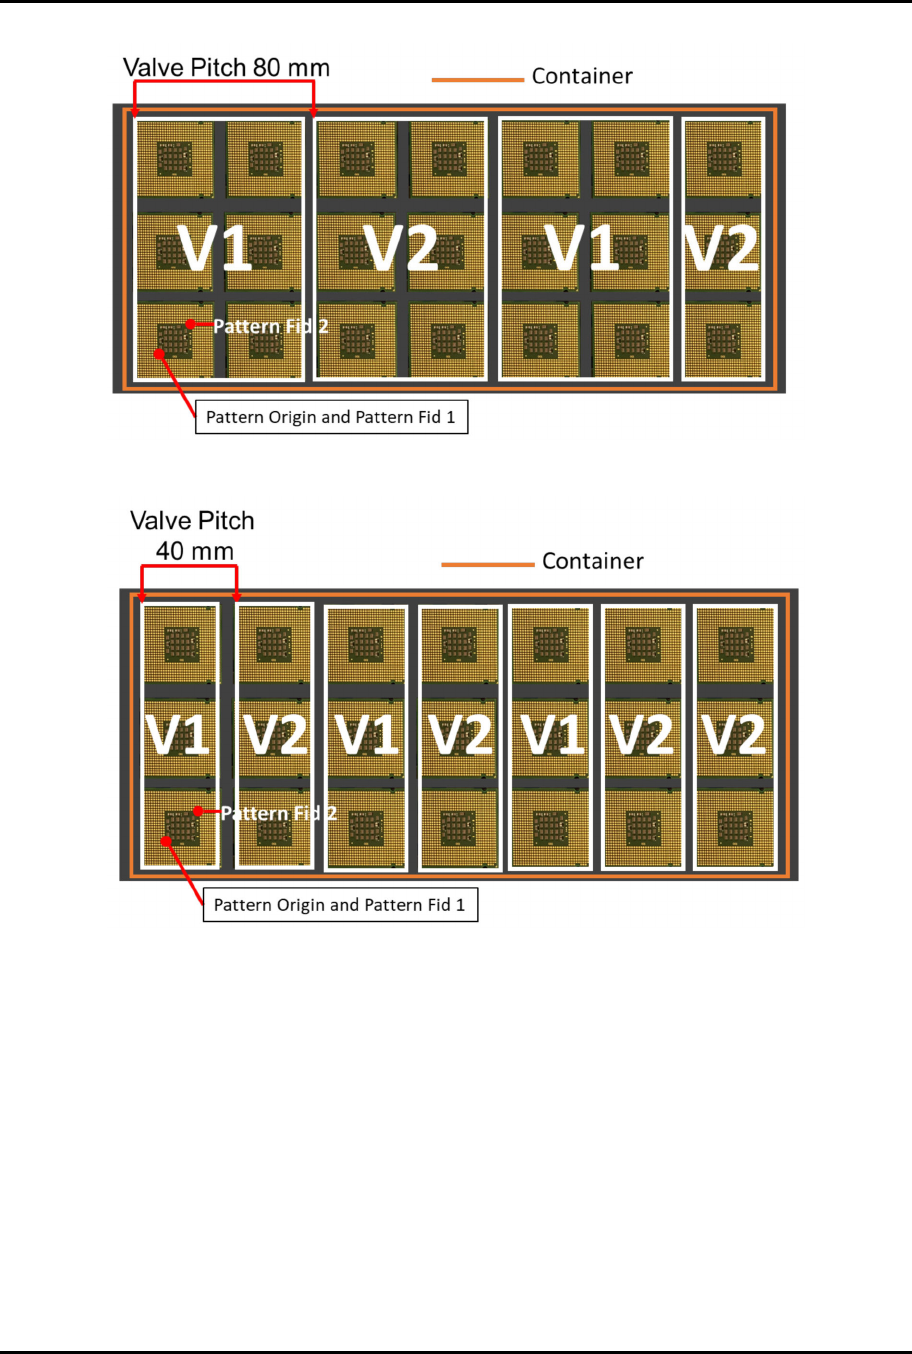
There are three dispensing options (Figure 4-23 through Figure 4-25):
Figure 4-23 Dispensing Option 1
ForteMAXDispensingSystemAddendum Recipe Creation
© 2023 Nordson Corporation 37
Figure 4-24 Dispensing Option 2
Figure 4-25 Dispensing Option 3
Based on the layout design guidelines described in 3.4 Designing the Dispense Layout, Option 2 is the
best option. Option 1 and Option 3 are not in the 45 mm to 112 mm valve pitch range (Table 3-1).

ForteMAXDispensingSystemAddendum Recipe Creation
38 © 2023 Nordson Corporation
To create the program:
?
NOTE
If necessary, refer to 4.4.1 Creating a Recipe for a Multi-up Panel for detailed instructions
on creating the recipe, pattern, and container.
1. Create a recipe and teach the workpiece fiducials.
2. Create the pattern, teach the pattern fiducials, and add dispensing instructions.
3. Create a container and define the container dimensions, origin and column and row pitch
ends (Figure 4-25).
4. Perform the following steps to place the container.
a.
Select the Workpiece pattern in the Recipe Tree and select Place Container .
b.
Select the Container to Place, Starting Corner, and Dispense Mode (Figure 4-27).
> In this example we are going to select Lower Left and Serpentine by Columns
(Figure 4-28). This will minimize the dispense head motion and therefore speed up
the program.
Figure 4-27 Place the Container
Figure
4
-
26
D
e
f
i
n
e
C
o
n
t
a
i
n
e
r
S
e
t
t
i
n
g
s